In the vast realm of information visualization, a concept map emerges as an effective tool for understanding and sharing knowledge. Concept maps illustrate relationships between ideas, laying out complex information in a digestible, visual format. Microsoft Word, a commonly used text processing software, offers a way to create these valuable visuals. Yet, despite being a trusted tool, Word may not always be the best platform for creating concept maps. In this article, we delve into the process of creating a concept map in Word, discuss its drawbacks, and introduce an easier alternative: Boardmix.
What is a Concept Map?
A concept map is a visual representation that connects ideas or concepts in a structured format, creating a web of understanding. The fundamental principle of a concept map lies in its nodes (concepts) and arcs (relationships), creating a network of interconnected information. The importance of concept maps stretches from business strategies and project management to education and personal use for problem-solving or brainstorming sessions.
How to Make a Concept Map in Word: A Detailed Guide
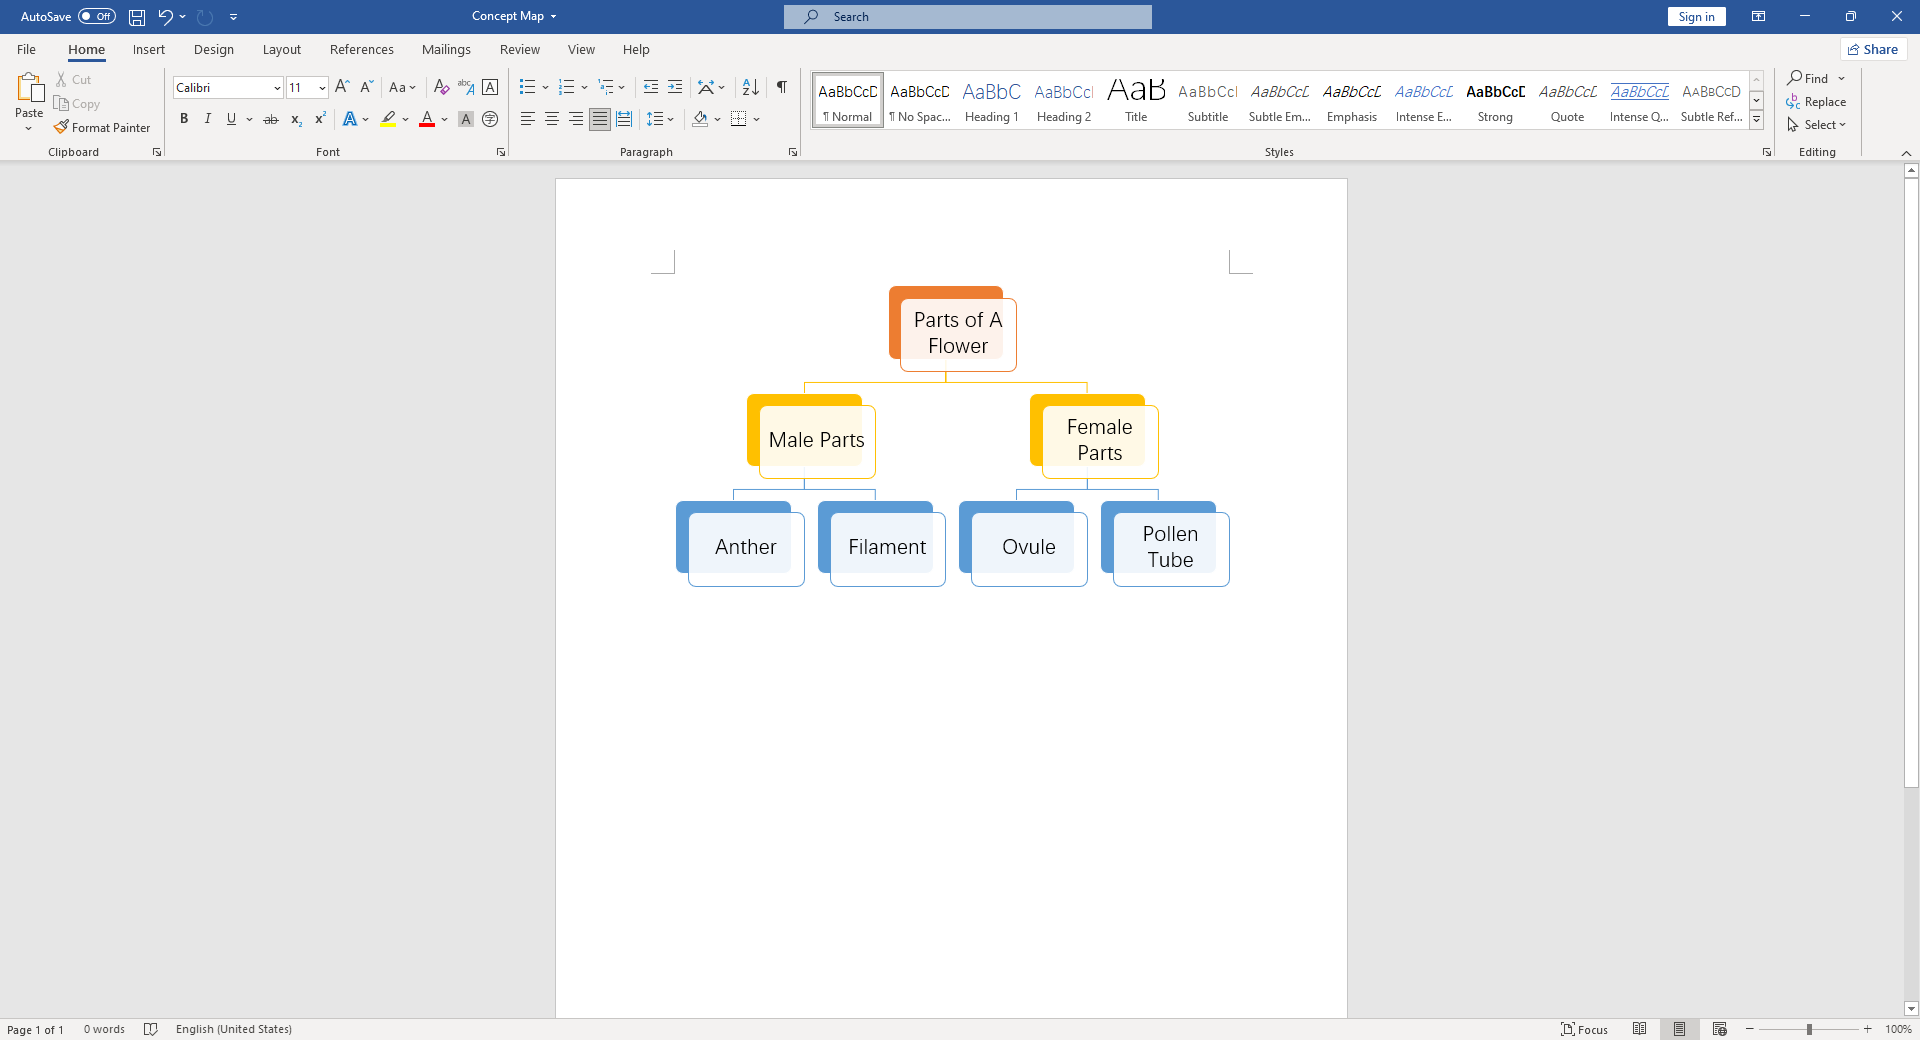
Creating a concept map in Word, although not as intuitive as dedicated mapping software, is still achievable. This section provides a comprehensive step-by-step guide on how to do so.
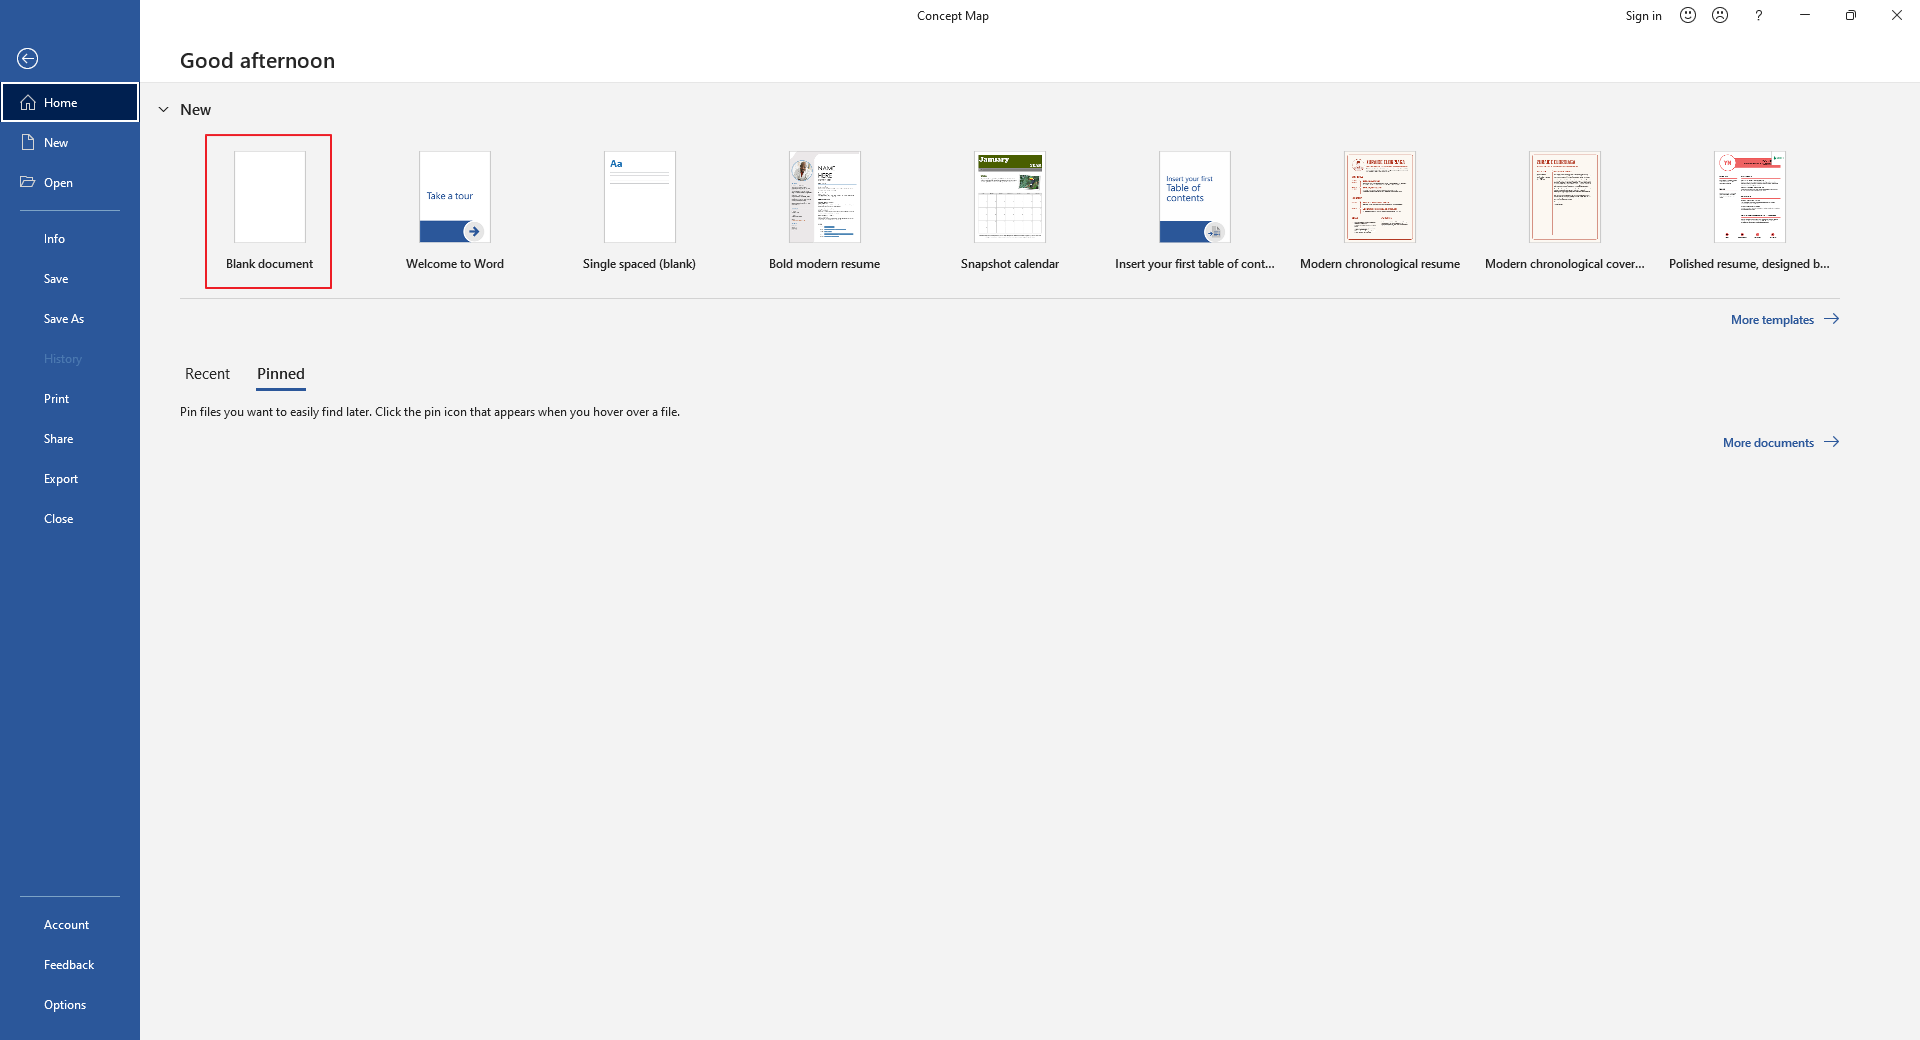
Step 1: Open a New Document
Firstly, open Microsoft Word. Click on 'File' at the top left corner of the window, and select 'New' from the dropdown menu. Click on 'Blank Document'.
Step 2: Insert a SmartArt Graphic
Navigate to the 'Insert' tab on the top toolbar. Click on the 'SmartArt' option in the 'Illustrations' group. This action opens the 'Choose a SmartArt Graphic' dialogue box.
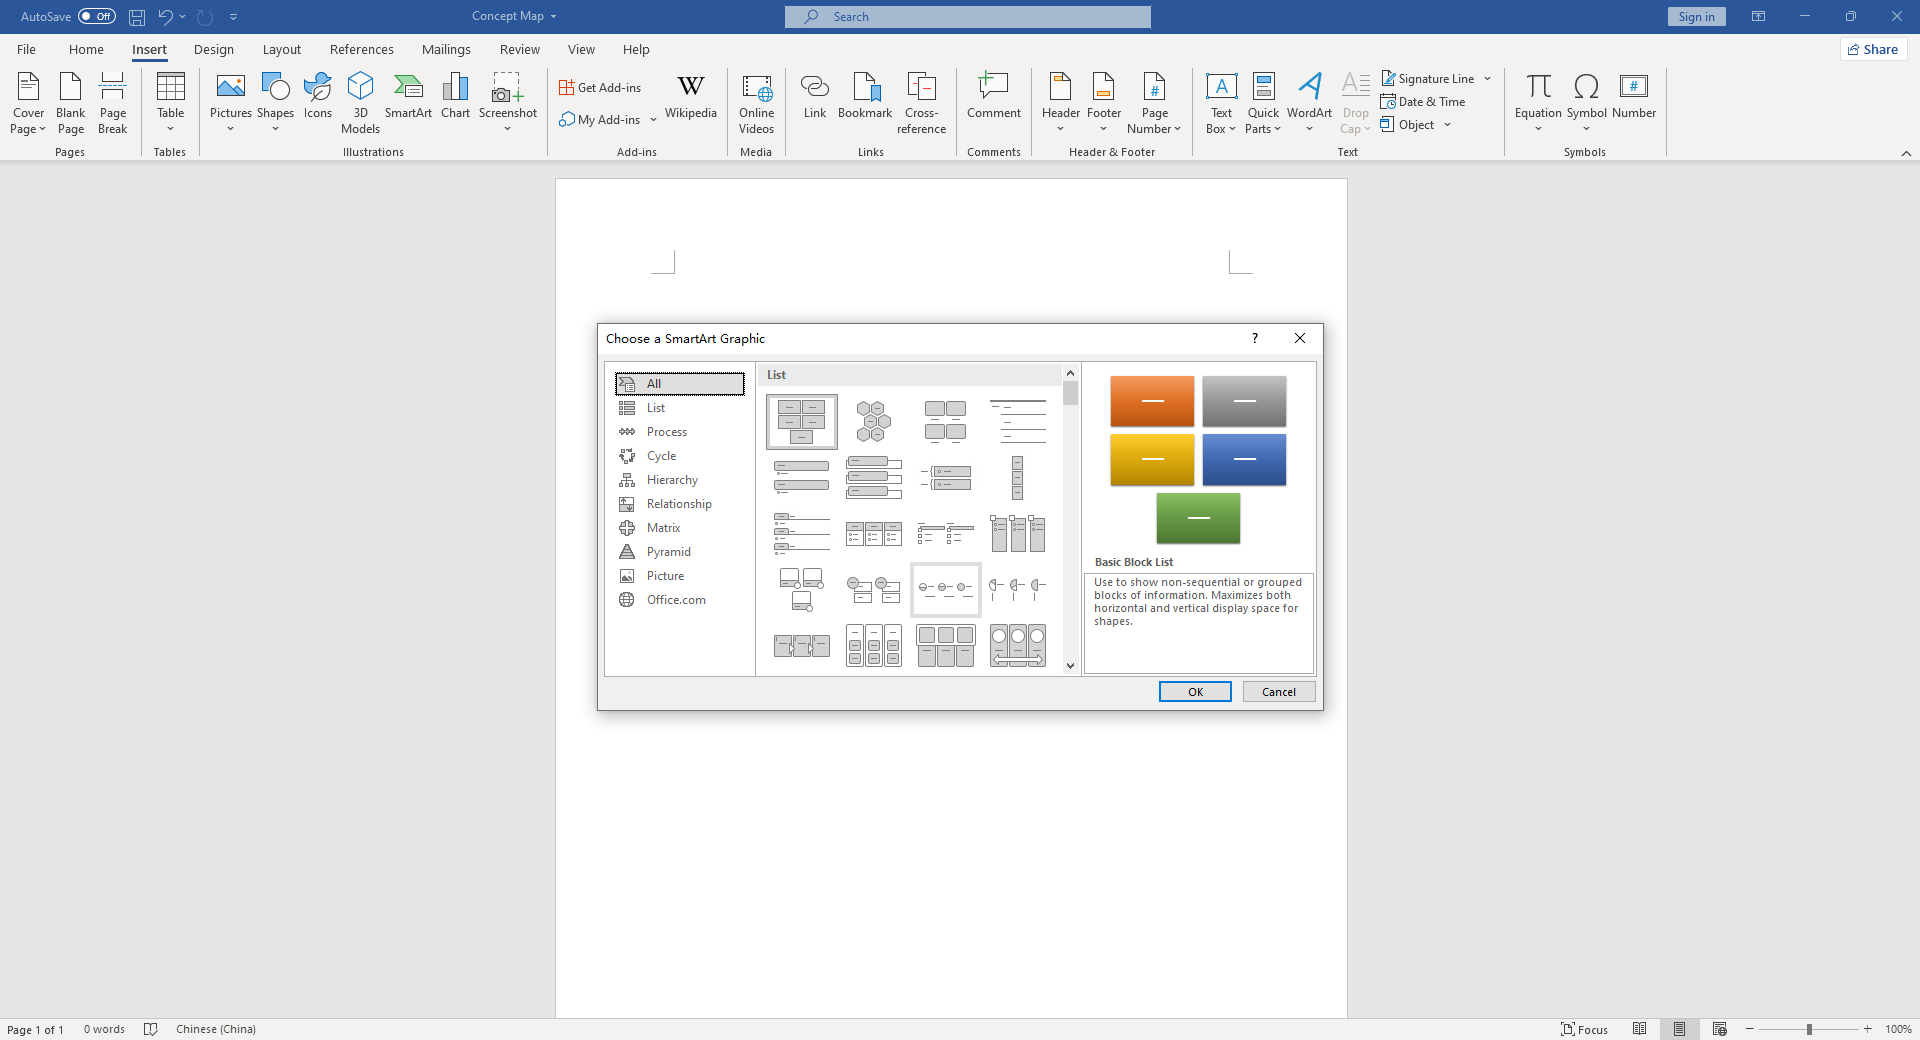
Step 3: Select a Suitable Hierarchy Layout
In the dialogue box, you will find various categories of graphics. For a concept map, the 'Hierarchy' category is typically the most suitable. Click on it, and you will see several types of hierarchy layouts. You can choose one that fits your requirements best, such as a radial, linear, or hierarchical SmartArt graphic. Once you've made your selection, click 'OK'.
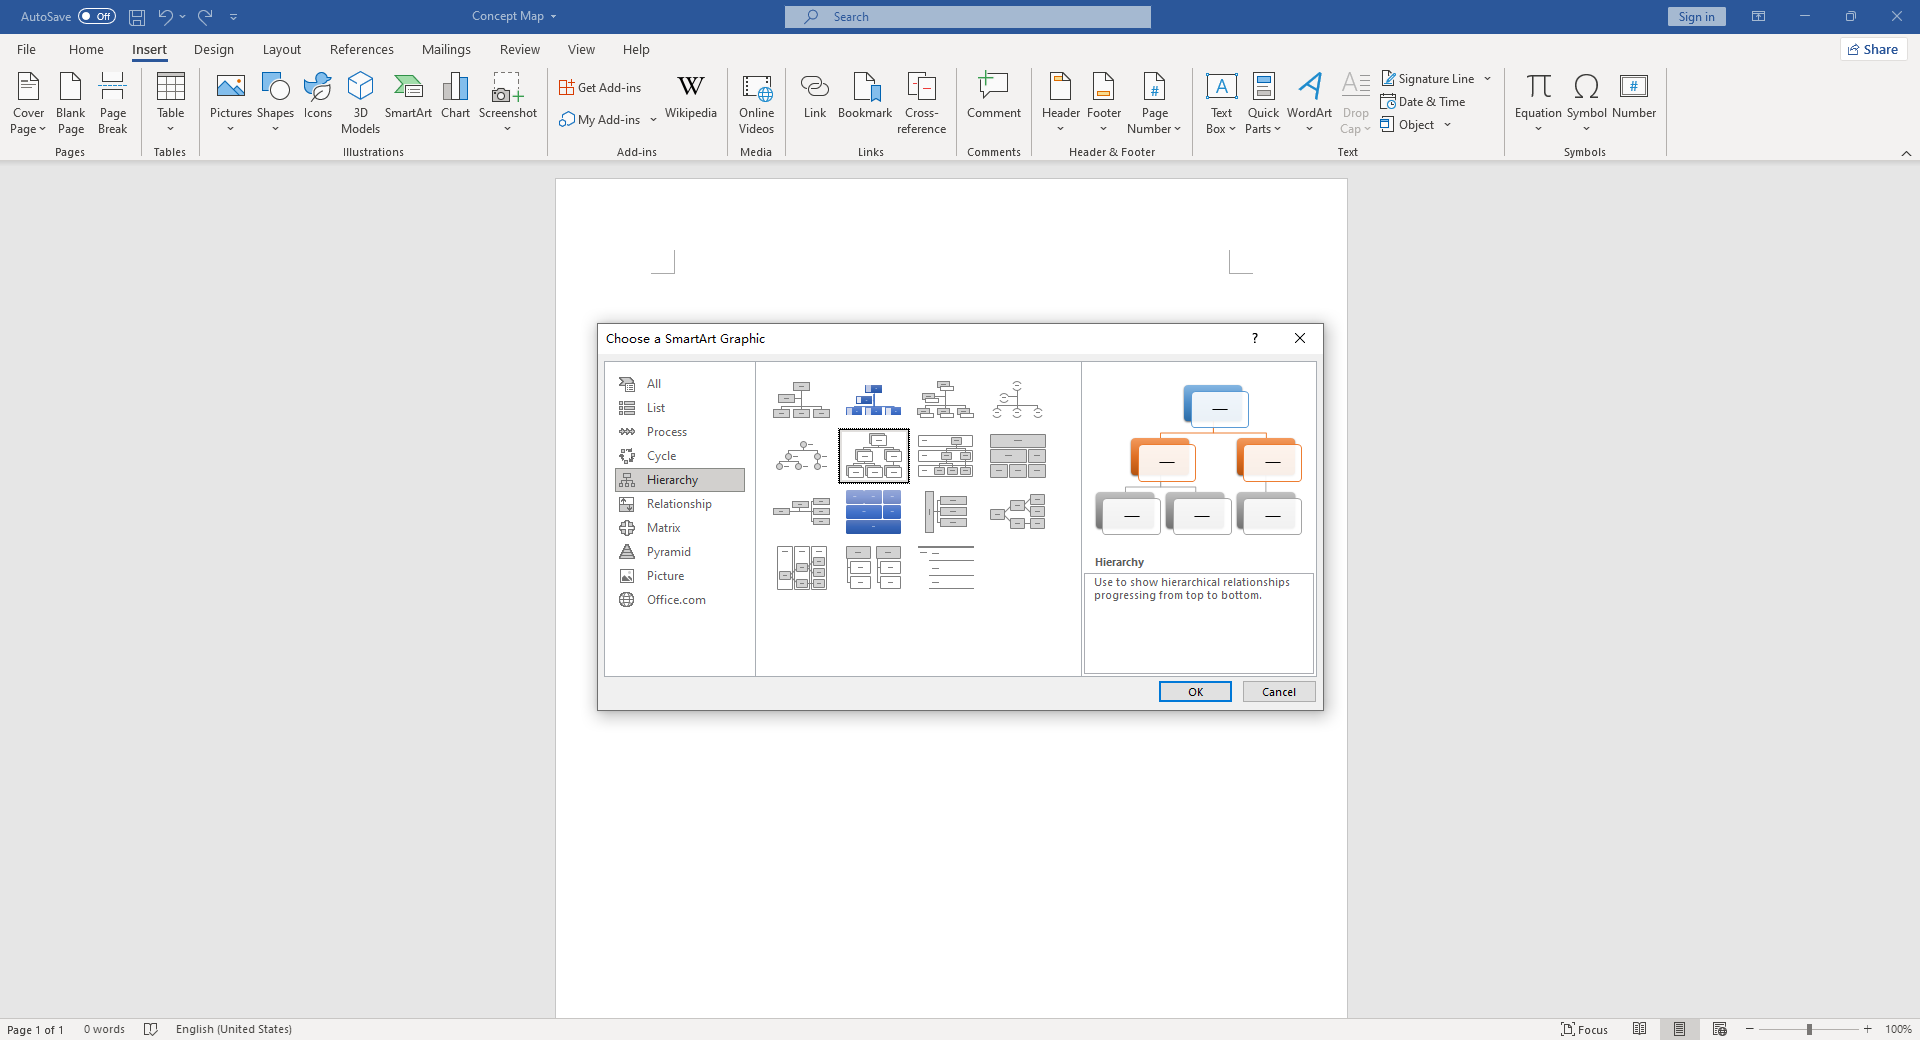
Step 4: Add Text to Your Concept Map
After inserting your chosen SmartArt graphic into your Word document, you can begin adding text to it. Click on a shape within the graphic and start typing to insert your text. Alternatively, you can use the text pane on the side (if it doesn't appear automatically, click on the small arrow on the left of your SmartArt graphic).
In this pane, you can easily add text for each shape in your hierarchy. Pressing 'Enter' creates a new bullet point, which adds a shape at the same level in the hierarchy, while pressing 'Tab' creates a subpoint, which adds a shape one level down.
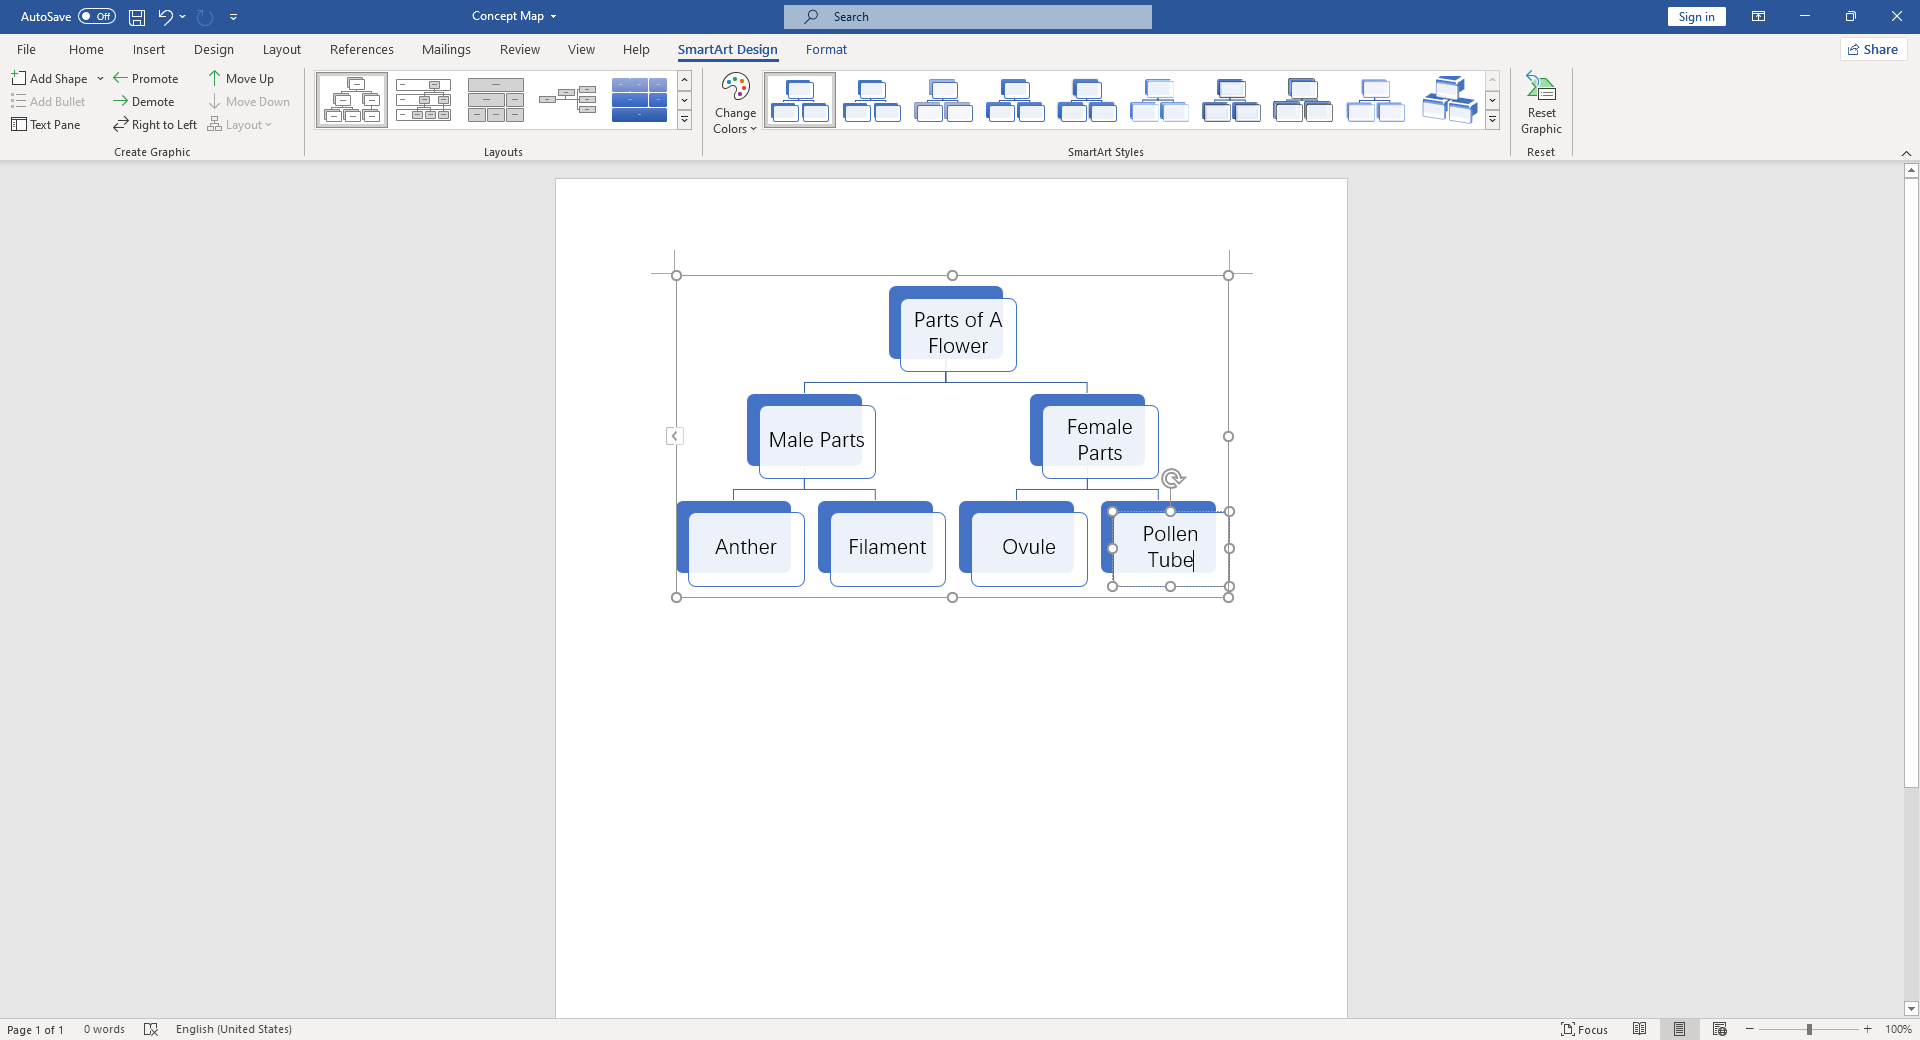
Step 5: Customise Your Concept Map
You can change the style, color, and size of your shapes and lines for better visual impact. To do this:
- Select the shape or line you wish to customize.
- Under 'SmartArt Tools', select the 'Format' tab.
- Choose the desired options from the 'Shape Styles' or 'WordArt Styles' groups.
If you want to insert images into your concept map:
- Right-click on the desired shape.
- Select 'Fill', then 'Picture'.
- You can then choose to upload an image from your device or search for online pictures.
Remember that customization should aid understanding rather than clutter or confuse your concept map.
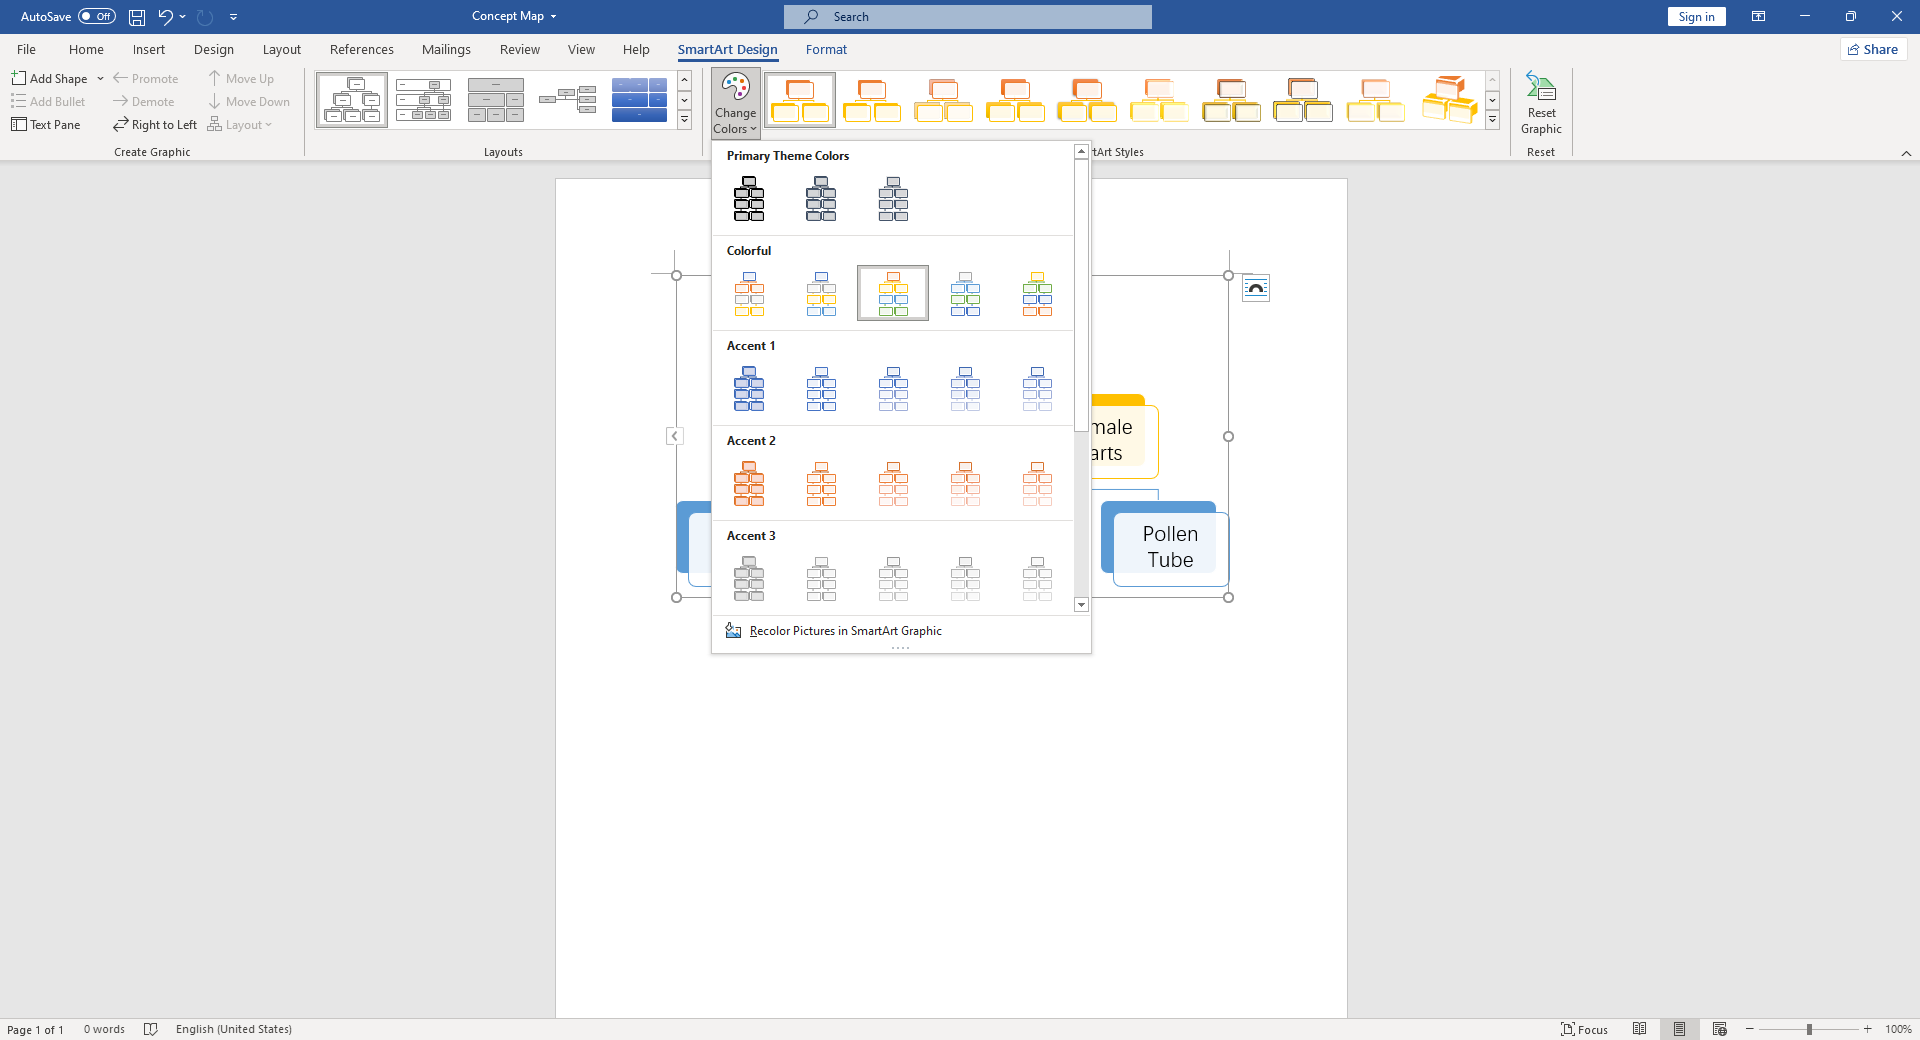
Step 6: Revisit and Refine
After you have finished inserting all your content and customizing your concept map, take a moment to review it. Check for any missing information or possible improvements. Consider if the relationships between concepts are clear and whether the overall layout helps clarify these relationships.
Creating a concept map in Word does have its challenges. However, with careful planning and thoughtful design choices, it's entirely possible to create a meaningful and effective concept map within this platform.
Major Drawbacks of Creating a Concept Map in Word
Although it is possible to create a concept map in Word, the process can be cumbersome. For instance, customization is limited to what Word offers within its SmartArt graphics options. Word's linear nature also makes it difficult to create non-hierarchical relationships and incorporate multimedia elements. Additionally, editing the concept map can be time-consuming as adding or deleting nodes or links often disrupts the entire layout.
Create Effortless Concept Maps with Boardmix
An alternative to Word for creating concept maps is Boardmix. This software is specifically designed for creating visual content, making it far more versatile and user-friendly than Word for this task.
Creating a concept map in Boardmix can be achieved in two ways: using pre-built templates or starting from scratch. The former offers convenience as it eliminates the need to layout each node and link individually. You simply choose a template that suits your needs and customize it with your content.
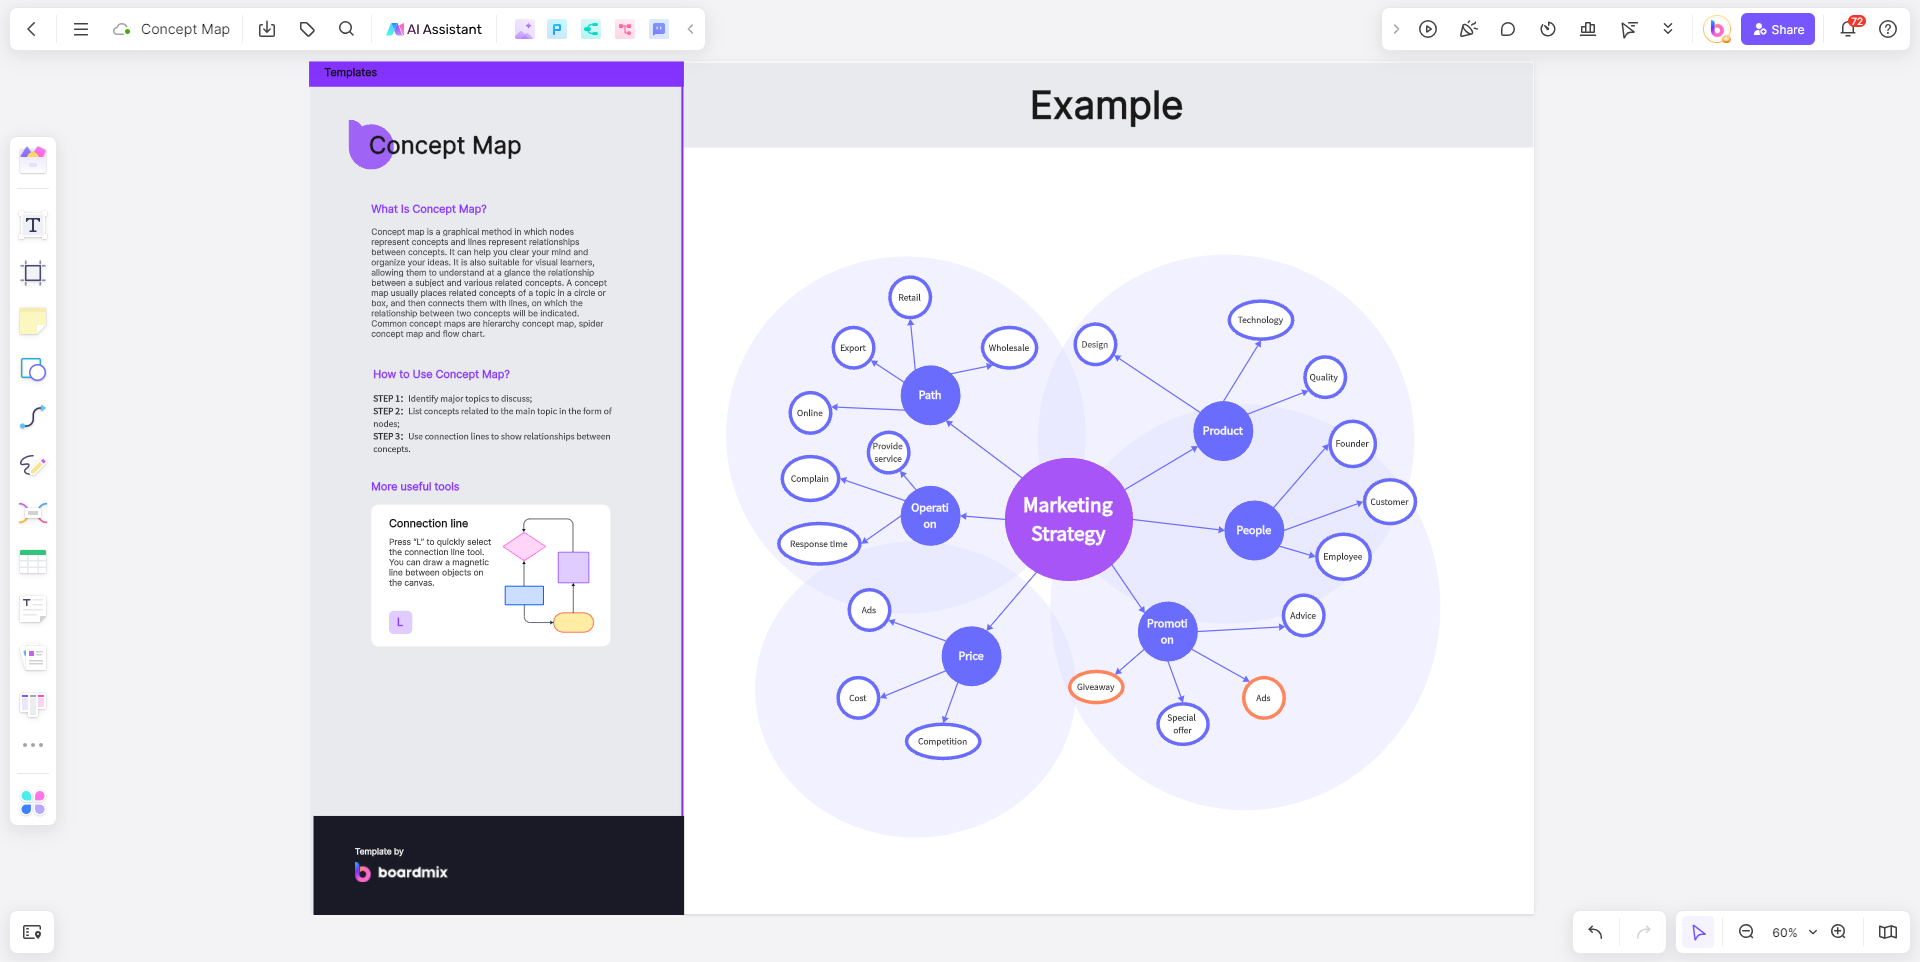
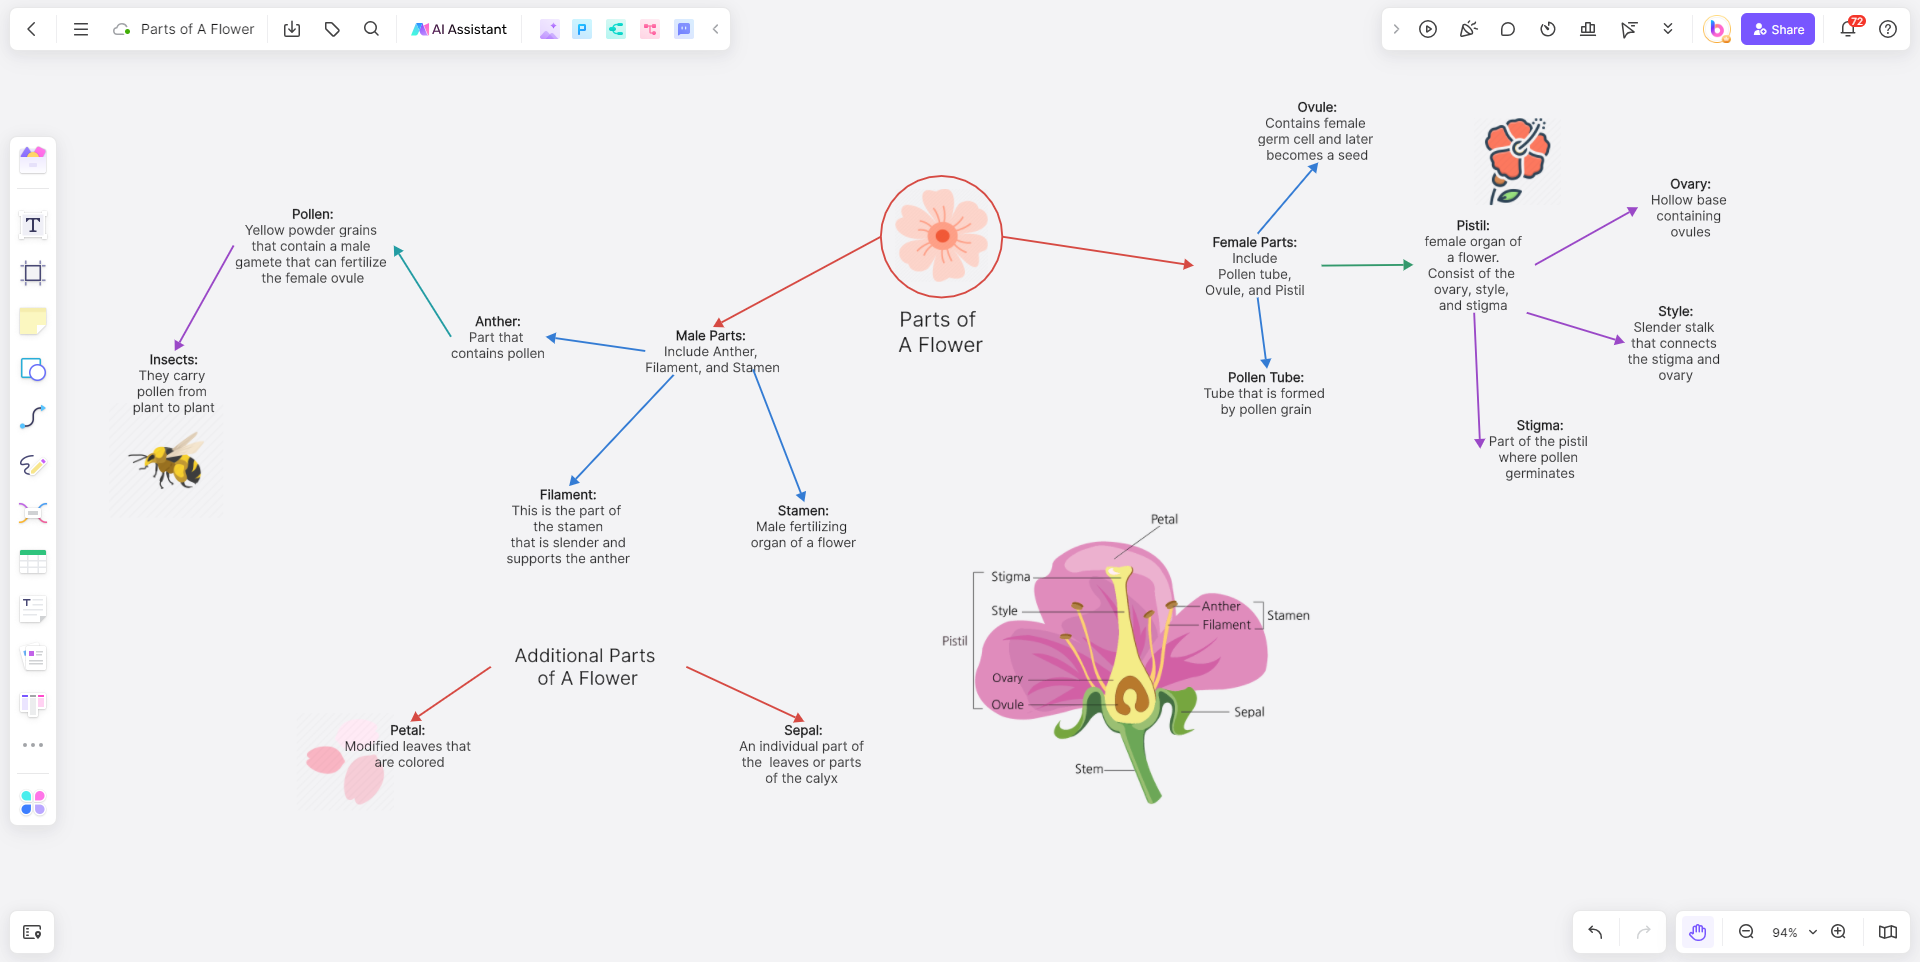
Starting from scratch, on the other hand, offers maximum customization. Boardmix provides diverse shapes, lines, and colors to help you create the ideal concept map. Unlike Word, Boardmix allows you to easily add and edit nodes without disrupting the overall layout, thus making your mapping process more efficient.
Which One is a Better Concept Map Maker: Word or Boardmix?
While Word provides a solution to create concept maps, its limitations can make the process daunting, especially for complex concept maps. On the other hand, Boardmix is designed specifically for visual content creation, thus offering ease of use and extensive customization. Therefore, although you may use Word for basic concept maps, we recommend trying out Boardmix for an enhanced concept mapping experience.
Embark on your journey of visual knowledge sharing with ease and confidence. Whether you choose Word or Boardmix, remember that a well-crafted concept map is not just visually appealing but also effective in driving understanding and collaboration.


