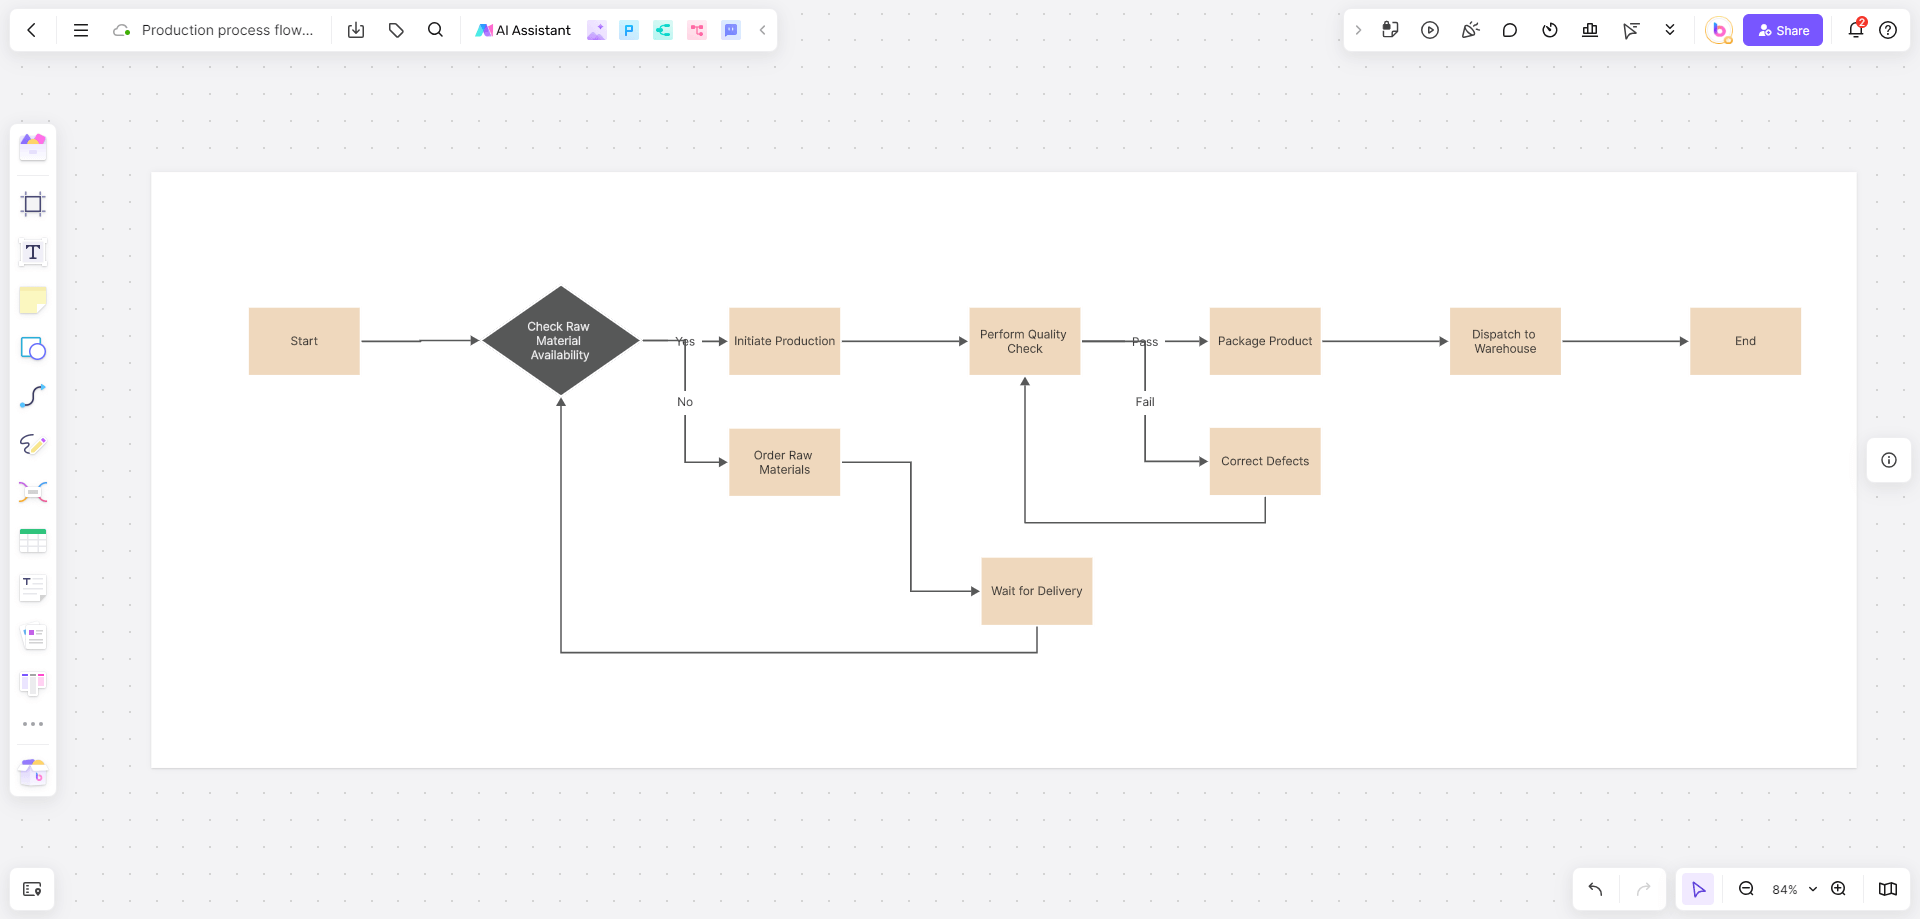
Whiteboarding has become an essential tool for brainstorming, teaching, project management, and collaborative work. The ability to customize your whiteboard, including changing its color, can significantly enhance your experience, making it easier to organize thoughts, highlight key points, and make your content more visually appealing. In this article, we’ll explore the importance of adjusting your whiteboard color, guide you through the process of changing whiteboard color on Canva, and introduce you to a comprehensive alternative—Boardmix.
How Changing Colors Helps You with Whiteboarding

Changing the color of your whiteboard isn’t just about aesthetics; it’s a powerful tool that can enhance your productivity and communication. Different colors can evoke various emotions and responses, making your whiteboard sessions more effective.
Improved Focus and Clarity: Using different whiteboard colors can help distinguish between different ideas or categories. For instance, you might use a calm blue background for brainstorming sessions to encourage creativity or a more vibrant color like yellow to draw attention to urgent tasks.
Enhanced Readability: A stark white background can sometimes cause eye strain, especially during long sessions. Changing the whiteboard color to a softer shade can make content easier to read, reducing fatigue and improving engagement.
Better Organization: Assigning specific colors to different sections or types of content can help in organizing your whiteboard. This can be particularly useful in project management, where tasks, timelines, and responsibilities are often segmented.
Aesthetic Appeal: Let’s face it—a visually appealing whiteboard is more engaging. Whether you’re presenting to a team, teaching a class, or organizing your thoughts, changing the whiteboard color can make your presentations more attractive and engaging.
How to Change Whiteboard Color on Canva
Canva is a widely-used online design tool that allows users to create everything from social media graphics to presentations and whiteboards. One of its key features is the ability to customize designs, including changing the color of your whiteboard. This feature helps users create visually appealing and organized designs with ease.
Canva offers a straightforward process for customizing the whiteboard color, making it easy to create visually appealing and organized designs. Here’s how you can change the whiteboard color on Canva:
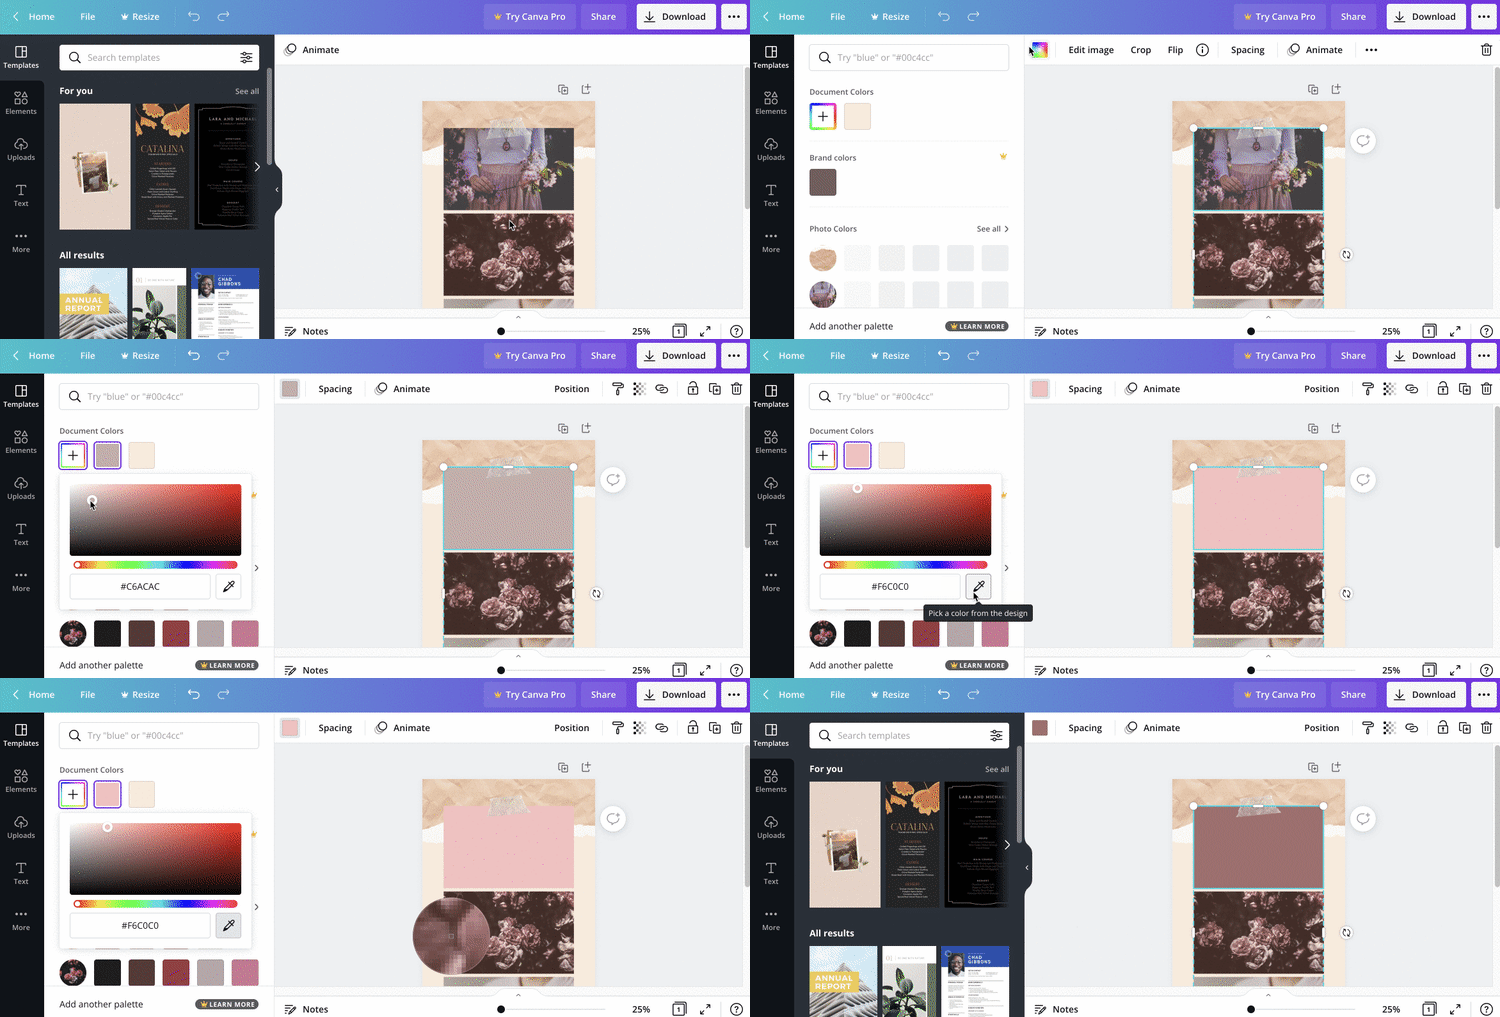
Select the Element to Edit: Click on the whiteboard background or any specific element whose color you want to change. Once selected, one or more color tiles will appear on the toolbar above the editor, depending on how many colors the selected element has.
Choose a Color: Click the color tile of the color you want to change. This action will open a panel showing your document colors, other suggestions, and any previously created color palettes.
Apply a New Color: To apply a different color to the selected element, click on a color from the options shown in the color panel. If you have a specific color in mind, you can click the “Add a new color” tile, which allows you to drag a circle to select a new color or enter a hex color code directly. Canva also offers the option to use gradients for a more dynamic background.
Use the Eyedropper Tool: If you want to pick a color from an existing part of your design, click the rainbow tile and select the “Eyedropper” tool. Hover your mouse over the area of your design whose color you want to replicate, then click to apply that color to the selected element.
Boardmix: A Comprehensive Alternative for Canva

While Canva is a great tool for design tasks, it may not meet the needs of every user. This is where Boardmix comes in as a comprehensive alternative.
Boardmix is an all-in-one digital whiteboard platform designed for teams, educators, and professionals who need a more versatile and collaborative tool. Unlike Canva, which is primarily a design tool, Boardmix is built with whiteboarding in mind, offering a range of features that enhance brainstorming, project management, and remote collaboration.
Key Features of Boardmix
Advanced Customization Options: Boardmix allows you to easily change the whiteboard color. You can choose from a broad spectrum of colors, create custom color, and even change textures of your whiteboard background.
Collaboration Tools: Boardmix is designed for team collaboration. You can invite team members to your whiteboard, allowing them to make changes in real time. The ability to change whiteboard colors on the fly can be particularly useful during collaborative sessions, helping to distinguish different team members’ contributions.
Template Library: Boardmix offers a vast library of templates, from project management boards to educational templates. You can easily change the whiteboard color of any template to match your theme or preference.
Intuitive Interface: Boardmix’s interface is user-friendly and intuitive, making it easy for anyone to start whiteboarding, regardless of their technical skill level. The process of changing whiteboard colors is seamless and can be done in just a few clicks.
Cross-Platform Compatibility: Boardmix is accessible on multiple devices, including desktops, tablets, and smartphones. This means you can change your collaborate with others from anywhere, at any time.
How to Change Whiteboard Color on Boardmix
Boardmix offers a robust set of tools for customizing your whiteboard, including the ability to change the whiteboard color. Here’s a step-by-step guide on how to do it:
Log into Boardmix: Start by logging into your Boardmix account. If you’re new to the platform, you can easily sign up for free.
Create or Open a Whiteboard: Once logged in, either create a new whiteboard or open an existing one that you want to edit.
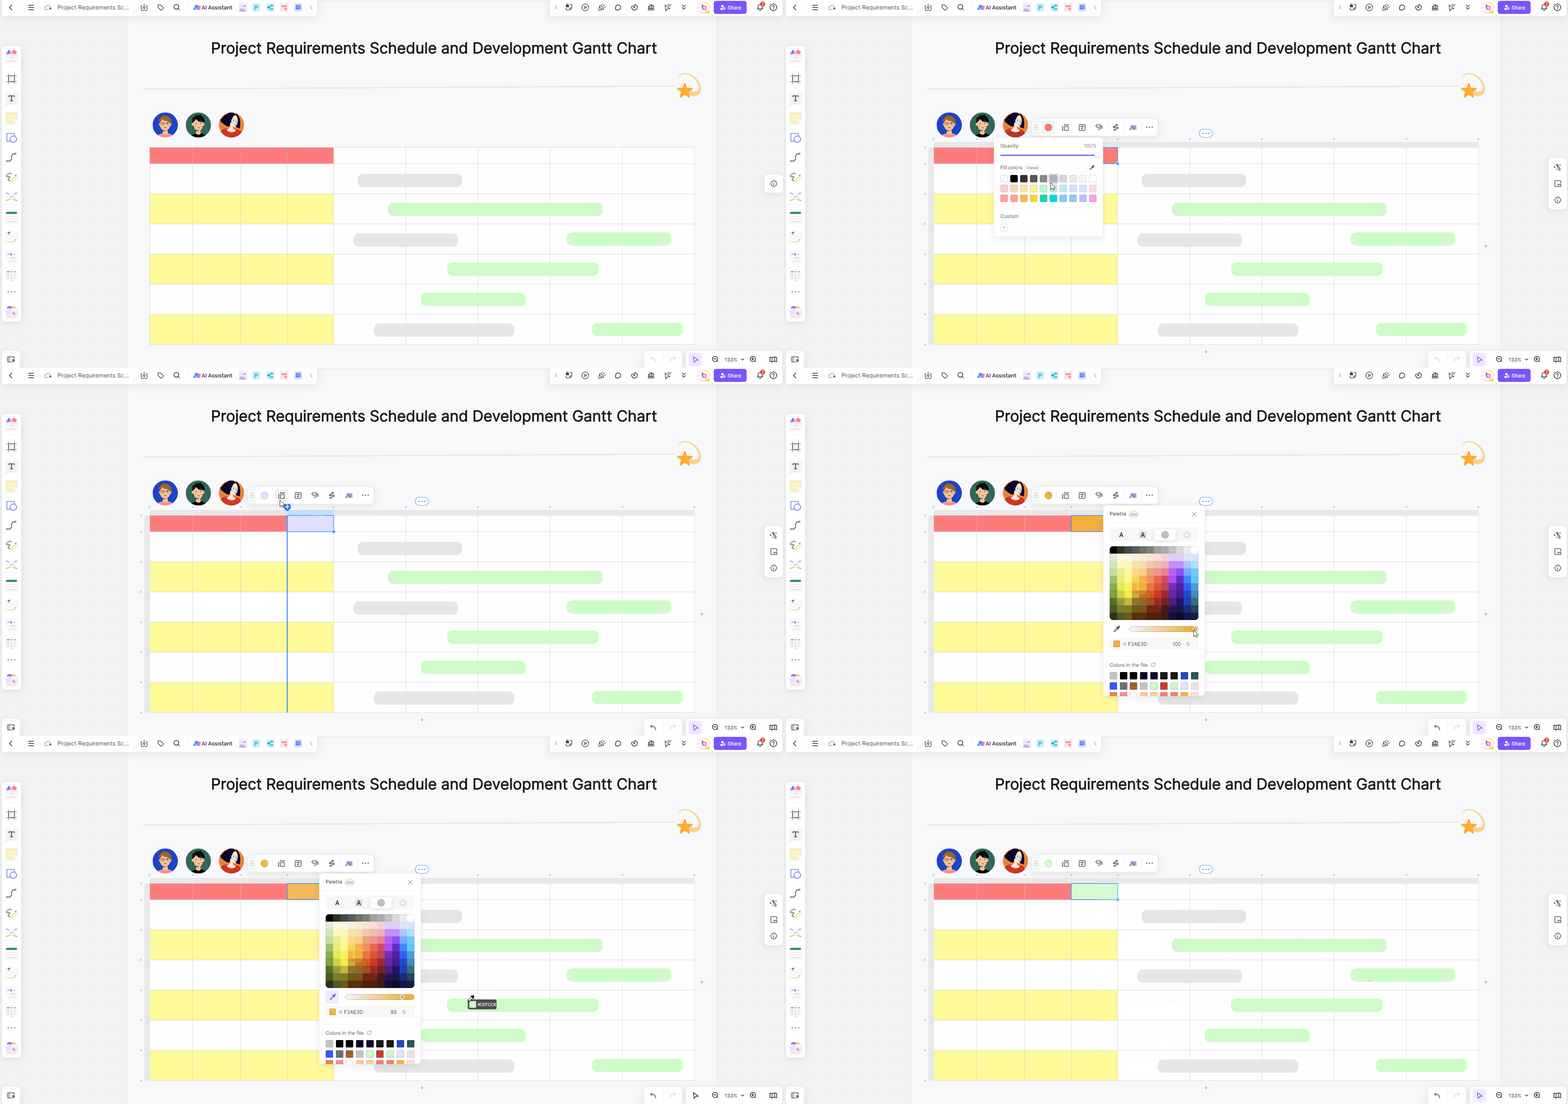
Select Element to Edit: Click on any specific element whose color you want to change. This will activate the customization options available for that element.
Choose the Color to Change: Once the element is selected, you’ll see a color tile or color options appear on the toolbar. Click on the color tile that corresponds to the color you want to change. This will open a color panel displaying your document colors, as well as other suggestions and previously created palettes.
Apply a New Color: To apply a new color, click on one of the colors from the options shown in the color panel. If you want to choose a custom color, click on the “Custom” tile. This opens a palette where you can select the desired color in a gradient color panel or enter a specific hexadecimal color code.
Use the Eyedropper Tool: If you wish to match a color from another part of your whiteboard or design, open the palette and select the “Color picker” tool. Hover your mouse over the area of the design whose color you want to use, and click to apply that color to the selected element.
Save and Share Your Whiteboard: After customizing the whiteboard color to your liking, save your changes. Boardmix also allows you to share your whiteboard with others by sending a link or exporting it as an image or PDF.
Conclusion
In conclusion, the ability to change your whiteboard color is an essential feature for anyone who frequently uses digital whiteboards. Whether you’re using Canva or Boardmix, understanding how to change whiteboard color can significantly enhance your whiteboarding experience, improving focus, clarity, and collaboration.
While Canva offers a solid set of features for changing whiteboard colors, Boardmix stands out as a comprehensive alternative with advanced customization options and collaborative tools. By learning how to change whiteboard color on both platforms, you can choose the one that best suits your needs and take your whiteboarding to the next level.
So, the next time you start a whiteboarding session, don’t just stick with the default color—experiment with different whiteboard colors to see how they can enhance your work and make your sessions more productive and engaging.


