The format for creating a user story map is very simple, and this is actually where the sheer beauty of this concept lies. There are just three basic elements – the user, what they want, and why they want it. Put these together in a sentence and you have a user story. Expand this story by adding the steps that the user takes to achieve what they want and you have a user story map. It is very straightforward but sometimes it can be a challenge to exhaust all the possibilities for any particular business.
3 User Story Mapping Examples for Beginners
Today, we will give you three user story map examples from three vastly different industries. These will illustrate the versatility of the user story map and give you several ideas on how you can apply the same basic pattern to improve the mapping process for your business and ultimately enable you to deliver more value to your customers.
Online Shopping User Mapping
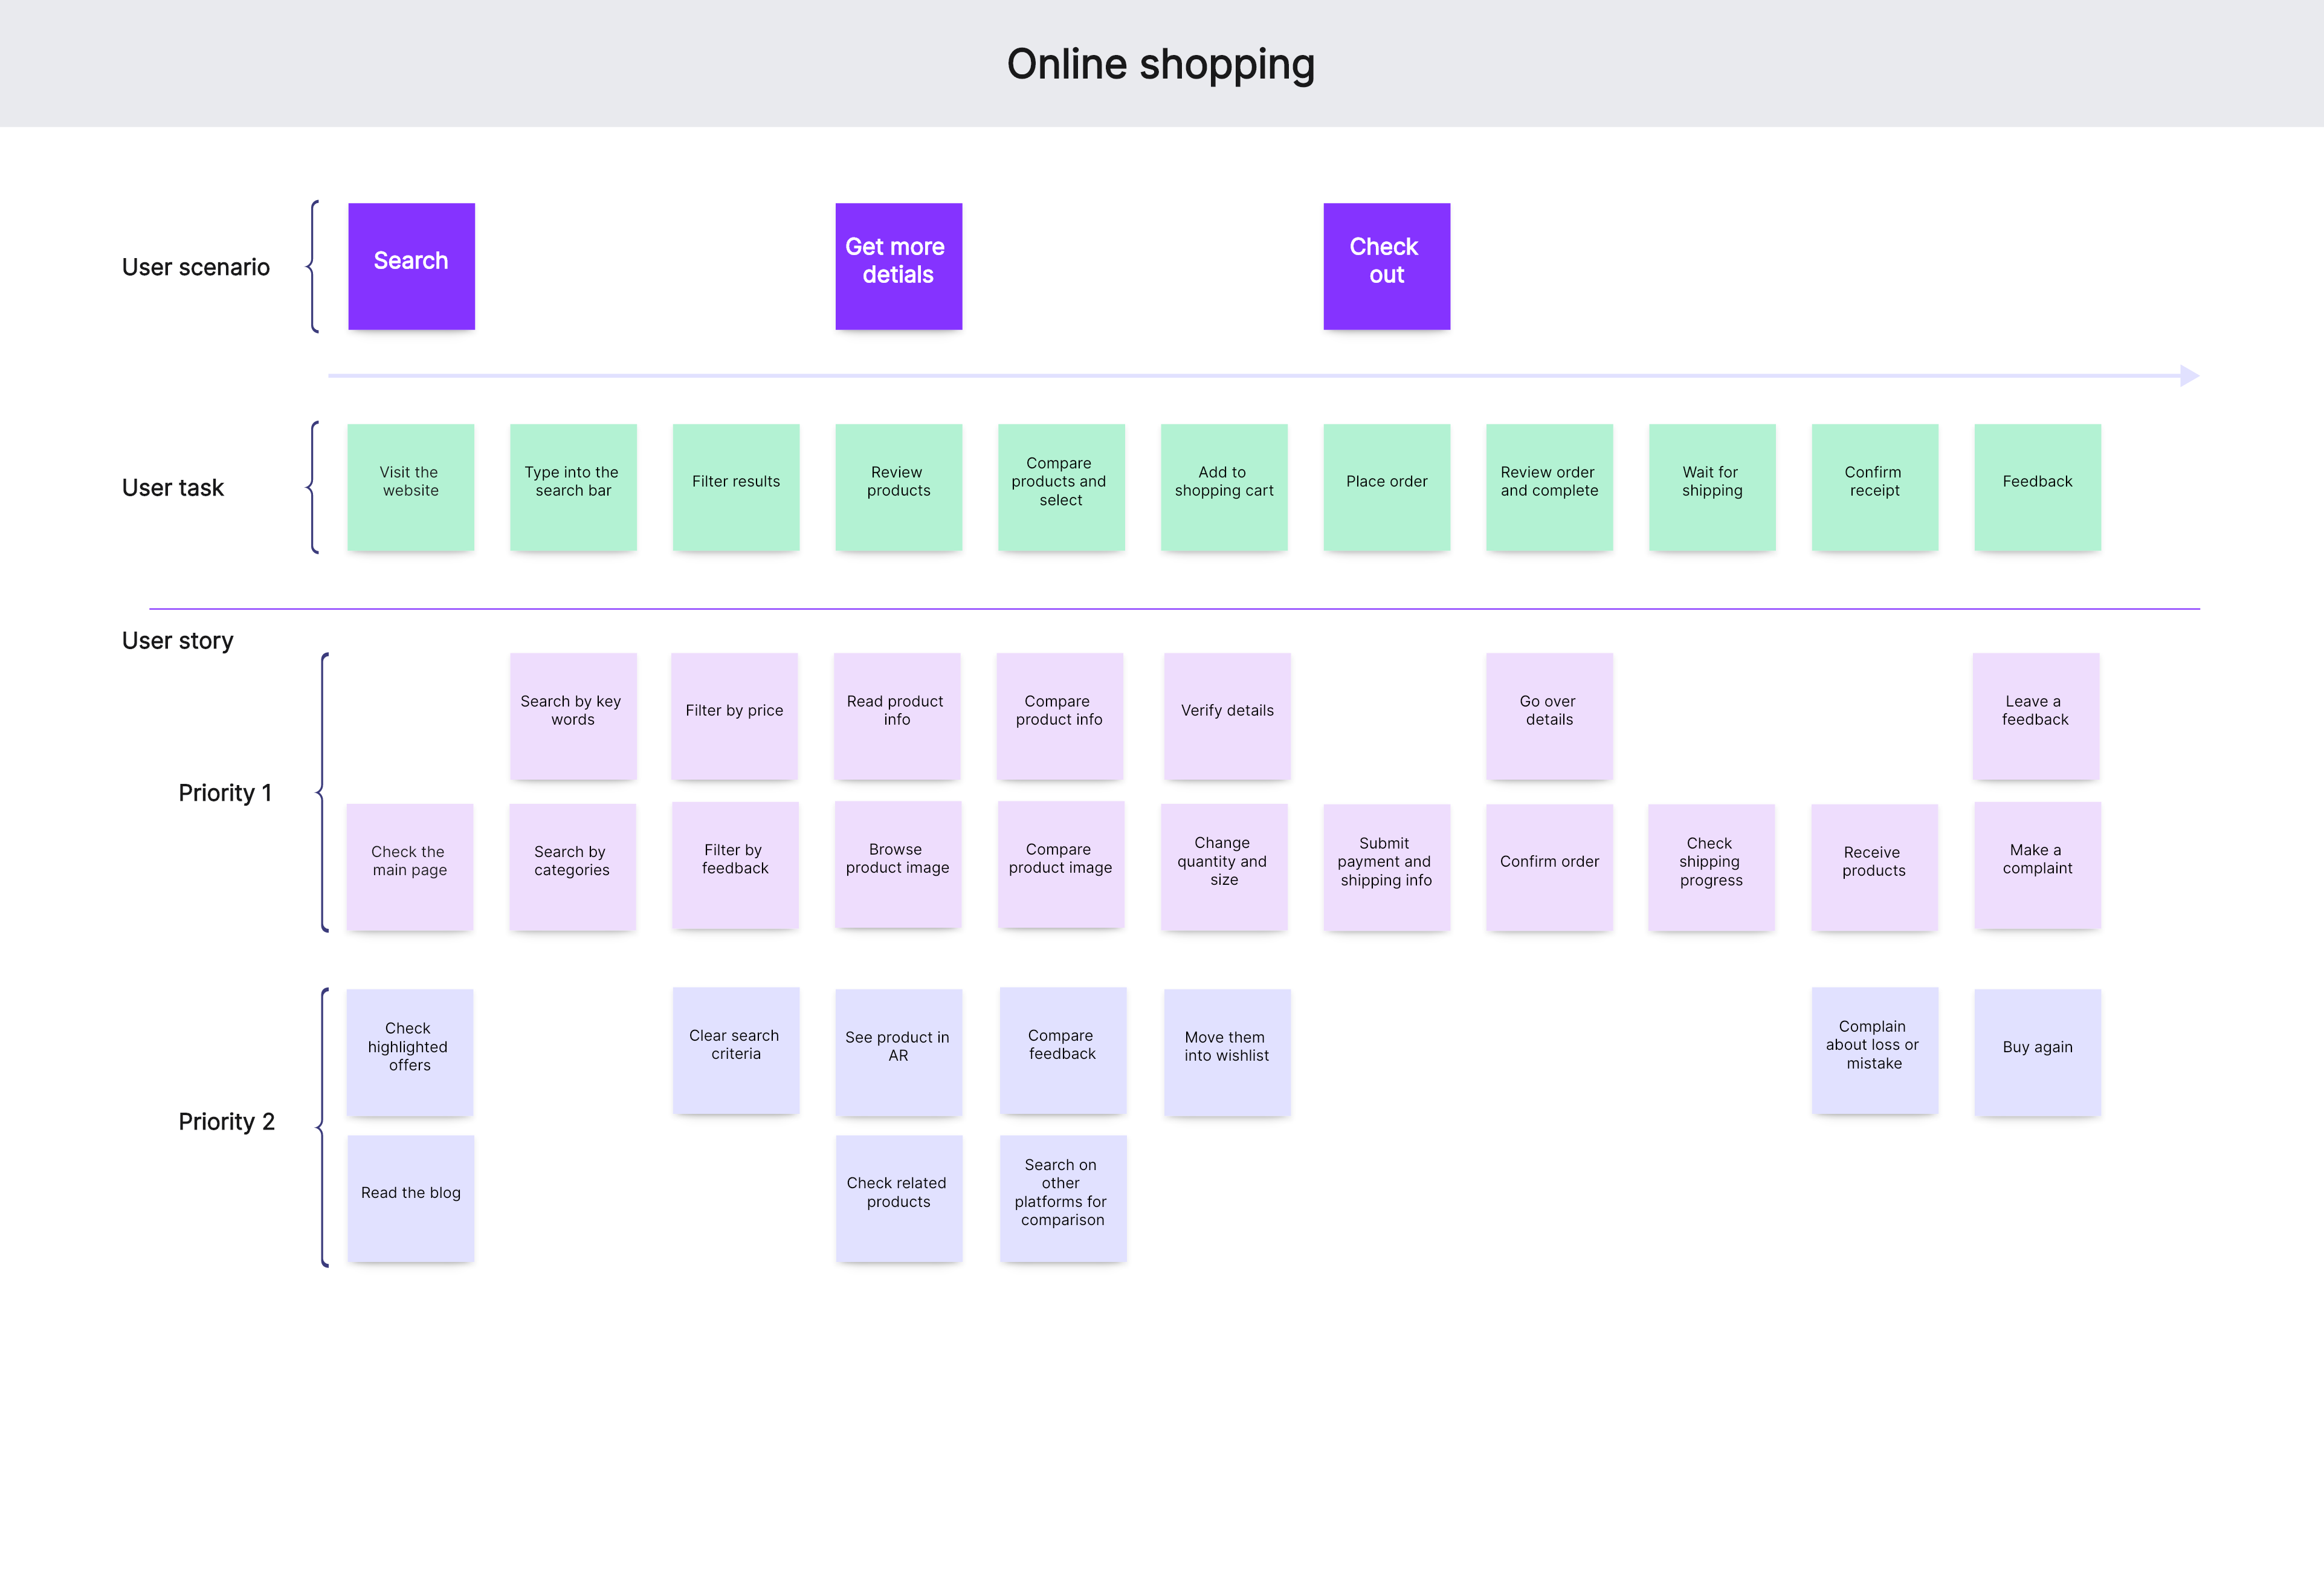
There are so many possible user stories to create for online shopping because of the extremely diverse clientele, as practically everyone shops online these days. For illustration purposes, let’s take on a very simple user story example: As a consumer, I want to compare products easily, so I can find the most reasonable price.
This user story can quickly turn into an elaborate story map because there are several tiny steps involved. The simple process of comparing products can be broken down into a lot of small user tasks – first go to the website, search for an item, filter the results by price, view the products, and finally compare the different items.
Chatroom APP
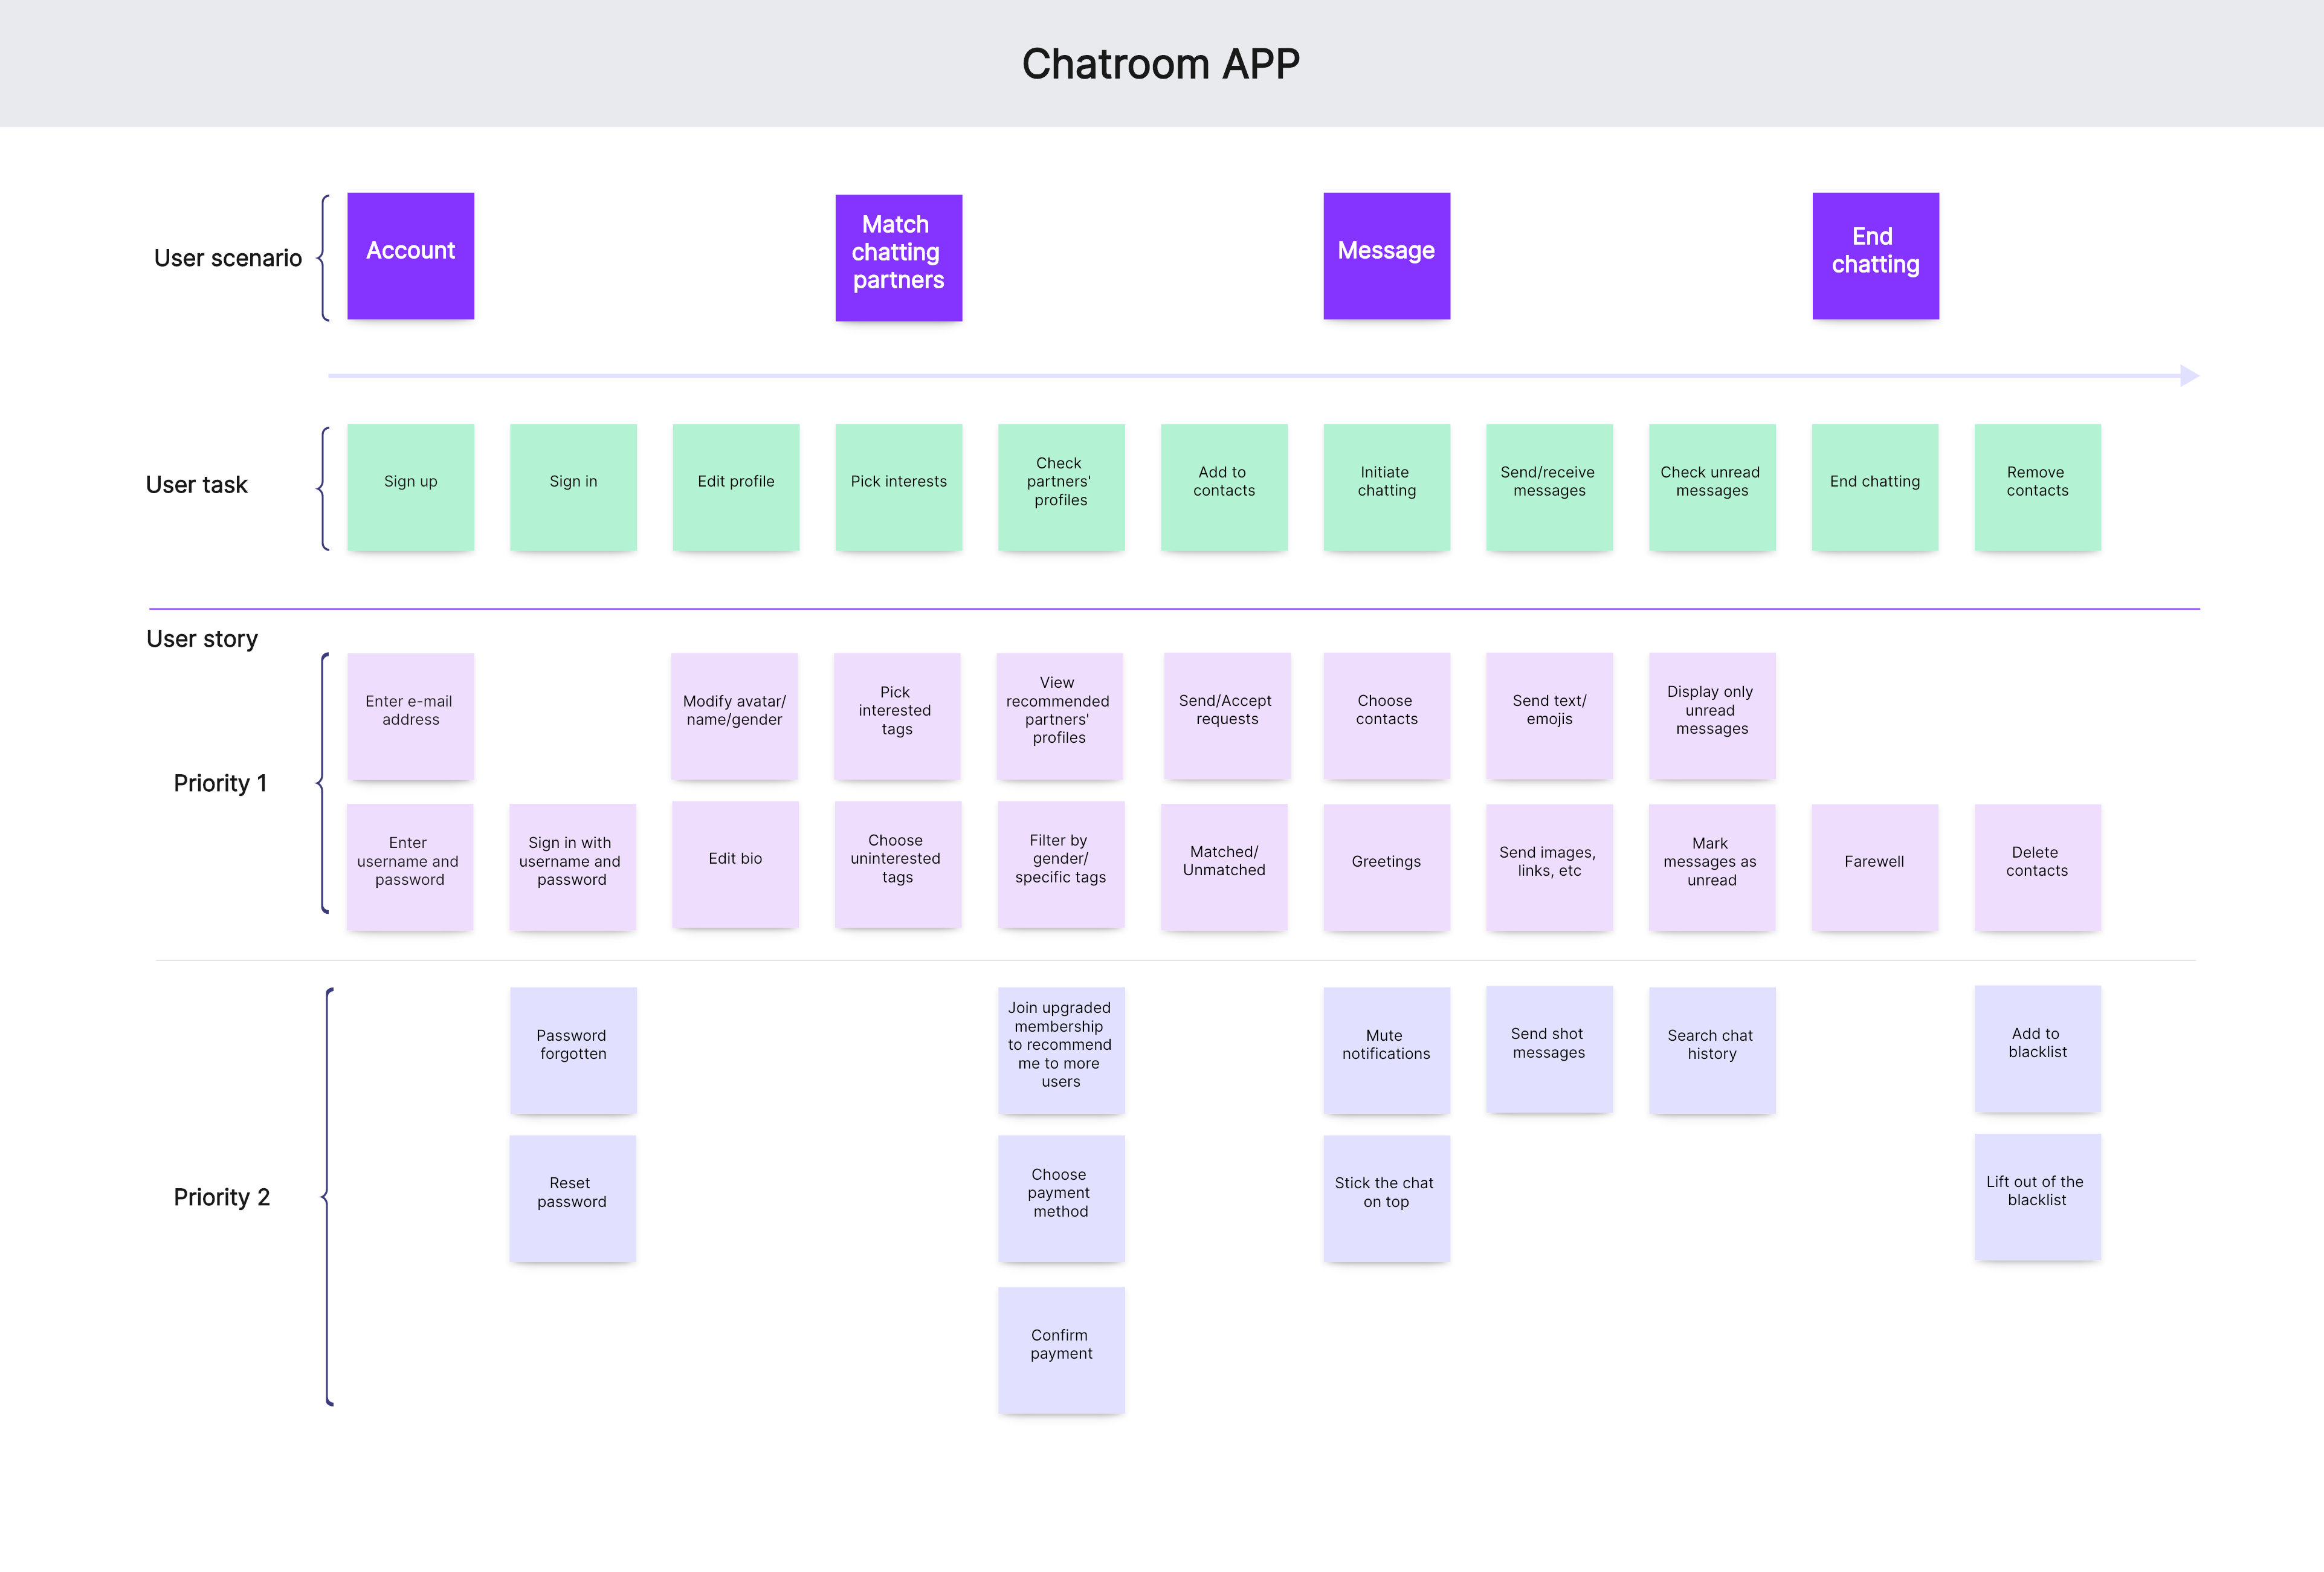
Another fairly common user story map example is what happens possibly millions of times a day around the world: As a social user, I want to find interesting people online, so I can meet new friends. This could apply to a dating app, a social media group for professionals within a common industry, or just an ordinary messenger app.
Again, there are dozens of scenarios that could play out and dozens of steps that the user can take until he achieves his goal. The user tasks would be clumped into groups, first for signing up, then for browsing for chatting partners, and finally making a selection. The browsing part alone can branch out into a lot of user stories – As a single man, I want to meet women in my city, so that we can meet up. Or as an avid jogger, I want to find like-minded athletes, so that I can join a team.
Karaoke APP
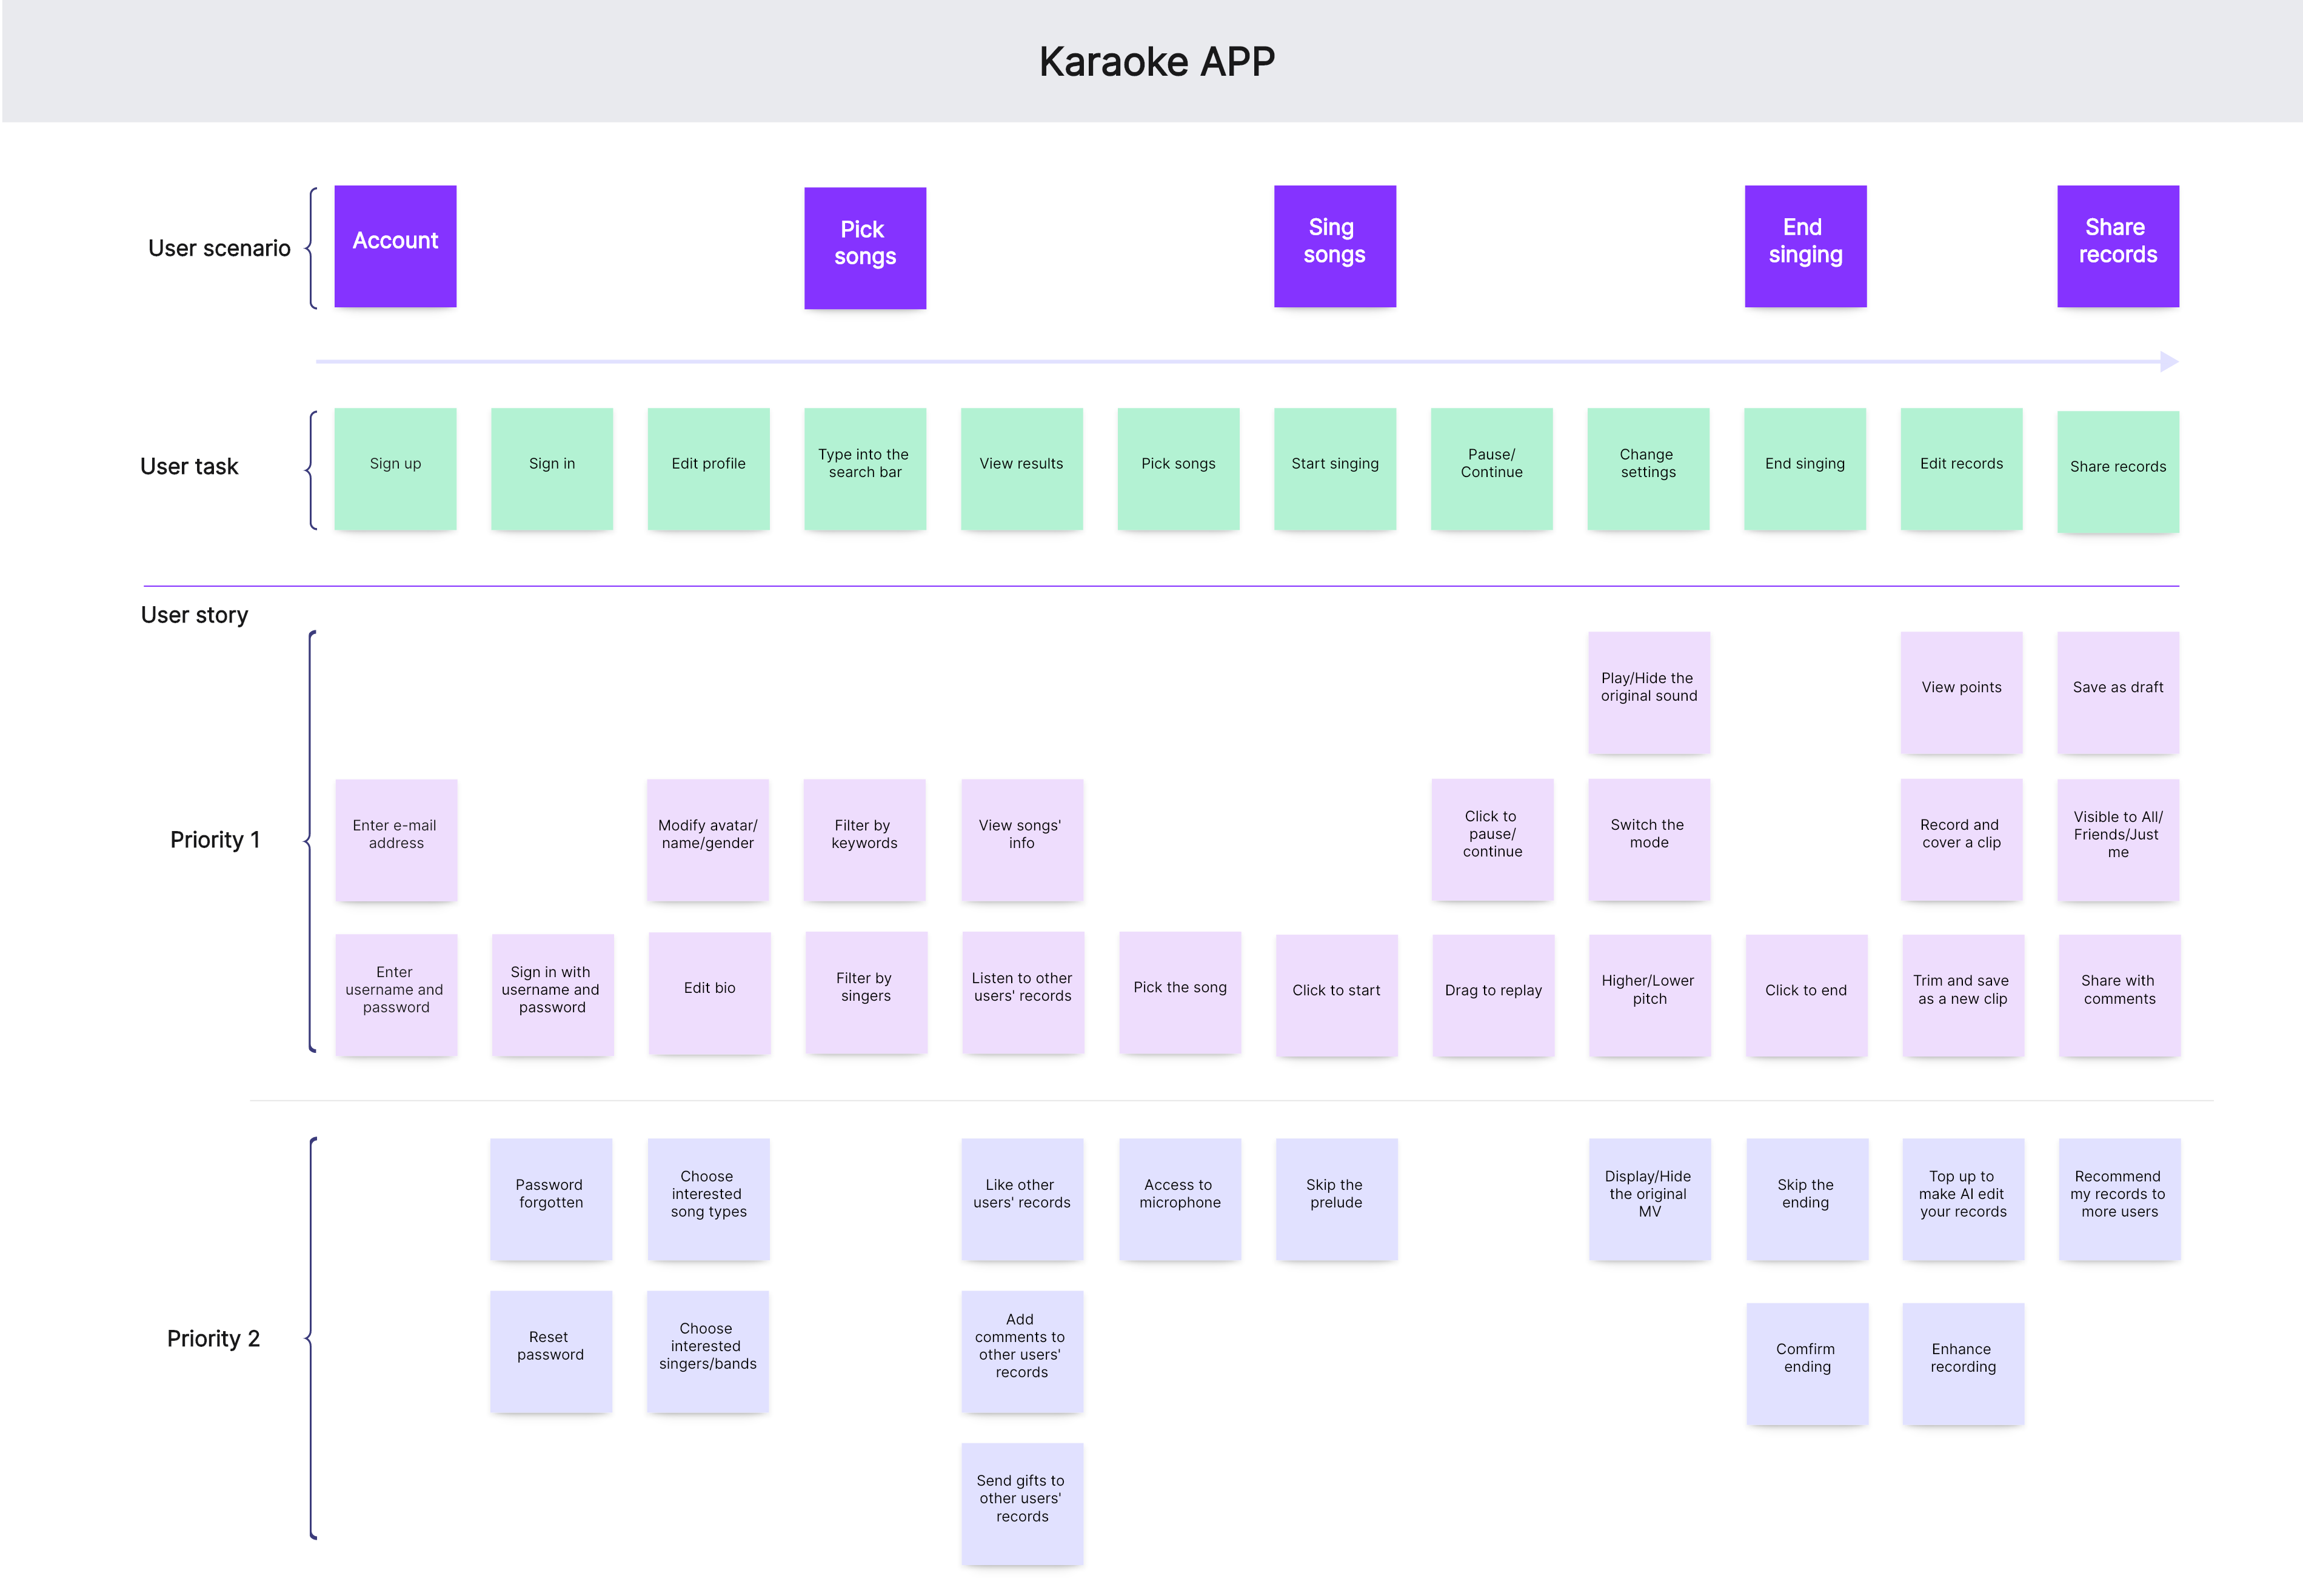
Online karaoke apps have become extremely popular in the last few years, and these are another situation for a great user story map example. As an aspiring singer, I want to perform my favorite songs, so that I can share my music online. The user scenarios include opening an account, picking songs, singing, and posting the songs online.
What the developer of the karaoke app would do is break these big user stories down to the smallest tasks. For example, for picking songs, top-priority tasks would include filtering songs by artist, genre, or keyword, then viewing info about the song, and also listening to other users who have already recorded the song. Lower-priority tasks might include sending gifts to other users or liking and sharing their records.
How to Make a User Story Map with Boardmix?
Boardmix is an online collaborative whiteboard that allows you to create your user story map in no time. The tool possesses a drag-and-drop editor that has a smooth learning curve.
Furthermore, all of your team members can also collaborate on the user story diagram to ensure that you have included all the required tasks. Here are the steps to craft this diagram using Boardmix:
Step 1 – Create the Project’s Activities

First of all, you need to decide which are your project’s main activities. Once you have determined the activities, you can create the shapes and place them at the top of the whiteboard.
Step 2 – Find and Create the User Tasks

The next step to create a user story diagram is to create the user tasks. These are subtasks that you must place on the second level. To make the levels easy to tell apart, you can select shapes of different colors.
Step 3 – Create User Stories
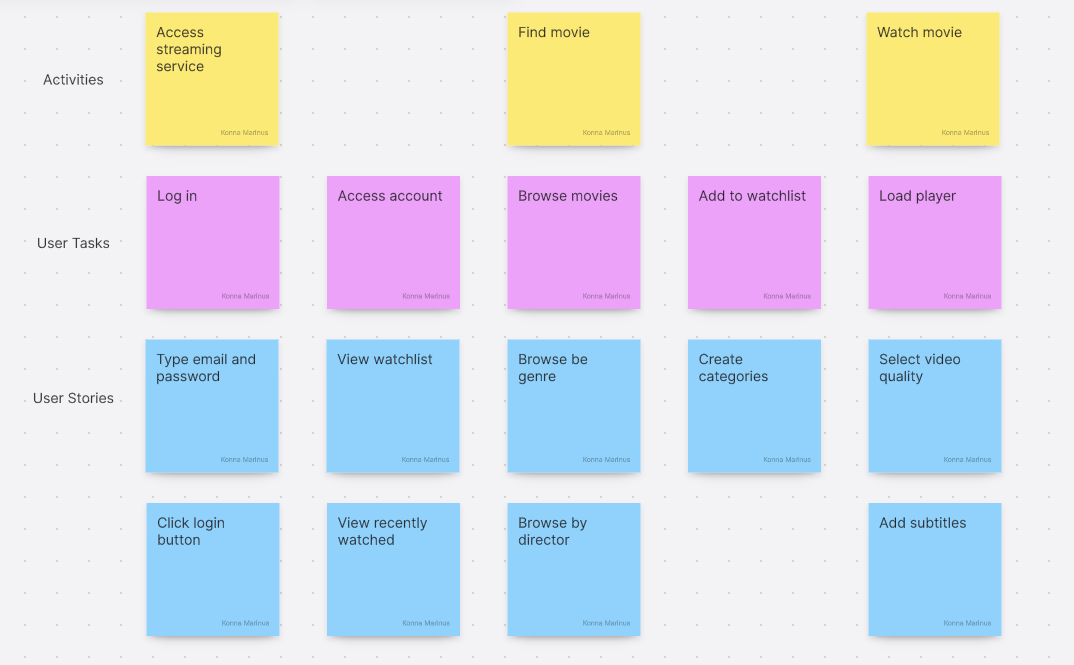
The following step is to add all relevant user stories. You will find the third level of your diagram contains the most tasks. Create all of them and select a different color for the shapes.
Step 4 – Manage User Stories
Before finalizing your diagram, you can evaluate the importance of each user story. Move the elements around to indicate their priority.
Step 5 – Share Your User Story Diagram
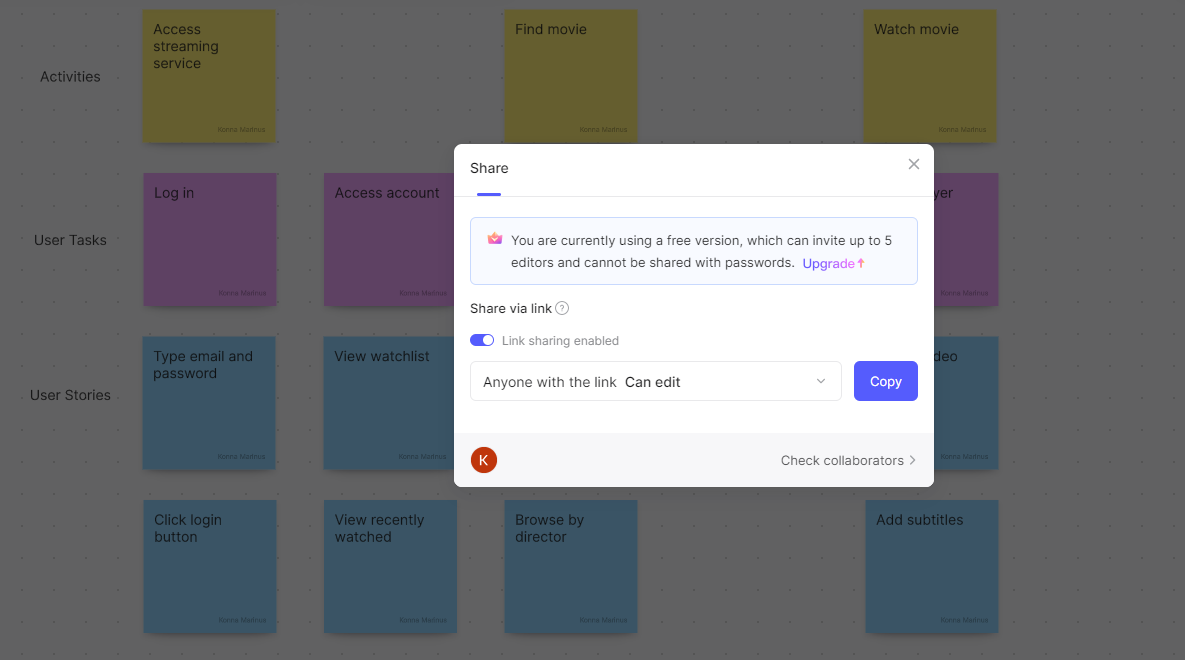
Finally, share the diagram with everyone involved. If there are changes that you need to implement, you can simply edit it.
FAQs about the User Story Maps
When to use the user story map?
A user story map can be used for any business task or situation that calls for a thorough understanding of the user experience, like software development or product design. It can also be used for evaluating a product or service that is being considered for upgrade or modification.
How to create a user story map?
The easiest way to create a user story map is to use a template and simply plug in the elements accordingly. You can also look at a user story example with a similar structure and pattern to your user story map after it.
Key Takeaways
As you can see, there can be a user story mapping example everywhere, especially in online applications. User mapping can help create the best possible experience for your customers. If you have never tried to create one before, the easiest way to do so is to use a user story mapping template. The one that we have at Boardmix, which you can access by clicking right here, comes highly recommended by project managers and business owners. It is very simple but very efficient, perfect for both beginners and seasoned user story mappers.


