What is a Project Timeline
A project timeline is a visual representation of the chronological order of tasks and milestones involved in a project. It helps to illustrate the sequence of events, deadlines, and dependencies between different tasks. A project timeline provides a clear overview of the project's progress, allowing stakeholders to track the project's status and make informed decisions. It helps to keep everyone involved in the project on the same page and ensures that the project stays on schedule. A well-designed project timeline is an essential tool for effective project planning, management, and communication.
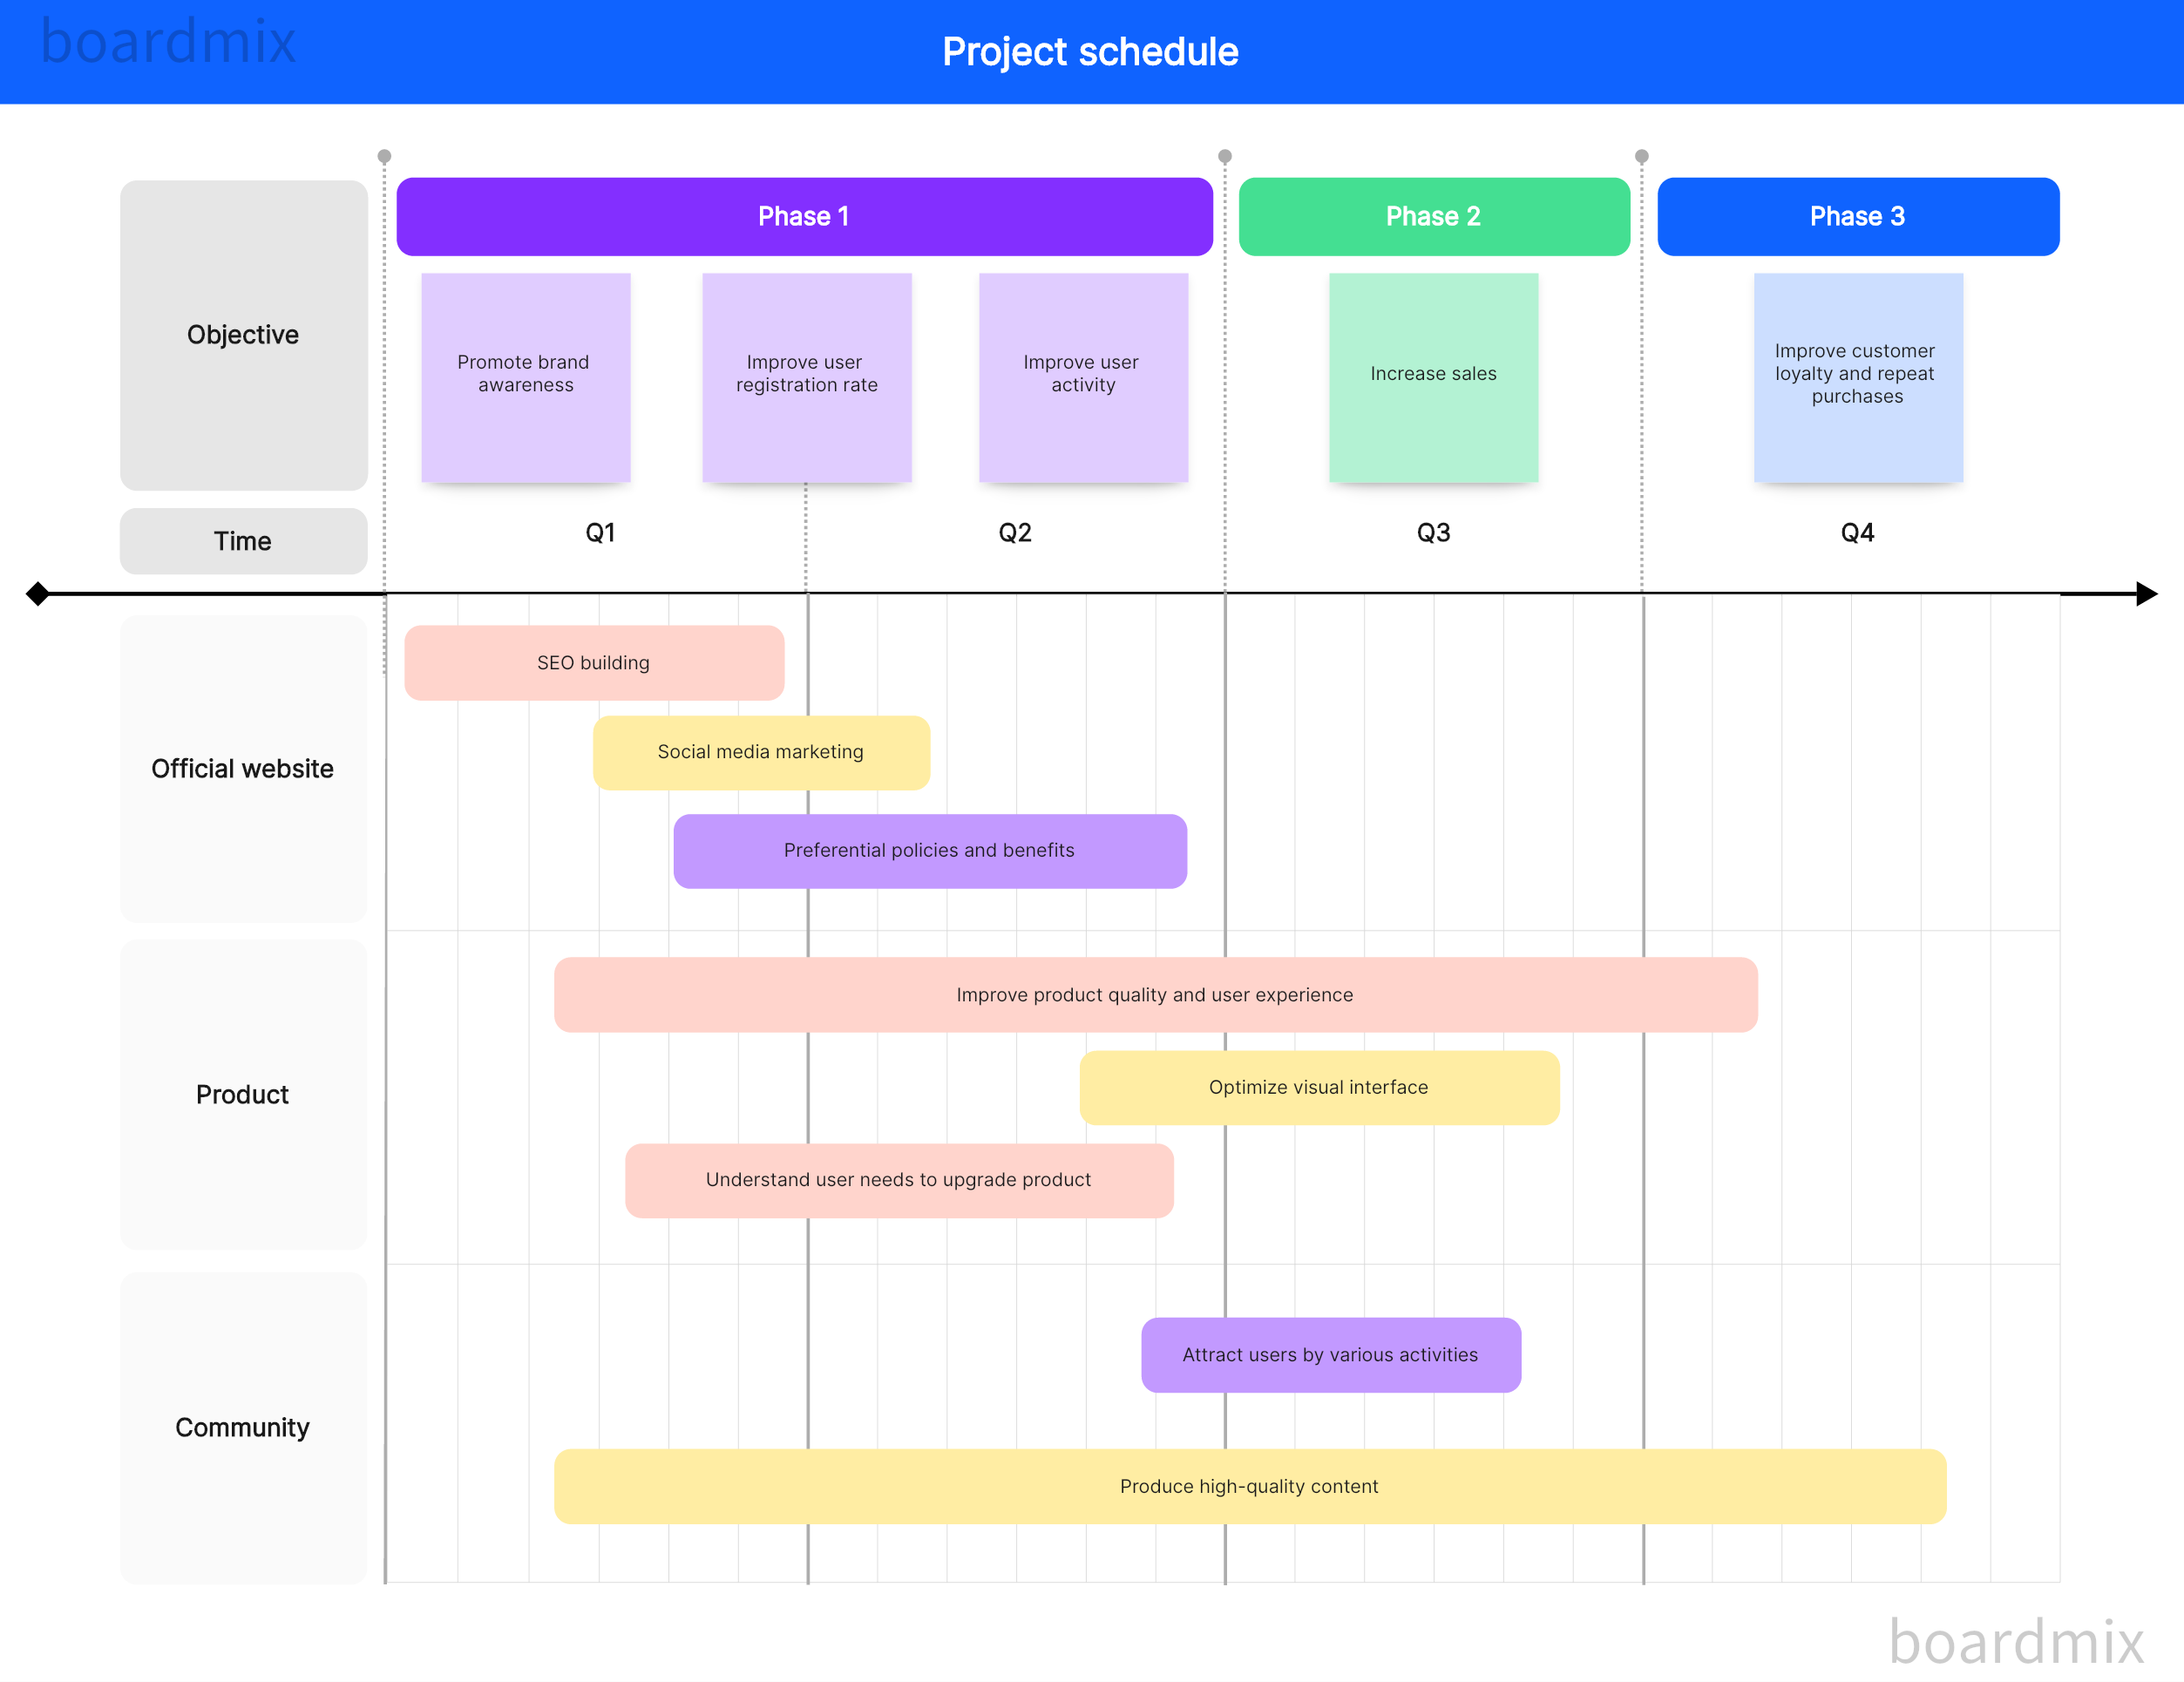
Project Timeline Example: Website Redesign Project
How to implement a project timeline in real life? Let's take website redesign as a project example. The project timeline is your compass, providing clear direction and keeping you on track. There's a lot to consider - from defining your goals and mapping out content to designing, testing, and finally launching your site. Here are the details of the project timeline example for the website redesign project.
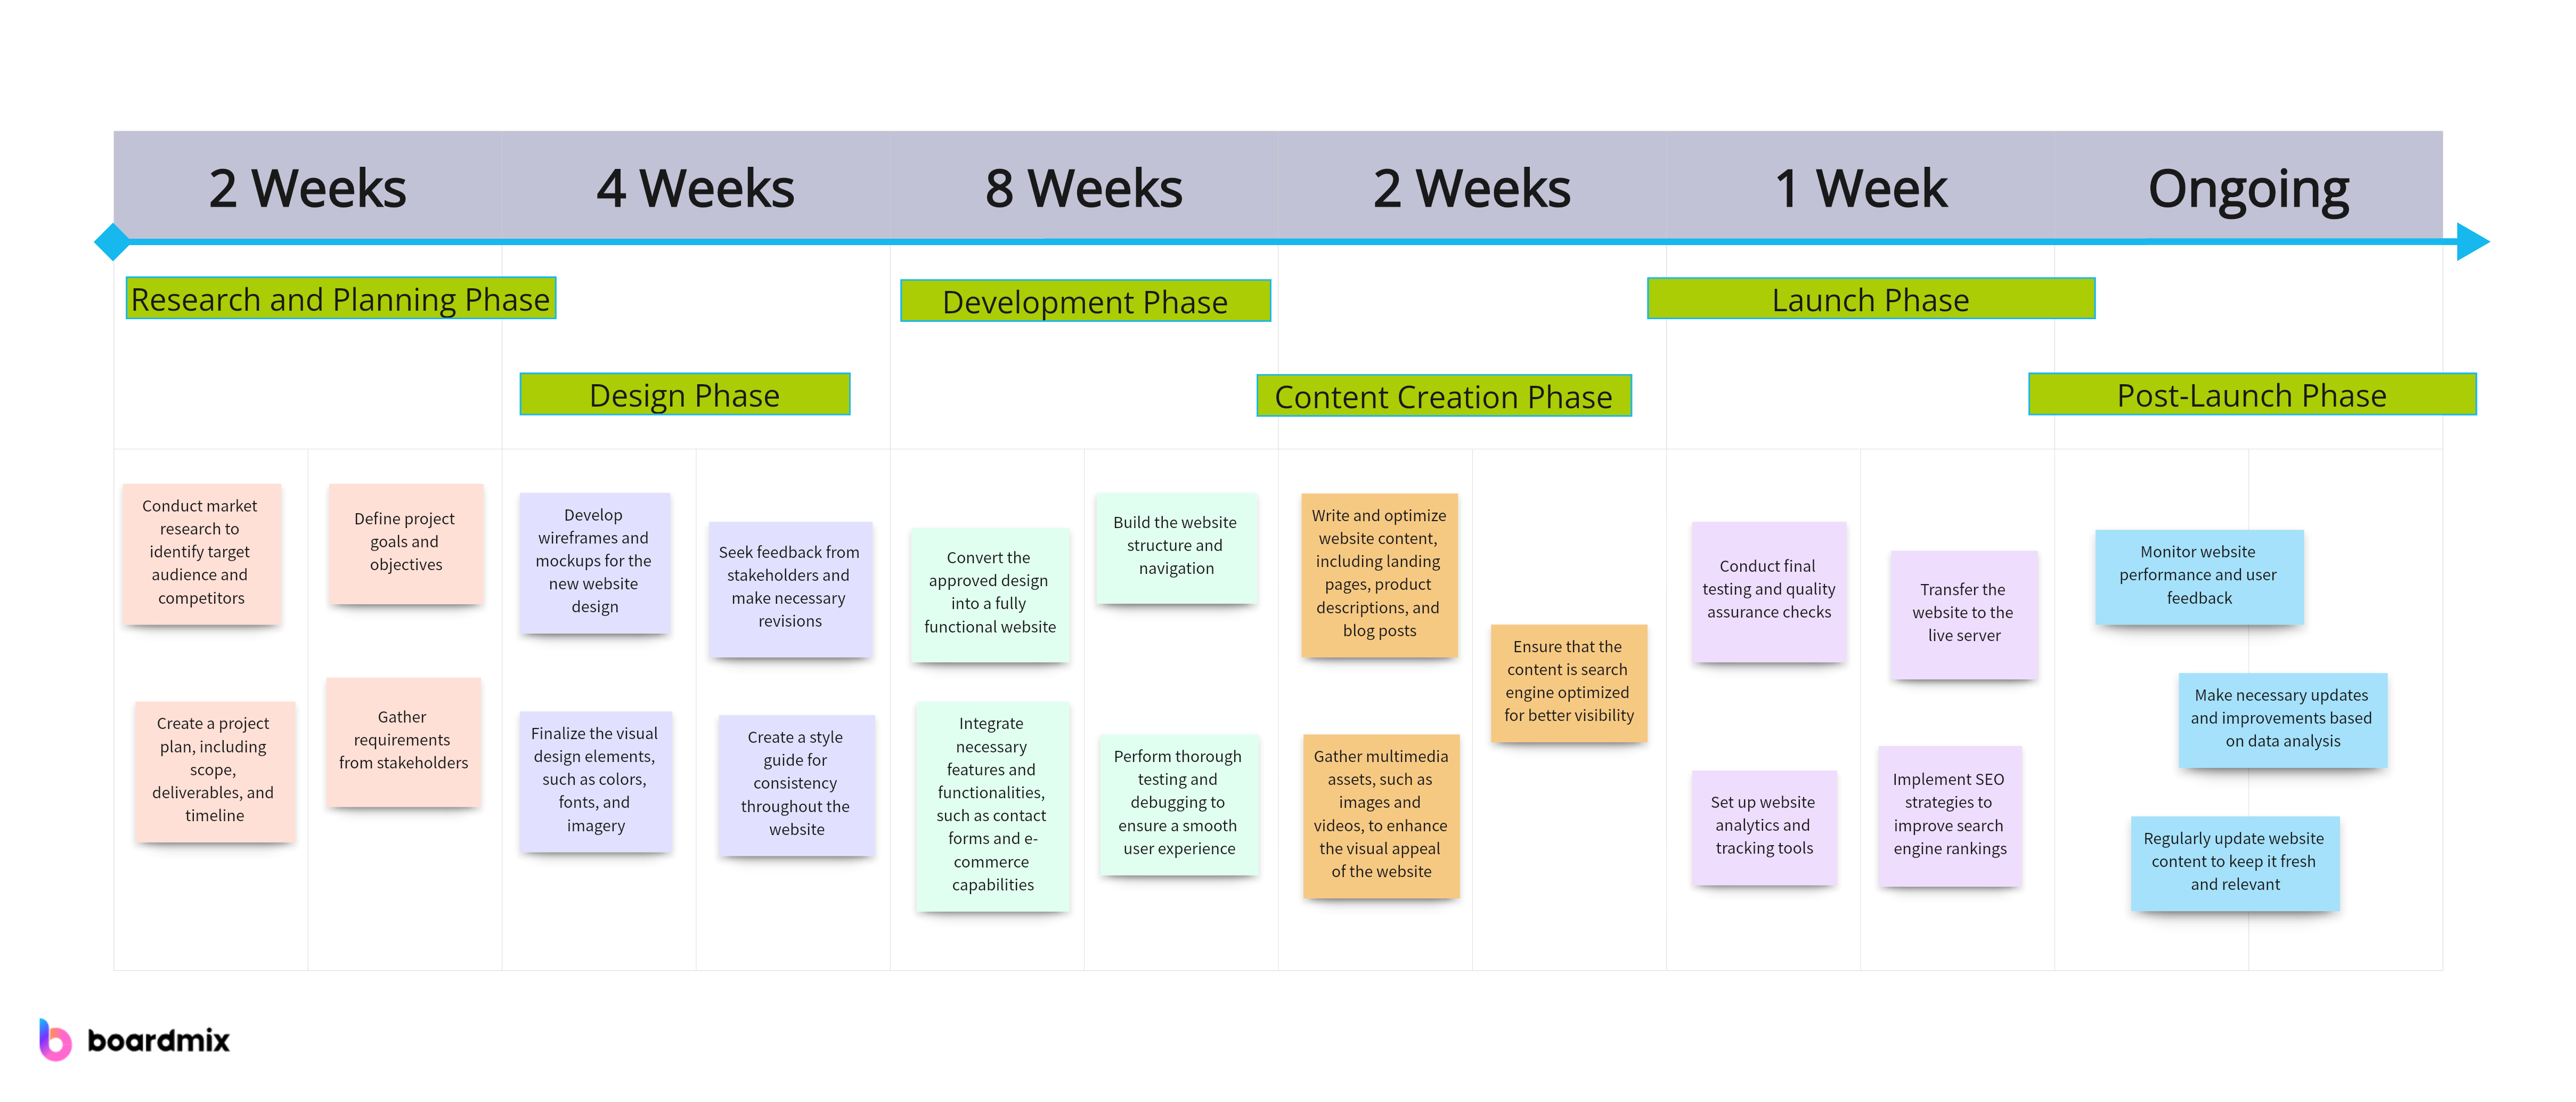 1. Research and Planning Phase (2 weeks):
- Conduct market research to identify target audience and competitors
- Define project goals and objectives
- Create a project plan, including scope, deliverables, and timeline
- Gather requirements from stakeholders
2. Design Phase (4 weeks):
- Develop wireframes and mockups for the new website design
- Seek feedback from stakeholders and make necessary revisions
- Finalize the visual design elements, such as colors, fonts, and imagery
- Create a style guide for consistency throughout the website
3. Development Phase (8 weeks):
- Convert the approved design into a fully functional website
- Build the website structure and navigation
- Integrate necessary features and functionalities, such as contact forms and e-commerce capabilities
- Perform thorough testing and debugging to ensure a smooth user experience
4. Content Creation Phase (2 weeks):
- Write and optimize website content, including landing pages, product descriptions, and blog posts
- Gather multimedia assets, such as images and videos, to enhance the visual appeal of the website
- Ensure that the content is search engine optimized for better visibility
5. Launch Phase (1 week):
- Conduct final testing and quality assurance checks
- Transfer the website to the live server
- Set up website analytics and tracking tools
- Implement SEO strategies to improve search engine rankings
6. Post-Launch Phase (Ongoing):
- Monitor website performance and user feedback
- Make necessary updates and improvements based on data analysis
- Regularly update website content to keep it fresh and relevant
Remember, this is just an example and can be customized based on the specific requirements of your website redesign project. It's important to allocate enough time for each phase and involve all stakeholders in the decision-making process for a successful project outcome.
Create Project Timeline Example on Boardmix Step-by-Step
Steps of Creating Project Time in Boardmix
Boardmix is a practical project management tool that can help you create clear, detailed timelines for your projects. Here are the steps to create a project timeline on Boardmix.
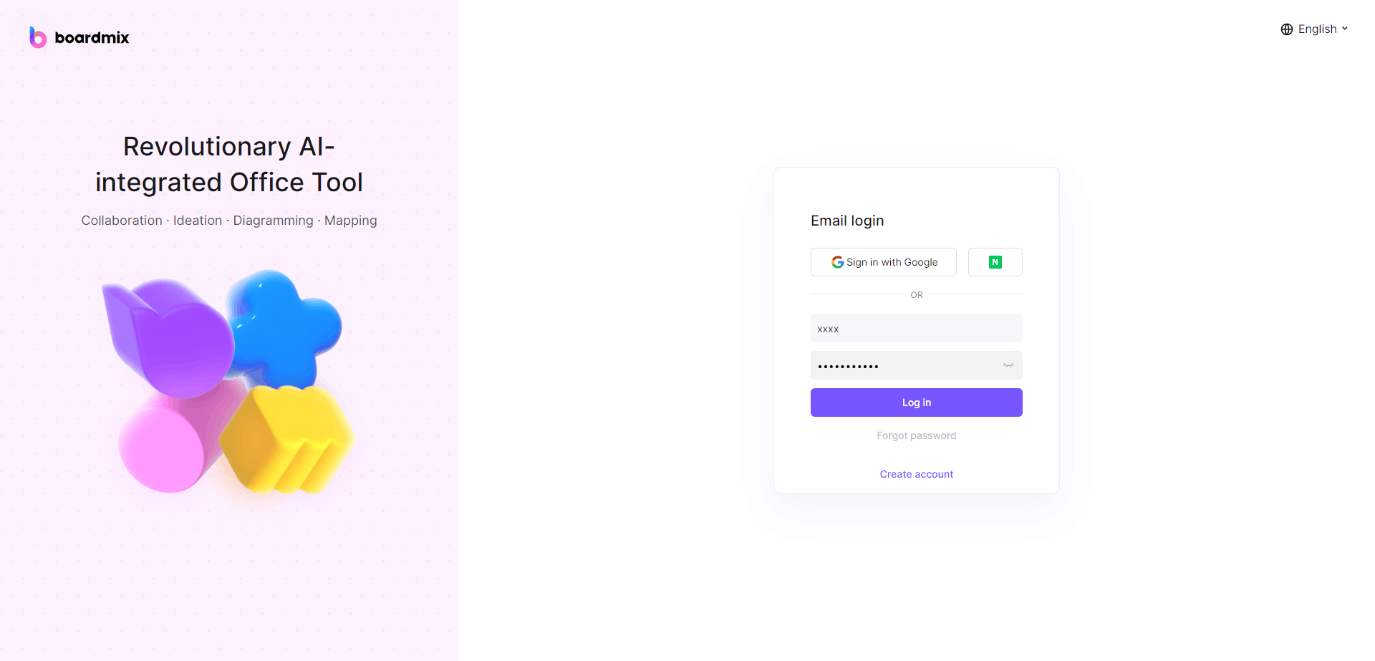
1. Log In To Boardmix
First, log in to your Boardmix account. If you don't have an account yet, you need to register first and set up your personal information.
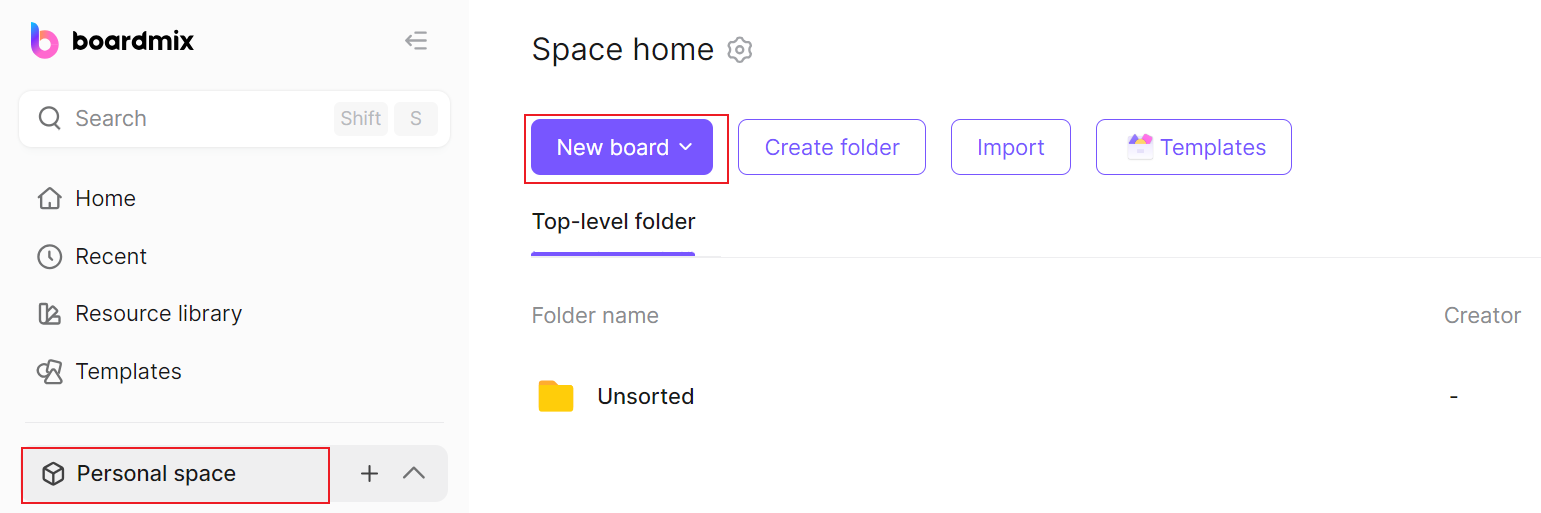
2. Create A New Project
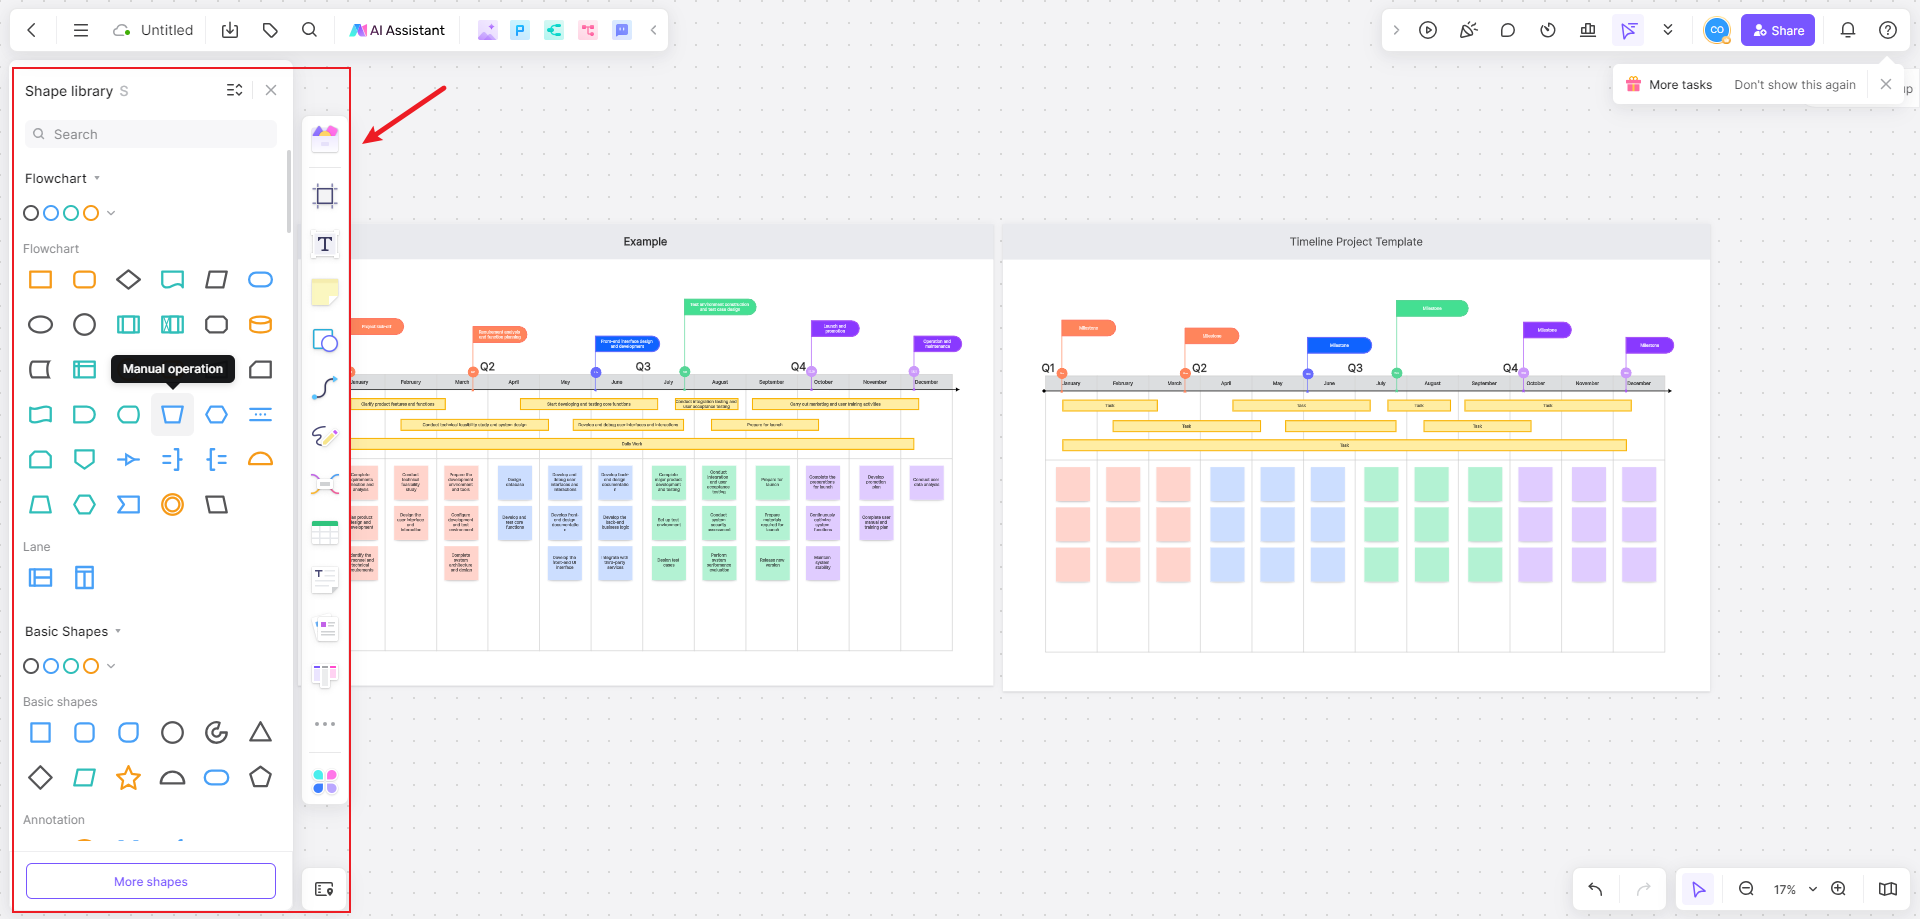
On your account homepage, click the "Create New Board" button. Then, enter the name of the Timeline project and select an appropriate template.
3. Edit Tasks and Activities
In the newly established project, click the edit button on the left to add tasks and activities that you need to complete. For each task and activity, you need to fill in the name description start date estimated end date.
4. Set Milestones
Add important milestones in corresponding tasks or activities as needed multiple milestones could be set filling in names plus estimated completion dates for milestones.
5. Establish Dependencies
For tasks and activities with dependencies add "Link Task" to establish relationships between tasks specifying which task depends on which task setting dependency types.
6. Assign Resources
Add "Assign Resources" in each task and activity to allocate necessary resources specifying which team members are responsible for which tasks allocating other resources like time money etc.
7. View and Share The Timeline
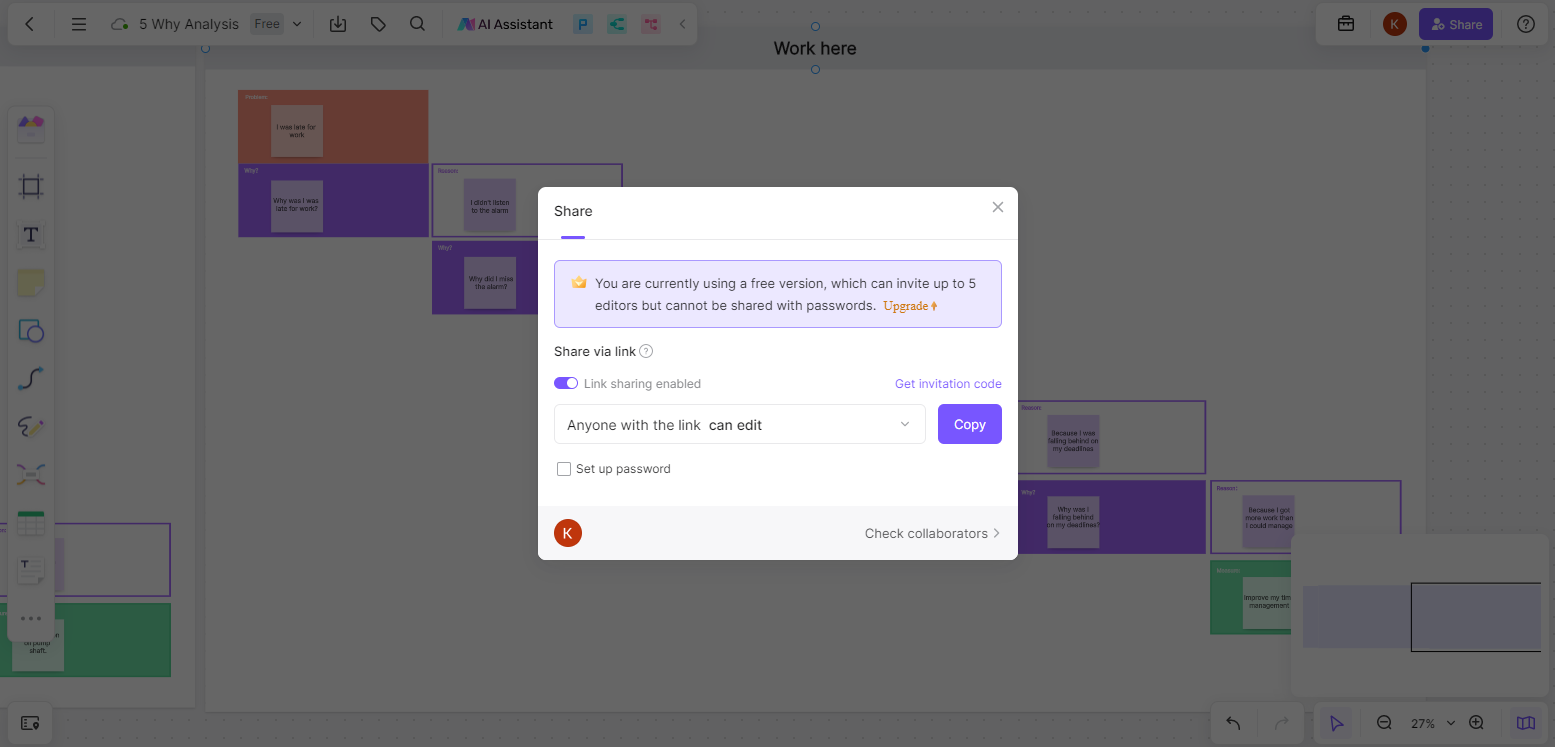
After completing the above steps save your project timeline where all tasks and activities' layouts on the timeline plus positions of each milestone can be seen by clicking the "Share" button project timeline could be shared with team members or other relevant personnel.
Boardmix offers various timeline editing features making it easy for you to create detailed steps for creating a project timeline on Boardmix.
Features of Creating Project Timeline in Boardmix
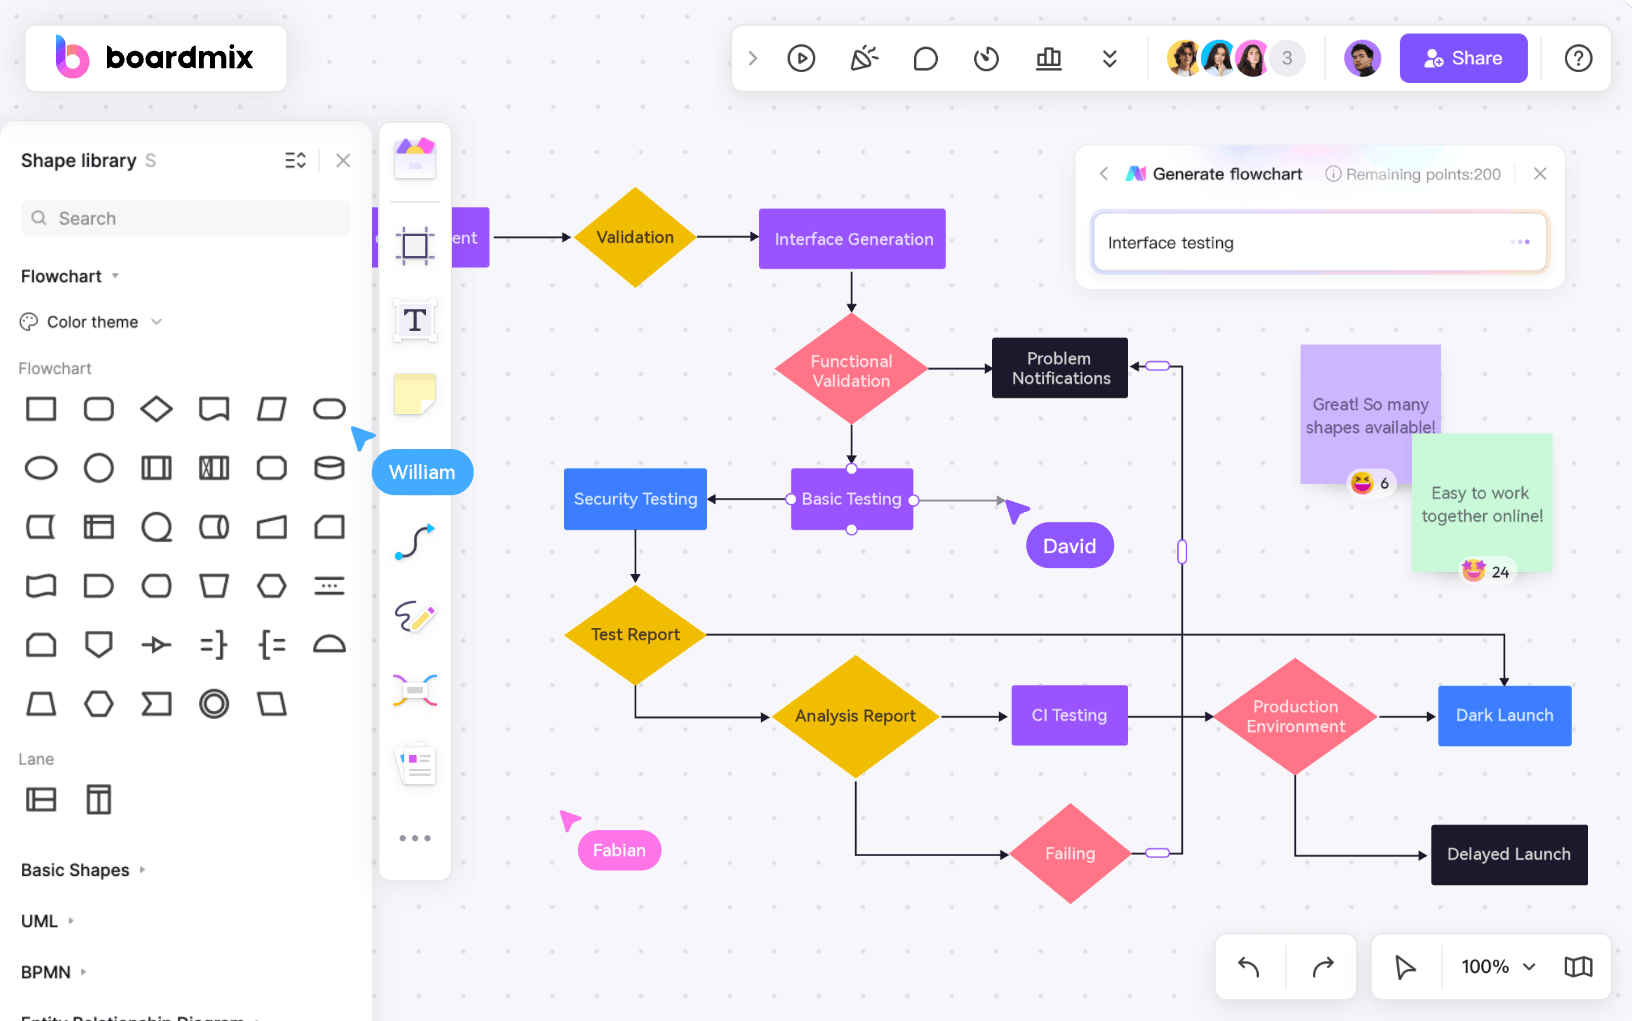
When creating a timeline in Boardmix, several key features can enhance your timeline creation process.
- Drag-and-drop interface: Boardmix provides a user-friendly interface that allows you to easily drag and drop tasks, milestones, and events onto your timeline. This makes it simple to arrange and adjust the elements of your timeline as needed.
- Customizable timeline view: With Boardmix, you can customize the appearance of your timeline. You can adjust the date range, zoom in or out, and choose different layouts to suit your specific needs.
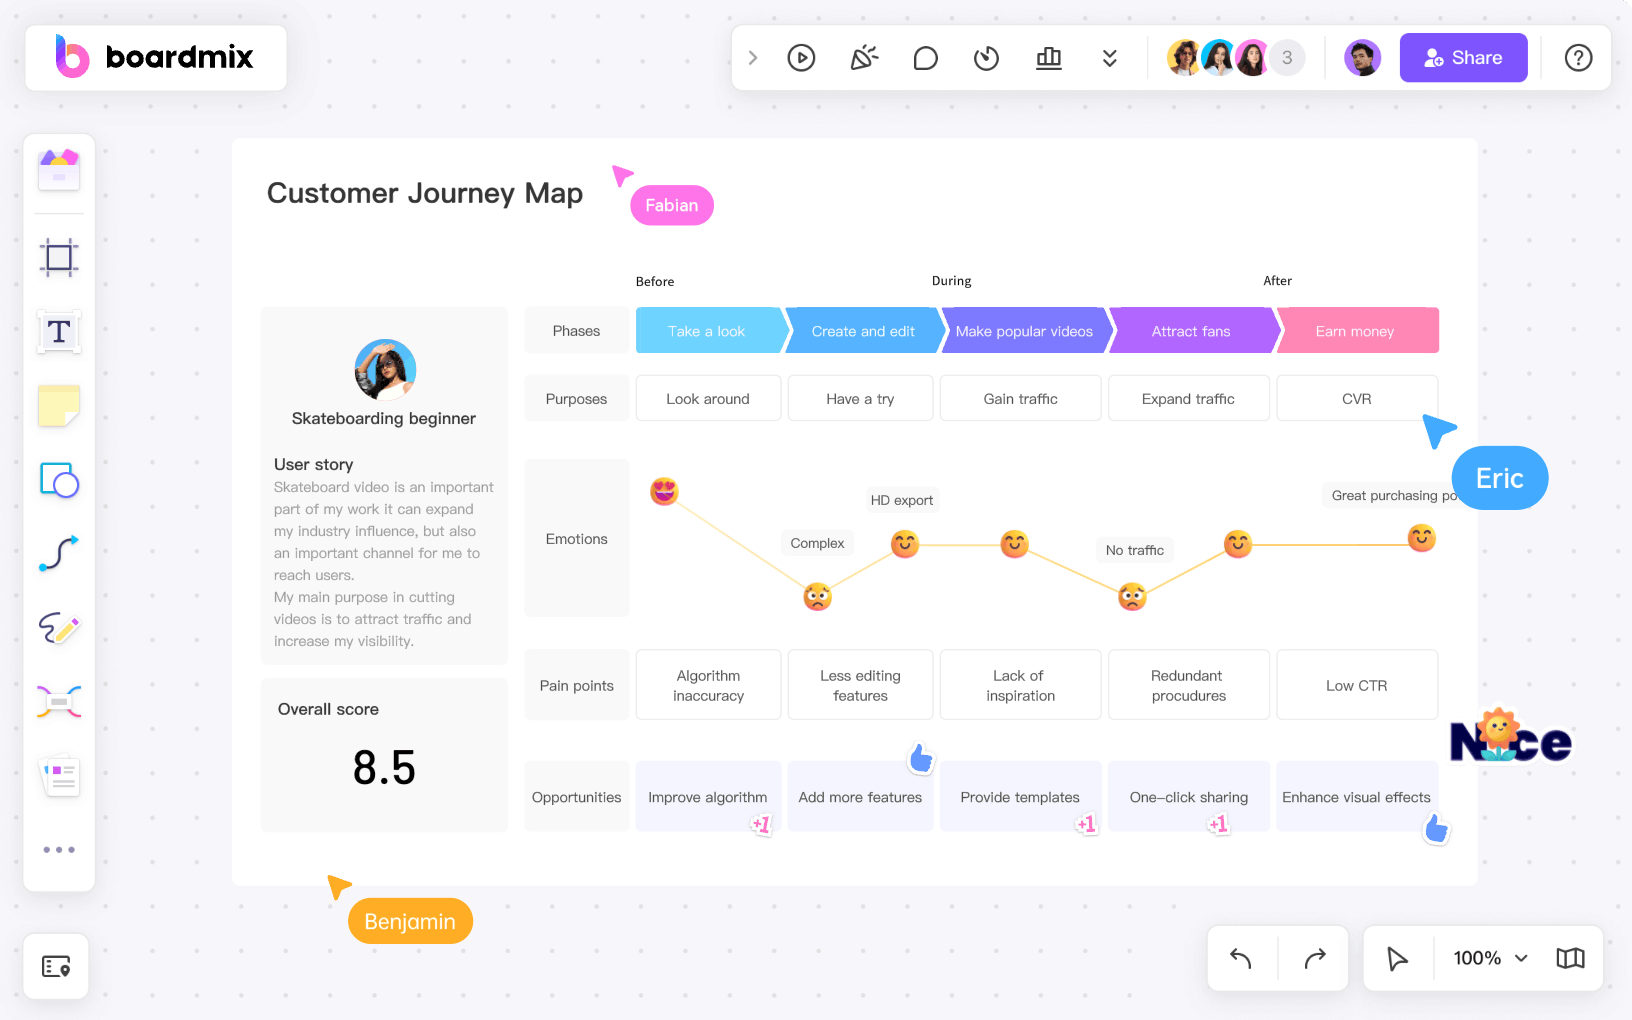
- Collaboration and sharing: Boardmix allows for easy collaboration and sharing of timelines with team members or stakeholders. You can invite others to view or edit your timeline, making it a collaborative tool for project management.
- Task dependencies and milestones: In Boardmix, you can easily set task dependencies and milestones on your timeline. This helps to visualize the order in which tasks need to be completed and highlights important project milestones.
- Integration with other tools: Boardmix integrates with popular project management tools such as Trello, Asana, and Jira. This means you can easily import tasks from these tools onto your timeline and keep all your project information in one place.
- Customizable colors and labels: Boardmix allows you to customize the colors and labels of tasks, milestones, and events on your timeline. This can help to visually differentiate between different types of activities or highlight important deadlines.
- Export and print options: Once you have created your timeline in Boardmix, you have the option to export it as an image or PDF file. This allows you to easily share or print your timeline for presentations or documentation purposes.
These features make Boardmix a versatile and efficient tool for creating timelines. Whether you are managing a small project or a complex multi-phase project, Boardmix can help you effectively plan and track progress through its intuitive interface and collaborative features.
Project Timeline Example Making Tips and Tricks
Here are some tips and tricks for creating an effective project timeline example.
- Define project goals and objectives: Before creating a project timeline, clearly define the goals and objectives of your project. This will help you determine the tasks and milestones that need to be included in the timeline.
- Break down the project into phases: Divide your project into manageable phases, such as research and planning, design, development, content creation, launch, and post-launch. This will help you organize your tasks and set realistic deadlines for each phase.
- Identify dependencies: Determine the dependencies between tasks. Some tasks may need to be completed before others can start. By identifying these dependencies, you can ensure a smooth flow of work and avoid delays.
- Set realistic deadlines: Be realistic when setting deadlines for each task. Consider factors such as the complexity of the task, availability of resources, and potential risks. It's better to give yourself some buffer time in case unexpected issues arise.
- Allocate resources effectively: Make sure you have the necessary resources, such as personnel, equipment, and budget, allocated for each task. This will help you avoid delays and ensure that the project stays on track.
- Communicate with stakeholders: Involve all relevant stakeholders in the project timeline creation process. This will help ensure that everyone is on the same page and has a clear understanding of the project timeline.
- Use project management tools: Consider using project management tools or software to create your project timeline. These tools can help you visualize the timeline, track progress, and collaborate with team members.
- Regularly update the timeline: Keep your project timeline updated throughout the duration of the project. As tasks are completed or delayed, make adjustments to reflect the current status of the project.
Remember, a well-designed project timeline is crucial for effective project planning and management. It provides a clear overview of the project's progress and helps keep everyone involved in the project aligned and informed.
Conclusion
In summary, the project timeline serves as a roadmap, guiding teams through the various stages of a project and ensuring the timely completion of tasks. For those seeking practical insights, a real-life project timeline example offers a tangible illustration of how these components come together in a cohesive visual representation. As you explore the world of project timeline examples, harness the power of Boardmix to create visually compelling and dynamic representations of your projects. With step-by-step guidance and user-friendly features, Boardmix transforms the creation of project timeline examples into an engaging and collaborative experience.