A cross-functional flowchart shows both the sequence of work and the person or team responsible for each step. It is useful when a process looks straightforward until work crosses a department boundary: who receives the request, what do they need, and what happens if they reject it? This guide explains the symbols and walks through an order-approval example you can build with the Boardmix flowchart maker.
What Is a Cross Functional Flowchart
A cross-functional flowchart, also known as a swimlane diagram, is a type of process map that visually represents a process while distinguishing the responsibilities of different departments or roles. Not every process map uses lanes; lanes add the ownership view.
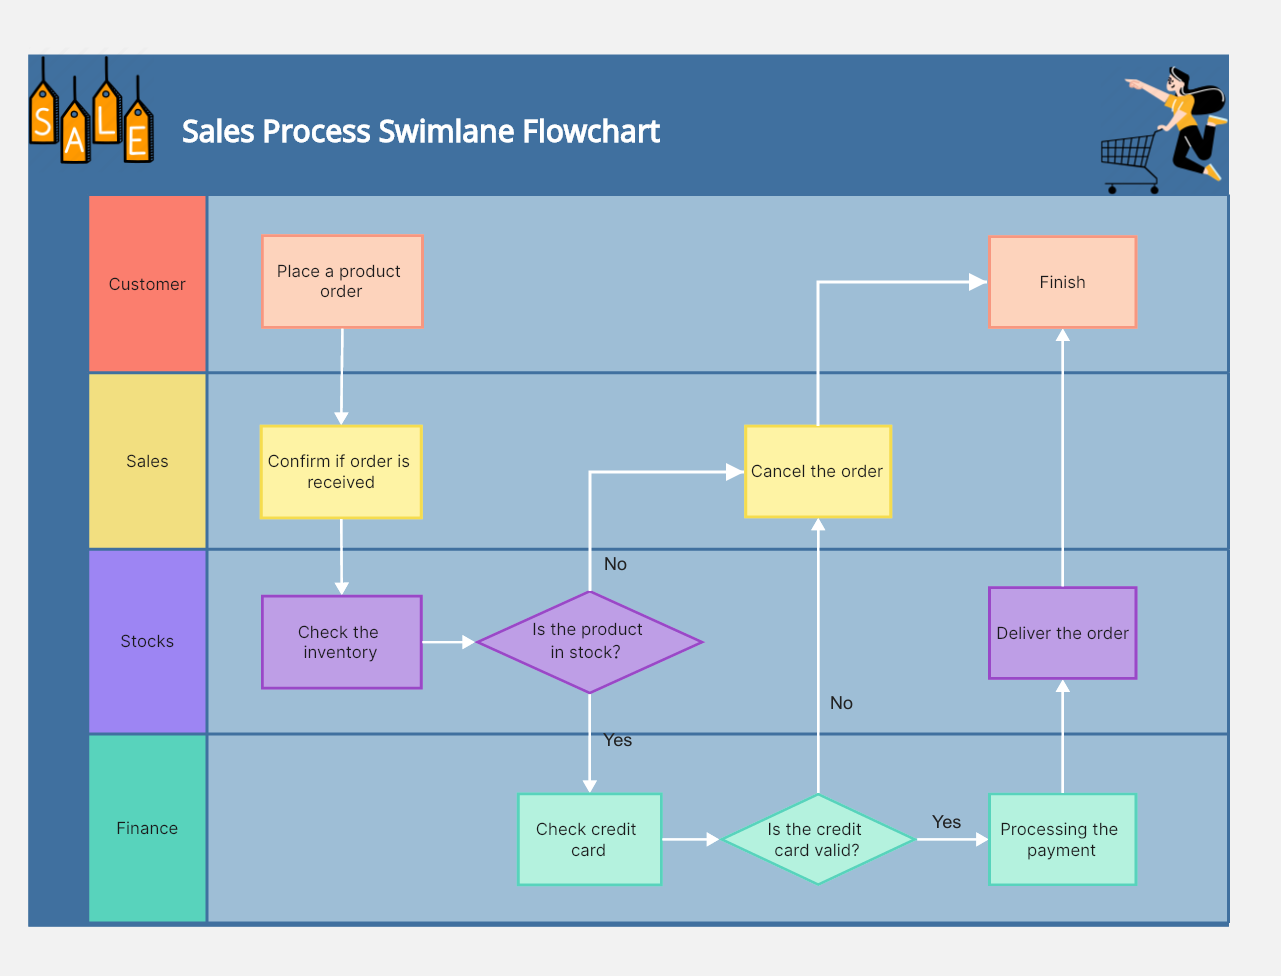
In this sales-order example, an unavailable item or invalid credit card routes the order to Sales for cancellation. An in-stock item with a valid card proceeds to payment and delivery. Both routes finish with the Customer lane. The labeled branches show what happens when an order can proceed and when it cannot.
Each 'swimlane' in this diagram represents a different department or role. The tasks and activities associated with each are located within their respective swimlane, creating a comprehensive picture of who does what in a particular process.
By offering a bird's eye view of the process and clearly marking out responsibilities, cross functional flowcharts help eliminate ambiguity and foster better understanding among all stakeholders.
When to Use a Cross Functional Flowchart
Cross functional flowcharts can be useful in a variety of situations:
- Process Analysis: They help visualize and understand processes across various departments or roles.
- Problem Identification: By illustrating the entire process, they can highlight bottlenecks or issues that might be hampering efficiency.
- Training: They serve as an excellent training resource for new employees to understand processes and their role in them.
- Process Improvement: They provide a clear snapshot of the process, which is essential when planning process improvement initiatives.
Benefits of Cross Functional Flowcharts
Using cross functional flowcharts provides numerous benefits:
- Clear Communication: These flowcharts clearly define roles and responsibilities, minimizing confusion and promoting clear communication.
- Increased Efficiency: They can identify bottlenecks or inefficiencies in the process, which can then be addressed to boost efficiency.
- Improved Collaboration: By providing visibility into tasks managed by other teams, these charts promote cross-departmental understanding and collaboration.
- Better Decision Making: A thorough understanding of the process leads to informed decision making.
Cross Functional Flow Diagram Symbols
There are several standard symbols used in cross functional flowcharts:
- Rectangles: Represent steps or tasks in the process.
- Diamonds: Indicate decision points.
- Arrows: Denote the direction of workflow.
- Ovals: Signify the start or end of a process.
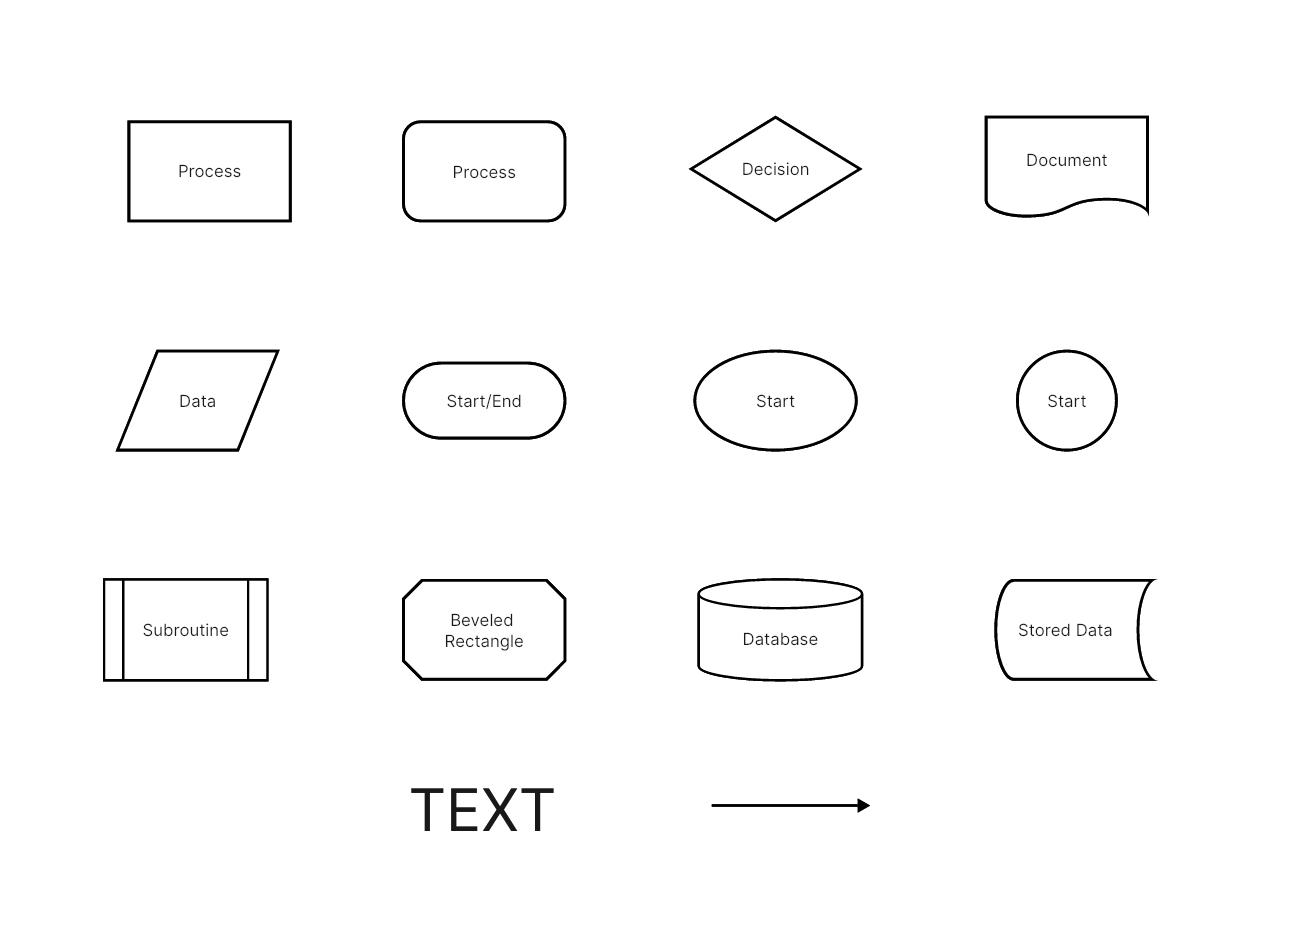
In addition to these, swimlanes (horizontal or vertical lines) are used to separate different functional units involved in the process.
Cross functional flowcharts are invaluable tools that offer deep insight into your organization's processes. With a clear visual representation, roles and responsibilities become easy to understand, paving the way for improved communication, enhanced efficiency, and informed decision making.
How to Make a Cross Functional Flowchart in Boardmix
Designed to foster team collaboration, Boardmix offers a broad array of features tailored to meet your organization's specific needs. Its user-friendly interface makes it easy even for those with minimal technical skills to design detailed and comprehensive cross-functional flowcharts.
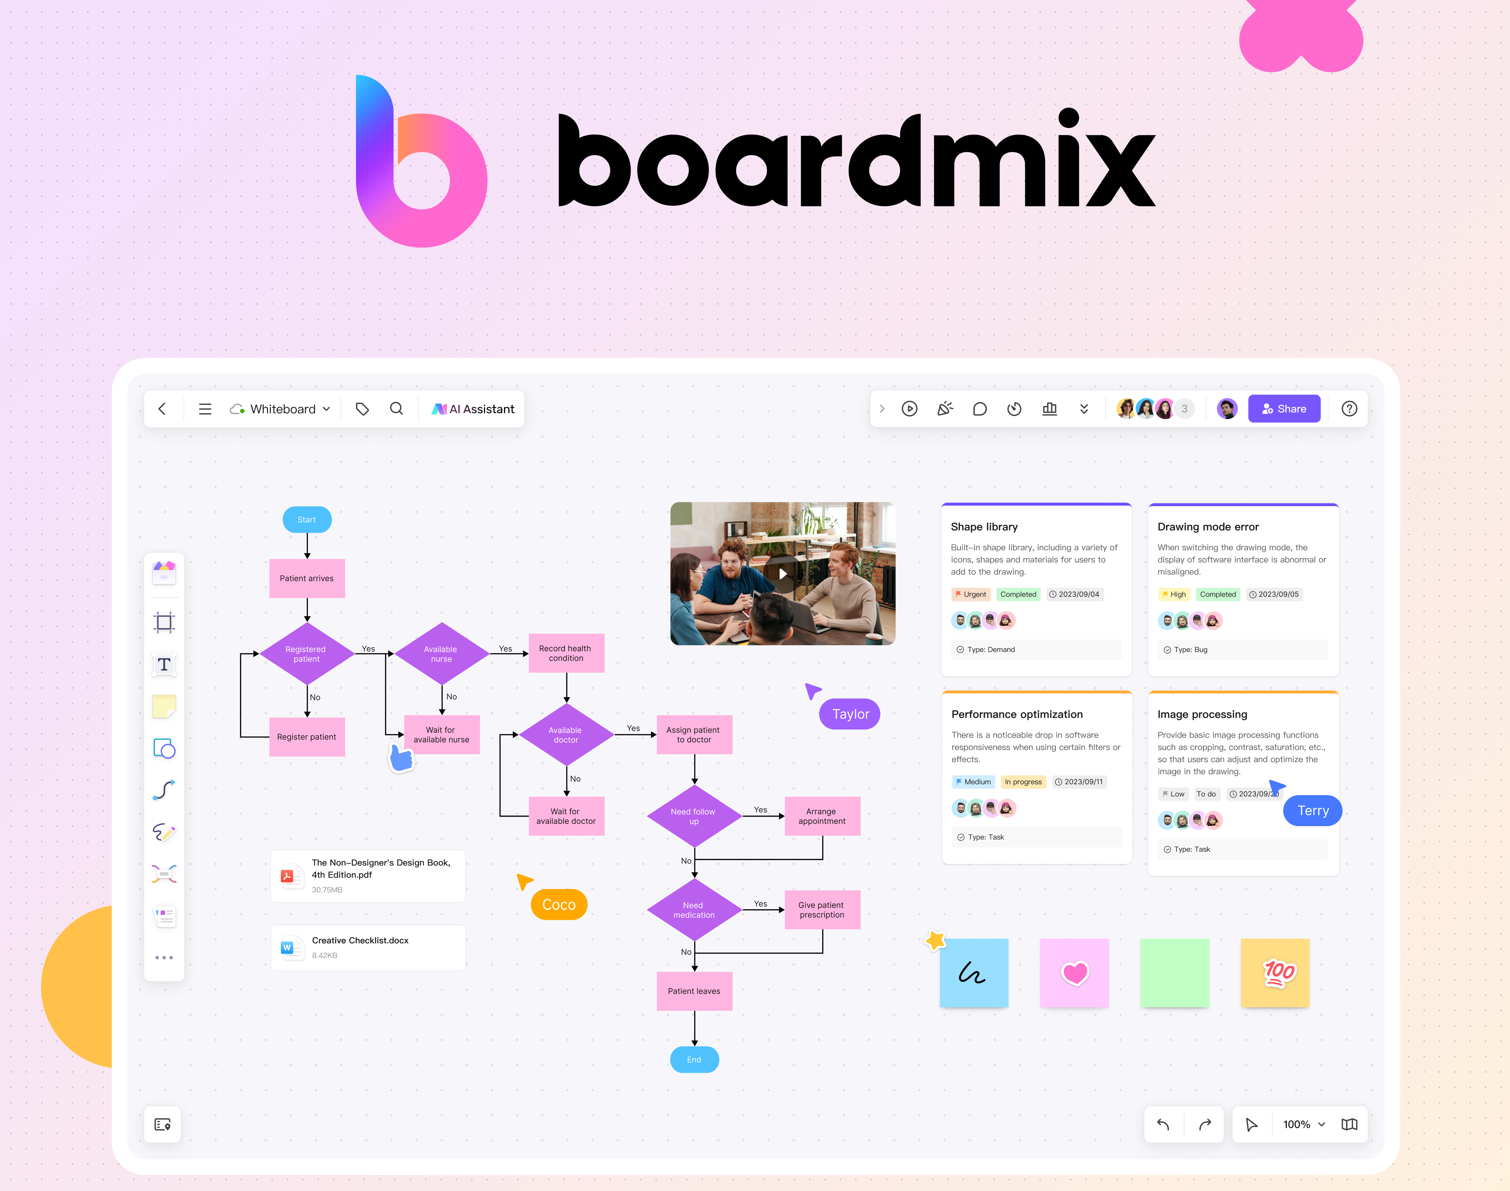
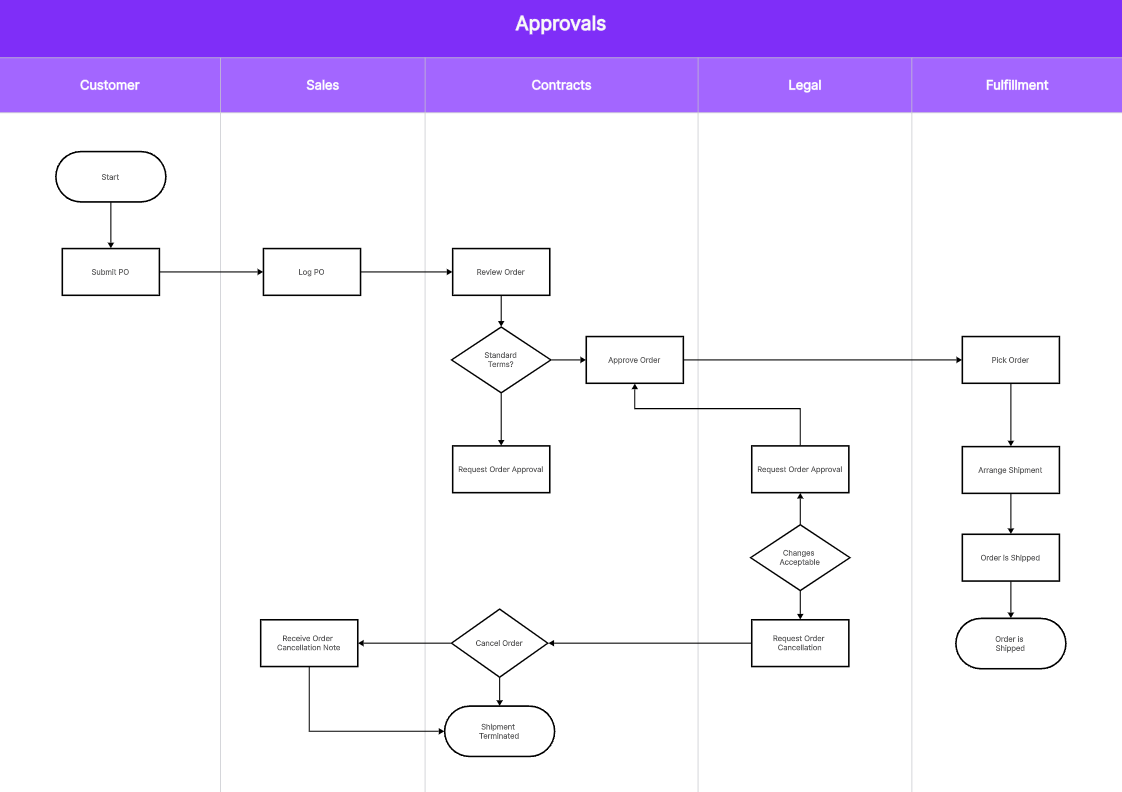
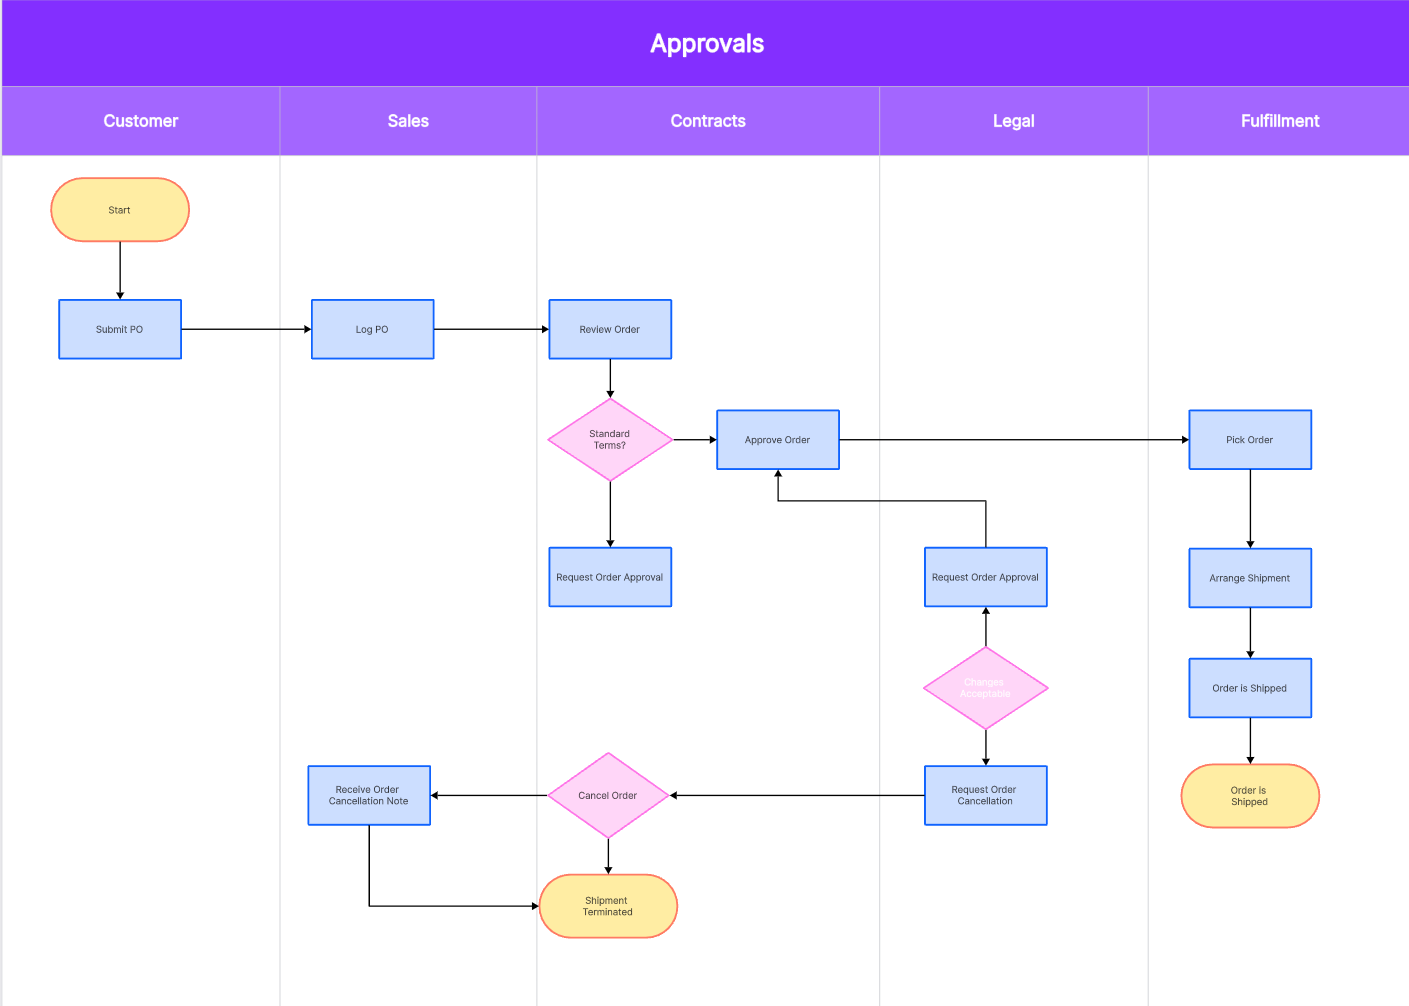
The illustrations below use an order-approval flow with Customer, Sales, Contracts, Legal, and Fulfillment lanes. Use the same scenario to practice: the process begins when the customer submits a purchase order and ends when the order is shipped or its cancellation is communicated. Agree on that boundary before adding detail, so the diagram does not expand into every activity in the business.
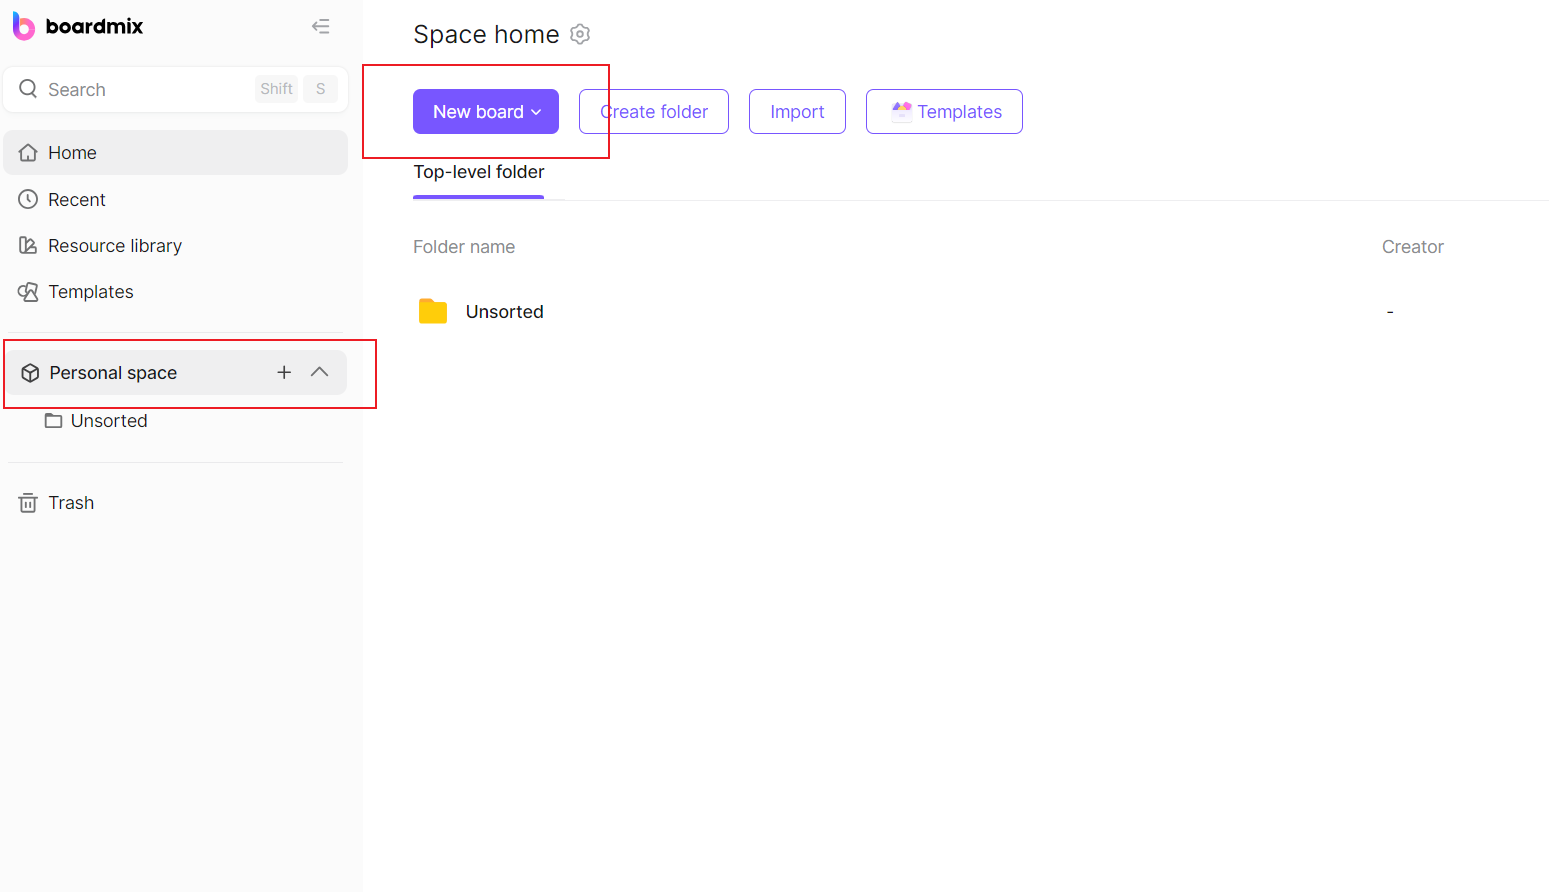
Step 1: Create a New Board
Open Boardmix and create a board from a suitable swimlane template, or start with a blank board and add labeled lanes and flowchart shapes. Give the map a title that includes its scope, such as “Purchase order: submission to shipment or cancellation.” Leave room beneath the main path for the non-standard-terms branch.
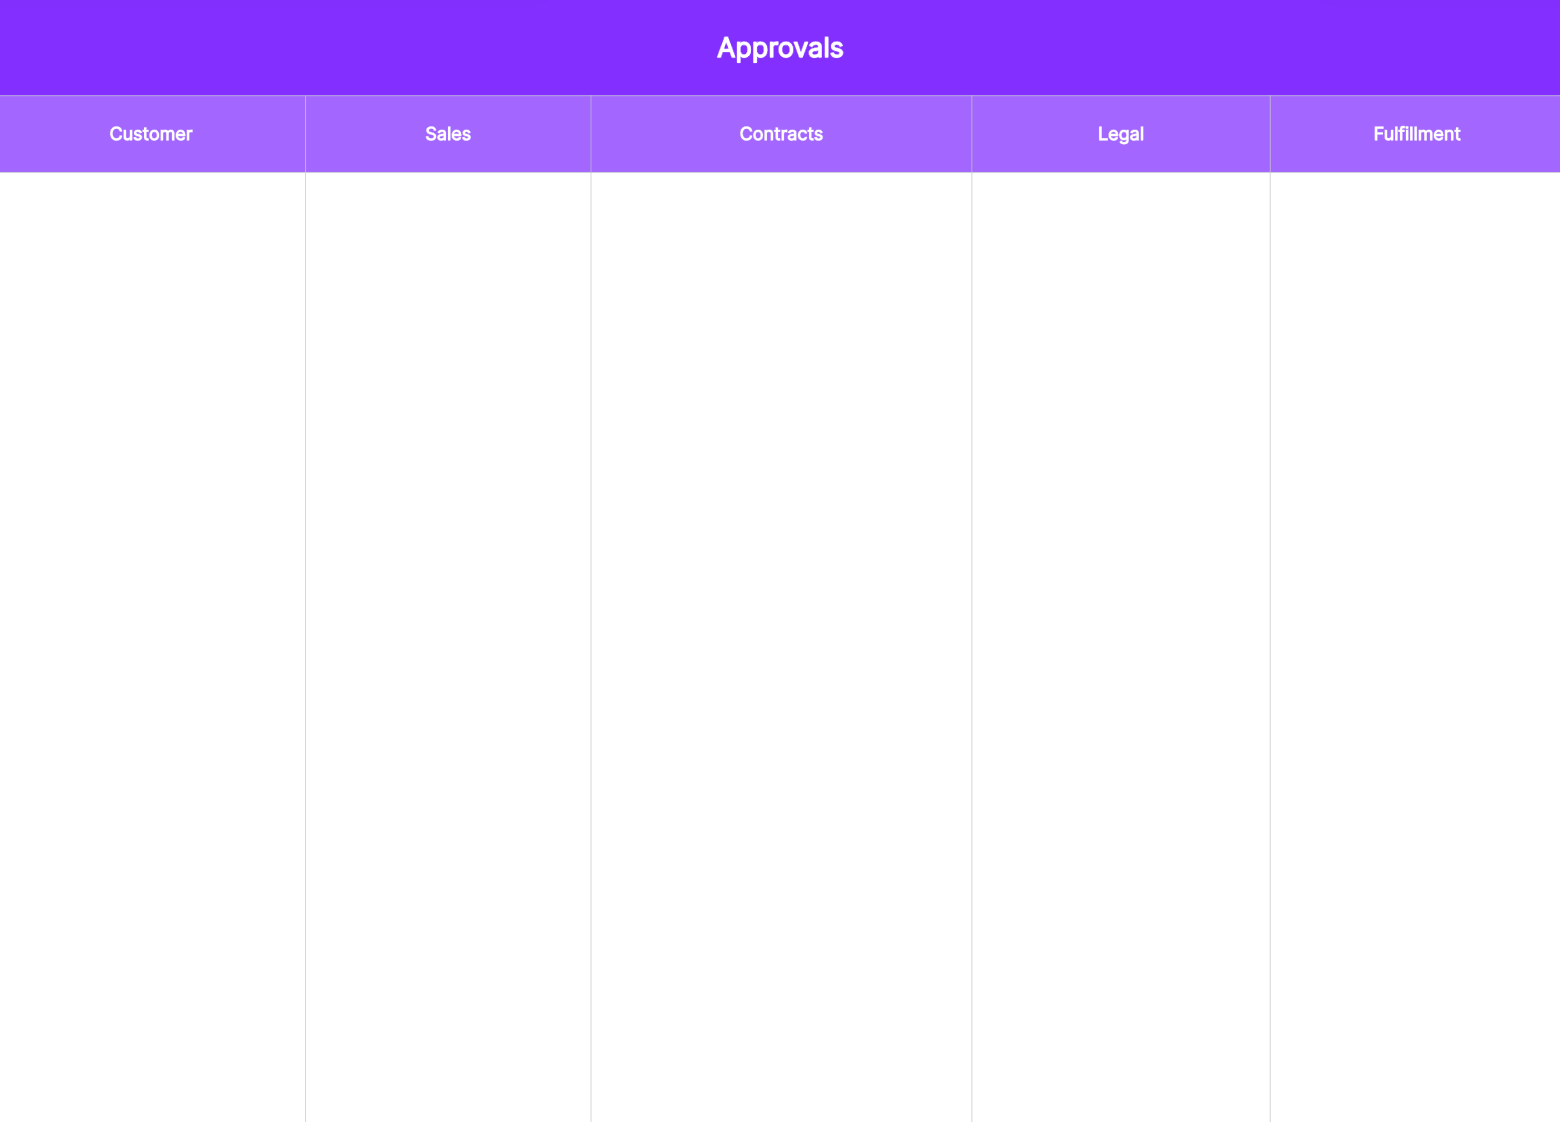
Step 2: Identify and Assign Swimlanes
Label five lanes Customer, Sales, Contracts, Legal, and Fulfillment, as in the layout below. Each action belongs in the lane of the team that performs it. If both Contracts and Legal are involved, separate “Request legal review” from “Review proposed terms” instead of stretching one box across two lanes and leaving ownership unclear.
Step 3: Map Out Your Process
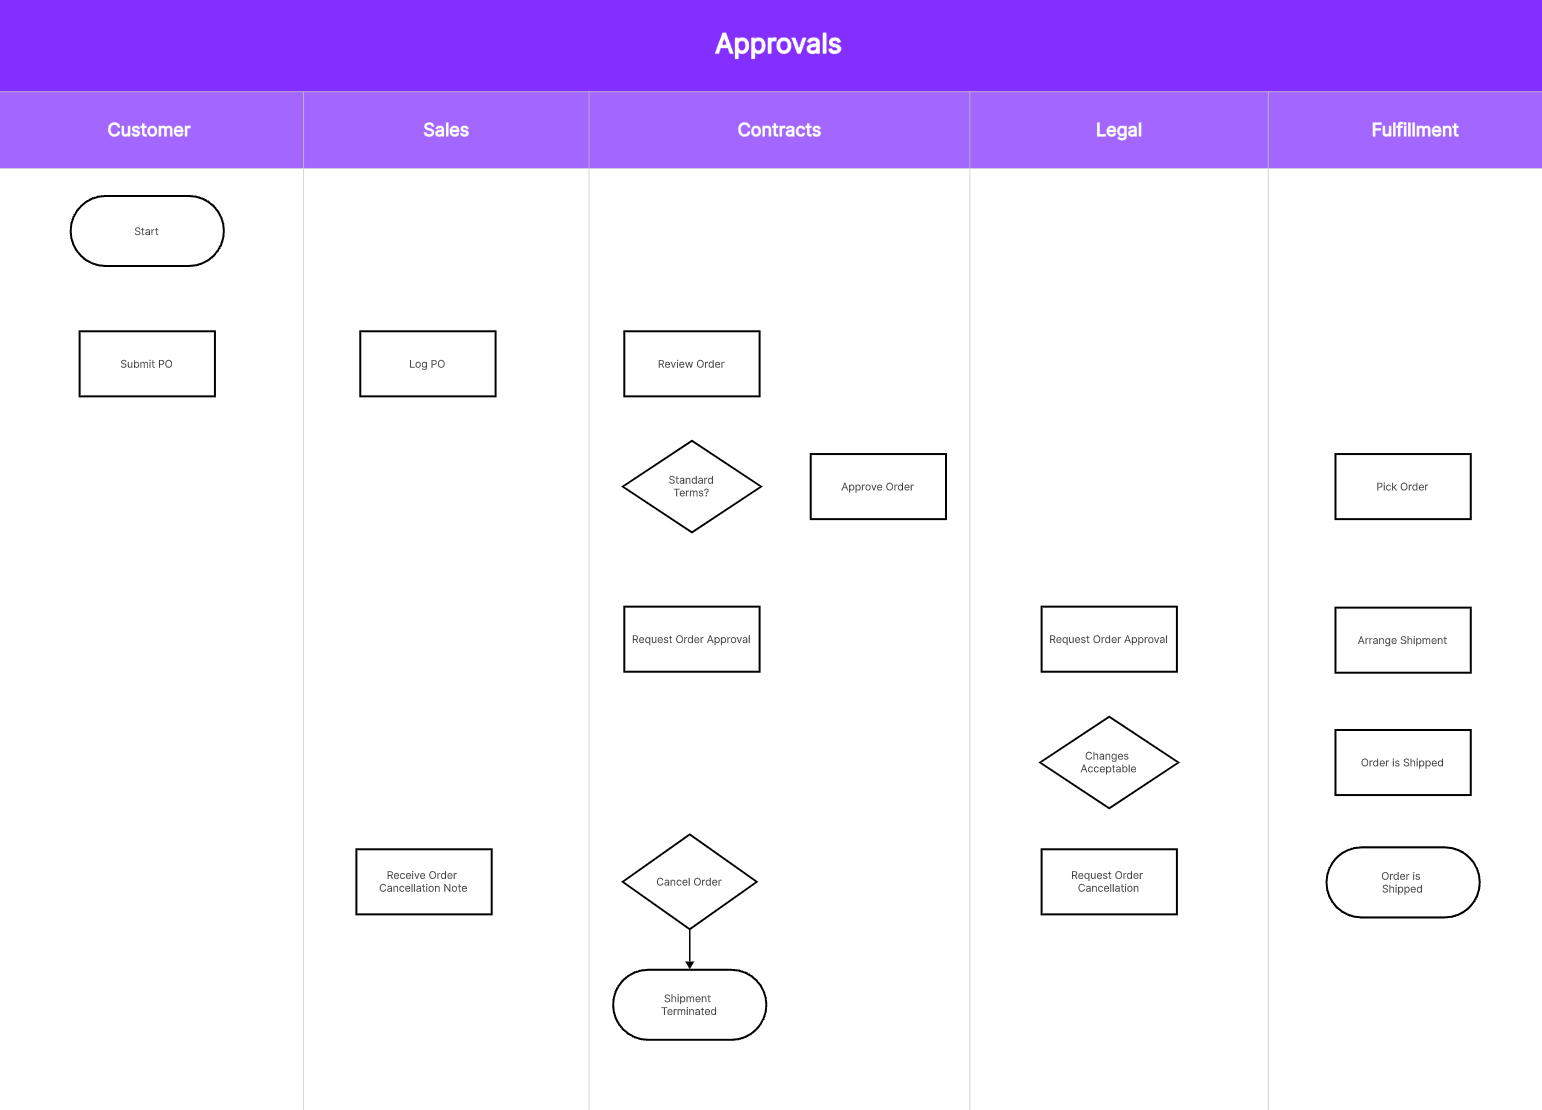
List the normal route first: Customer submits the purchase order; Sales logs it; Contracts reviews the order and approves standard terms; Fulfillment picks and ships it. Then add the exception: non-standard terms go to Legal for review before Contracts can approve or cancel the order. Ask the people who do this work to confirm that this is the actual route in your organization.
Step 4: Drag and Drop Symbols
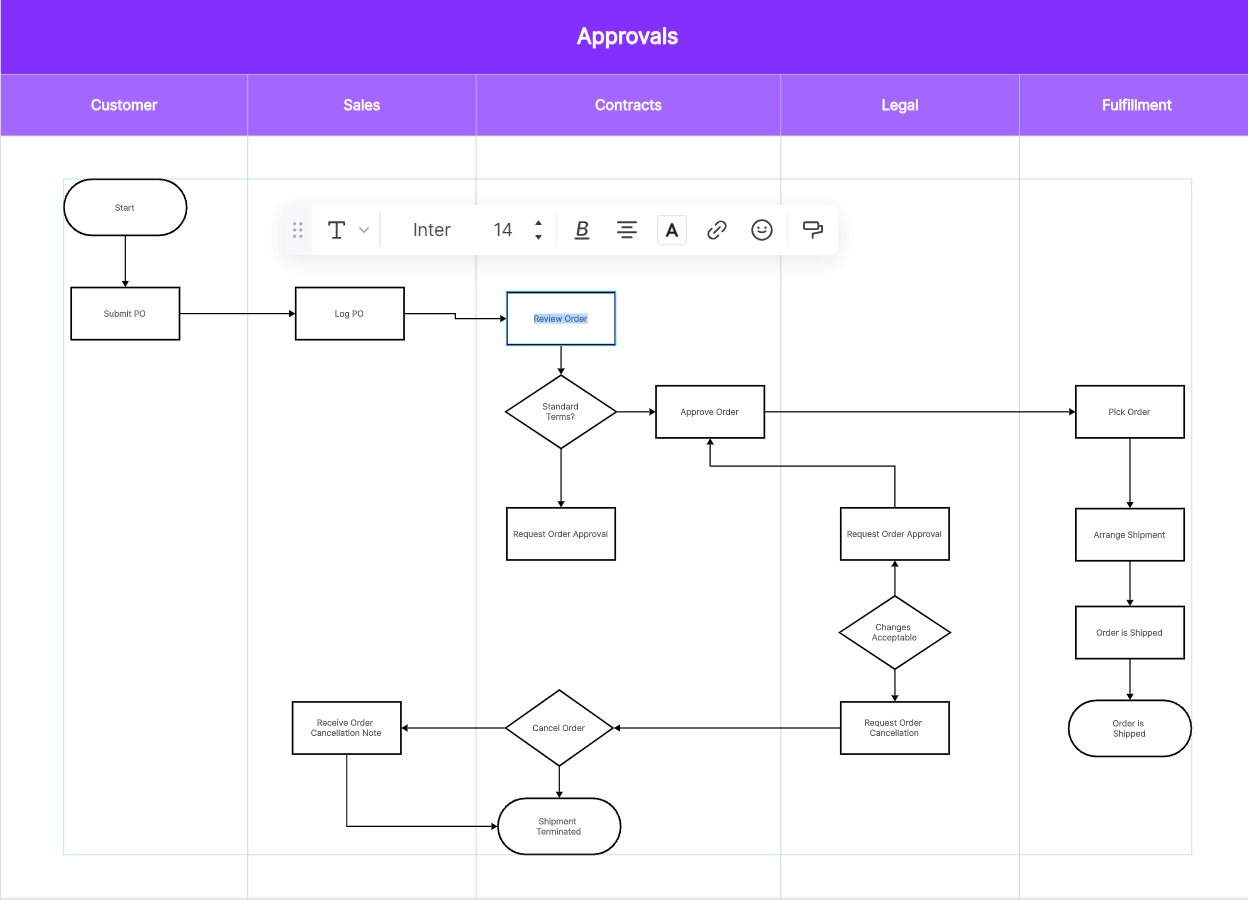
Use rectangles for actions such as “Log purchase order” and “Review terms,” diamonds for questions such as “Standard terms?”, and terminators for the start and end. “Cancel order” is an action, not a question, so it belongs in a rectangle. If you need a decision before it, give that diamond a question such as “Approve order?”
Step 5: Connect the Symbols with Arrows
Connect the normal path, then trace the exception independently. “Request legal review” must have an outgoing arrow to an action in Legal’s lane, and Legal’s response must return to the next owner. In the draft illustrations, the request below “Standard Terms?” needs this connection to Legal; do not leave it as a dead end. Keep both approval and rejection routes visible, even if the rejection route occurs less often.
Step 6: Label Each Symbol
Edit each shape’s text to state an action or a question. Label the outgoing arrows from “Standard terms?” as Yes and No. For Legal’s decision, make the answer routes equally explicit: an acceptable result returns to Contracts for approval; an unacceptable result leads to cancellation. Add a short handoff label where useful, such as “purchase order + proposed terms,” so the receiving team knows what input it needs.
Step 7: Customize Your Flowchart
Use consistent shape sizes and enough spacing to read the arrow labels. Color can help distinguish lanes, but the owner labels and connectors must carry the meaning without it. If an exception makes arrows cross, move the related shapes closer or use a clearly labeled connector; do not remove a required path just to make the diagram tidier.
Step 8: Save, Share or Export Your Flowchart
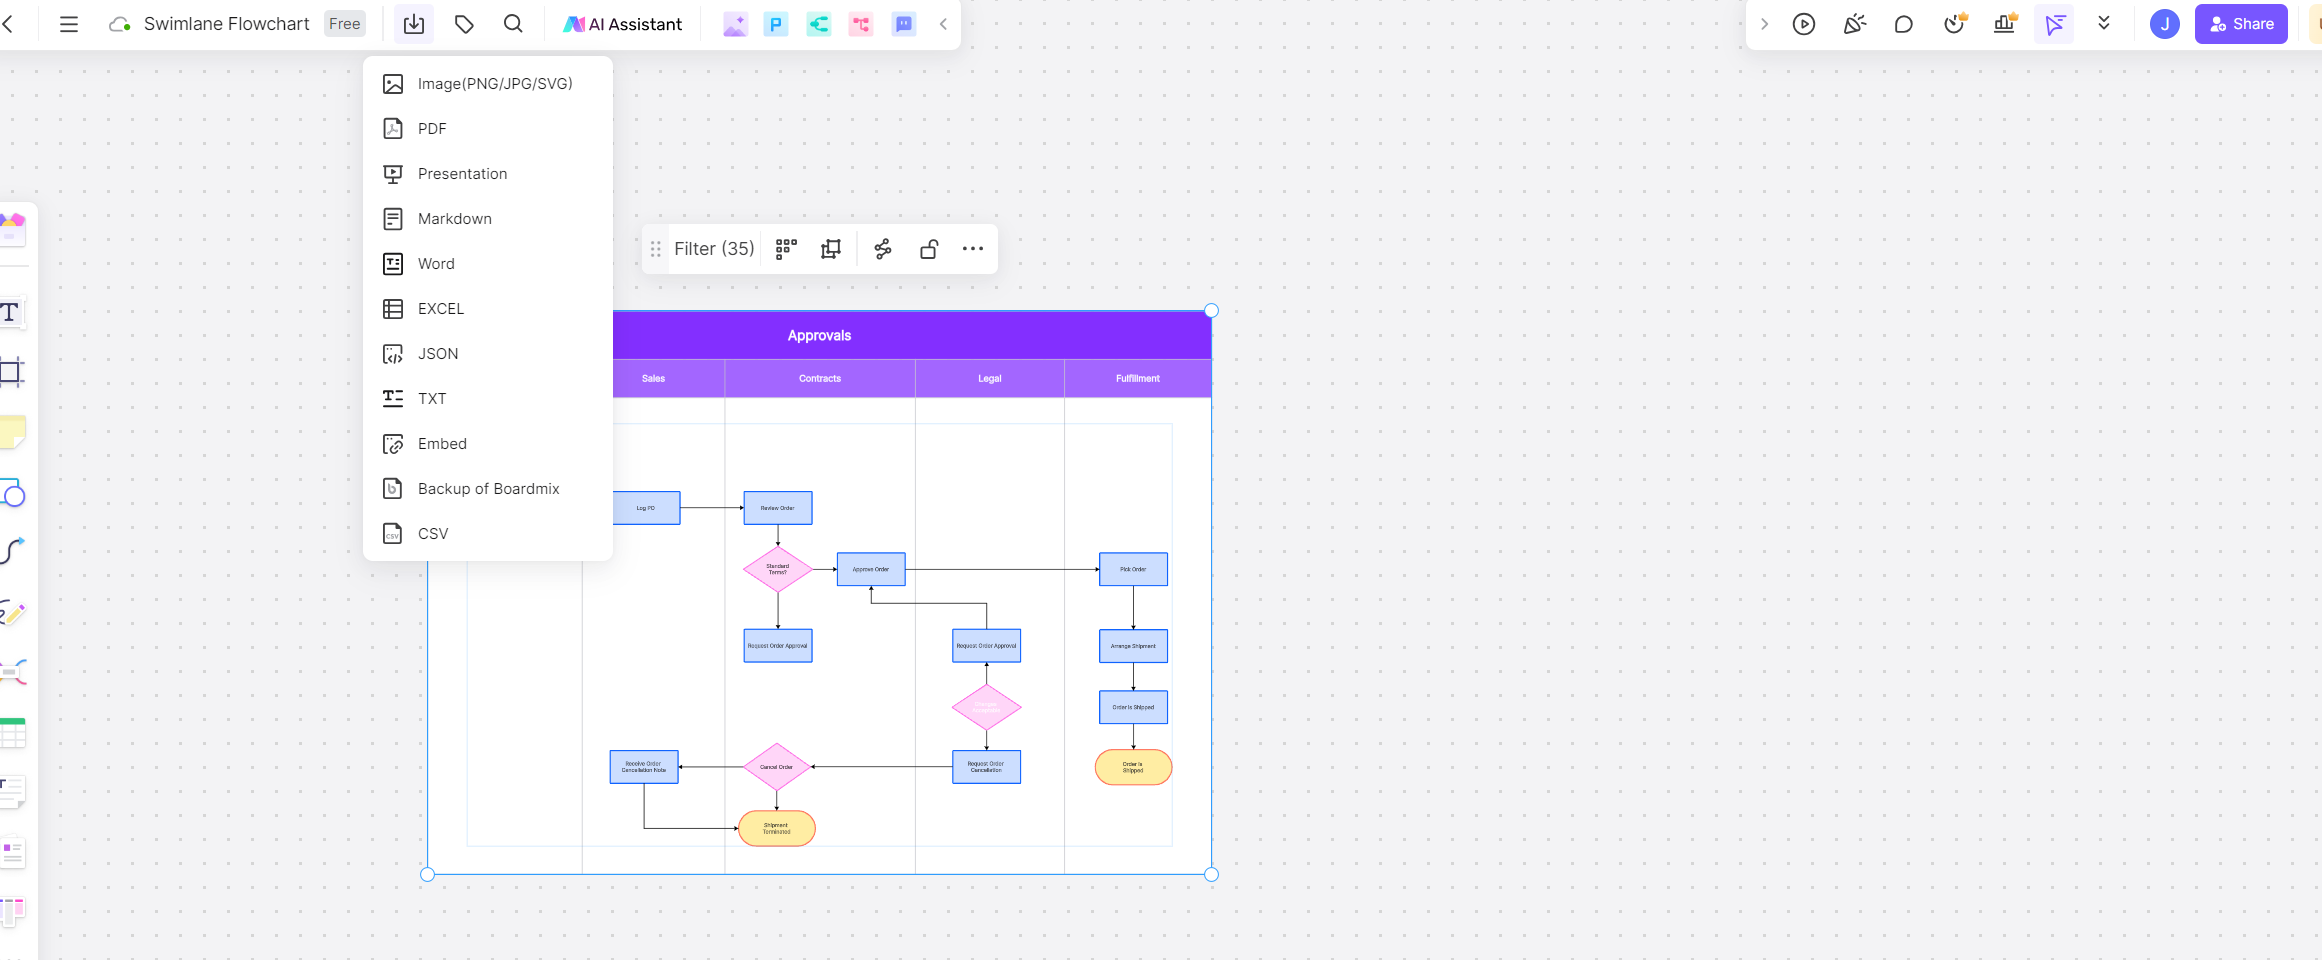
Before sharing the map as an agreed workflow, ask the lane owners to trace one standard order and one rejected non-standard order. On the rejection route, who tells the customer, and where does the process end? Add the notification action and its owner if they are missing. Use comments on unresolved steps, then share the board with suitable viewing or editing permissions. An exported copy can support a handover, but include the map’s date and a link to the maintained board so readers can find later changes.
The result should make the next action clear on both paths. A reader should be able to point to the current step, identify its owner, and follow the arrow to the person who receives the outcome.
Best Practices for Cross Functional Flowcharts
Creating a cross-functional flowchart is a task that demands strategic thinking, meticulous planning, and clear communication. Below are some best practices to ensure that your cross-functional flowchart is not only detailed and comprehensive but also effective in achieving its intended purpose.
Start with High-Level Processes
When beginning to design your flowchart, it's crucial to start with high-level processes before drilling down into specific tasks and steps. This approach offers a broader view of the overall process, making it easier to understand how each function or department contributes to the final outcome.
Incorporate Color Coding
Utilizing different colors for distinct departments or stages can significantly enhance your flowchart's visual appeal and readability. Color coding can help team members quickly identify their tasks and responsibilities, boosting efficiency and productivity.
Clearly Define Tasks and Roles
Each task within the flowchart should be clearly defined, and roles and responsibilities assigned for each function should be explicitly stated. This clarity fosters accountability and ensures every team member understands their role in the process.
Use Arrows Wisely
Arrows show the sequence of work, including returns and exceptions. Reduce unnecessary crossings by improving the layout, not by omitting connections. Every decision needs a route for each relevant outcome, and every unfinished action needs a next step. A lane crossing tells you that work changes hands; a note beside the connector can explain what is handed over.
Regularly Update the Flowchart
As business processes evolve over time, so should your cross-functional flowcharts. Regular updates are necessary to ensure they accurately reflect the current state of operations. Remember, a flowchart that isn't up-to-date can lead to confusion, inefficiency, and potential mistakes.
Solicit Feedback from Team Members
The individuals involved in the depicted process are often the best sources of information when it comes to improving your flowchart. Therefore, regularly solicit feedback from your team members and make necessary adjustments based on their input.
Simplify Complex Processes
If a process seems too complex, it might be worth breaking it down into smaller sub-processes. This strategy can help improve the flowchart's readability and make it easier for team members to understand their tasks and responsibilities.
By adopting these best practices when creating a cross-functional flowchart in Boardmix, you can ensure that your diagram is accurate, easy-to-understand, and effective in optimizing business operations across various departments within your organization.