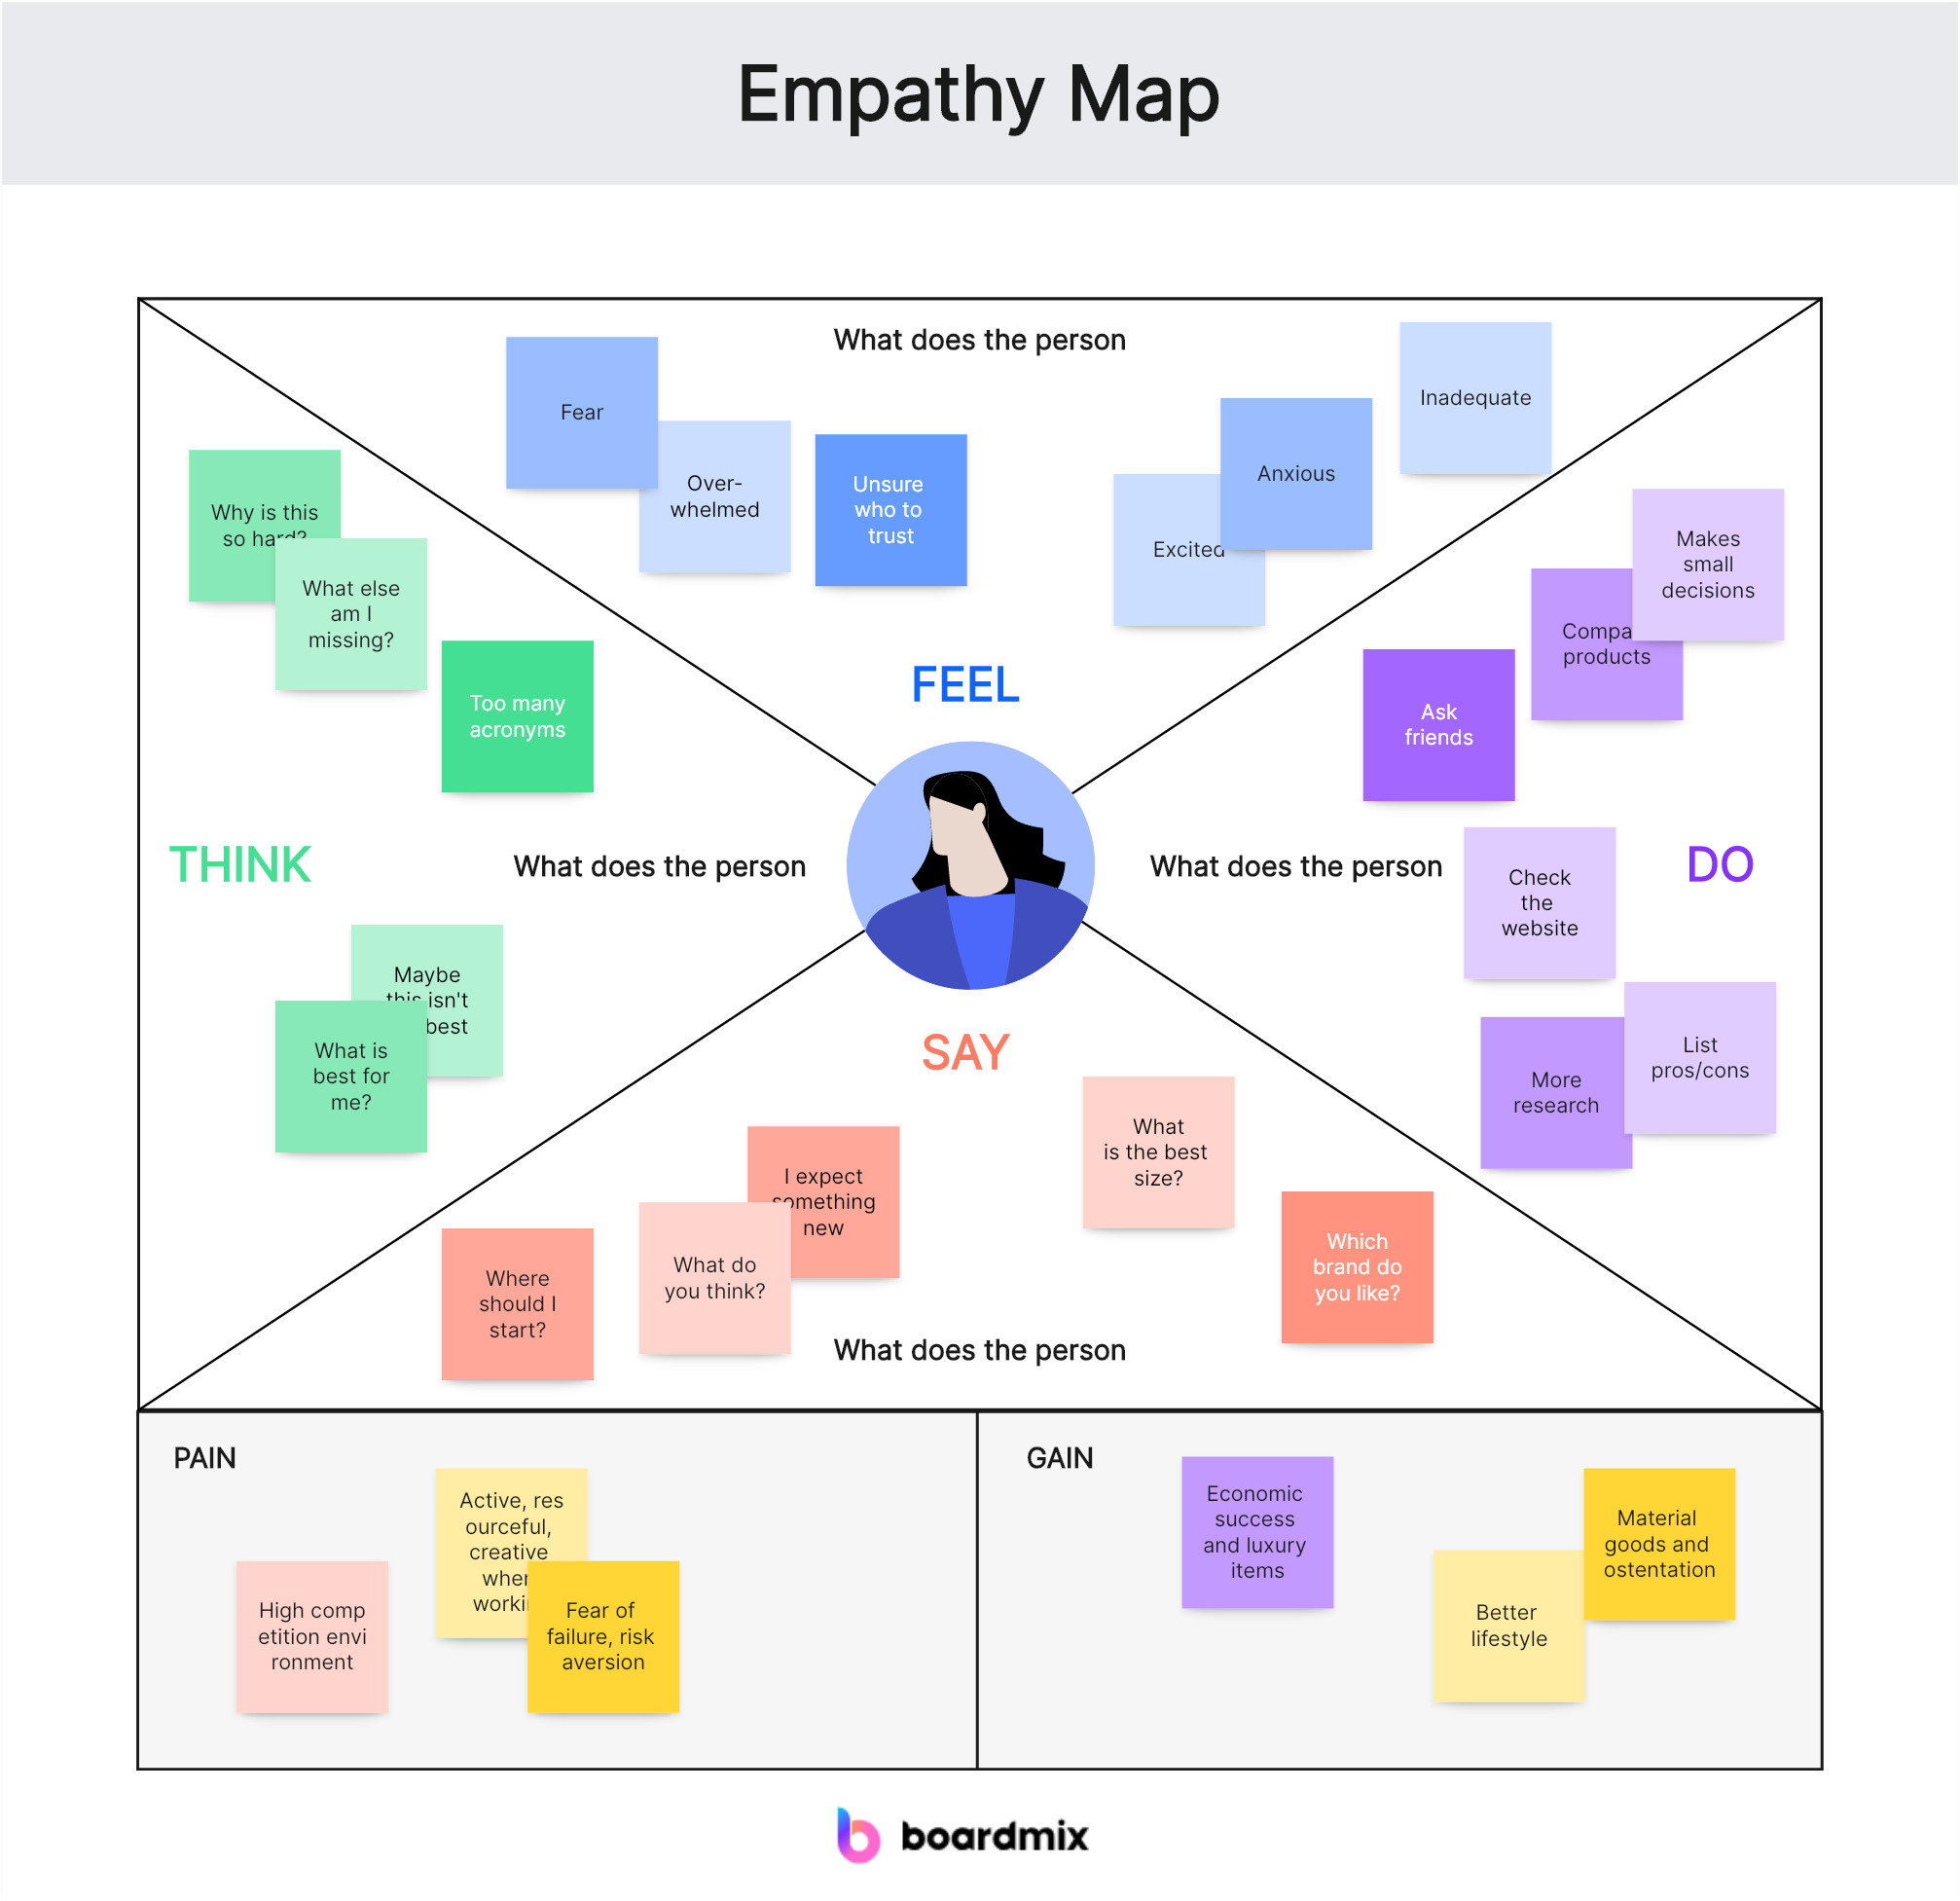
An empathy map is a visual tool used to identify and understand the needs and experiences of a particular group of people. It's a way to put yourself in someone else's shoes and see the world from their perspective. The map is divided into four main sections: thoughts, feelings, says, and does. By filling out these sections, you can gain a comprehensive view of the user's experience.
This article will provide a detailed example of how to create an empathy map for a specific group: students. We'll explore the challenges, thoughts, feelings, and motivations of students, and how an empathy map can help educators, designers, and students themselves better understand and support this diverse community.
Why Empathy Maps Matter for Students
Students face a unique set of challenges, from academic pressures to social dynamics and personal growth. An empathy map can help educators and designers create environments, curricula, and tools that are more attuned to the needs of students. It can also help students understand each other better, fostering a more empathetic and supportive community.
Creating an Empathy Map for Students
Let's walk through the process of creating an empathy map for students, using a hypothetical student named Alex as our example.
1. Thoughts: What is Alex thinking?
- Concerns about grades and future career prospects.
- Anxiety about upcoming exams and deadlines.
- Curiosity about the material being taught.
- Desire to balance schoolwork with social life and hobbies.
2. Feelings: What feelings does Alex experience?
- Stress and anxiety about academic performance.
- Excitement and engagement when learning new concepts.
- Overwhelming and frustration when faced with too much work.
- Loneliness or isolation, especially during online learning.
3. Says: What does Alex say?
- "I'm worried about my grades."
- "I wish I had more time to study."
- "This topic is really interesting."
- "I don't understand why we have so much homework."
4. Does: What actions does Alex take?
- Procrastinates on assignments, leading to last-minute cramming.
- Participates in study groups to better understand the material.
- Seeks help from teachers or tutors when struggling with a subject.
- Balances schoolwork with extracurricular activities and part-time jobs.
By filling out these sections, we can start to see a clearer picture of Alex's experience as a student. This information can be used to inform decisions about academic support, mental health resources, and the design of educational tools and environments.
Empathy Map Application: A Case Study
Let's apply the empathy map to a real-world scenario. Imagine a university is looking to redesign its library to better serve students. Using empathy maps, the university gathers insights from a diverse group of students, including Alex.
From the empathy maps, the university learns that many students feel overwhelmed by the amount of information available and struggle to find quiet spaces for studying. They also discovered that students wish for more collaborative spaces and resources for group projects.
Armed with this information, the university decides to:
- Create designated quiet zones and collaborative areas within the library.
- Implement a user-friendly search system to help students find resources more easily.
- Offer workshops on time management and study skills.
- Provide additional resources for mental health support, such as counseling services and stress-reduction workshops.
How to make an Empathy Map in Boardmix?
Creating an Empathy Map in Boardmix is a straightforward process. Here are the steps to follow:
1. Open Boardmix and log in to your account.
2. Create a new board or search for an Empathy Map template in the template library.
3. On the board, click on the "Shapes" icon located on the left-hand side toolbar.
4. Select the "Square" shape from the shapes menu.
5. Draw a square on the board to represent the Empathy Map.
6. Next, click on the "Text" icon located on the left-hand side toolbar.
7. Click inside the square shape and add labels for each section of the Empathy Map: "Says," "Thinks," "Feels," and "Does."
8. Now, you can start adding sticky notes to each section of the Empathy Map. Click on the "Sticky Note" icon located on the left-hand side toolbar.
9. Click inside each section of the Empathy Map and add relevant information, thoughts, feelings, and actions that your target audience may have.
10. Repeat this process for each section of the Empathy Map until you have captured all the necessary information.
11. You can also customize the colors and styles of the sticky notes to make your Empathy Map visually appealing and easy to understand. To do this, click on a sticky note and select the desired options from the toolbar that appears.
12. Once you have completed your Empathy Map, you can save it by clicking on the "Save" button located at the top right corner of the board.
That's it! You have successfully created an Empathy Map in Boardmix. Now you can use it to gain insights into your target audience's thoughts, feelings, and actions, which will help inform your creative projects and decision-making processes.
Empathy maps are powerful tools for understanding the complex experiences of any group, including students. By taking the time to map out the thoughts, feelings, words, and actions of students, educators, designers, and even students themselves can gain valuable insights. These insights can lead to more effective support systems, better educational tools, and a more empathetic learning environment. In a world that increasingly values empathy and understanding, the empathy map is a practical and versatile tool that can make a real difference in the lives of students.