In the intricate and diverse world of manufacturing, keeping track of all processes can be a daunting task. That's where the brilliance of a manufacturing flow chart comes into play. Serving as a visual aid, a flow chart for production illuminates the sequential stages involved in the production process, improving understanding and communication among stakeholders.
This article will introduce all aspects of a manufacturing flowhart, dive into its definition, application, benefits and more. You can also learn how to make a flowchart for production based on your needs. Keep reading.
What Is a Manufacturing Flow Chart
A manufacturing flow chart, often referred to as a flow diagram, is a graphical representation of a process within the manufacturing sector. The primary purpose of a manufacturing flowchart is to communicate the process stages, from raw materials to finished products, in a clear and comprehensible manner.

In essence, a flowchart delineates each step in the process visually, connecting them using symbols and arrows. These symbols vary based on the actions they represent – for example, an oval represents the process's start or end, while a rectangle signifies a specific action or step in the process.
A comprehensive manufacturing flow chart provides an overarching view of the entire production process. It elucidates how different stages interconnect, where decisions need to be made, and what actions follow those decisions. Furthermore, it highlights areas where bottlenecks may occur or where there might be room for process optimization.
When to Use a Flowchart for Production
Utilizing a flow chart for production becomes essential in multiple scenarios:
- Process Understanding: When you need to understand a complex process better, creating a visual map of the workflow simplifies comprehension.
- Training and Onboarding: New team members can significantly benefit from flowcharts when familiarizing themselves with the production process.
- Process Improvement: If you're looking to streamline production processes, a flowchart helps identify inefficiencies, redundancies, or bottlenecks that can be addressed.
- Compliance and Documentation: Flowcharts serve as a useful tool to demonstrate compliance with quality management standards and provide valuable documentation for audits.
Benefits of Manufacturing Flowchart
The usage of a manufacturing flow chart in production yields numerous benefits:
- Enhanced Understanding: Visual representation simplifies complex processes, making it easier for everyone involved to understand the entire process.
- Improved Communication: It serves as an excellent communication tool between different departments or teams within the manufacturing setup.
- Efficient Troubleshooting: Flowcharts enable efficient identification and resolution of issues or bottlenecks within the production process.
- Process Optimization: They can highlight areas of waste or inefficiency, paving the way for implementing process improvements.
Manufacturing flow charts serve as instrumental tools in modern production environments. They aid in understanding complex processes, fostering communication, resolving issues, and identifying opportunities for improvement.
Manufacturing Flow Chart Symbols
A key component of any flowchart, including those for manufacturing, is the symbols used. Each symbol carries a specific meaning, representing different stages or actions within the process.
Here are the standard symbols used in a manufacturing flow chart:
- Oval: Represents the start or end of a process.
- Rectangle: Depicts an action or task within the process.
- Diamond: Symbolizes a decision point where a question is asked, and the flow diverges based on the answer.
- Parallelogram: Indicates input or output within the process.
- Arrows: Direct the sequence and flow of steps.
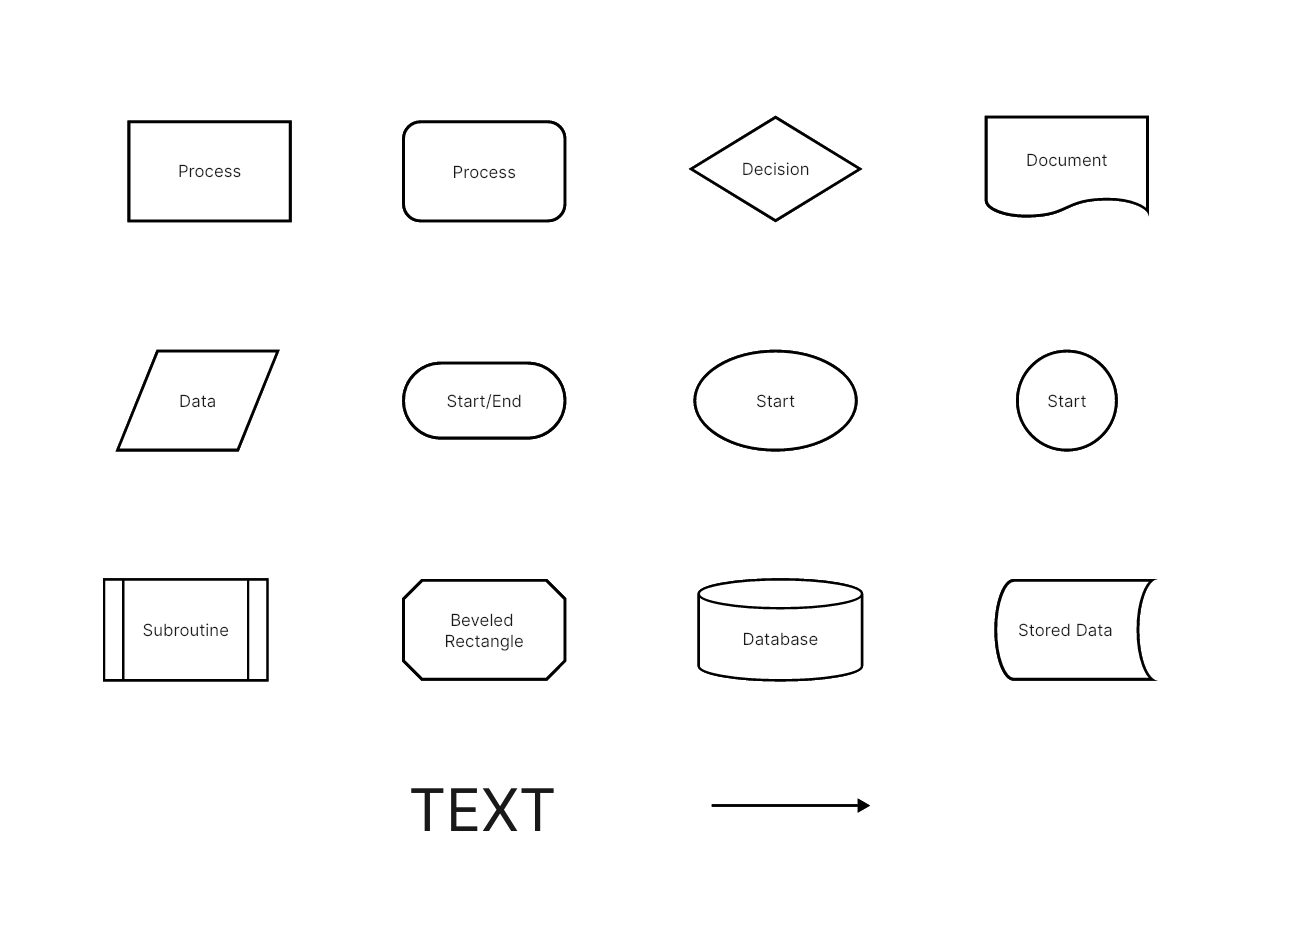
Understanding these symbols allows for easy reading and creation of flow charts for production.
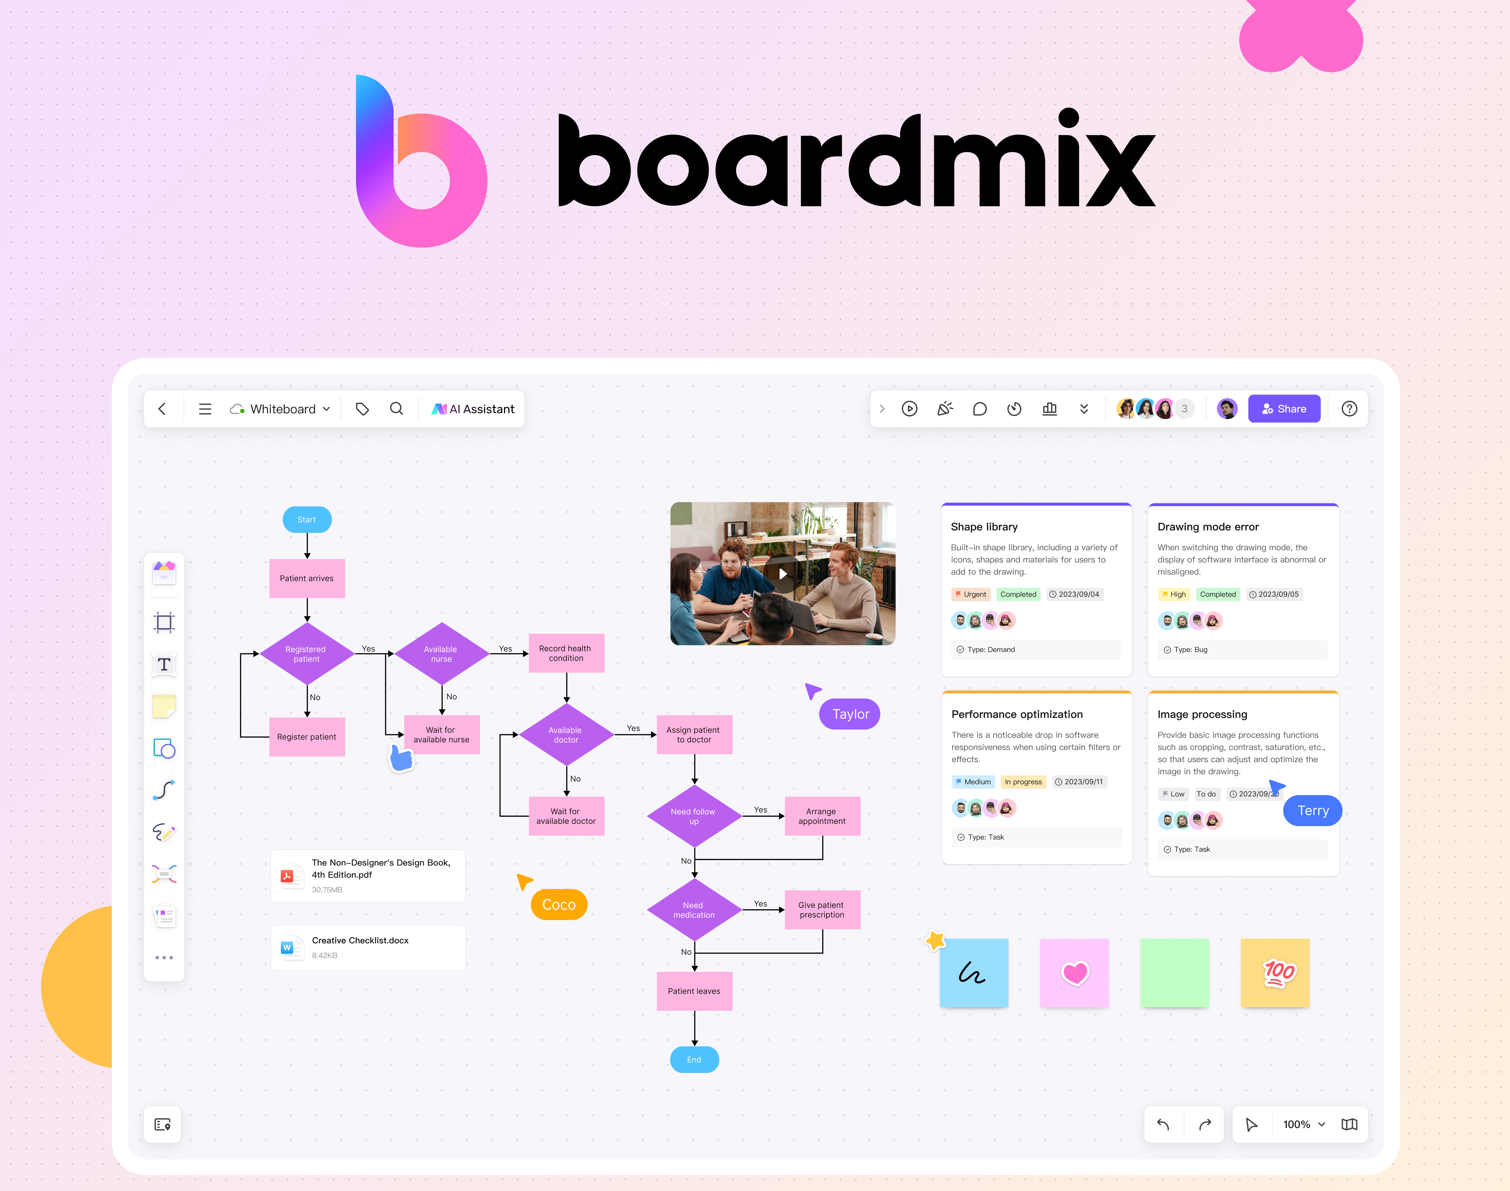
How to Make a Manufacturing Flow Chart in Boardmix
In a world where visual representation carries immense importance, Boardmix makes it easy to construct coherent and compelling flow charts. Whether it's for manufacturing or any other business process, these step-by-step instructions will guide you in making a professional and precise flow chart with Boardmix.
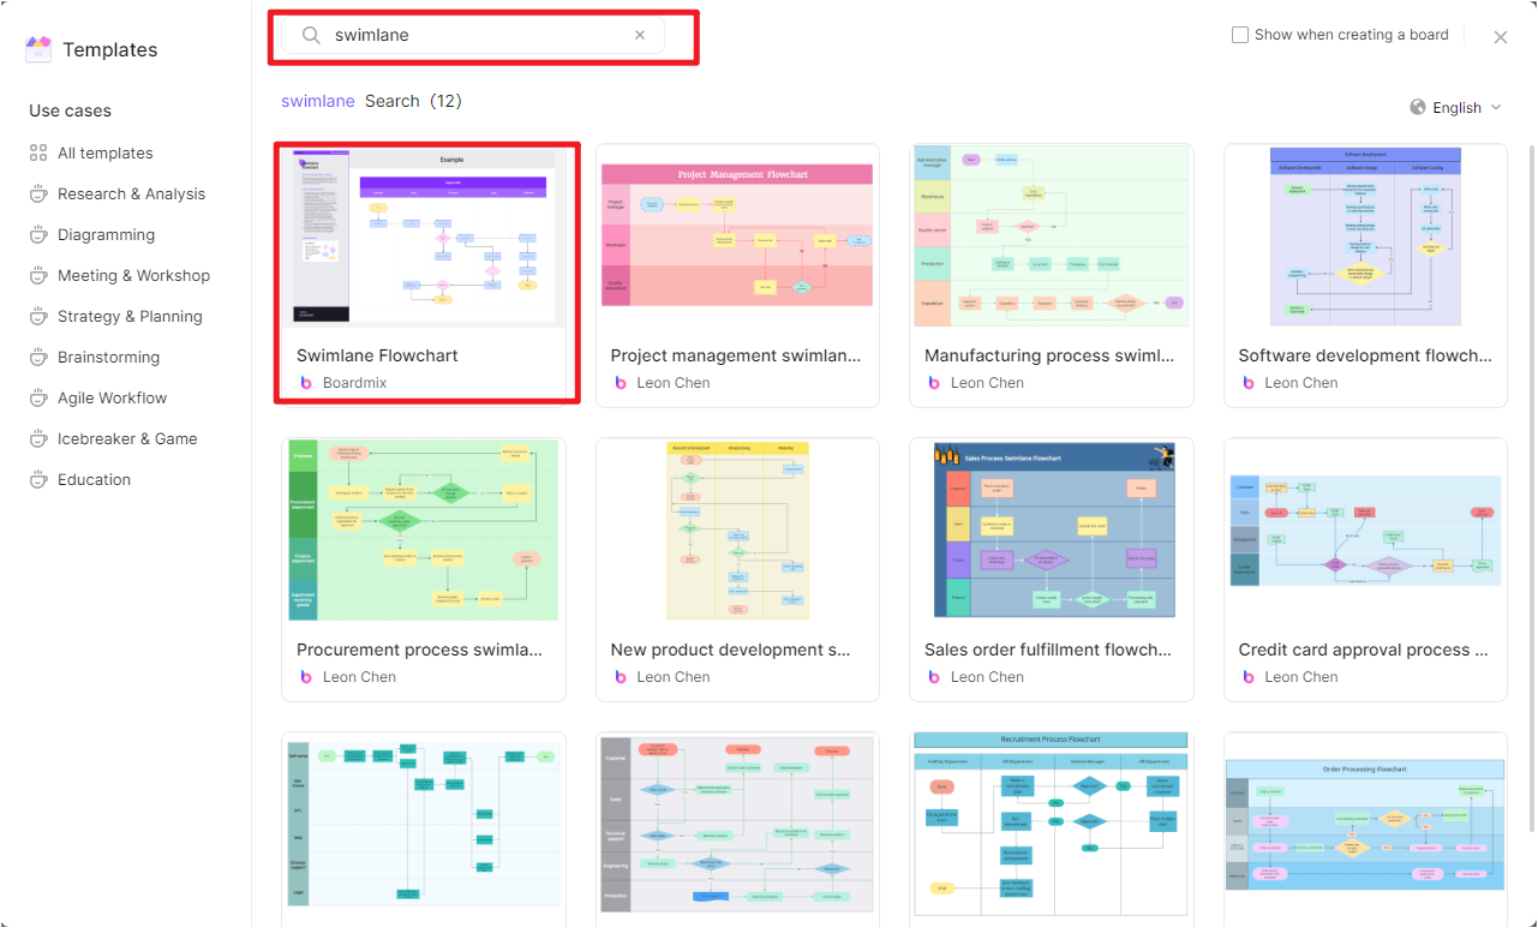
Step 1: Start a New Boardmix Board
To begin, open your Boardmix application and create a new board. If you want to start quickly, in the "Templates" option, scroll down and select "Swimlane Flowchart" from the list. This will open a blank workspace preloaded with the tools you'll need to create your manufacturing flow chart. Here we'll focus on creating a manufacturing flow chart from scratch.
Step 2: Map Out Your Manufacturing Process
Before starting the diagram, map out your manufacturing process in your mind or on paper. Understand the steps involved, decisions needed, and the order in which everything happens. This will make your chart more accurate and organized.
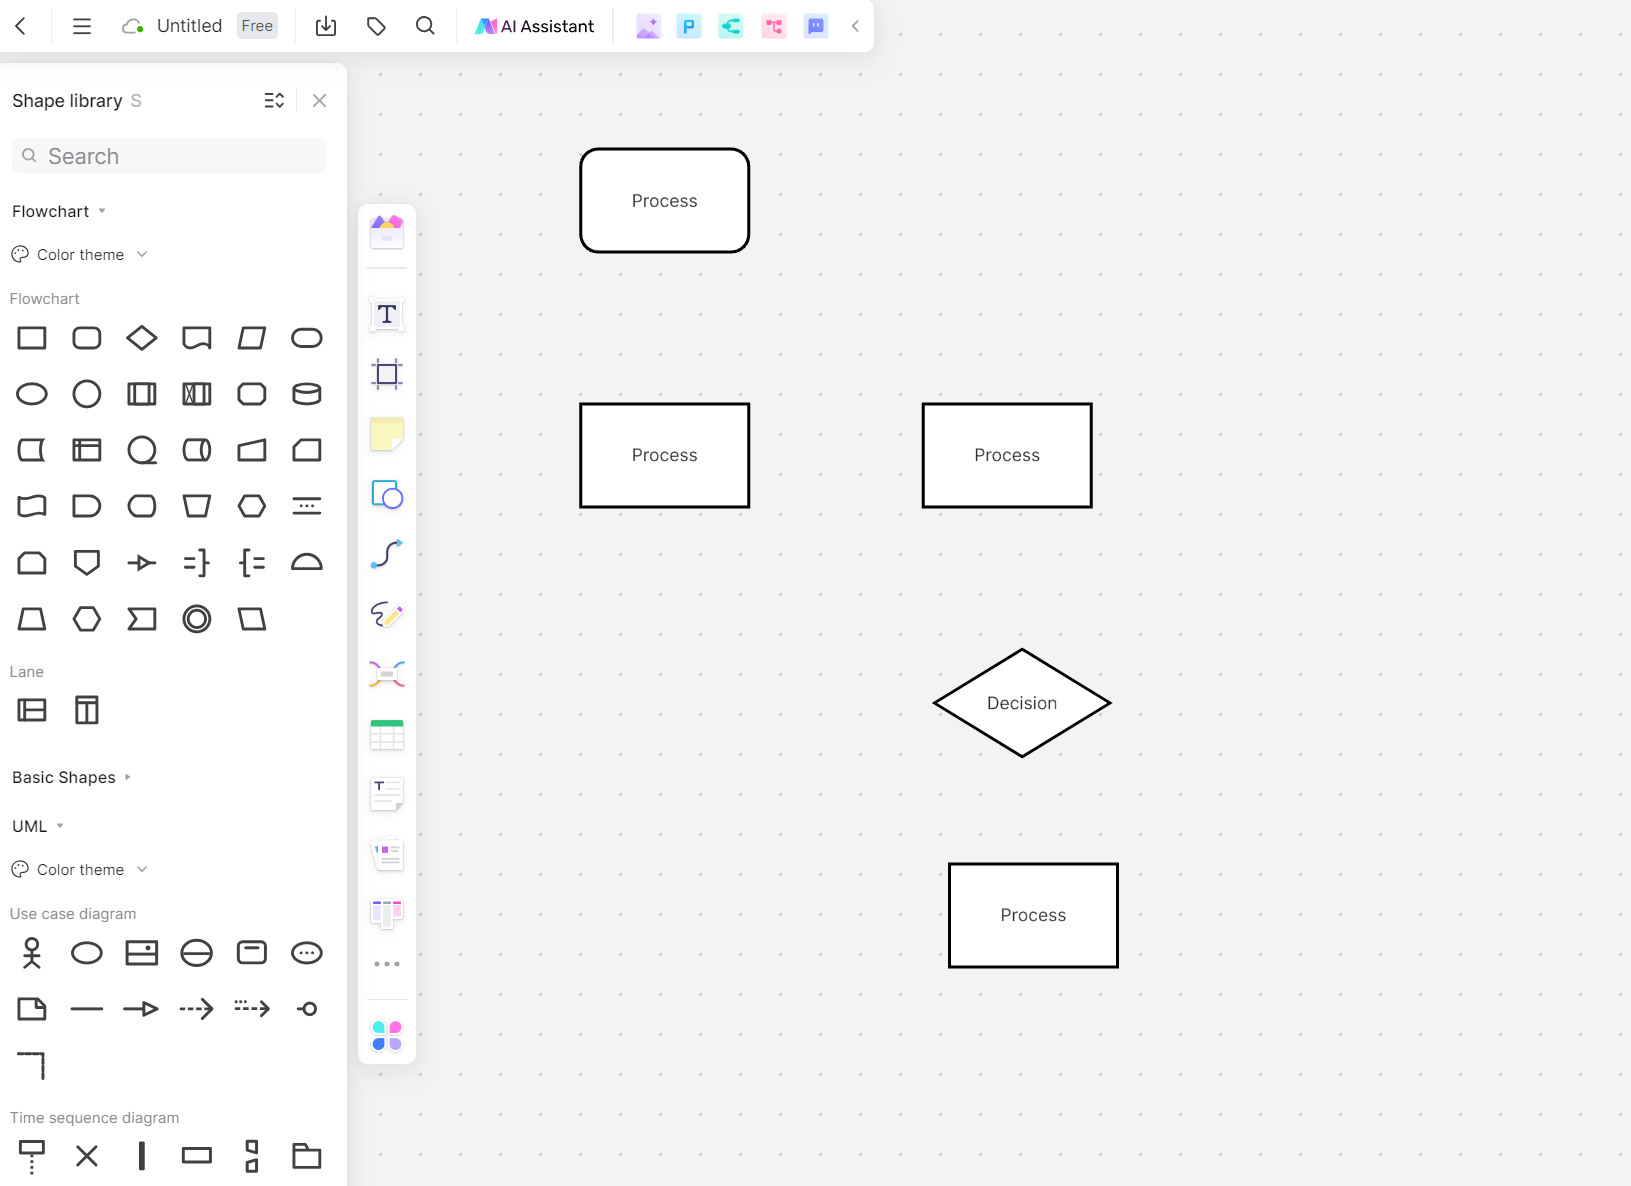
Step 3: Add Symbols to Your Chart
Start by adding symbols to represent each step of your manufacturing process. On the left side of the workspace, you'll see a panel titled "Shapes". Drag and drop the shapes you need onto your workspace.
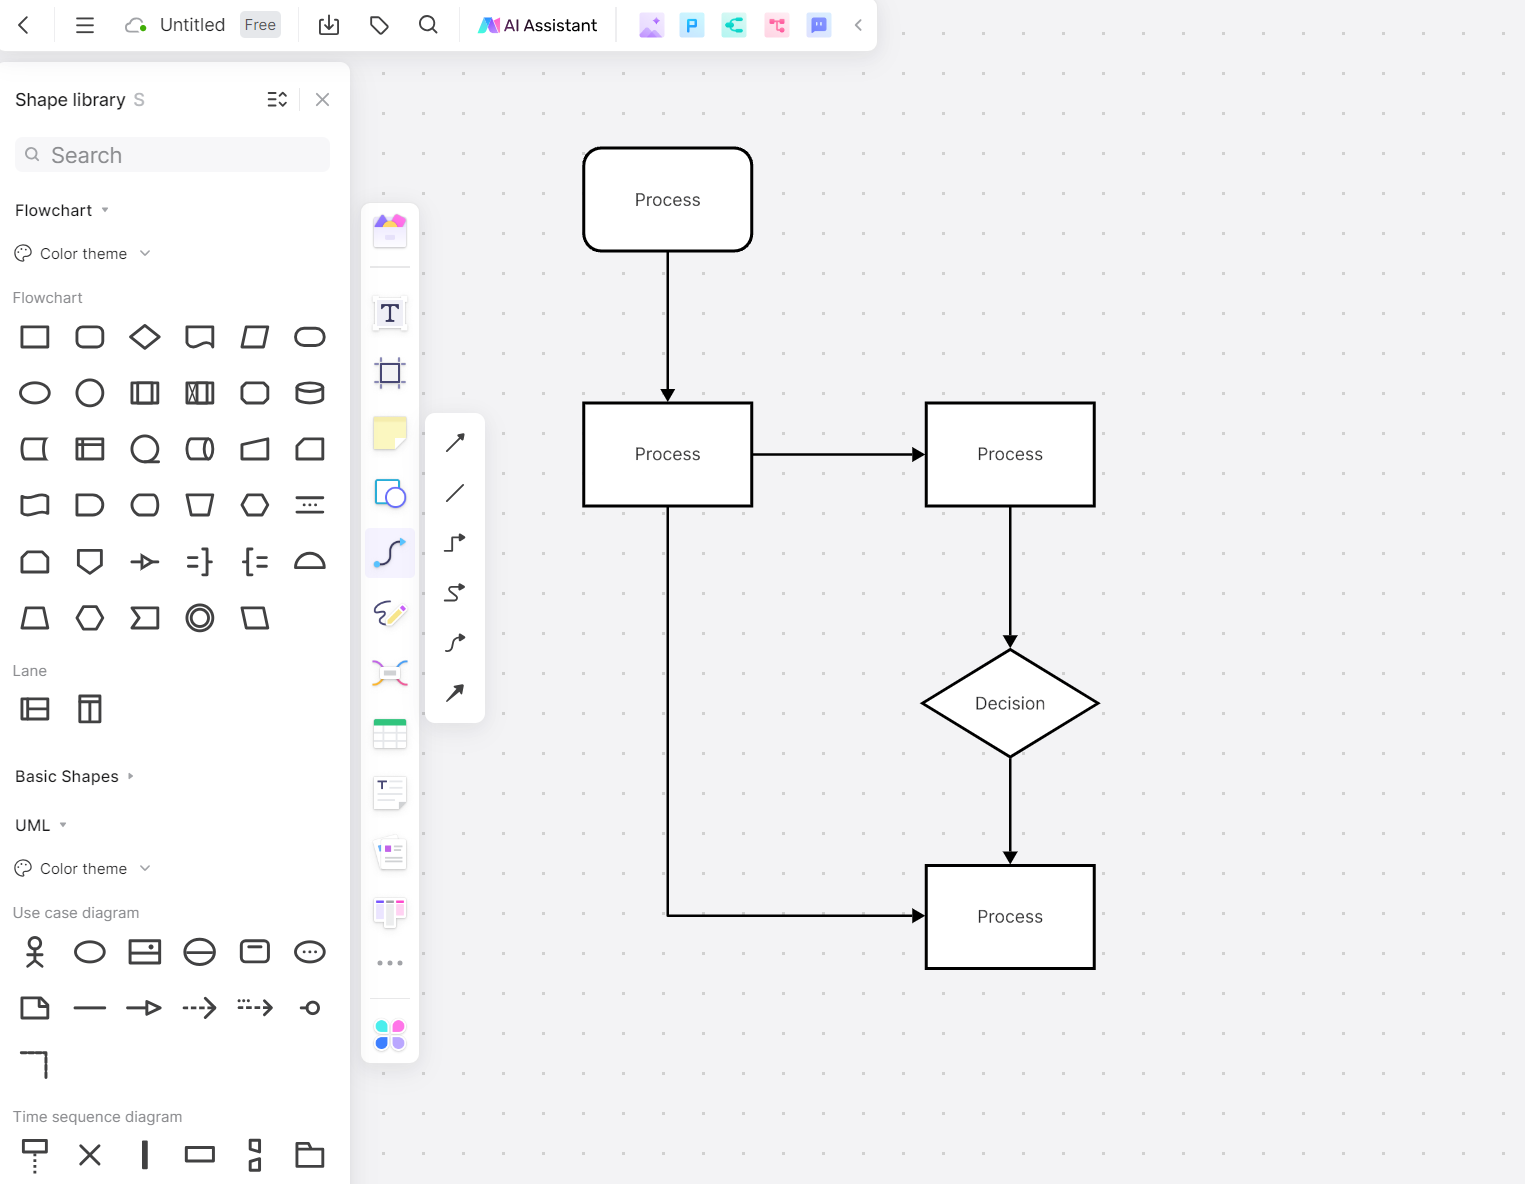
Step 4: Connect Your Steps with Arrows
Next, show the progression of steps using arrows. Under the "Lines" tab on the left panel, select the type of line or arrow you wish to use. Drag it onto the workspace and attach it to your symbols, indicating the direction of the workflow.
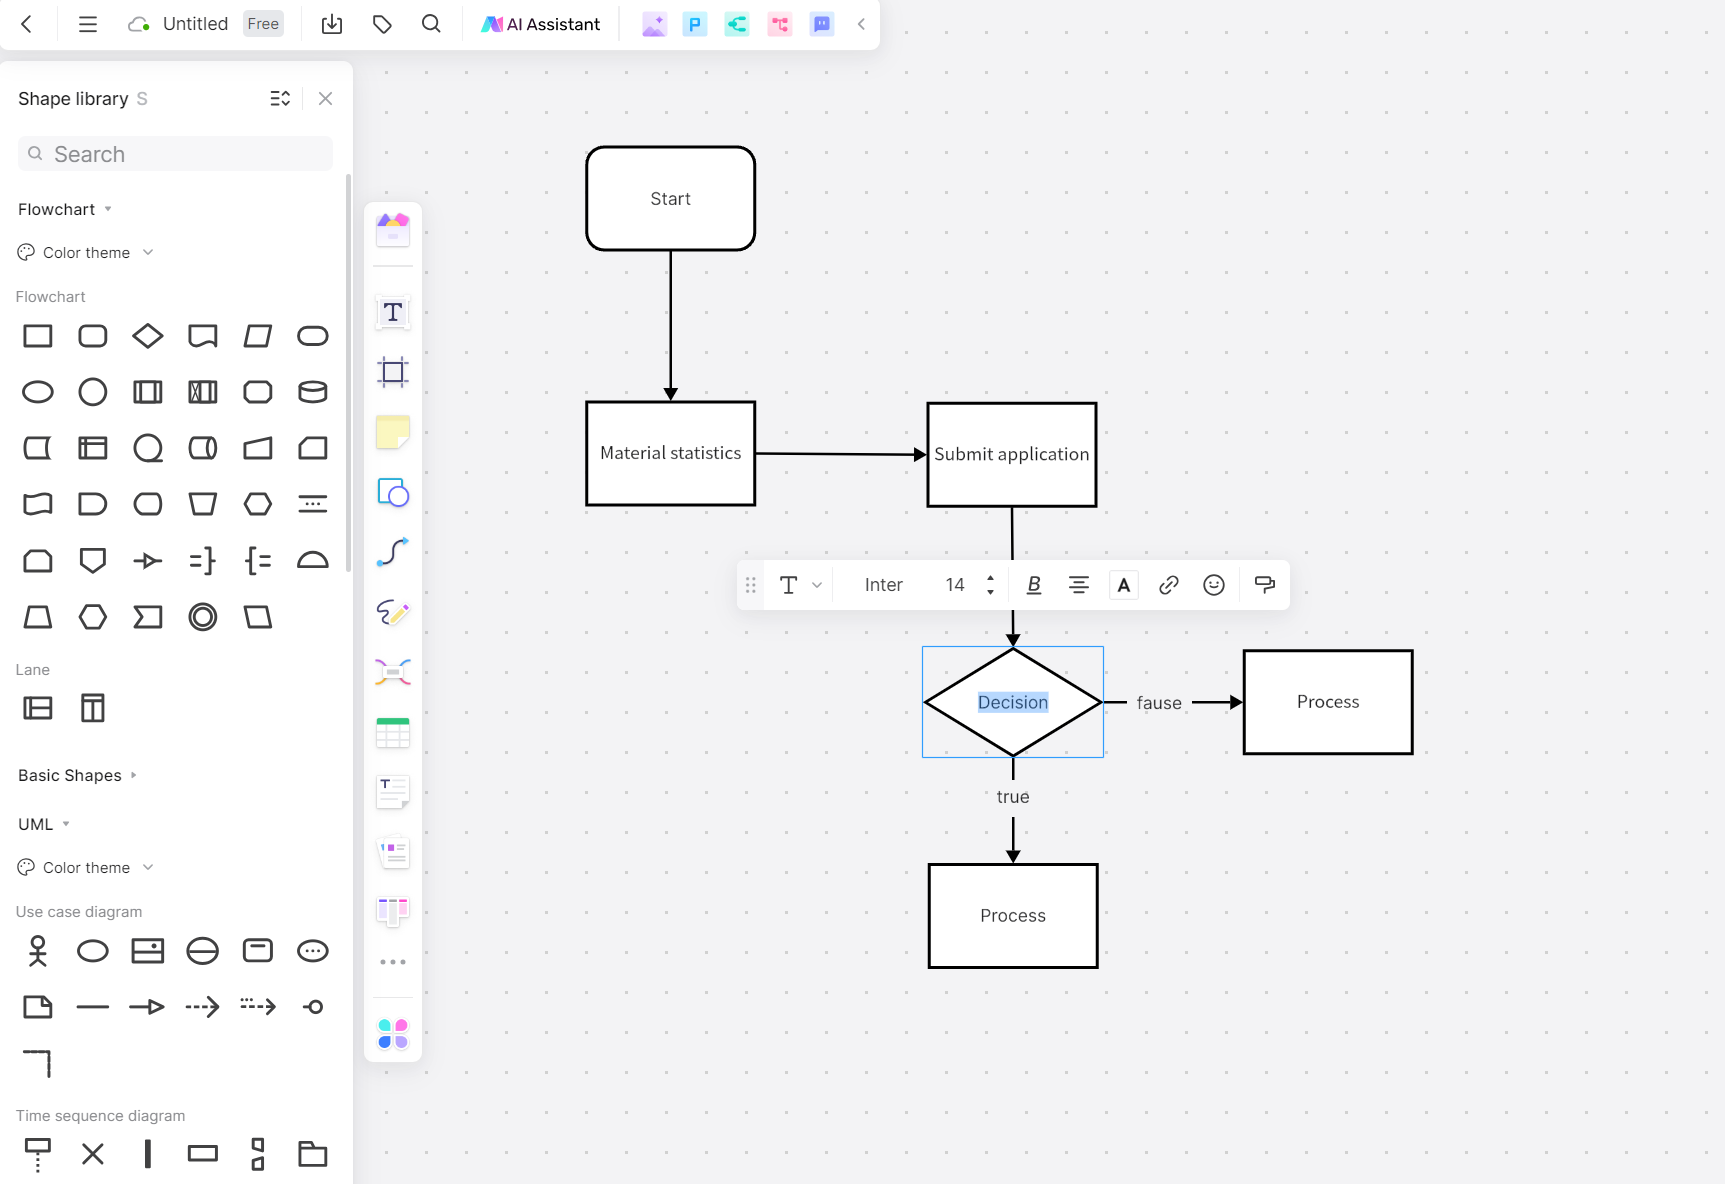
Step 5: Label Your Symbols and Arrows
After arranging and connecting all your symbols, label each one to represent the corresponding step in your manufacturing process. To add text, click on a symbol and start typing. For arrows indicating direction or decision, label them as well to clarify actions.
Step 6: Customize Your Chart
Once your flow chart is complete structurally, customize it to make it more visually appealing and easy to understand. You can alter the color, size, and style of your symbols or text.
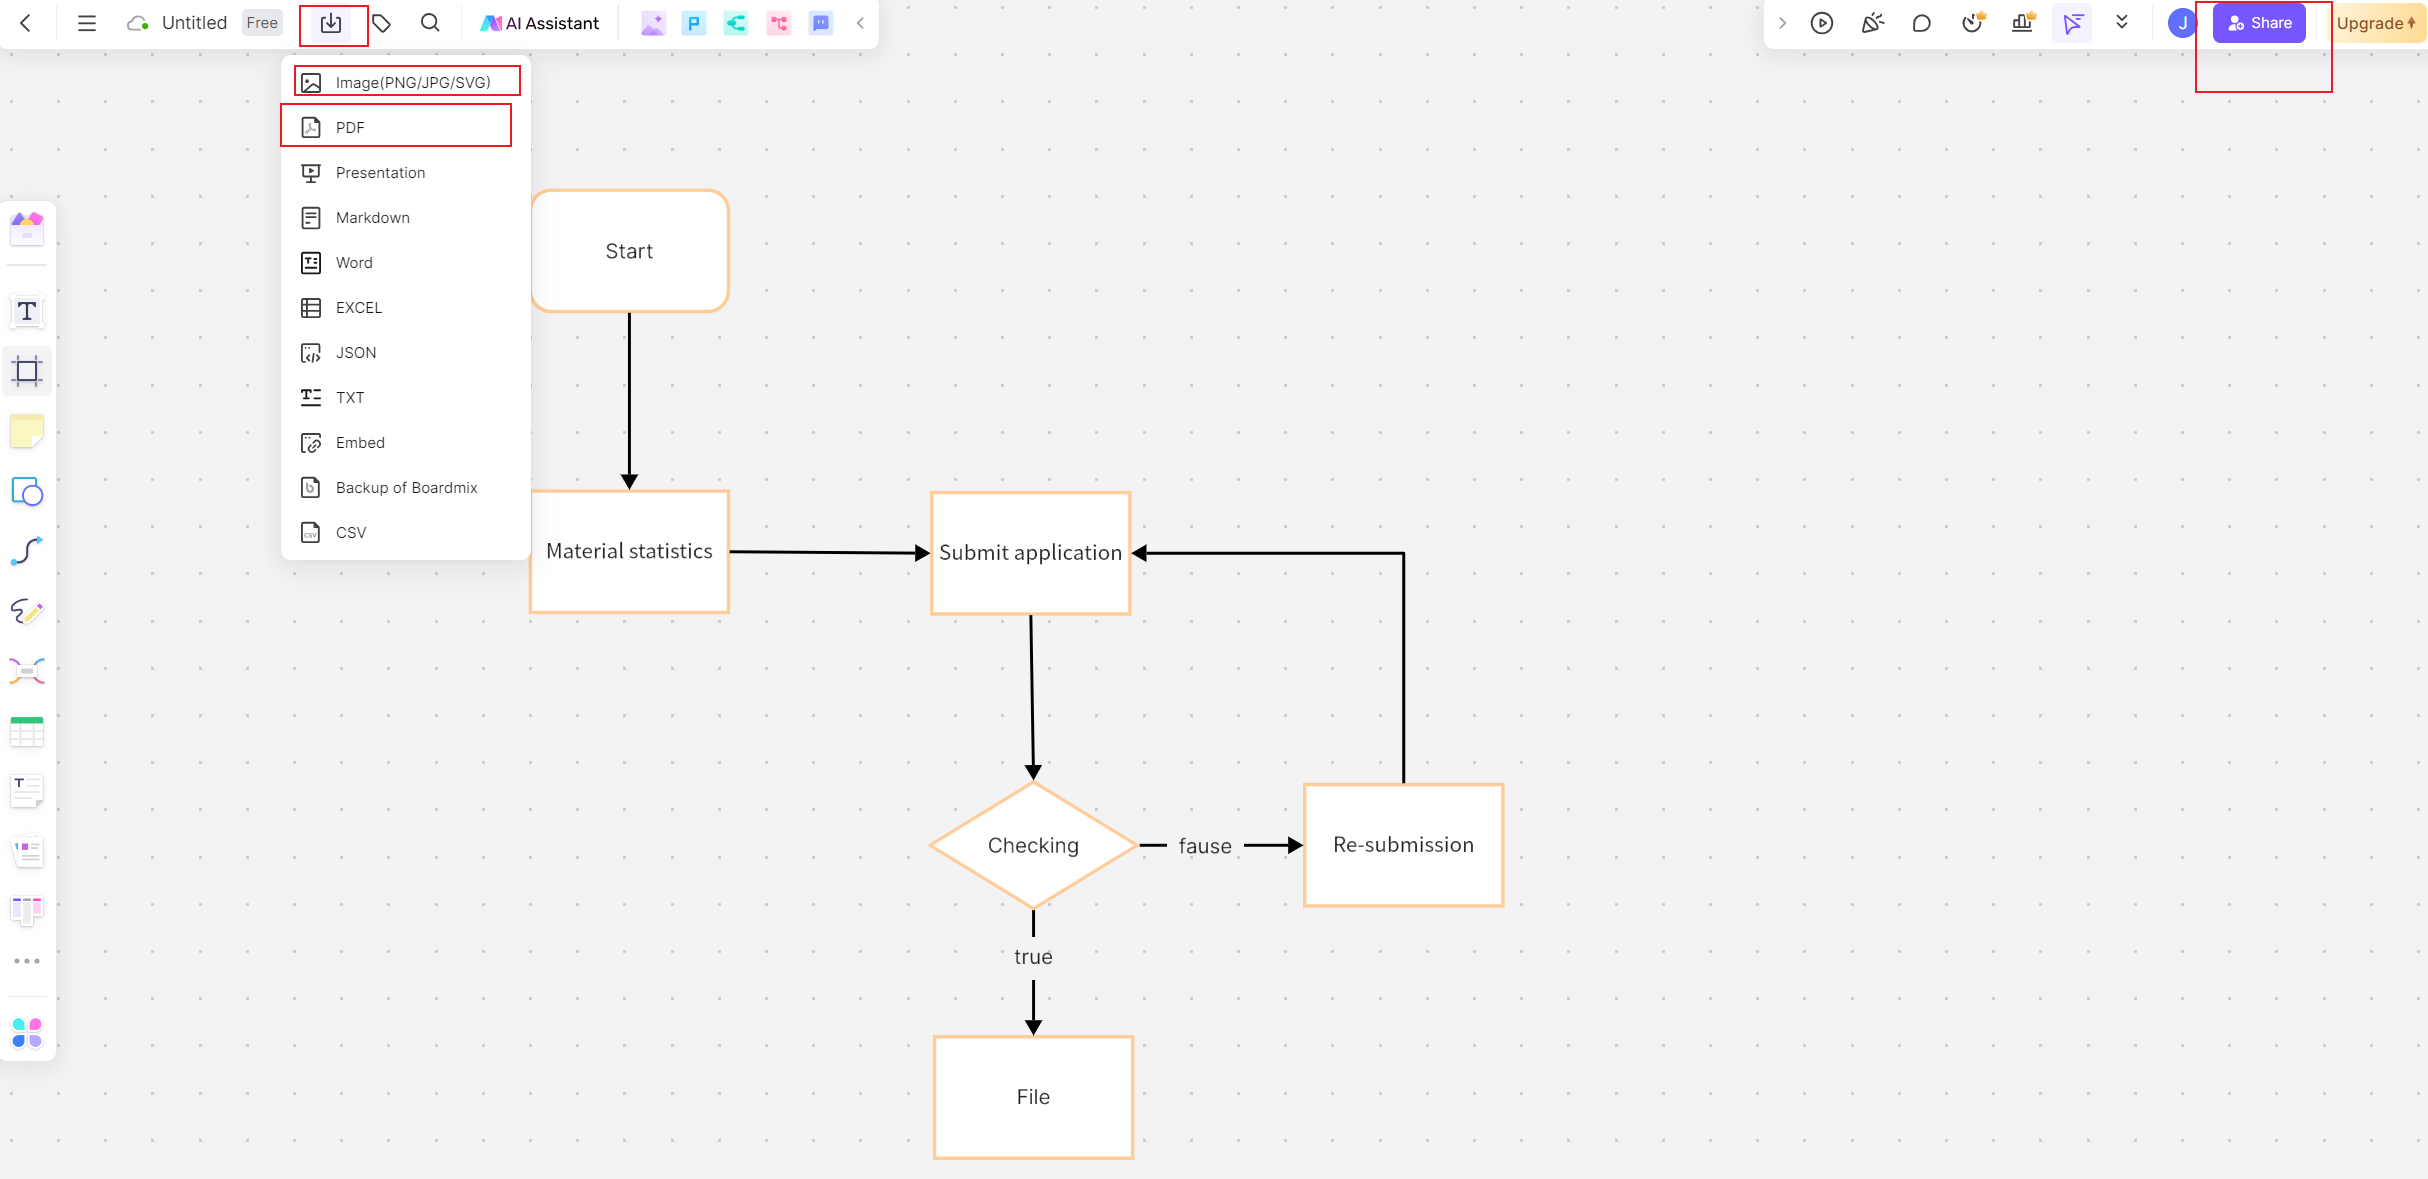
Step 7: Save, Share, or Export Your Flow Chart
Finally, save your board. Boardmix allows you to share your files with team members for collaborative editing or viewing. You can also export your flow chart as an image or PDF for distribution or future reference.
And there you have it – you've successfully created a professional-looking manufacturing flow chart using Boardmix! Remember, clarity is key when creating a flowchart. Make sure it is simple, easy-to-follow, and accurate.
Tips and Tricks on Making a Flow Chart for Production
Crafting an effective flow chart is an art that demands precision, foresight, and clarity. Here are some handy tips and tricks to guide you in making a standout flow chart for production.
Understand Your Process Thoroughly
The cornerstone of creating a meaningful flowchart is a deep understanding of the production process. Before you begin drafting, make sure to acquaint yourself with all aspects of the manufacturing process - its inputs, outputs, steps, decisions, and stakeholders.
Keep It Simple
Remember that a flow chart's main objective is to simplify complex processes and facilitate comprehension. Avoid packing your chart with excessive details that could cause confusion or misunderstanding.
Use Standard Symbols
Standard symbols ensure that your flow chart is universally understood. Stick to widely recognized symbols, such as ovals for start and endpoints, rectangles for steps or tasks, diamonds for decision points, and arrows for direction of flow.
Leverage Color Coding
Color coding can significantly enhance your flow chart's clarity. Assign different colors to various stages or categories of steps in the process to make them easy to identify.
Ensure Logical Flow
Ensure your flow chart follows a logical progression from the start to the end of the production process. Typically, flowcharts follow a left-to-right or top-to-bottom flow, moving along with each step or decision.
Test Your Flow Chart
Once you've completed your flowchart, test it by tracing each potential path. This step can help you spot errors or inconsistencies that need to be addressed.
Seek Feedback
Don't shy away from seeking feedback on your flow chart from team members or other stakeholders in the manufacturing process. Their insights could prove invaluable in refining your chart.
Revise and Update Regularly
A flowchart is not a one-and-done tool; it's a living document that should evolve with any changes in your manufacturing process. Keep your flowchart up-to-date to ensure it continues to serve as an accurate representation of your process.
Creating a flow chart for production requires more than just dragging and dropping symbols onto a page. Keep these tips in mind to create a clear, informative, and user-friendly flow chart that adds value to your manufacturing process.