The drive for efficiency in business operations has fostered the development of various tools, among which process flow diagrams hold a special place. These diagrams visually represent the sequential flow of a process, making it easier to understand, analyze, and improve. Let's delve into the concept, advantages, benefits and creation of a process flow diagram in detail.
What Is a Process Flow Diagram
A process flow diagram (PFD) is a visual tool used to depict the steps involved in a process or system. By breaking down the process into individual tasks and illustrating the order and interactions between these tasks, PFDs offer an overview of how a process works.
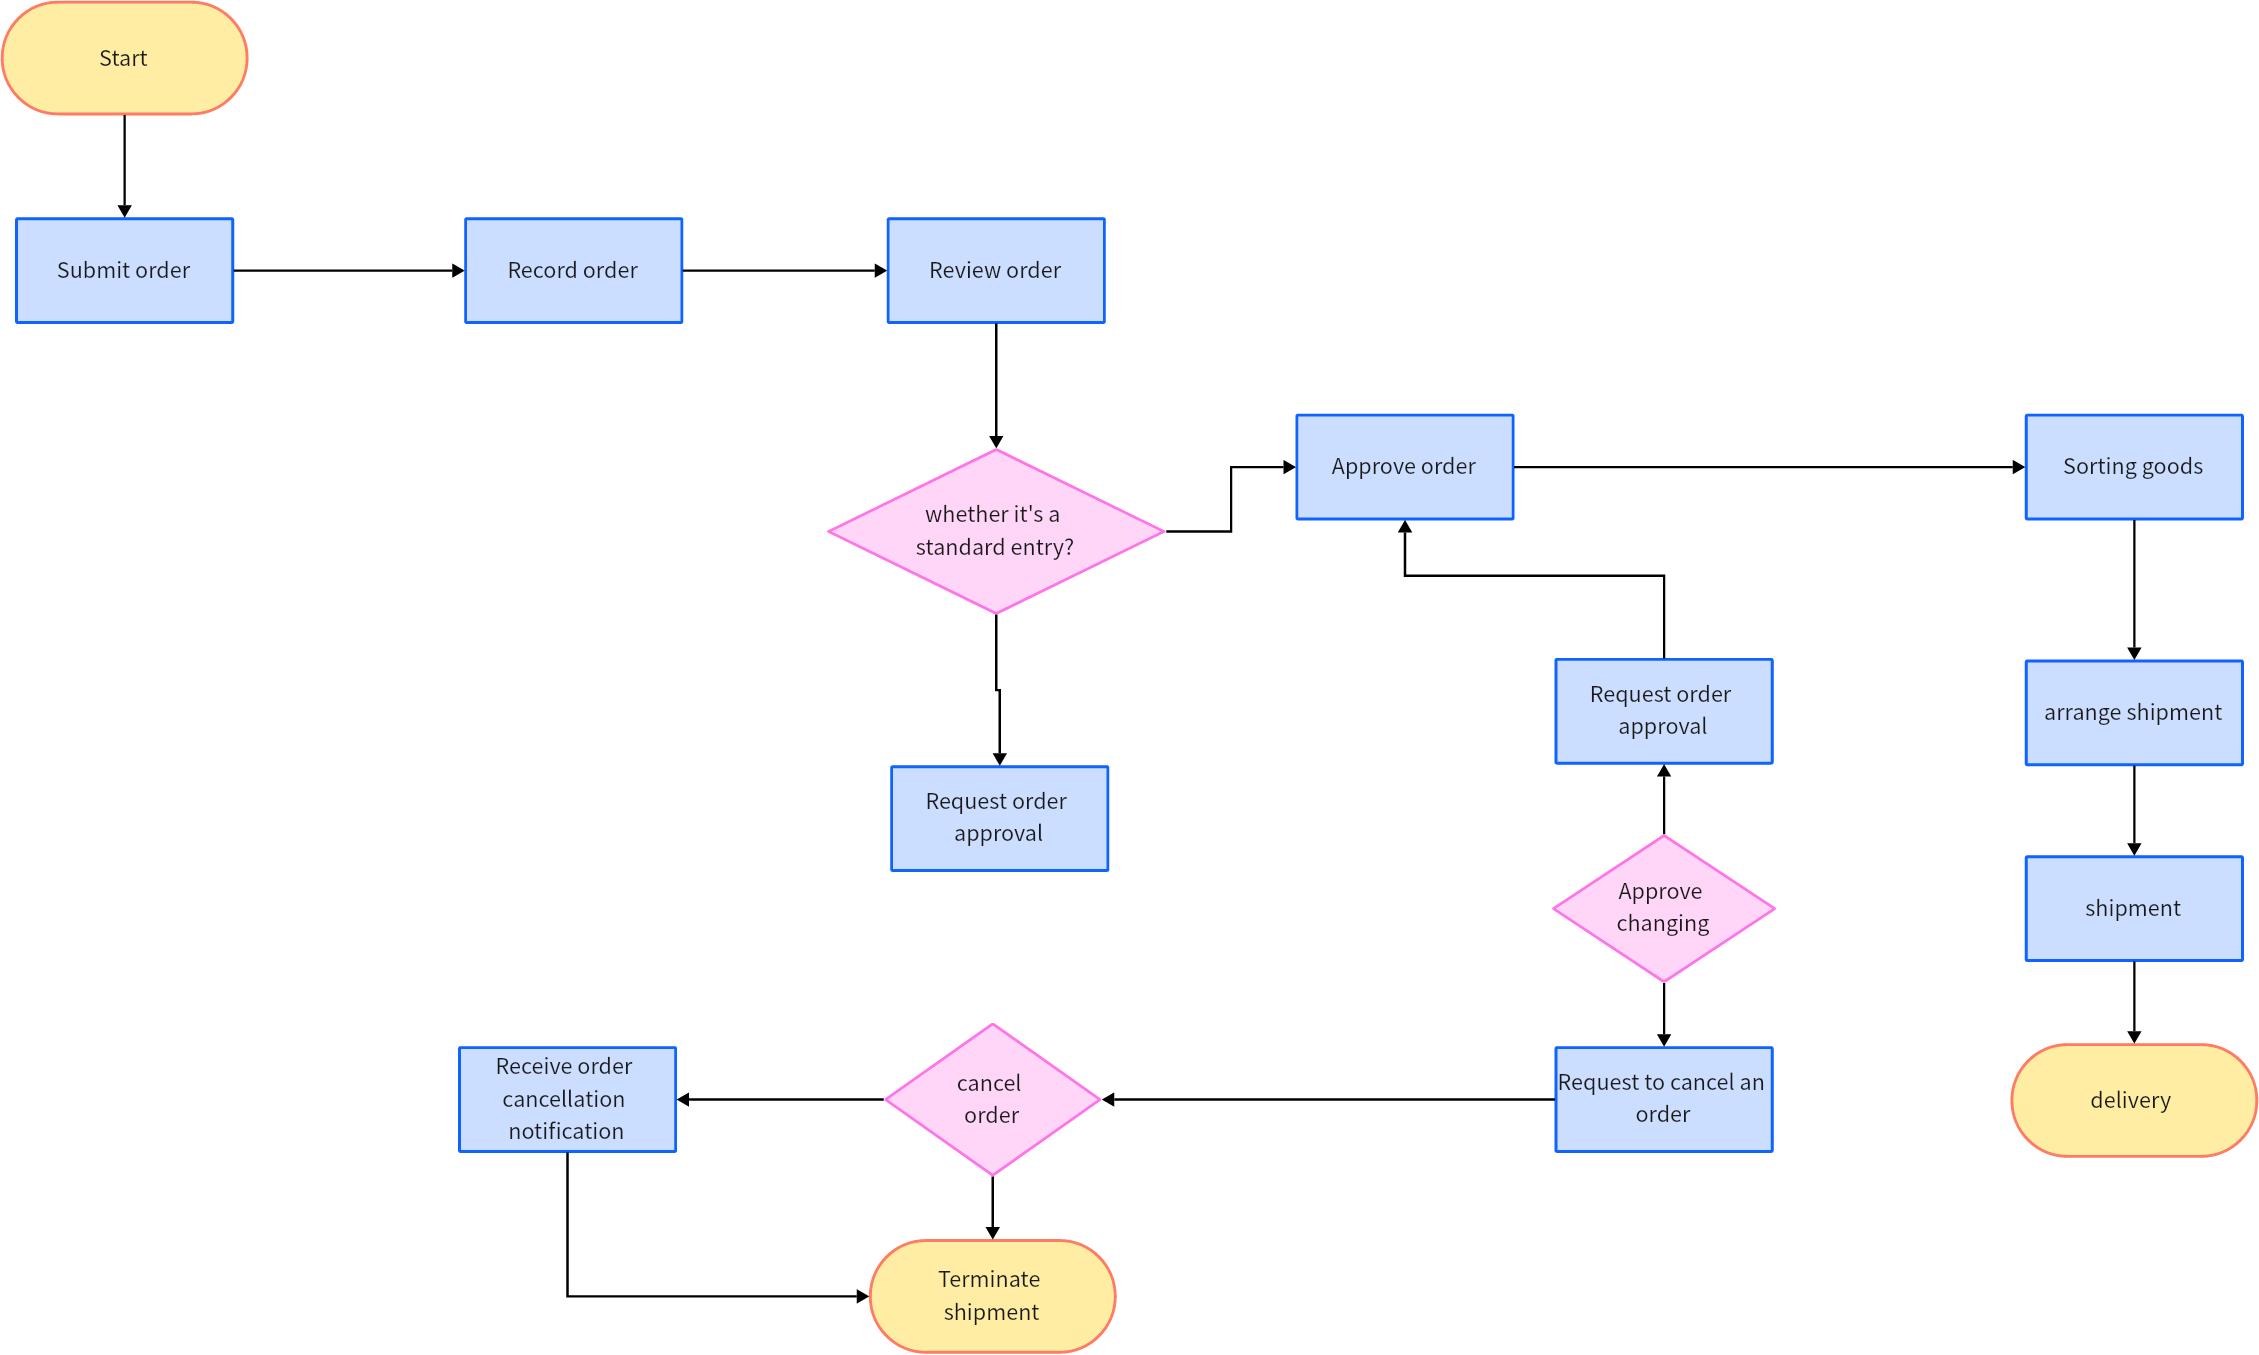
This diagram includes different symbols or shapes representing various elements of the process, such as operations, decision points, and flow of control. These symbols are interconnected by arrows that show the direction of the process flow.
When to Use a Process Flow Diagram
Process flow diagrams can be employed in a wide variety of contexts, including but not limited to:
Process Understanding
PFDs are invaluable for understanding how a particular process functions, especially if it is complex or involves multiple stakeholders.
Process Improvement
By visualizing a process in detail, PFDs can help identify areas of inefficiency or waste, highlighting potential areas for improvement.
Training & Documentation
PFDs can serve as training materials for employees to understand a particular process or as documentation for future reference and standardization.
Benefits of Process Flow Charts
The utilization of process flow charts offers several benefits:
- Enhanced Understanding: PFDs simplify complex processes into understandable visual formats, promoting enhanced comprehension amongst all stakeholders.
- Effective Communication: These diagrams serve as effective tools for communicating how a process functions to different stakeholders, from team members to clients and senior management.
- Efficient Problem-Solving: By making the process structure visible, PFDs enable easier identification of bottlenecks, redundancies, or errors, thereby facilitating efficient problem-solving.
Process flow charts are essential tools for business optimization. They allow organizations to better understand their processes, communicate them effectively, and uncover improvement opportunities for more efficient operations.
How to Read and Interpret a Process Flow Diagram
A process flow diagram (PFD) provides a graphical representation of a process, making it easier to understand, analyze, and communicate. However, for someone unfamiliar with these diagrams, it might seem like a confusing array of shapes and lines. So, how does one interpret a process flow diagram? Here's a step-by-step guide:
Step 1: Recognize the Diagram Elements
First, you need to recognize the different elements present in the diagram. These include symbols, arrows, and text:
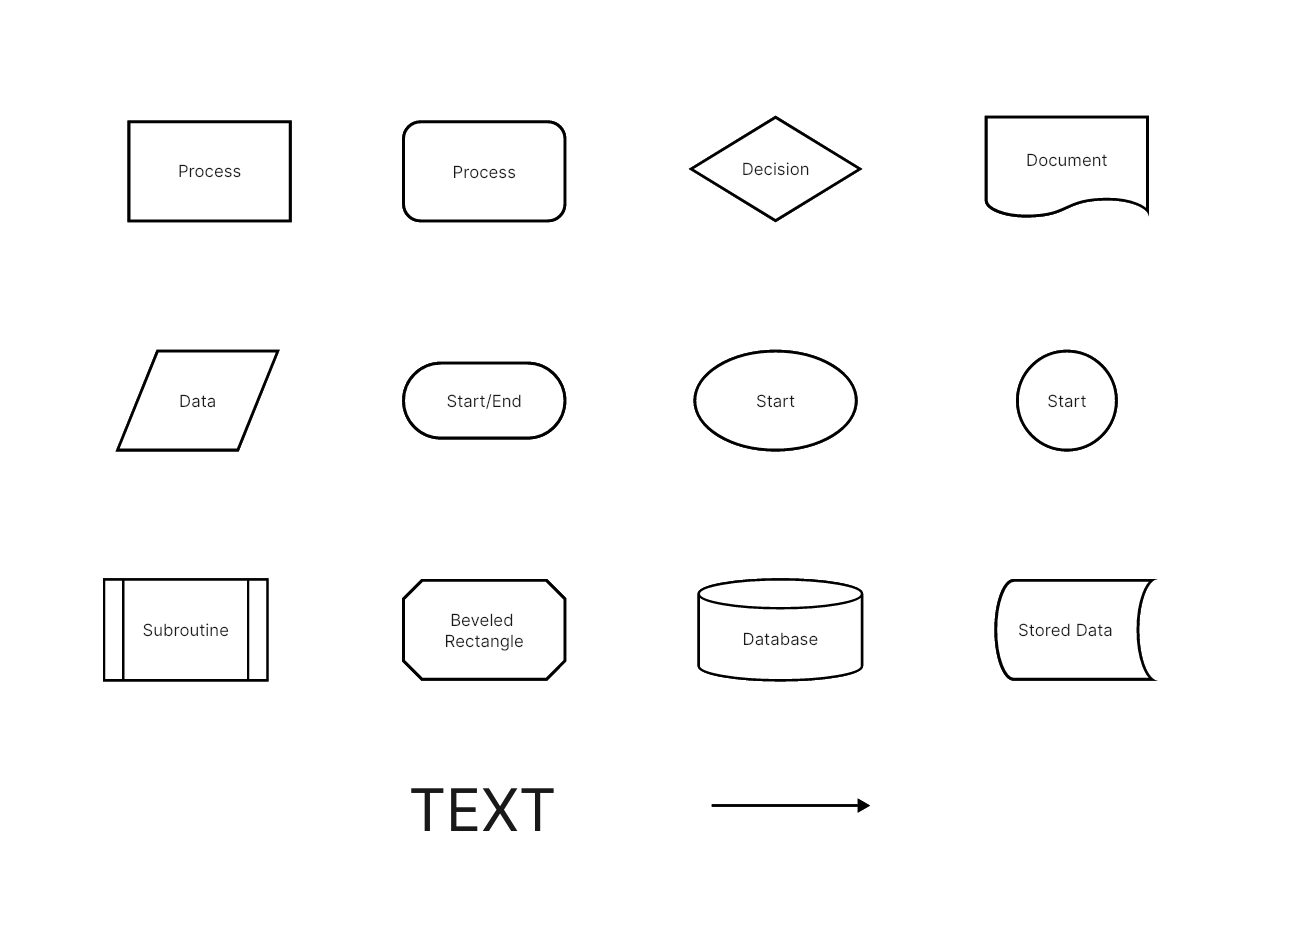
- Symbols: Different shapes or symbols represent different parts of the process. For example, rectangles usually represent tasks or operations, diamonds symbolize decisions, and ovals are used for the start and end points.
- Arrows: Arrows show the direction of the process flow, connecting different tasks and decisions.
- Text: Each symbol is accompanied by text explaining what it represents in the process.
Understanding these elements is crucial for interpreting a process flow diagram.
Step 2: Identify Start and End Points
Identifying the start and end points of the process is your next step. These points are typically represented by ovals or circles and labeled appropriately. They give you an idea of where the process begins and where it should ideally conclude.
Step 3: Follow the Process Flow
Start at the designated beginning point and follow the arrows through the diagram. This way, you'll trace the path that the process takes from start to finish.
Step 4: Understand the Tasks and Decisions
As you follow the process flow, take note of the tasks and decisions represented by the symbols. Understanding what each symbol stands for and how it contributes to the overall process is critical to interpreting a PFD correctly.
Step 5: Analyze Process Branches
If you encounter decision points (diamond shapes), you’ll notice they have more than one arrow coming out from them, indicating multiple possible paths or branches. These are usually labeled with the condition that determines which path will be taken.
Reading and interpreting a process flow diagram may seem complex initially, but with practice, it becomes a straightforward task. Once you're able to interpret these diagrams, you can leverage them for better understanding and communication of processes.
How to Create a Process Flow Diagram with Boardmix
Creating a Process Flow Diagram (PFD) is an integral part of many industries as it visually illustrates the flow of a process from start to finish. Boardmix is a popular tool for creating these diagrams due to its ease of use and comprehensive set of features. Here's a step-by-step guide on how to create a PFD using Boardmix.

Step 1: Identify the Process
The first step in creating a process flow diagram is understanding and identifying the process you want to illustrate. This includes all the tasks, steps, decisions, and outputs involved.
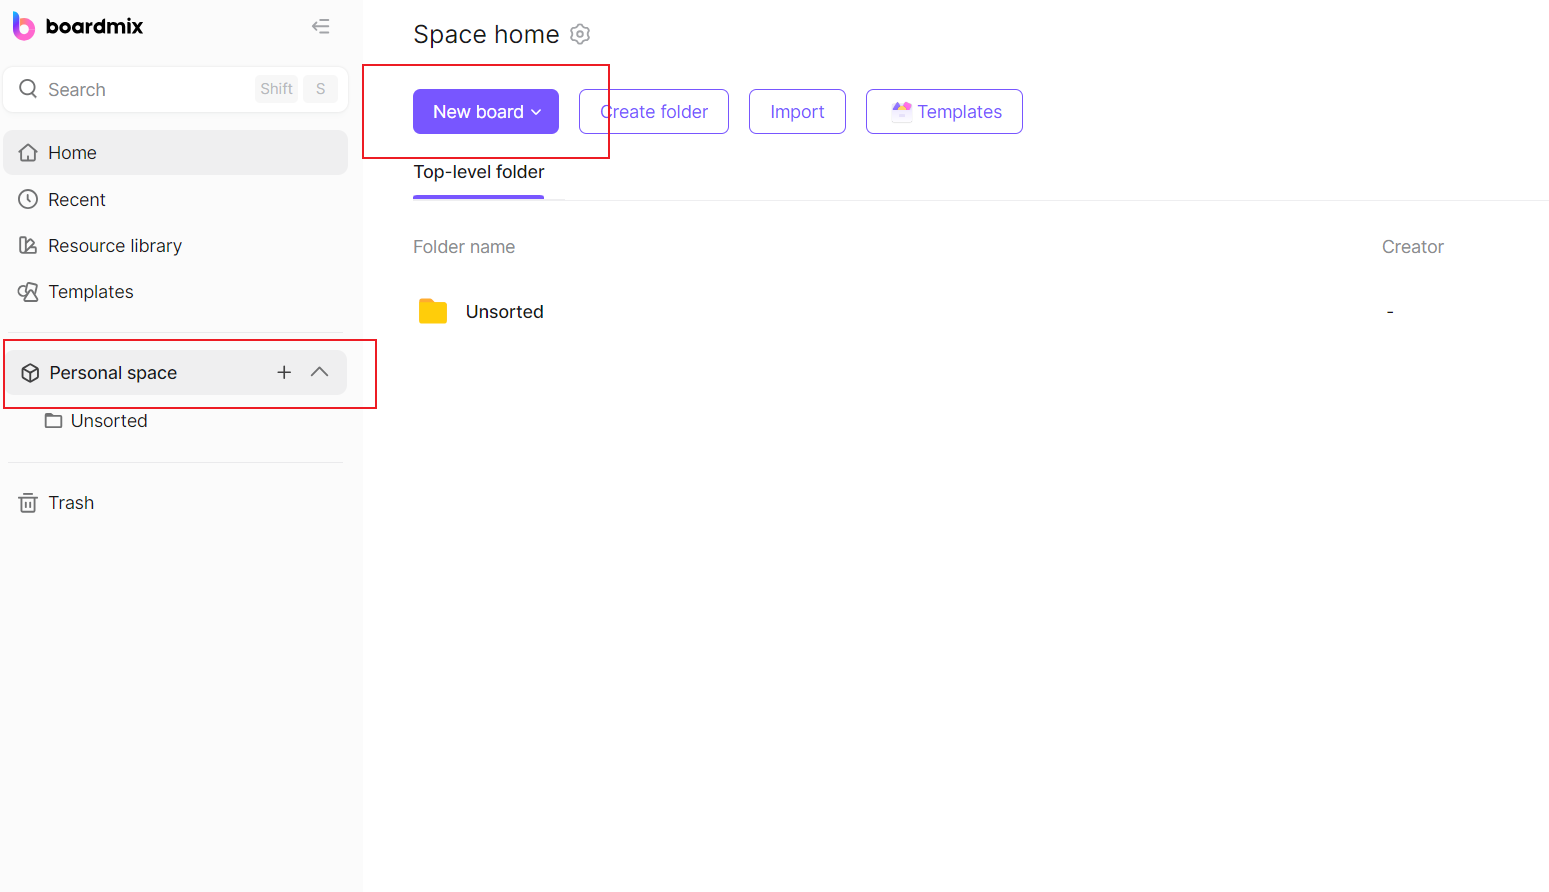
Step 2: Open Boardmix and Start a New Diagram
Open the Boardmix application on your device and click on the "New board" option. This will open a blank canvas for you to start creating your PFD.
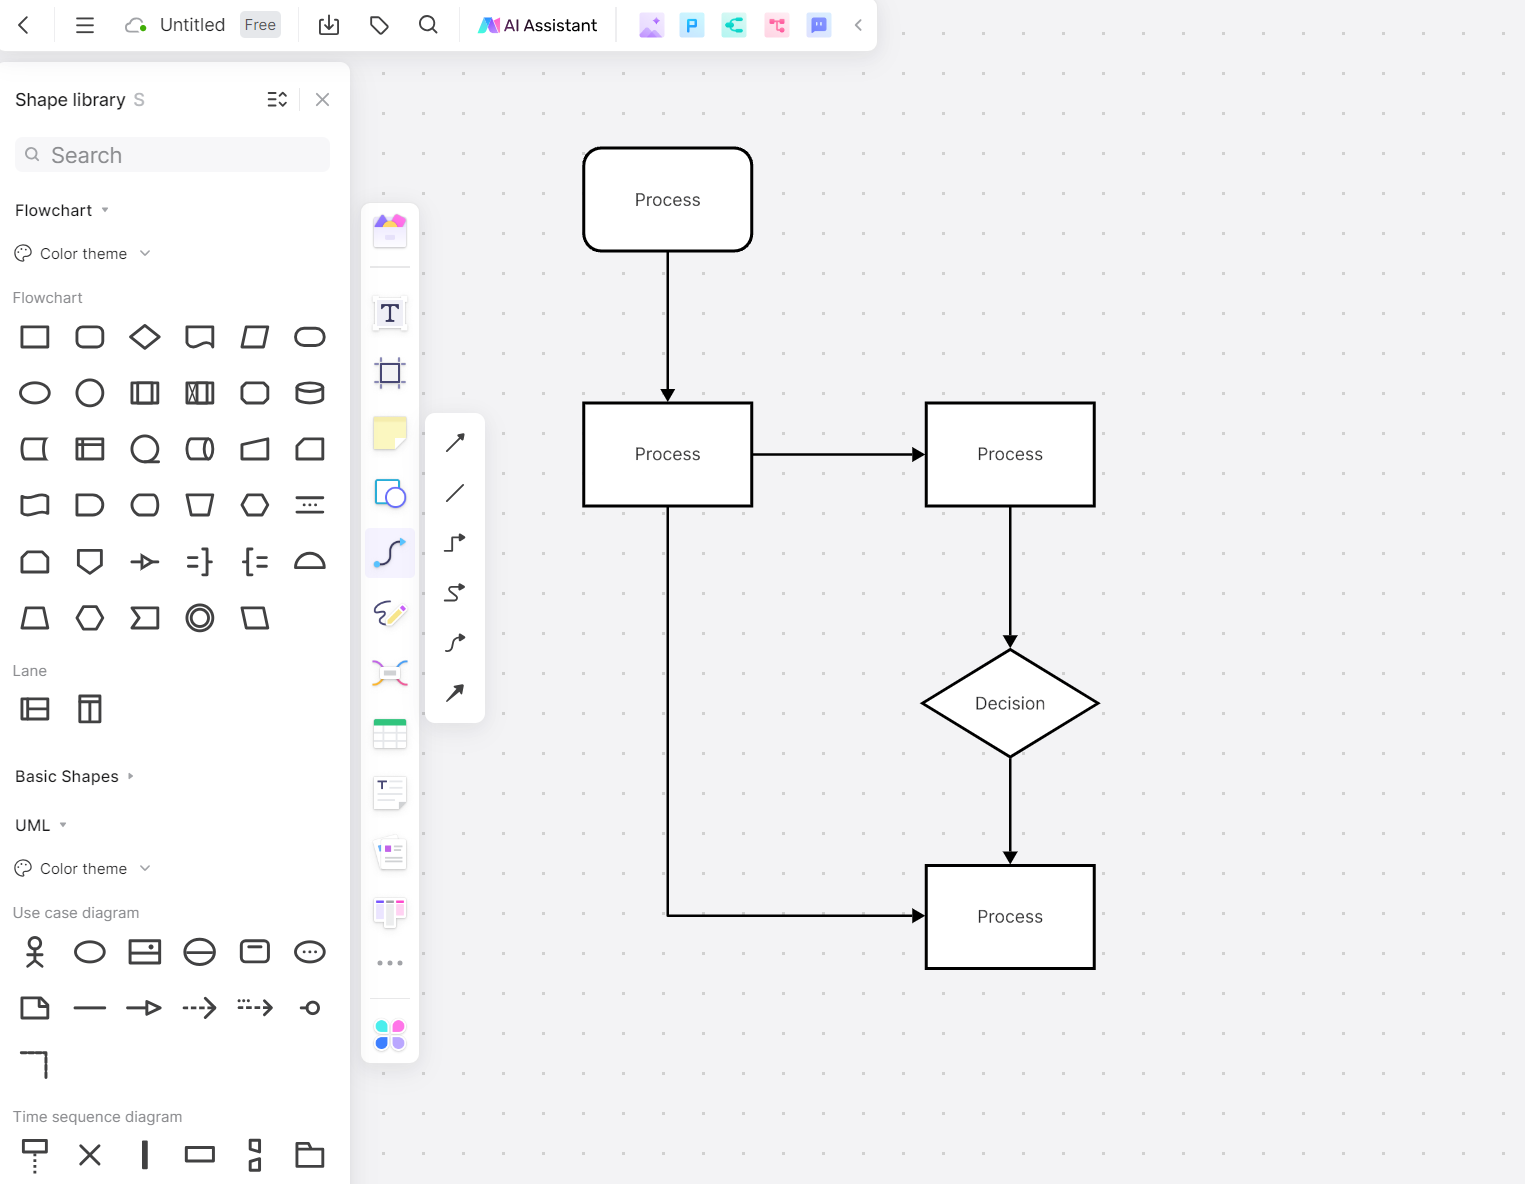
Step 3: Add Symbols
In the Boardmix interface, you will find a toolbar with different symbols and shapes. These represent different steps, processes, and decision points in your process flow diagram. Simply drag and drop these onto your canvas.
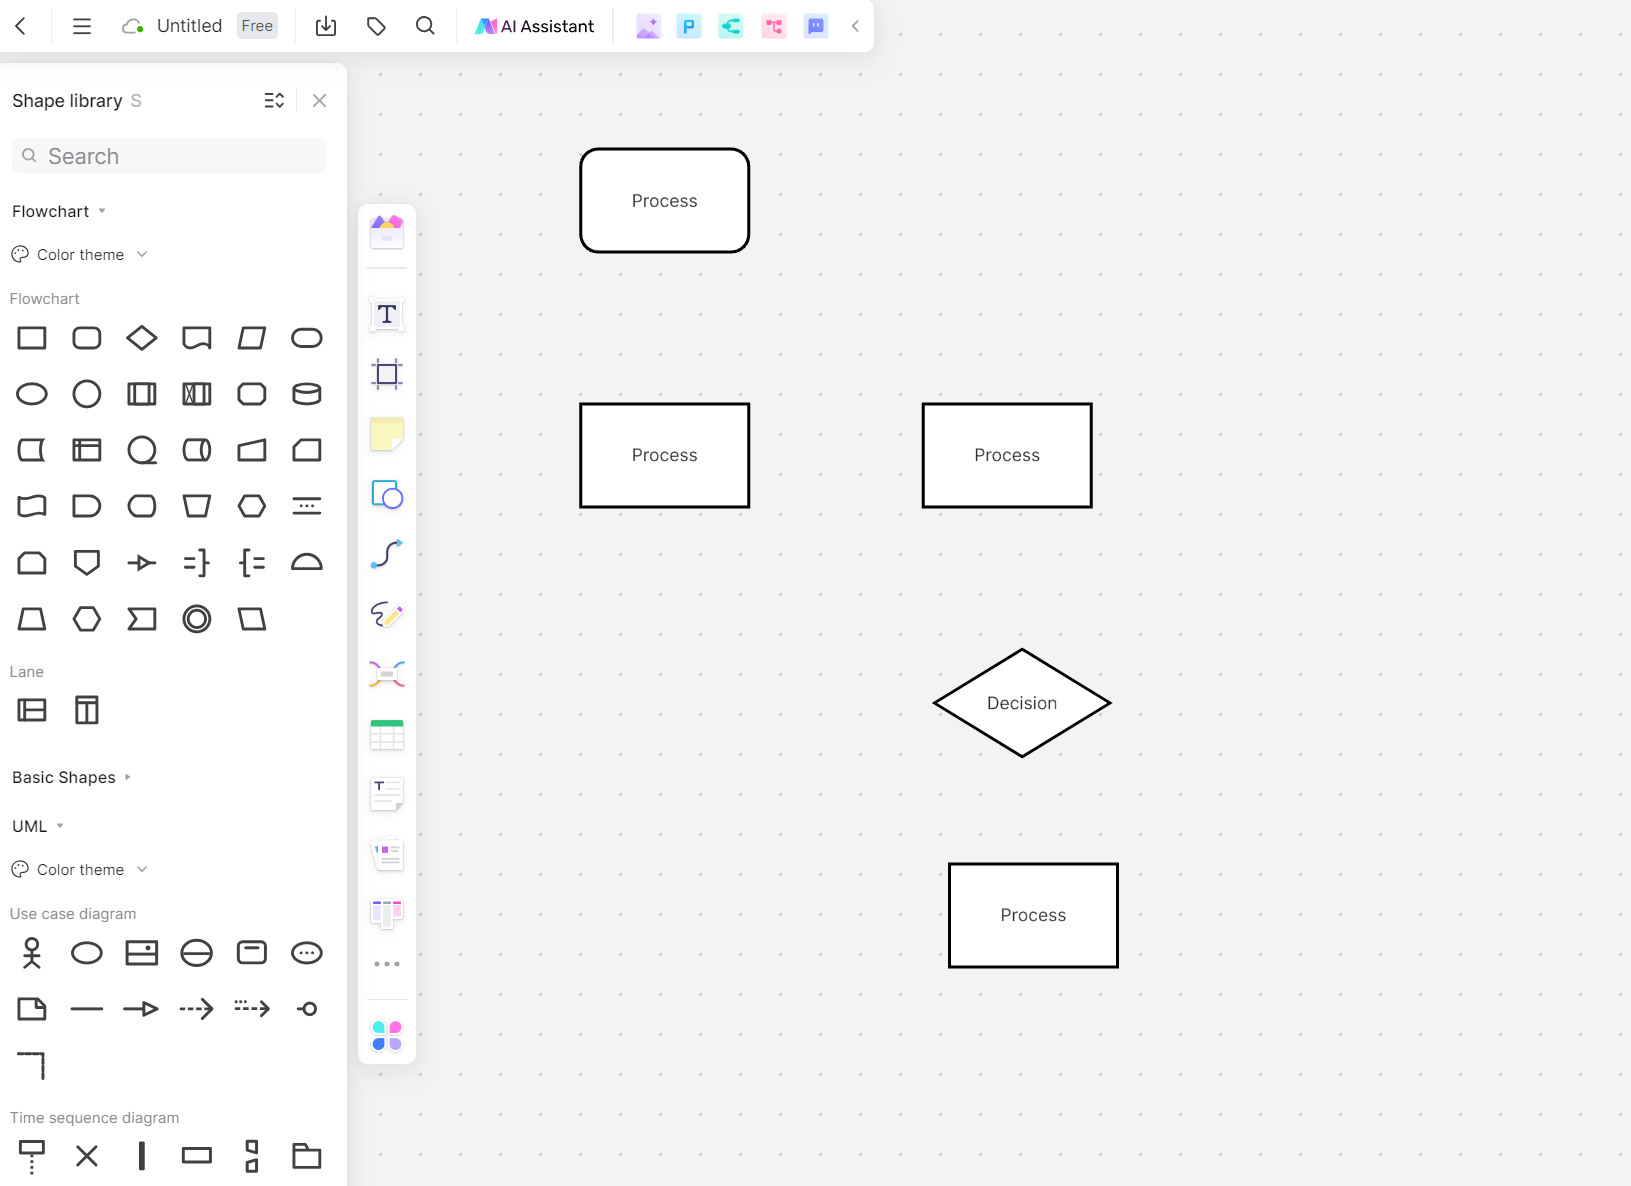
Step 4: Connect the Symbols
Next, connect these symbols using arrows to indicate the flow of the process. Boardmix provides easy-to-use connectors that automatically snap into place between symbols.
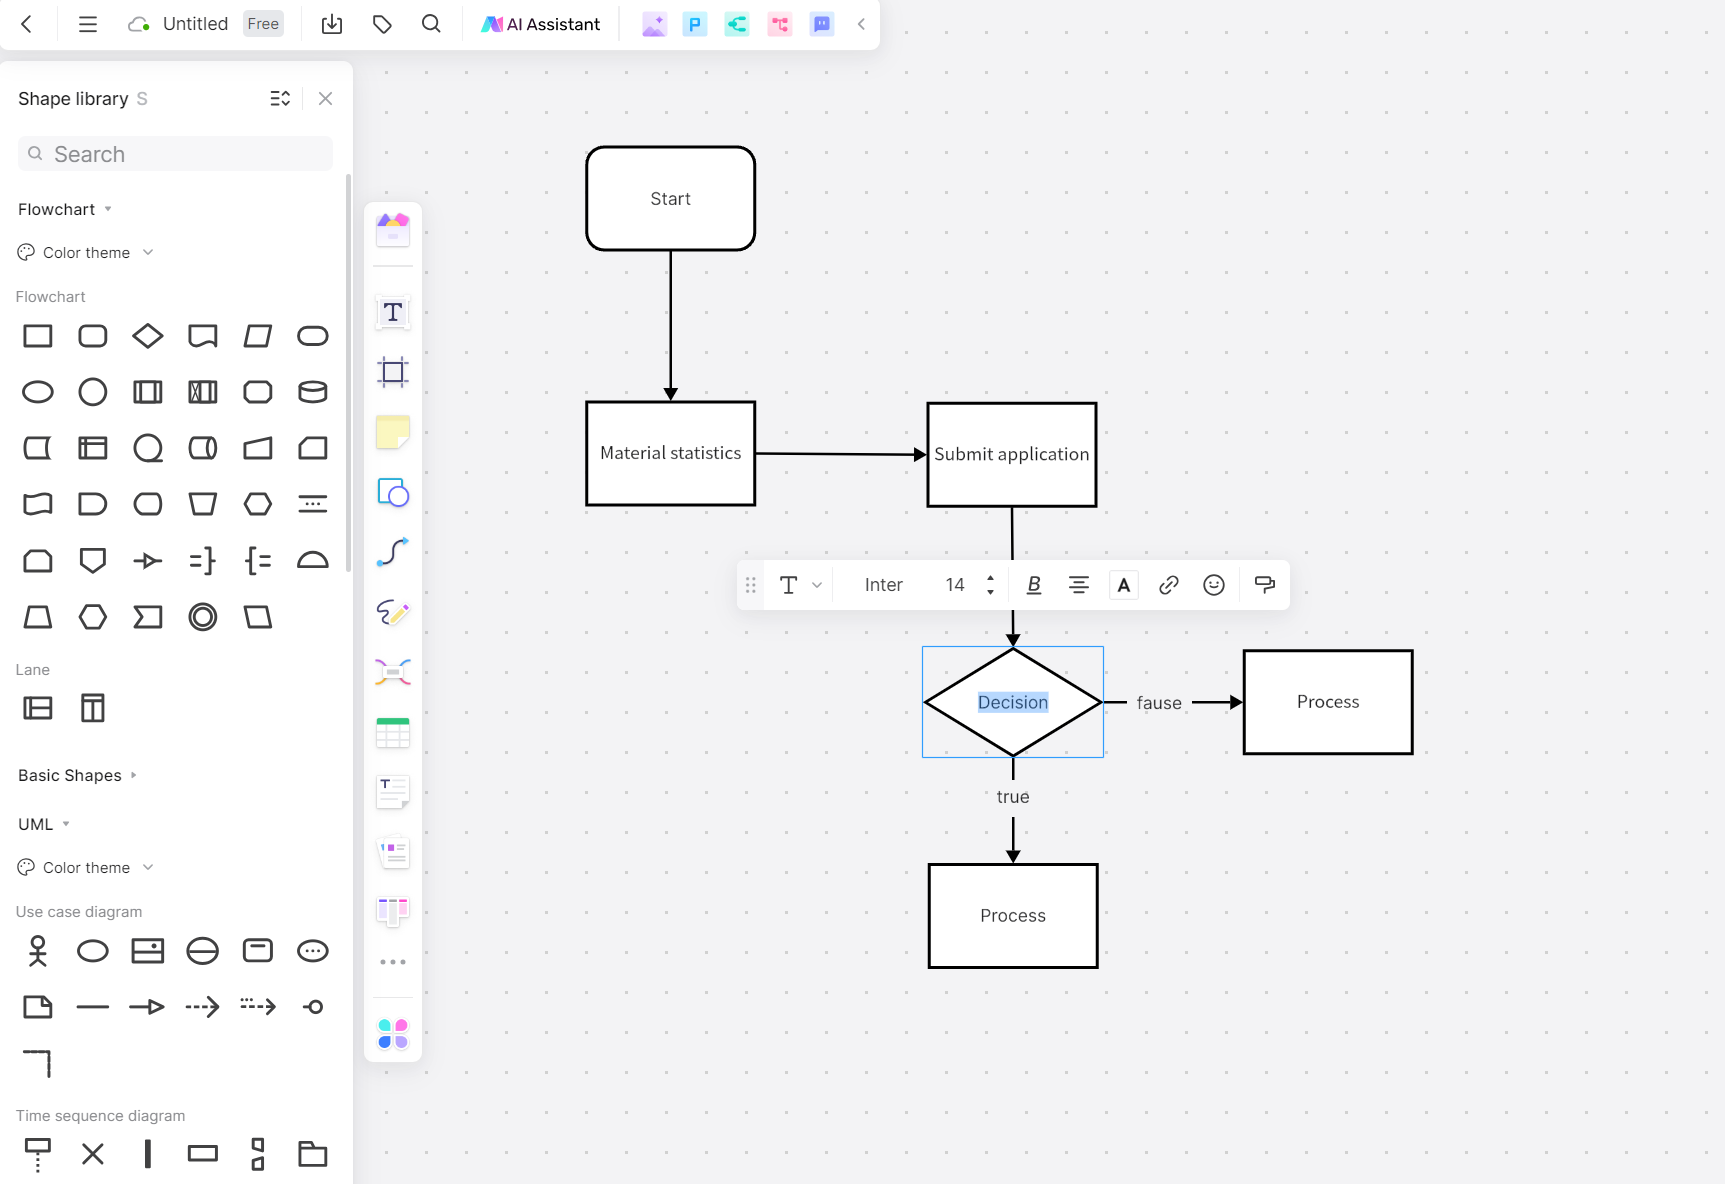
Step 5: Label Each Step
After placing and connecting the symbols, you need to label each symbol with a brief description of the step or decision it represents. To do this, just click on the symbol and type in the appropriate text.
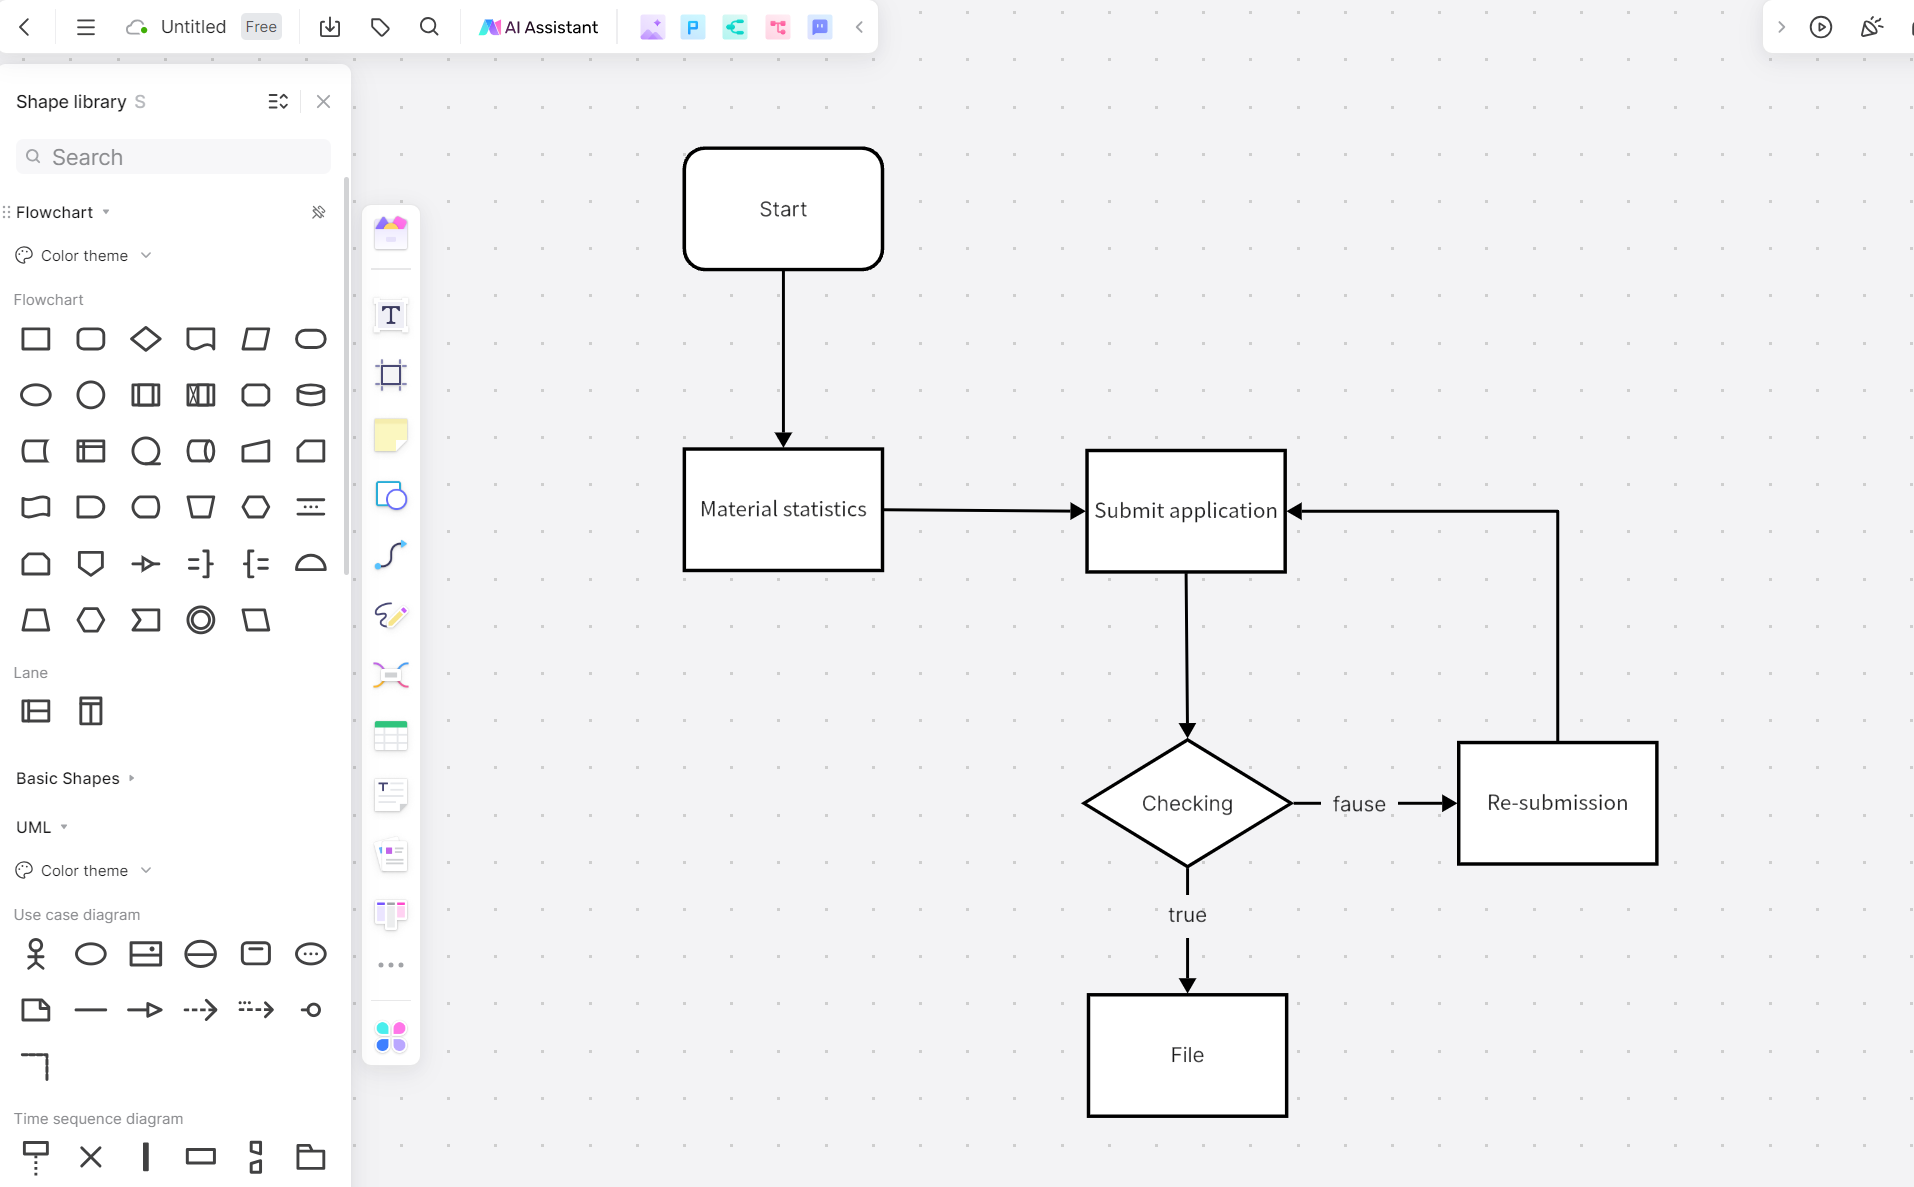
Step 6: Validate the Diagram
Once all symbols are in place and labeled, validate your diagram. This involves checking that all steps and decisions are accurately represented and that the process flows logically from start to end.
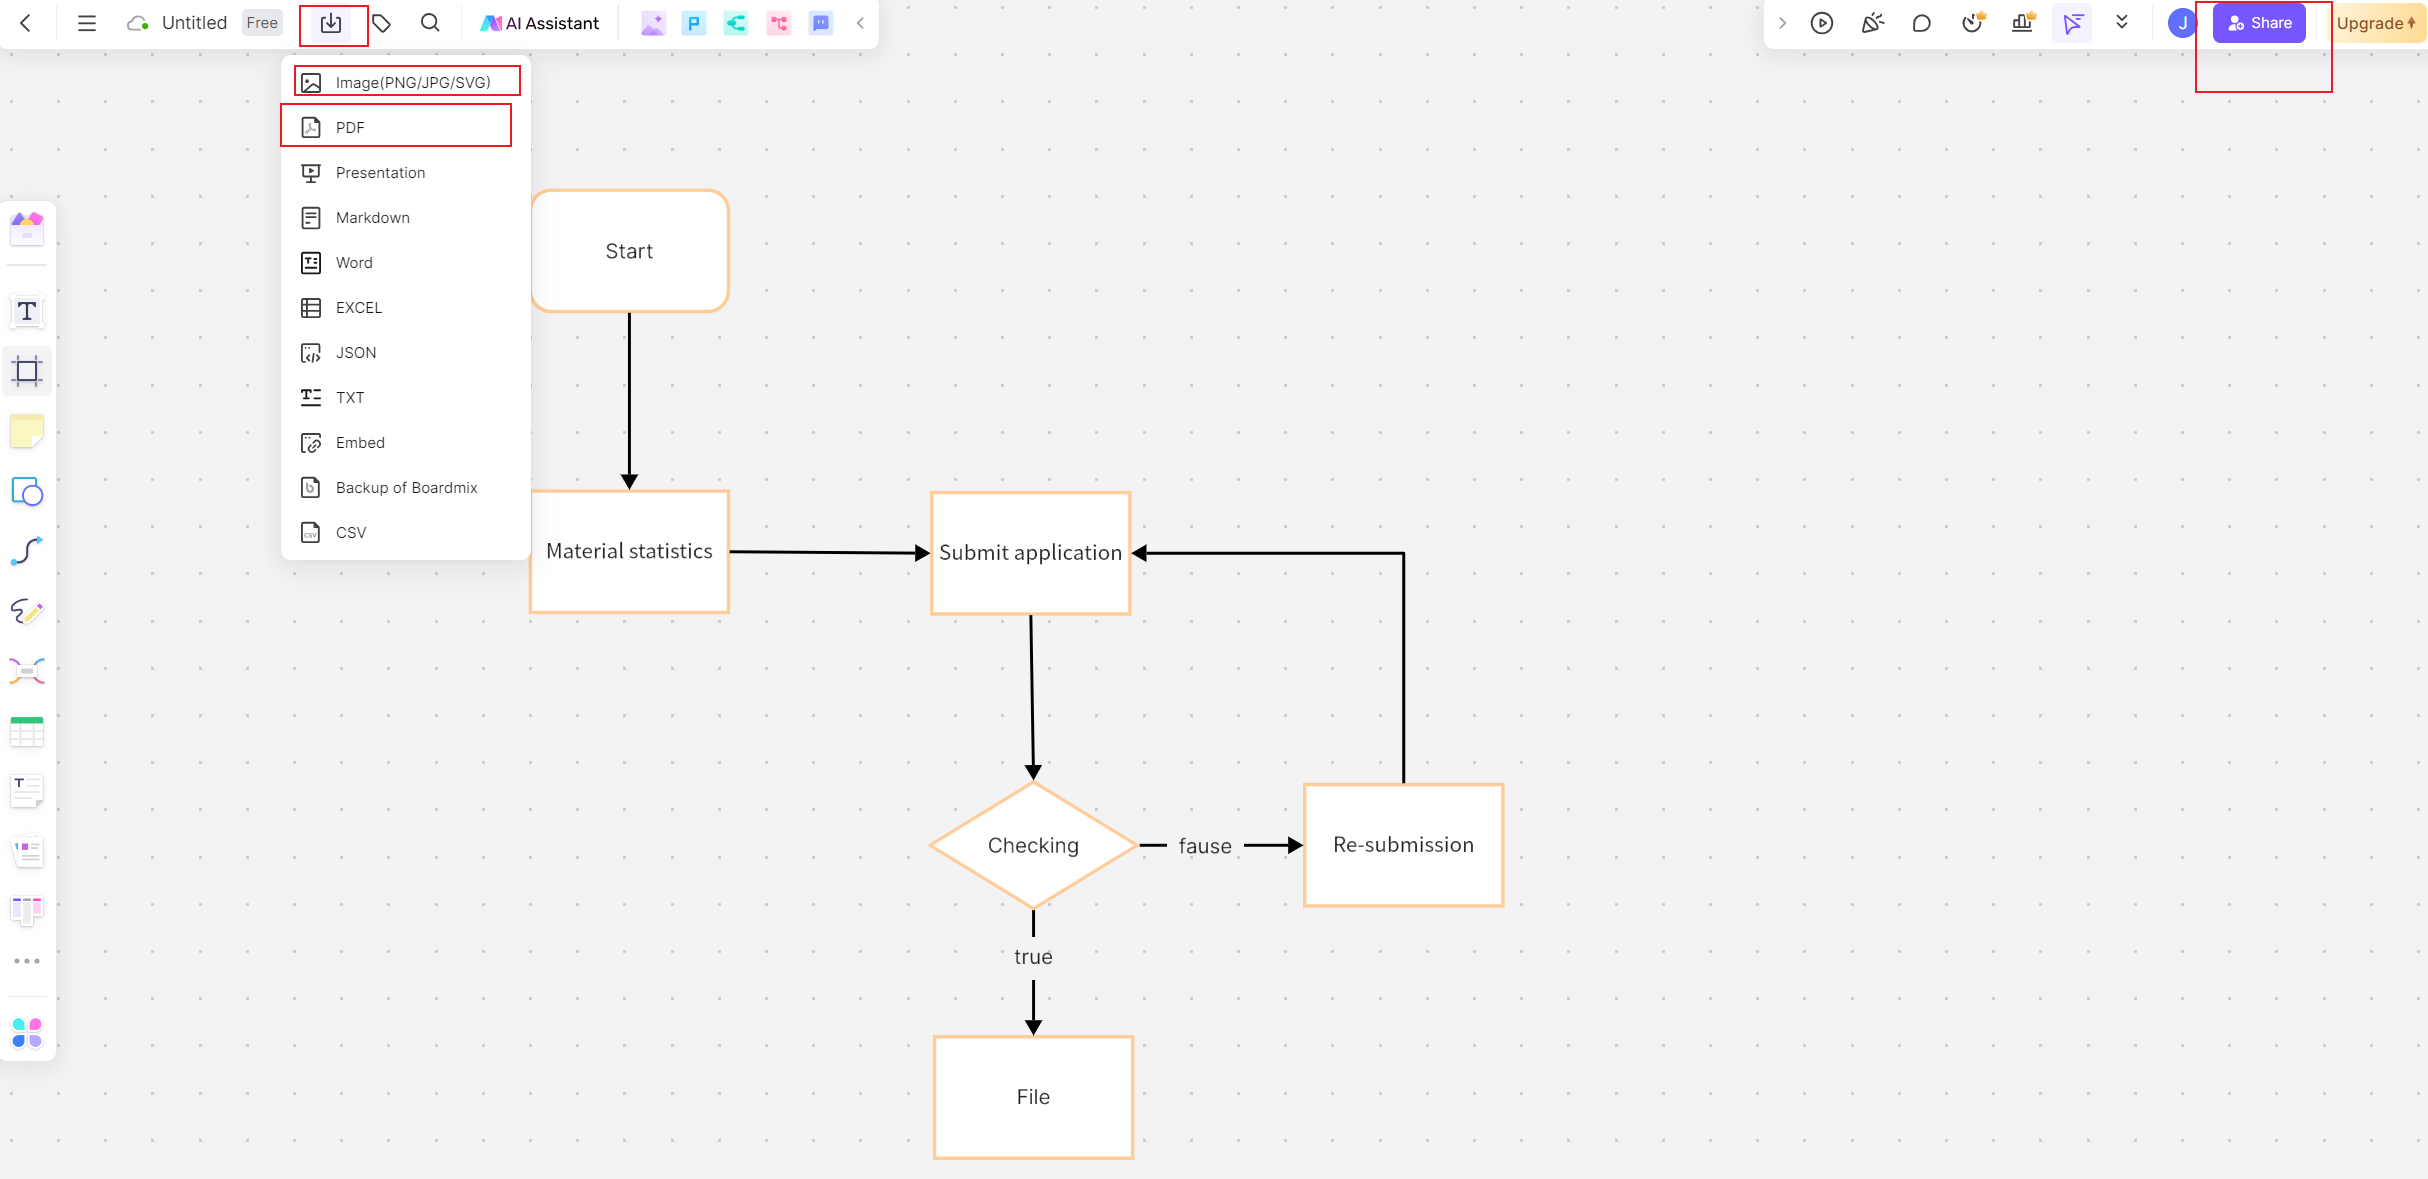
Step 7: Share or Export Your Diagram
When you're satisfied with your PFD, share with others for collaboration. You can also export it as an image or PDF for use in presentations or documentation.
By following these steps, you can easily create effective and comprehensive process flow diagrams with Boardmix, making complex processes easy to understand and manage.