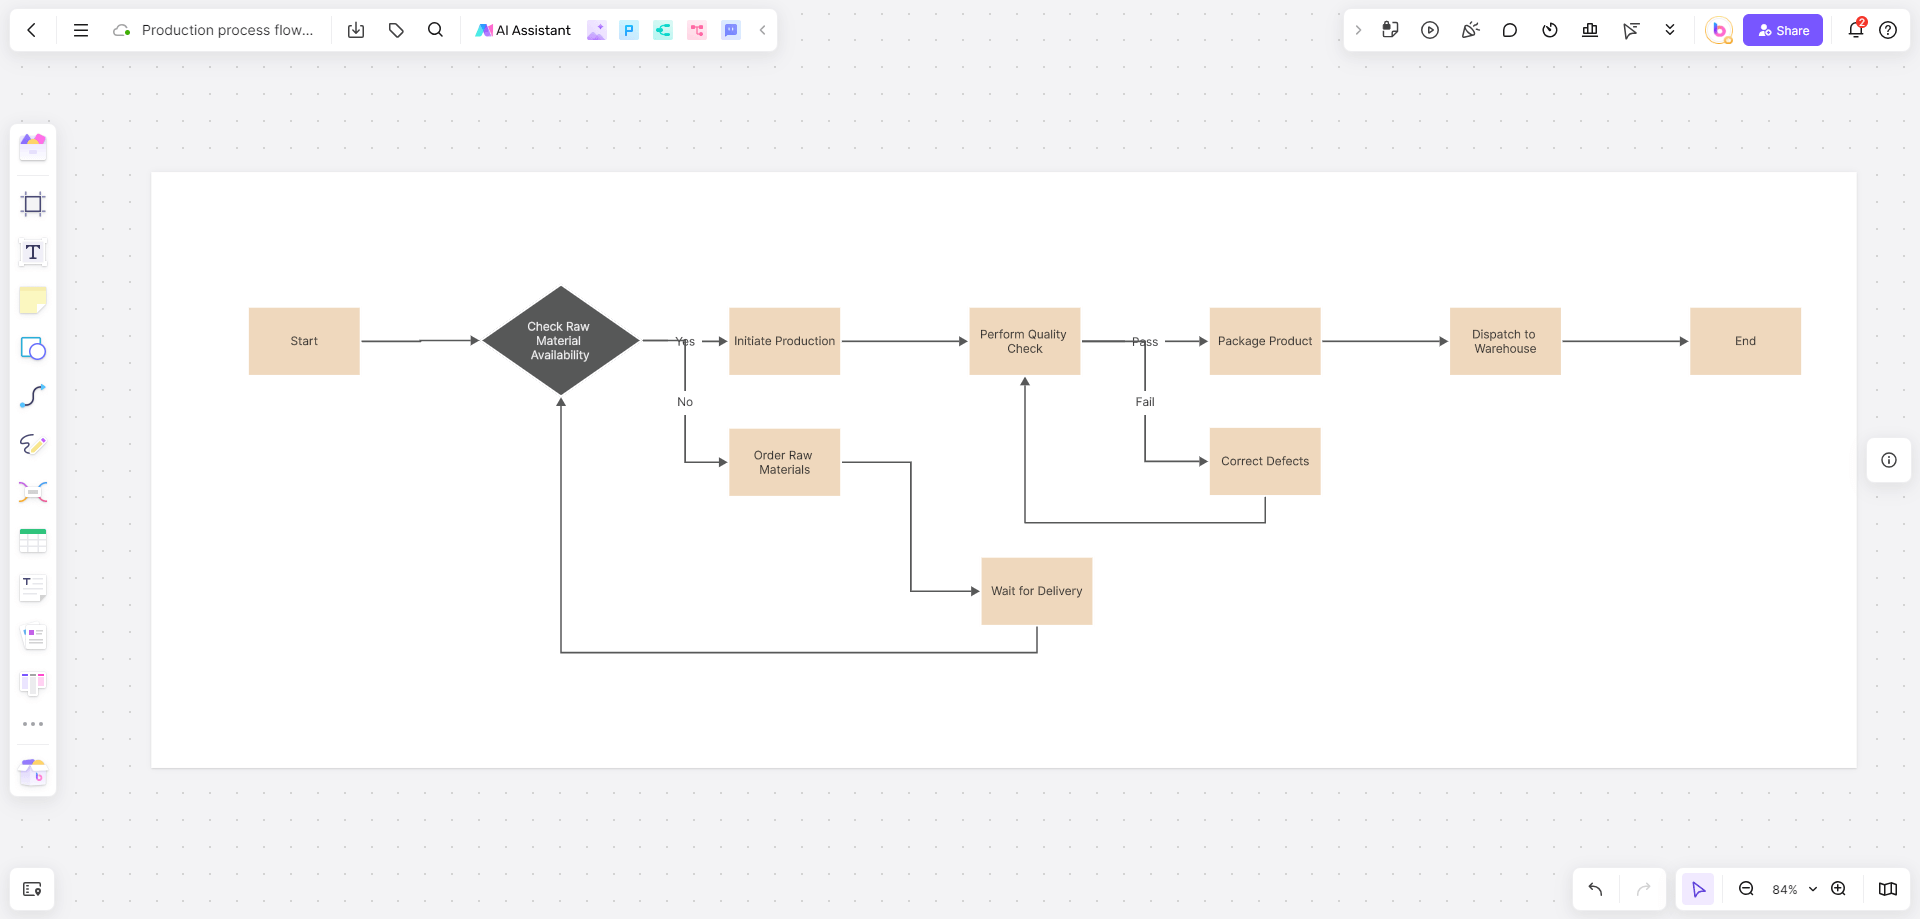
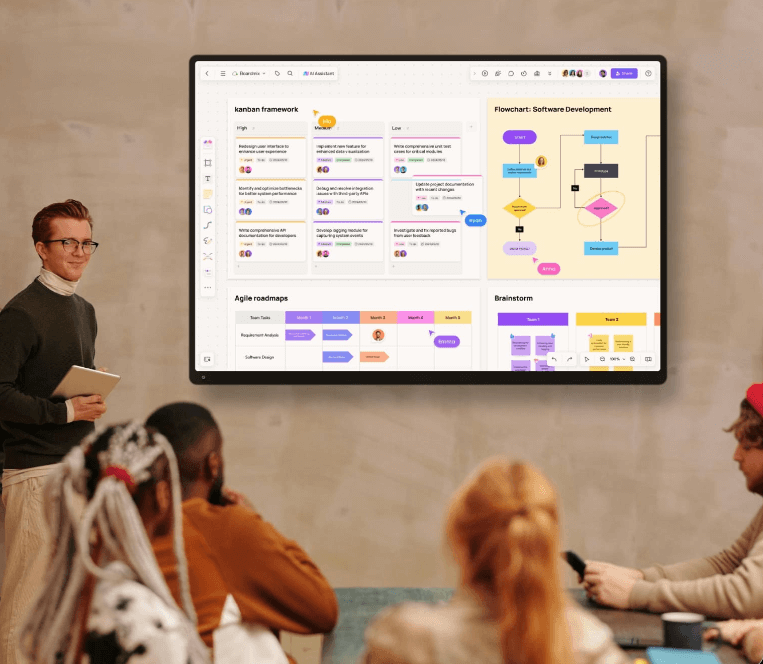
Microsoft Word has established itself as the essential tool for creating documents of all kinds, from simple texts to more elaborate reports and presentations. However, we often underestimate its advanced capabilities, one of which is creating timelines. This detailed tutorial will guide you through the step-by-step process of how to create a timeline in Word, while also introducing the brand new online tool Boardmix, so you can present your data in a more visual and impactful way.
What is a timeline?
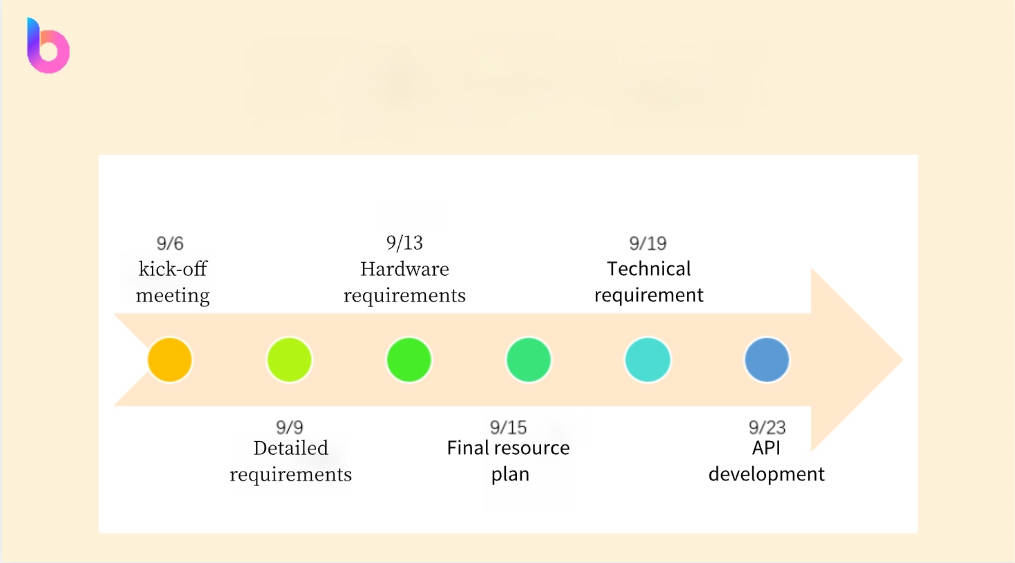
Click to create timeline on Boardmix
A timeline is a graphical representation that illustrates the sequence of events in a given period. It is commonly used in academic, business, and personal settings to visualize the progression of projects, research, stories, or any other type of process over time. This tool is especially useful for presenting complex information in a simple and understandable way, allowing readers to quickly grasp the essence of what is being conveyed.
Why create a timeline in Word?
Creating a timeline in Word has several advantages. First, it's an effective way to visualize a sequence of events or milestones in an easy-to-understand format. This can be particularly useful in business or academic settings, where it can be used to track the progress of a project, illustrate a company's history, or summarize research findings.
Plus, creating a timeline in Word doesn't require any additional software or advanced technical skills. Although Word is primarily known as a word processor, its capabilities go far beyond that. With the right tools and a little practice, you can create attractive, professional timelines right in Word.
Last but not least, timelines created in Word are completely customizable. You can adjust the colors, fonts, and styles to fit your specific needs and reflect your brand or personal style.
How to create a timeline in Word?
We're going to break down the process into simple, easy-to-follow steps so you can create your timeline in Word with ease.
Step 1: Open a New Document in Word
Start by opening Microsoft Word and select the option to open a new blank document.
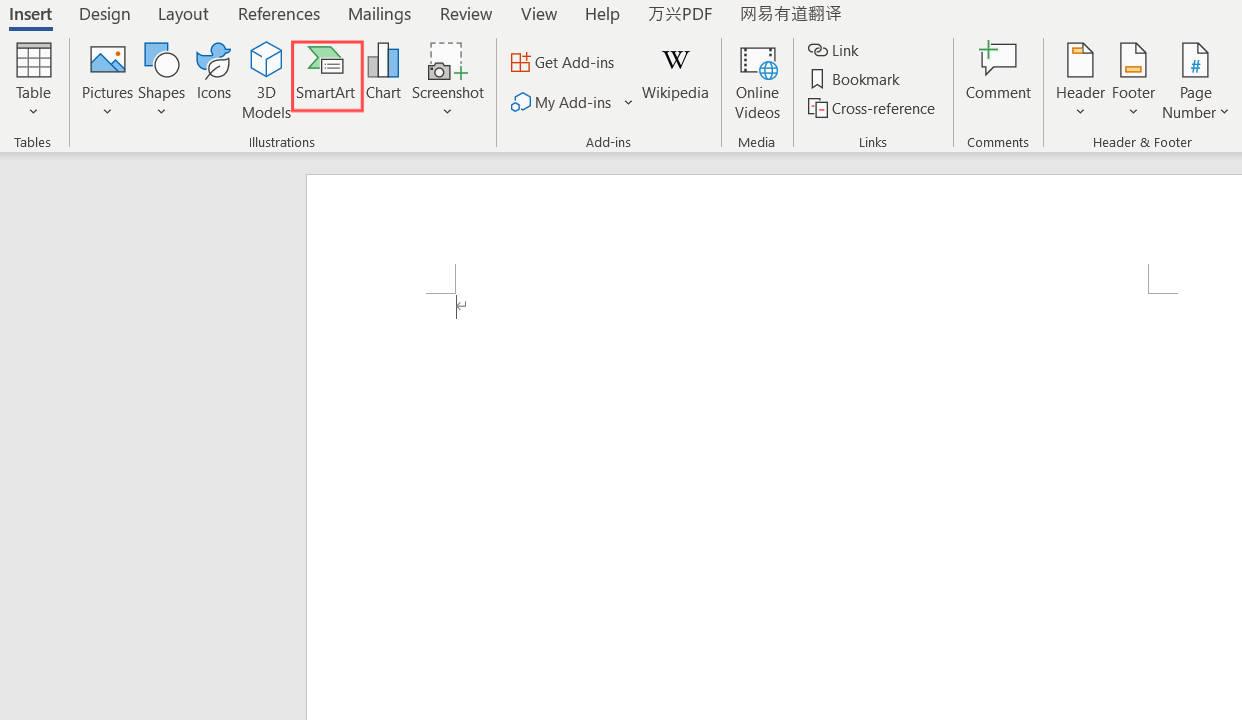
Step 2: Access the SmartArt Tool
Go to the 'Insert' tab in the main menu and select 'SmartArt'. The SmartArt tool is incredibly useful for creating visual graphics, including timelines.
Step 3: Select the Right Chart Type
Within the SmartArt dialog box, find and select the 'Process' type that best fits the timeline you want to create. Here you'll find options like 'Basic Timeline', 'Process Circle', 'Linear Process', and more.
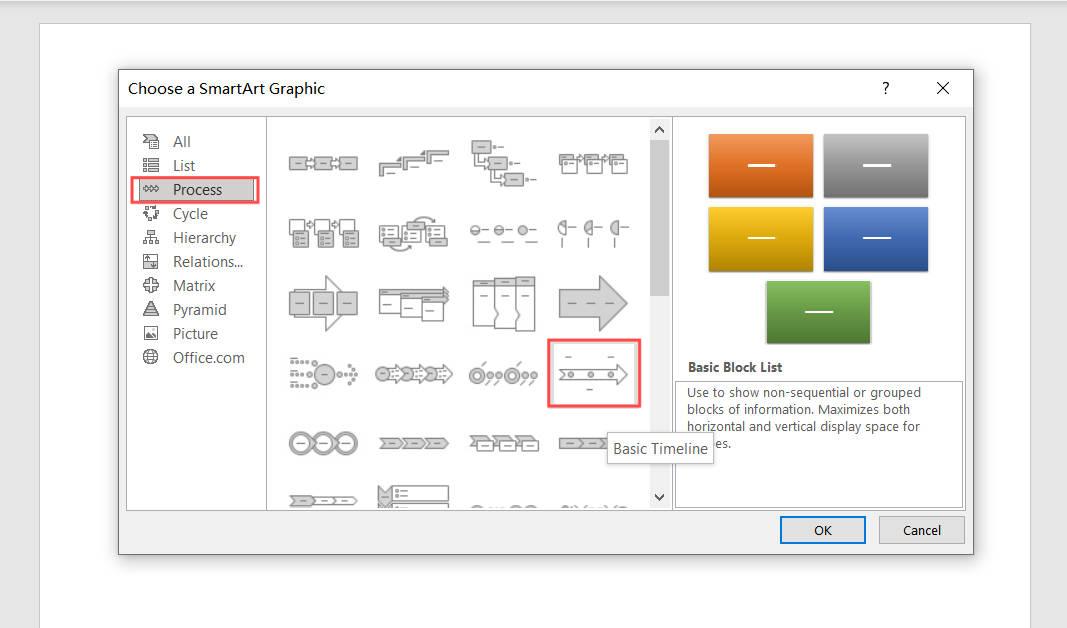
Step 4: Customize Your Timeline
Once you've selected the chart, it will be inserted into your document. From here, you can customize it to suit your needs. You can add or remove points on the timeline, change the color and style of the text, and even add special effects.
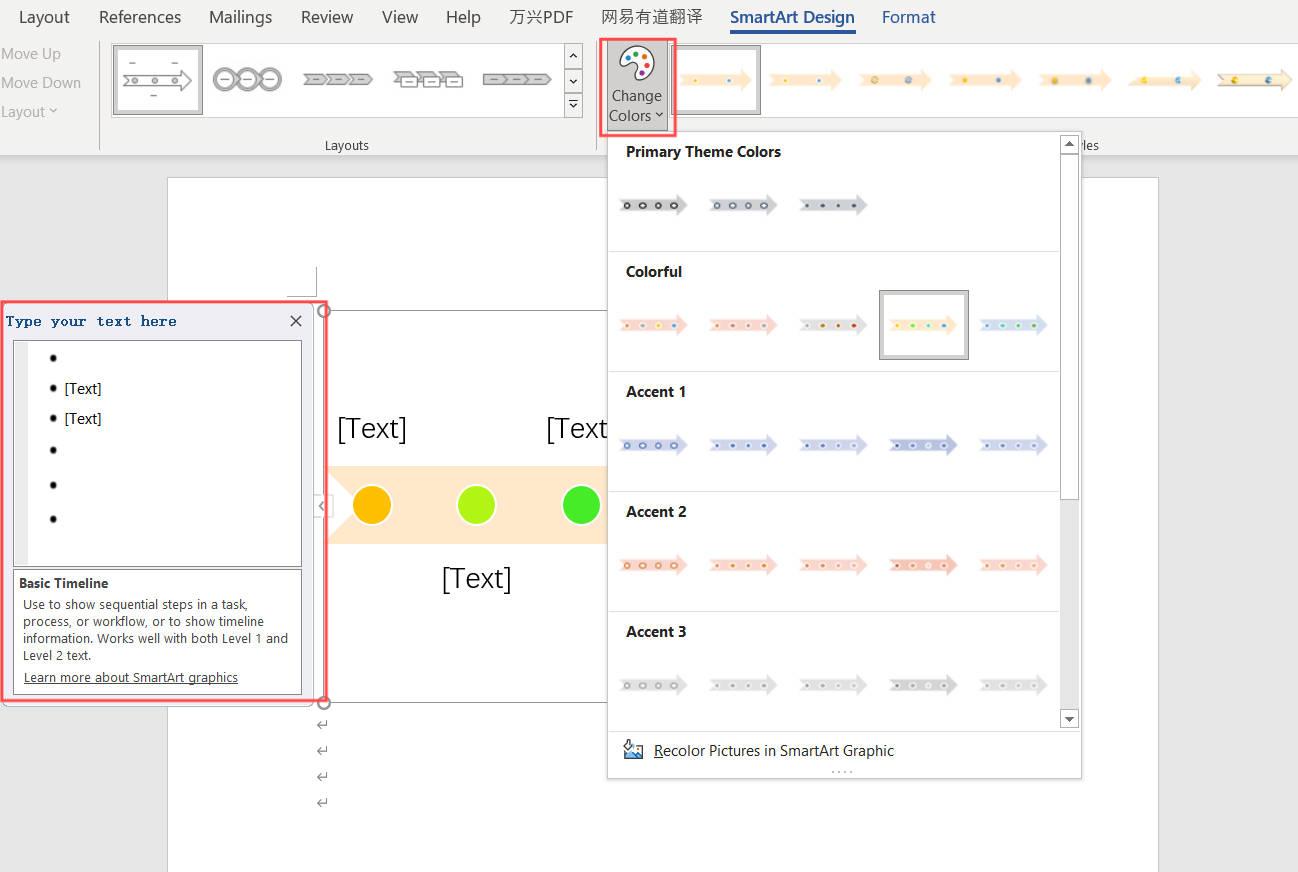
Step 5: Enter your data
Click on the text boxes inside the SmartArt graphic to start entering your data. Depending on the type of chart you choose, you might have the option to add dates, descriptions, and other relevant details.
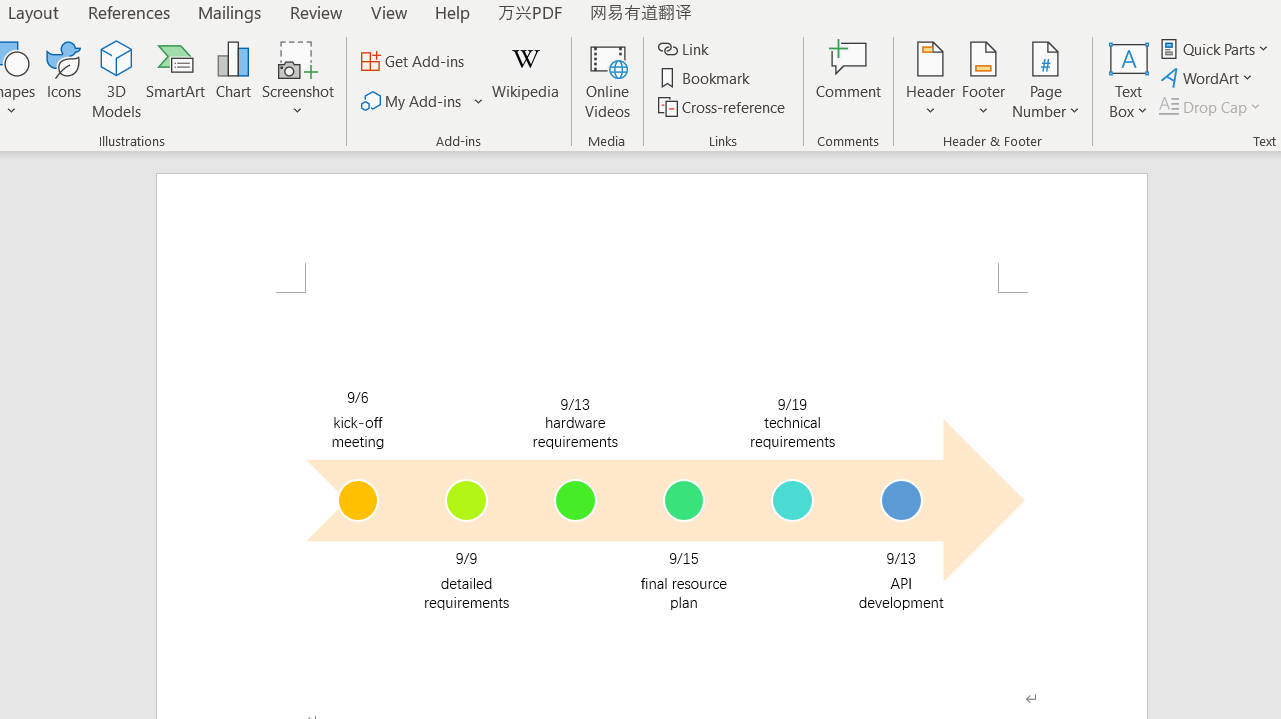
Step 6: Save and share your timeline
Finally, after you customize and fill out your timeline, you can save it and share it with anyone you want.
In addition to Word, PowerPoint is also an effective tool from Microsoft for timeline creation. For the detailed guide on how to create timeline in PowerPoint, visit How to Create a Timeline in PowerPoint: Step-by-Step Guide.
How to create a timeline in Boardmix?
Boardmix is a project management software application that also allows for the creation of timelines. Just like in Word, timelines in Boardmix allow you to visualize the sequence of events or milestones of a project in a clear and attractive way.
Steps to Create Timeline in Boardmix
Below we will guide you step by step on how to create a timeline in Boardmix.
Step 1. Log in to your Boardmix account: To get started, you will need to log in to your Boardmix account. If you don't have an account yet, you can easily sign up on their website.

Step 2. Create a new board: Once you're logged in, you'll need to create a new board. You can do this by clicking the "New board" button on the main dashboard.
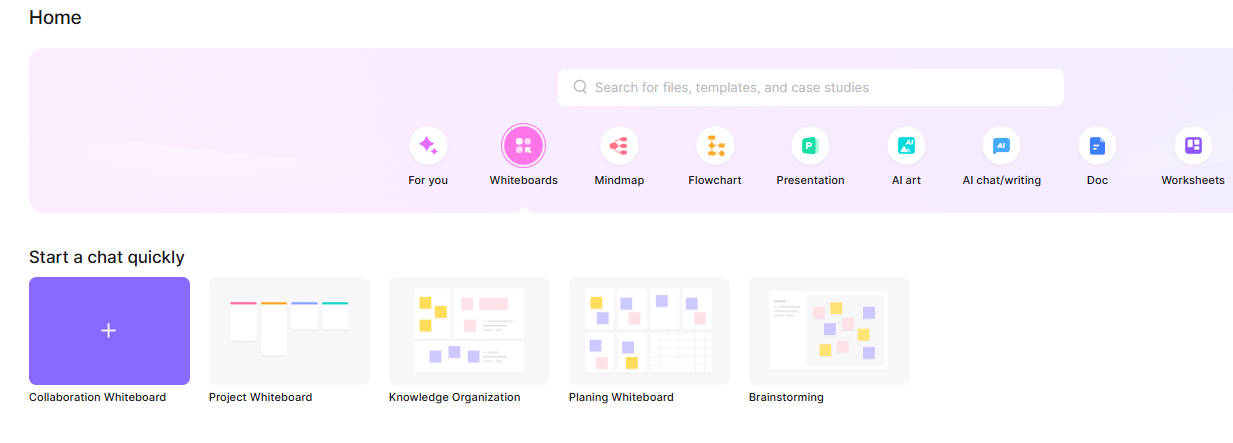
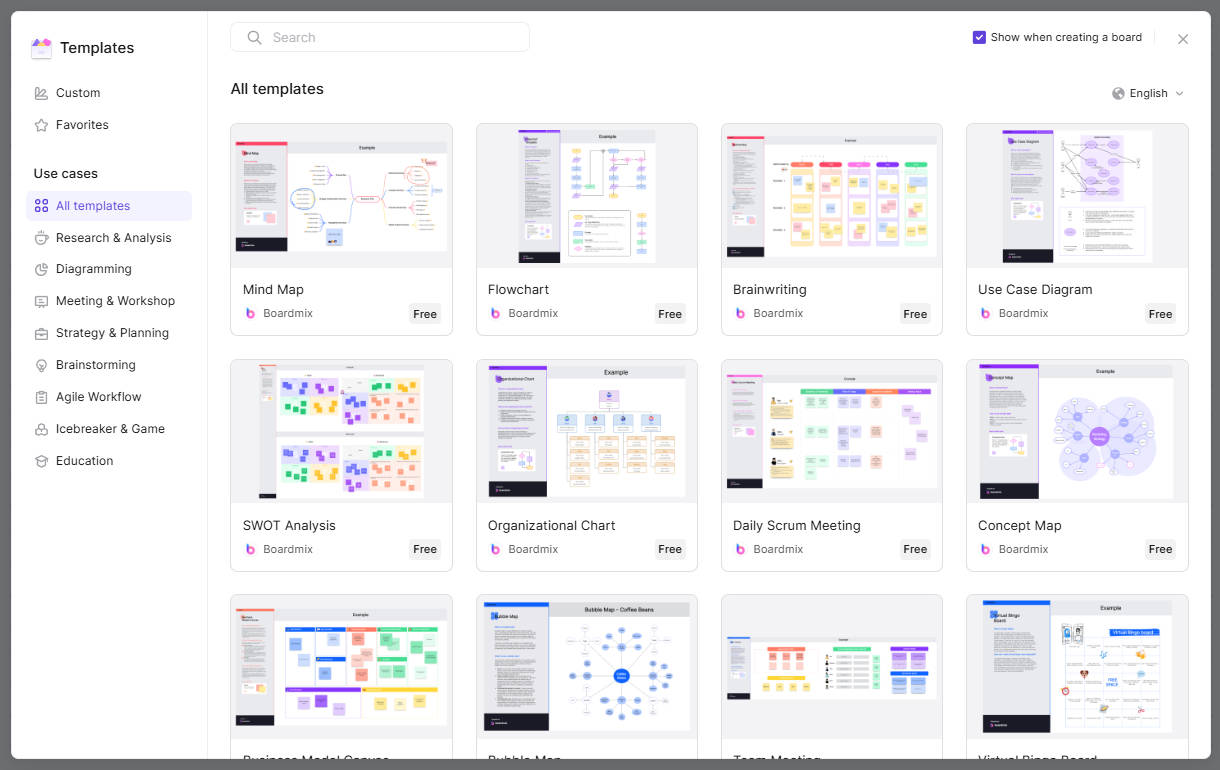
Step 3. Select a template: On the created board, click on "Templates" from the toolbar. Here you can select a template. You can find the timeline template that suits your needs.
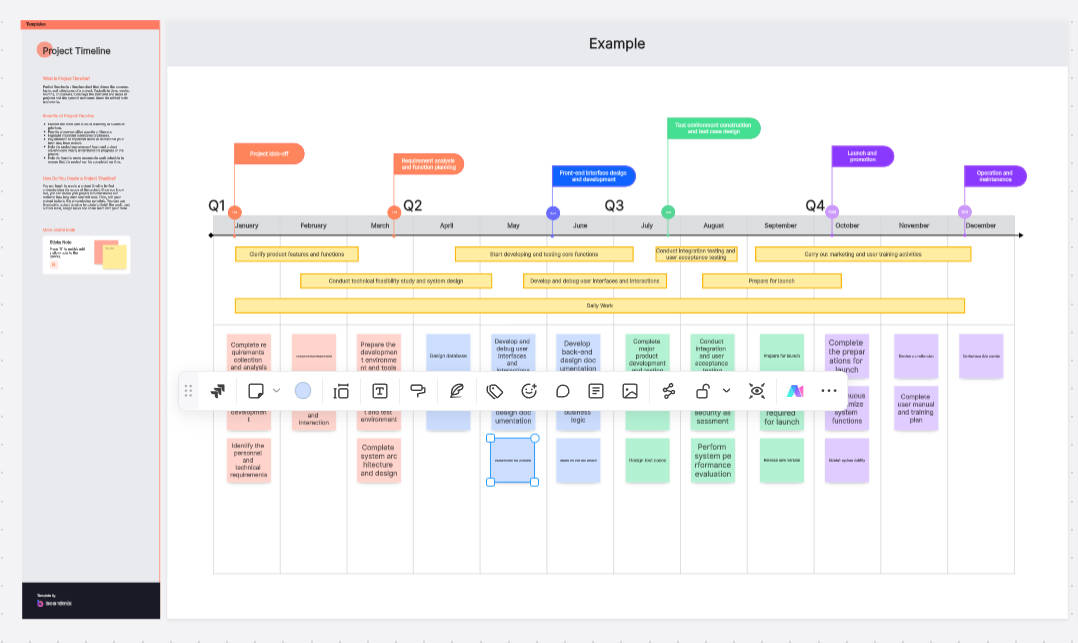
Step 4. Add events or milestones: You can now start adding events or milestones to your timeline. To do so, simply click the + icon and fill in the required information.
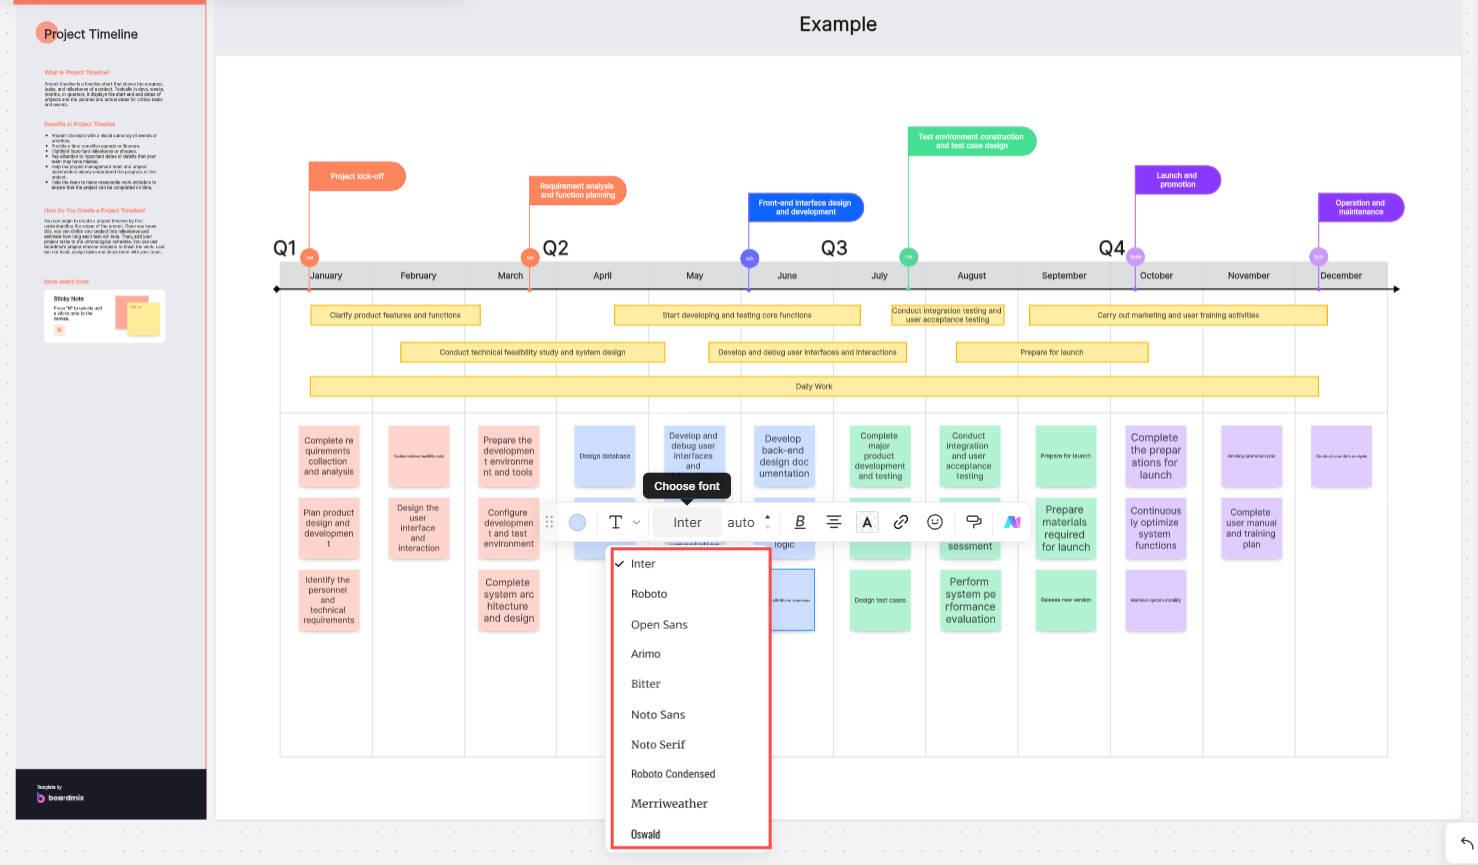
Step 5. Customize your timeline: Boardmix allows you to fully customize your timeline. You can change the colors, fonts, and styles to suit your specific needs.
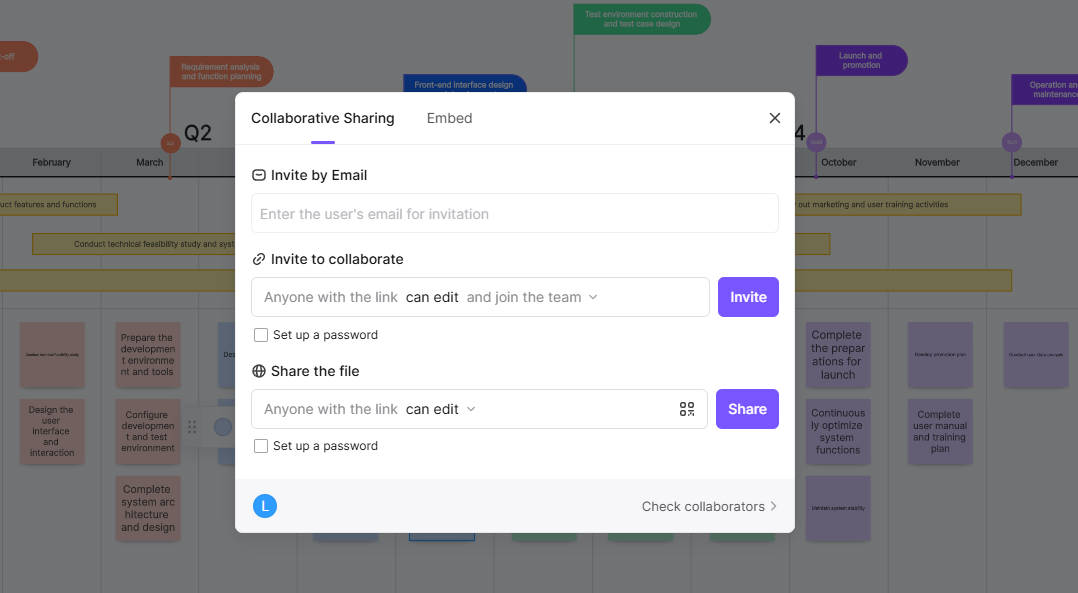
Step 6. Save and share your timeline: Your timeline is saved online in real time. Once you are happy with your timeline, simply click the "Share" button to share it. You can then share your timeline with other members of your team or anyone who needs to see it.
Timeline Samples Created in Boardmix
Example 1: Western Music History Timeline
This mind map, created in Boardmix, offers an insightful overview of Western music history, showcasing the evolution of music from the Medieval period (B.C. 500 – A.C. 1400) to the Modern Era (A.C. 1900 – present). Each era is detailed with its key features, prominent composers, and innovations. For example, it highlights the Baroque period's intricate styles, the Romantic era's emotional depth, and the Modern era's diverse influences. The map also categorizes significant instruments and societal influences, making it an excellent resource for exploring how cultural shifts shaped Western music. Its organized layout ensures clarity and encourages interactive learning.
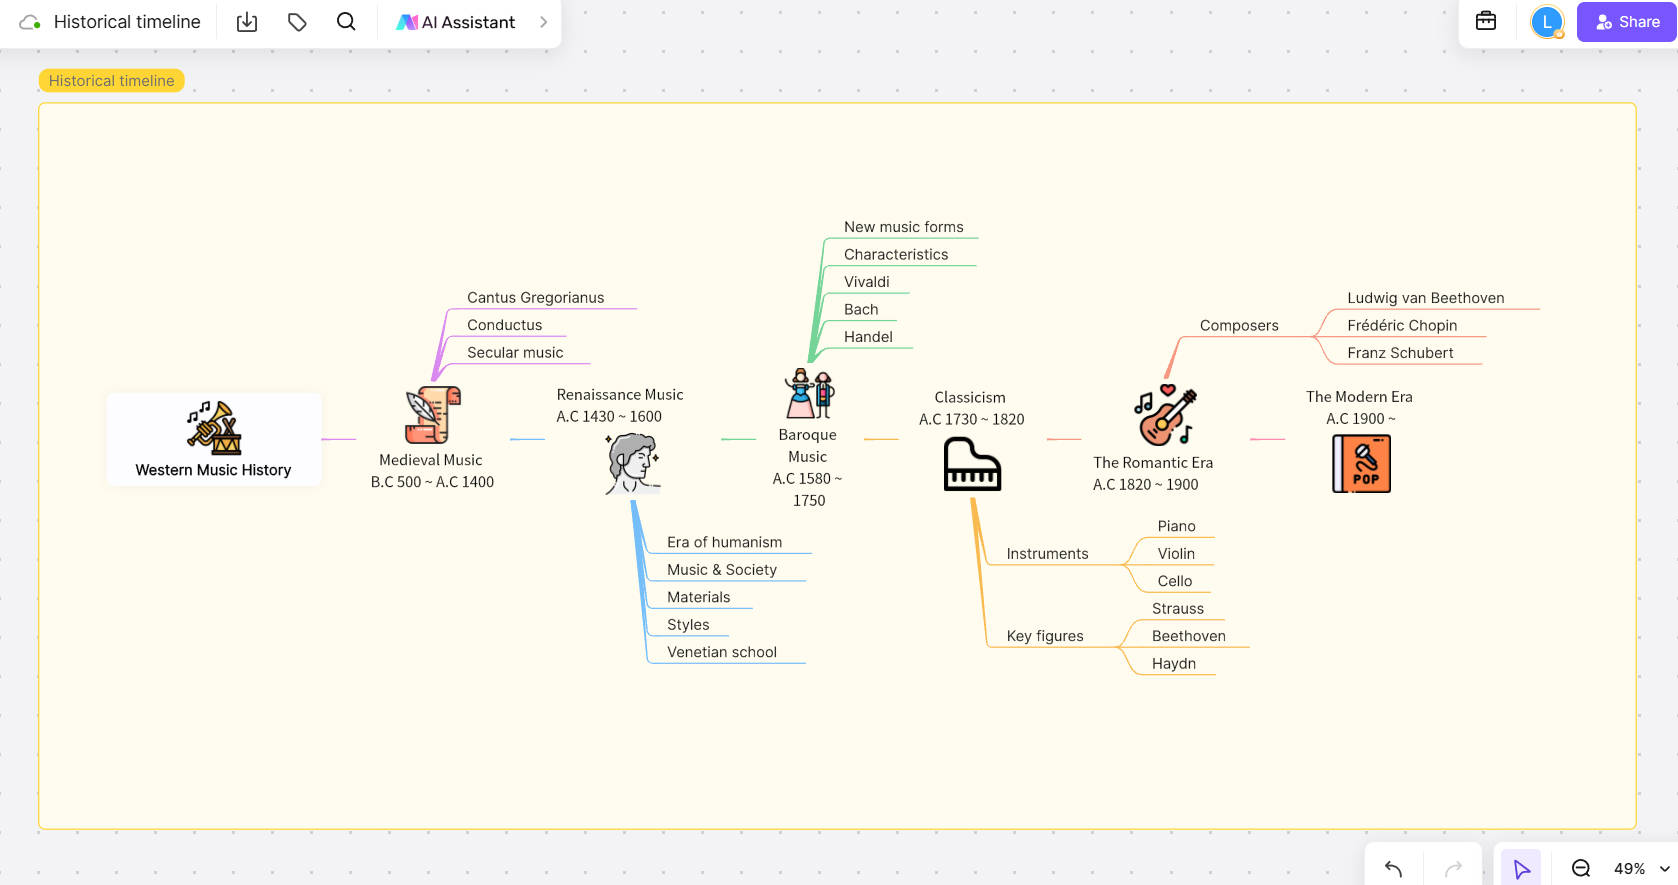
Click to create Western Music History Timeline on Boardmix
Example 2: Enterprise Development Timeline of Nike
This timeline, crafted in Boardmix, illustrates Nike's remarkable journey from its inception in 1963 to its evolution into a global powerhouse by 2023. It begins with Phil Knight's entrepreneurial start with Onitsuka Tiger products and follows the establishment of the first physical store in 1964. Key milestones, such as Nike's official founding in 1971 and its collaboration with basketball legend Michael Jordan in 1984, are highlighted, showcasing the brand's growth and market influence. The timeline concludes with Nike's adaptation to modern innovations in 2022. This visual representation captures Nike's perseverance, innovation, and impact on the sportswear industry.
How to choose: Create timelines in Boardmix or Word?
Choosing between creating timelines in Boardmix or Word will largely depend on your specific needs and the context in which you plan to use the timeline. Here are some pros and cons for each platform.
Create timelines in Boardmix
Pros:
Specificity: Boardmix is specifically designed for project management and timeline creation, so it offers more advanced functionality in this regard.
Unlimited Canvas: Boardmix is an unlimited whiteboard that allows you to draw endlessly, so you can create timelines freely.
Collaboration: Boardmix makes it easy to share your timeline with other team members, which is great for collaborative projects.
Real-time updates: With Boardmix, you can update your timeline in real time, and all team members can see the changes immediately.
Cons:
Requires learning: If you haven't used Boardmix before, there may be a learning curve to get familiar with the platform.
Create timelines in Word
Pros:
Accessibility: Word is a tool that most people already have installed on their computers, so you won't need to download or learn how to use new software.
Customization: Word offers a wide range of options to customize your timeline, including colors, fonts, and styles.
Integration with other Microsoft programs: If you are already using other Microsoft programs like Excel or PowerPoint, you can easily integrate your timeline with these.
Cons:
Limited functionality: Although Word offers the ability to create timelines, it is not a tool specifically designed for this, so it may lack some advanced features.
Can be laborious: Creating a timeline in Word can be a more laborious process compared to a specialized tool like Boardmix.
In short, if you are looking for a quick and affordable solution and are already familiar with Word, this might be the option for you. On the other hand, if you work in a collaborative environment and need more advanced functionalities, Boardmix might be the best option.


