Navigating the digital landscape can often feel like steering a ship through turbulent waters, especially when it comes to managing traffic securely. This is where Azure Application Gateway comes into play. This powerful tool from Microsoft Azure not only ensures secure routing of traffic but also provides features like SSL termination, cookie-based session affinity, and URL path-based routing. But how does one harness the power of Azure Application Gateway effectively? What are the steps involved in setting it up? And most importantly, how can it contribute to a more secure and efficient digital environment for your business? Let's delve into these questions together, exploring the potential of Azure Application Gateway in transforming your approach to secure traffic management.
What is Azure Application Gateway
Azure Application Gateway is a load balancer designed for web applications, offering a variety of traffic routing rules and site-level policies. It provides a reliable and efficient way to route client requests for web applications, helping businesses build more efficient, reliable, and secure web applications.
1. Load Balancing
Azure Application Gateway distributes traffic in applications running multiple instances. It supports session stickiness, which means that requests from the same client will be routed to the same server to maintain continuity of user experience.
2. URL Routing
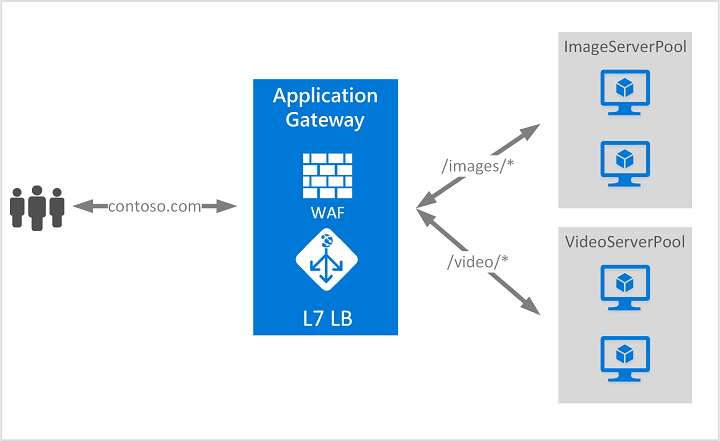
It supports URL path-based routing, allowing developers to route requests from specific URL paths to specific backend pools. For example, requests for the "/images" path can be routed to servers providing image content.
3. SSL/TLS Termination
Azure Application Gateway can handle SSL and TLS encryption at the gateway level, thereby reducing the burden on backend servers. At the same time, it also supports re-encryption to ensure that data transmission from the gateway to the backend server is also encrypted.
4. Web Application Firewall
The Azure Application Gateway has a built-in Web Application Firewall (WAF) that can protect web applications from common web attacks such as SQL injection and cross-site scripting. At the same time, it provides a custom rule set that allows developers to defend against specific threat patterns.
5. Auto Scaling and Availability Zones
Azure Application Gateway supports auto-scaling and can dynamically adjust capacity based on traffic demand. In addition, by deploying in multiple availability zones, it can provide high reliability and availability.
Whether you need efficient load balancing, fine-grained traffic control or strong security protection, Azure Application Gateway can meet enterprise needs for managing web applications.

(image from Microsoft)
What is Azure Gateway Used for
Azure Gateway service plays a key role on the Microsoft Azure platform. Here are its main uses.
1. Network Connection
Azure Gateway is mainly used to create stable and secure network connections. For example, it can create VPN (Virtual Private Network) connections between Azure virtual networks and local IT infrastructure, or create VPN connections between Azure virtual networks.
2. Data Encryption
When data is transmitted over the network, Azure Gateway uses IPsec (Internet Protocol Security) and IKE (Internet Key Exchange) protocols for encryption to ensure data security.
3. Traffic Routing
Azure Gateway can also be used to route network traffic. When your application communicates between Azure and local servers, Azure Gateway can effectively route traffic to the correct destination.
4. High Availability and Disaster Recovery
The Azure Gateway service provides built-in high availability and disaster recovery capabilities. For example, if a data center fails, Azure Gateway can automatically switch to another data center to ensure the continuity of network connection.
5. Unified Communication Protocols
Azure Gateway supports various communication protocols such as OpenVPN, SSTP (Secure Socket Tunneling Protocol), and IKEv2 (Internet Key Exchange version 2), making communication more flexible and convenient across different environments and devices.
Azure Gateway is an important tool for achieving secure, efficient network connections, playing a significant role in enterprise applications and cloud computing environments.
Benefits of Application Gateway in Azure
Azure Application Gateway is a web traffic load balancer that allows you to manage traffic to meet the needs of various applications. There are many benefits to using Azure Application Gateway.
1. Enhanced Security
Azure Application Gateway provides built-in security protection for your applications. For example, the Web Application Firewall (WAF) can prevent common vulnerabilities such as SQL injection and cross-site scripting attacks. In addition, it can also integrate with Azure's Security Center and DDoS protection services to enhance overall application security.
2. Auto Scaling
Azure Application Gateway can automatically scale up or down to meet the needs of applications. It can automatically monitor and adjust its capacity to meet traffic demand without manual intervention.
3. Advanced Routing Capabilities
Azure Application Gateway provides URL path-based routing capabilities. This allows you to route traffic to different backend pools based on the request's URL path. In addition, it also supports multi-site hosting, allowing you to host multiple web applications in the same application gateway instance.
4. Session Affinity
For web applications that need to maintain client sessions, Azure Application Gateway provides session affinity features, ensuring that requests from the same client are always routed to the same backend server.
5. SSL/TLS Termination
Azure Application Gateway allows you to terminate SSL/TLS at the gateway level, which means that backend servers no longer need to process these operations, thereby improving server performance.
6. Integration
Azure Application Gateway can seamlessly integrate with other Azure services (such as Virtual Machine, Virtual Machine Scale Sets, Azure Kubernetes Service, etc.) making it easier for you to build and manage complex cloud applications.
As an advanced HTTP load balancer, Azure Application Gateway offers a range of features designed to meet the needs of enterprise-level web applications.
Use Azure Application Gateway for Secure Traffic Management
Setting Up Azure Application Gateway
Here are the steps to create and configure Azure Application Gateway, as well as setting up SSL certificates.
- Log in to the Azure Portal: Visit the Azure Portal and log in with your Azure account.
- Create a new application gateway: In the left menu of the Azure portal, select "Create a resource". Then enter "Application Gateway" in the search box, select "Application Gateway" from the search results, and click the "Create" button.
- Fill in application gateway information: On the interface for creating an application gateway, fill in the required information such as name, subscription, resource group, etc. Choose an appropriate region, and select VNet (Virtual Network) and subnet.
- Configure other settings: Configure other required settings such as public IP address, SKU size, etc.
- Complete creation: Check if your configuration information is correct, then click on the "Create" button to complete the creation of the application gateway.
- Configuring Application Gateway
- Enter application gateway configuration page: Find the application gateway you just created in the Azure portal and click to enter its configuration page.
- Configure backend pool: In the left menu of the configuration page, choose "Backend pools". Click on the "Add" button and add your backend servers or addresses.
- Configure HTTP settings and listeners: In the left menu of the configuration page, choose "HTTP settings" and "Listeners". Configure according to your needs.
- Configure routing rules: In the left menu of the configuration page, choose "Routing rules". Create routing rules according to your needs such as path-based or hostname-based routing.
- Setting up SSL Certificate
- Obtain an SSL certificate: First, you must obtain an SSL certificate from a trusted Certificate Authority (CA). The certificate must include public and private keys and be in PFX format.
- Upload SSL certificate: On the application gateway's configuration page, choose "Listeners". Click on adding new listener; select HTTPS under listener type and upload your SSL certificate.
- Apply SSL certificate: After completing the SSL certificate upload save the changes made then apply them; now your application gateway can communicate using HTTPS.
Secure Traffic Management
Traffic management is an important part of network management, which involves directing network traffic to available servers. A good traffic management strategy can optimize server performance, and increase application availability and response speed while reducing bandwidth requirements.
The main methods of traffic management include load balancing (distributing network traffic to multiple servers), content routing (directing traffic to specific servers based on content type), and caching (storing frequently used content near users in the network).
A: Applying Azure Application Gateway to Traffic Management
Azure Application Gateway is an advanced HTTP load balancer that can perform fine-grained traffic routing. It provides the following features for traffic management:
- Load Balancing: Azure Application Gateway can automatically distribute incoming traffic among backend servers, thereby balancing the load, increasing response speed, and improving application performance.
- URL Path-Based Routing: Azure Application Gateway can route traffic based on the URL path in HTTP requests. For example, you can configure the gateway so that all requests starting with "/images" are routed to a backend pool dedicated to handling images.
- Multi-Site Hosting: Azure Application Gateway can host multiple web applications in a single instance. Each web application can have its public IP address but share the same gateway instance, thereby saving resources and costs.
- Setting up Routing Rules
Azure Application Gateway allows you to create routing rules based on URL paths or other conditions. Here are the steps to create a URL path-based routing rule.
- Log into Azure Portal and go to your application gateway.
- Select "Routing Rules" from the left menu, then click the "Add" button.
- In the new pop-up window, enter the rule name, select listener type (basic or path), and backend target. If you choose path as listener type, you also need to enter matching conditions (for example, URL path pattern).
- After completing inputting information click the "Add" button to create a rule.
B: Utilizing a Web Application Firewall (WAF) Defending Against Web-Based Attacks
Azure's application gateway's WAF feature defends against common web attacks such as SQL injection along with cross-site scripting attacks; here are steps towards enabling along with configuring WAF:
- Log into the 'Azure' portal then access your application gateway
- From the left menu select "Web Application Firewall", then under the right side's "Firewall Mode" dropdown list select "Defence Mode".
- You may opt for customizing the rule set or use the default OWASP Core rule set
- After configuring the rule set click the "Save" button enabling WAF
Please note that WAF configuration needs adjustment according to your application characteristics along with security requirements; simultaneously when utilizing WAF it requires regular checking along with updating of rule sets to defend against the latest threats along attacks.
How to Make Azure Application Sample
Here are some simple steps on how to create an Azure application.
- Log in to the Azure Portal: First, visit the Azure Portal and log in with your Azure account.
- Create a new resource group: In the left menu of the Azure portal, select "Resource Group". Click the "Create" button and enter your resource group name and location.
- Create a new App Service: After successfully creating a resource group, click "Create Resource" in the left menu again. Enter "App Service" in the search box, select "App Service" from the search results, and click the "Create" button.
- Configure App Service: On the configuration page, select the newly created resource group, and enter information such as your app service name, publishing method, operating system, location, etc. After completing all configurations, click "Review + Create", then click the "Create" button.
- Deploy your application: After successfully creating an app service, you can deploy your application code to Azure via FTP or local Git. Just find the FTP/Deployment username and password on your app service overview page and use the FTP client or Git for deployment.
- Test your application: Once your code is successfully deployed, you can enter "http://yourappservicename.azurewebsites.net" in a web browser to test whether your application is running normally.
The above are steps for creating a basic Azure application example. The specific steps may vary depending on your specific application type and requirements but the overall process remains the same.

These are the steps to create a basic Azure application example. The specific steps may vary depending on your specific application type and requirements, but the overall process remains the same.
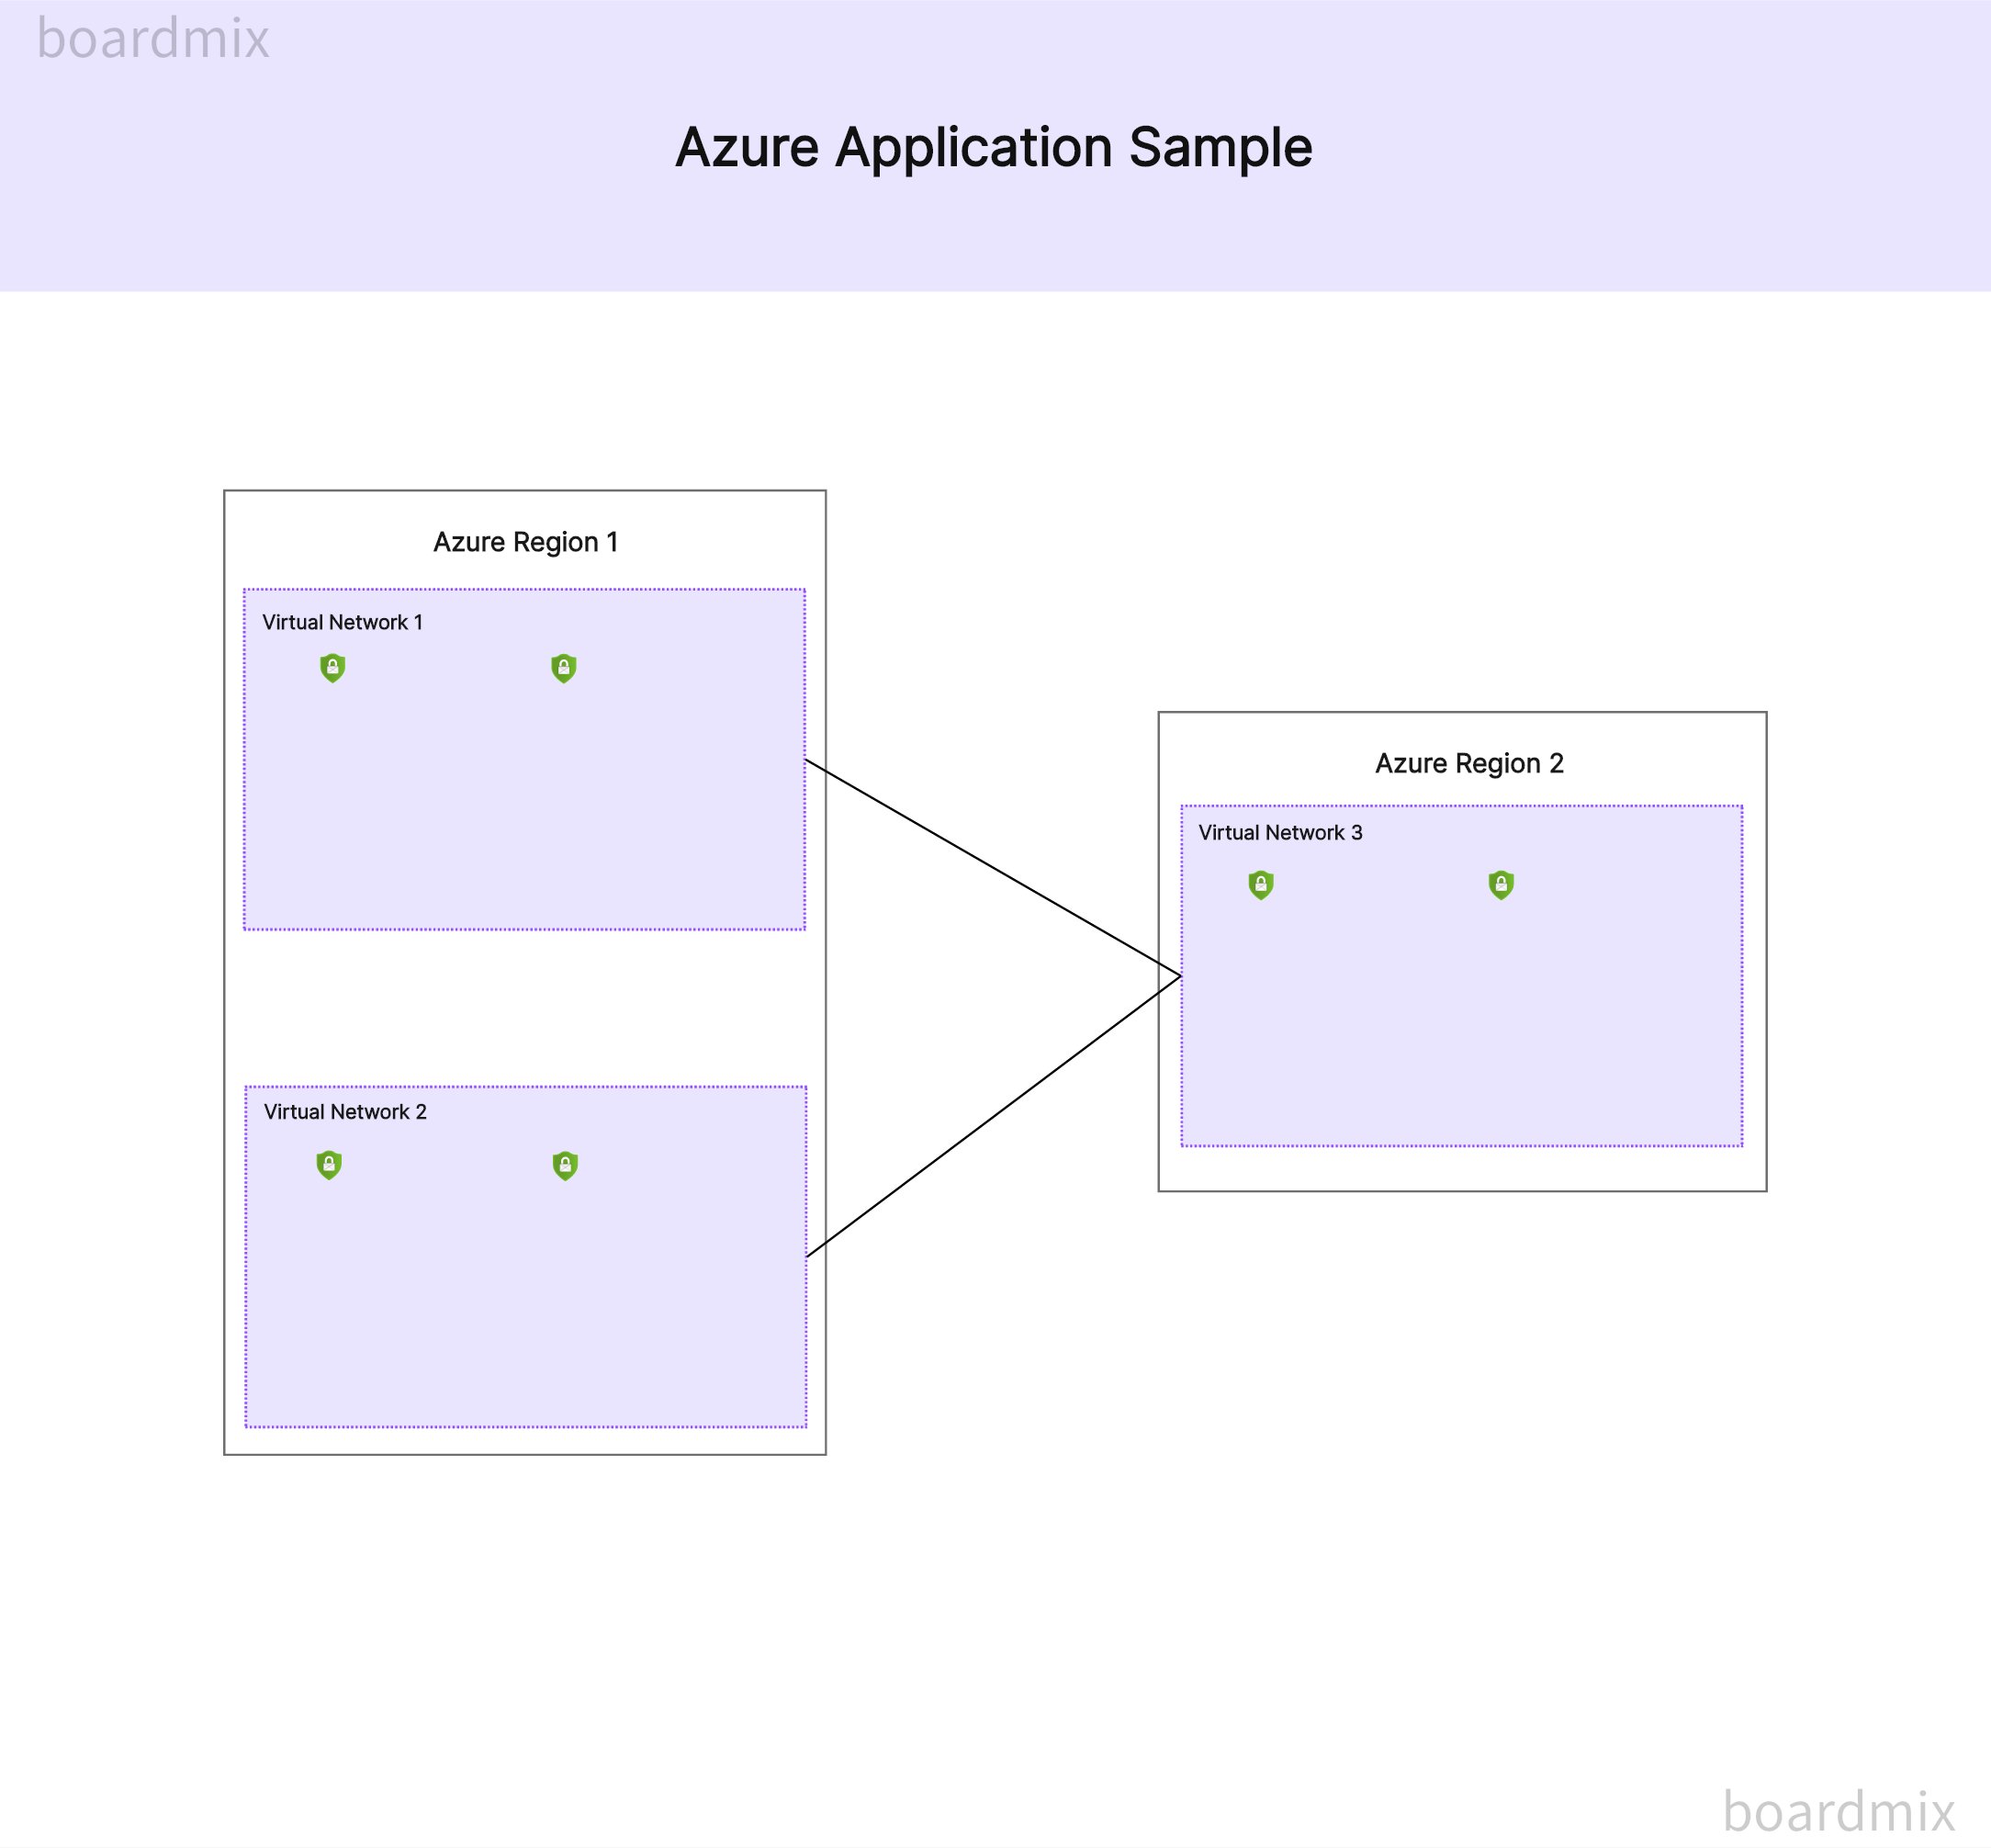
Boardmix provides ready-made Azure application sample templates, which can help you quickly create and customize your Azure applications. First, you can use this template to plan out the basic architecture of your application. You can then modify and customize the template to your specific needs. For example, you may need to add additional services or change the way data is processed. Boardmix provides a wealth of editing tools to make this process very simple. After you've finished designing and customizing, you can also use Boardmix to share and collaborate on your projects. Whether sharing project progress with team members or clients, it only takes a few clicks. By using ready-made Azure application sample templates and customizing them to your needs, you'll be able to complete your project tasks more efficiently.


