In today's fast-paced and information-laden environment, finding ways to organize thoughts, ideas, or complex data can be challenging. That's where a mind map comes in handy. Often, we resort to Microsoft Excel for many of our organizational needs due to its robust functionality. This article is here to help you understand how you can create a Mind Map in Excel, although it's not primarily designed for this purpose. Let's delve deeper into the specifics and the alternatives for a smoother Mind Mapping experience.
What is a Mind Map?
A mind map is essentially a graphical representation of thoughts, ideas, tasks, or other concepts linked to a central keyword or idea. It helps in structuring information in a way that assists in better analysis, comprehension, synthesis, recall, and generation of new ideas. Its efficacy lies in its ability to trigger radiant thinking and stimulate cognitive functions.
How to Create a Mind Map in Excel?
While Excel is known primarily for its spreadsheet functionality, its robust suite of features allows for a wide range of tasks, including creating mind maps. This can be achieved using either the Shapes Library or the SmartArt feature. Below we explore each of these methods in detail:
Method 1: Using the Shapes Library
Excel's extensive Shapes Library offers users a diverse set of building blocks to create custom mind maps. Here's a step-by-step guide to assist you in this process:
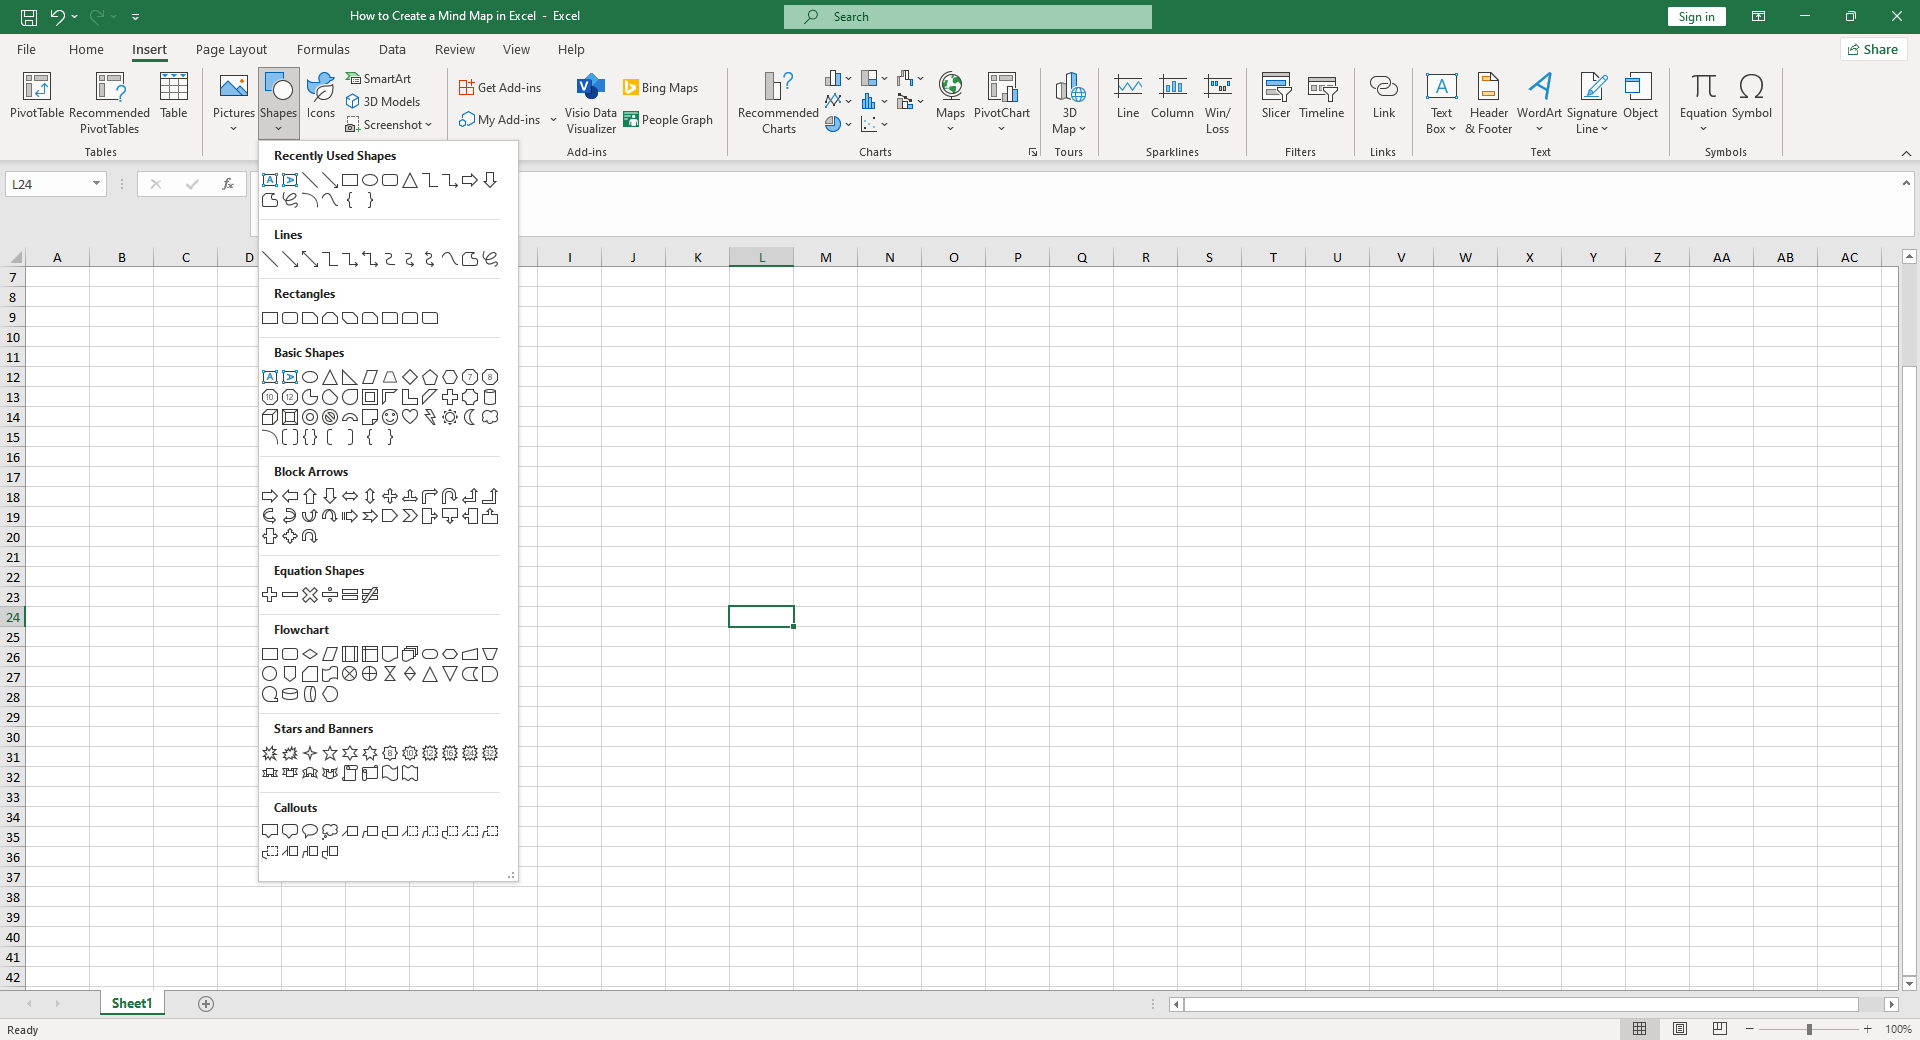
- Insert a Shape: Navigate to the Insert tab in the top menu and click on Shapes. A drop-down menu will open, showcasing an array of shapes to choose from. To start your mind map, pick a central shape that will represent your main idea or topic. Click on your selection and then click anywhere on the spreadsheet to place the shape.
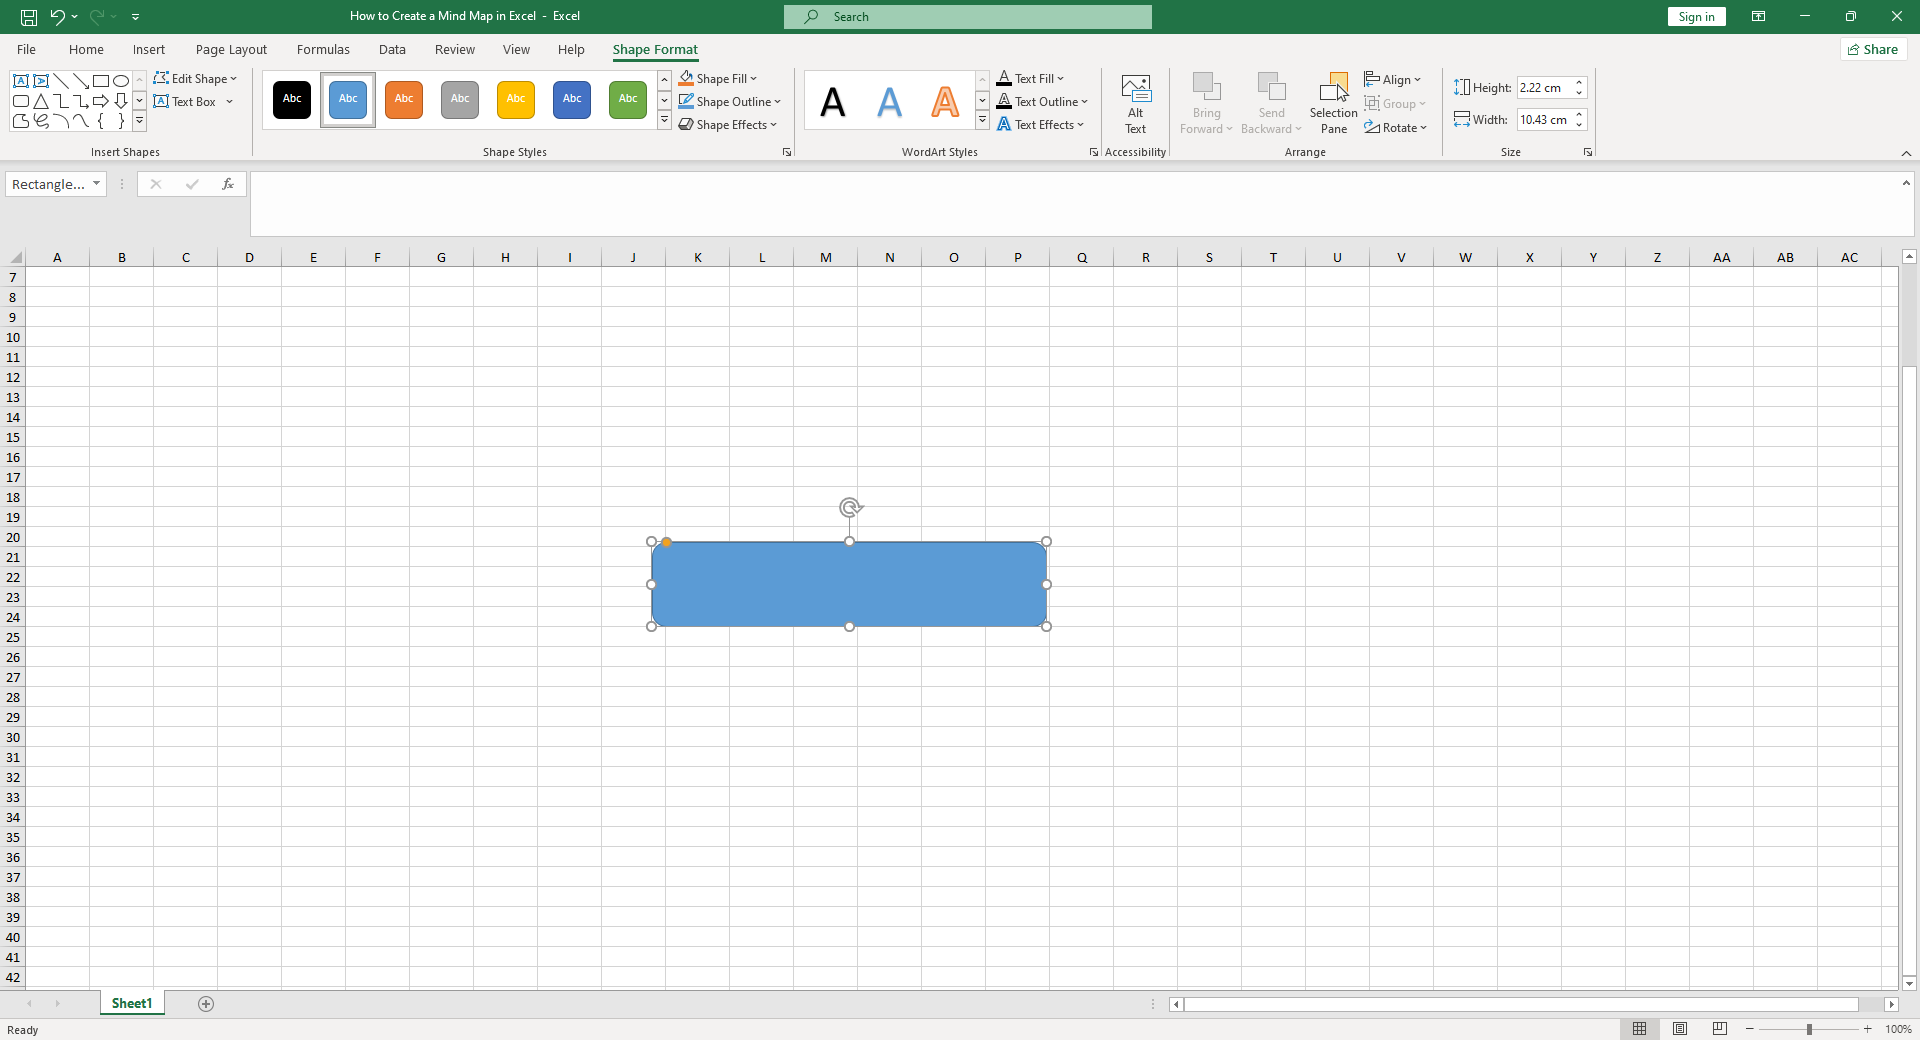
- Customize Your Shape: Once you've inserted your shape, use the Format tab under Drawing Tools (which should appear automatically when a shape is selected) to customize it. You can modify the color, size, and outline of your shape to fit your needs.
- Add Text: Right-click on your shape and select Edit Text to insert relevant text into your shape.
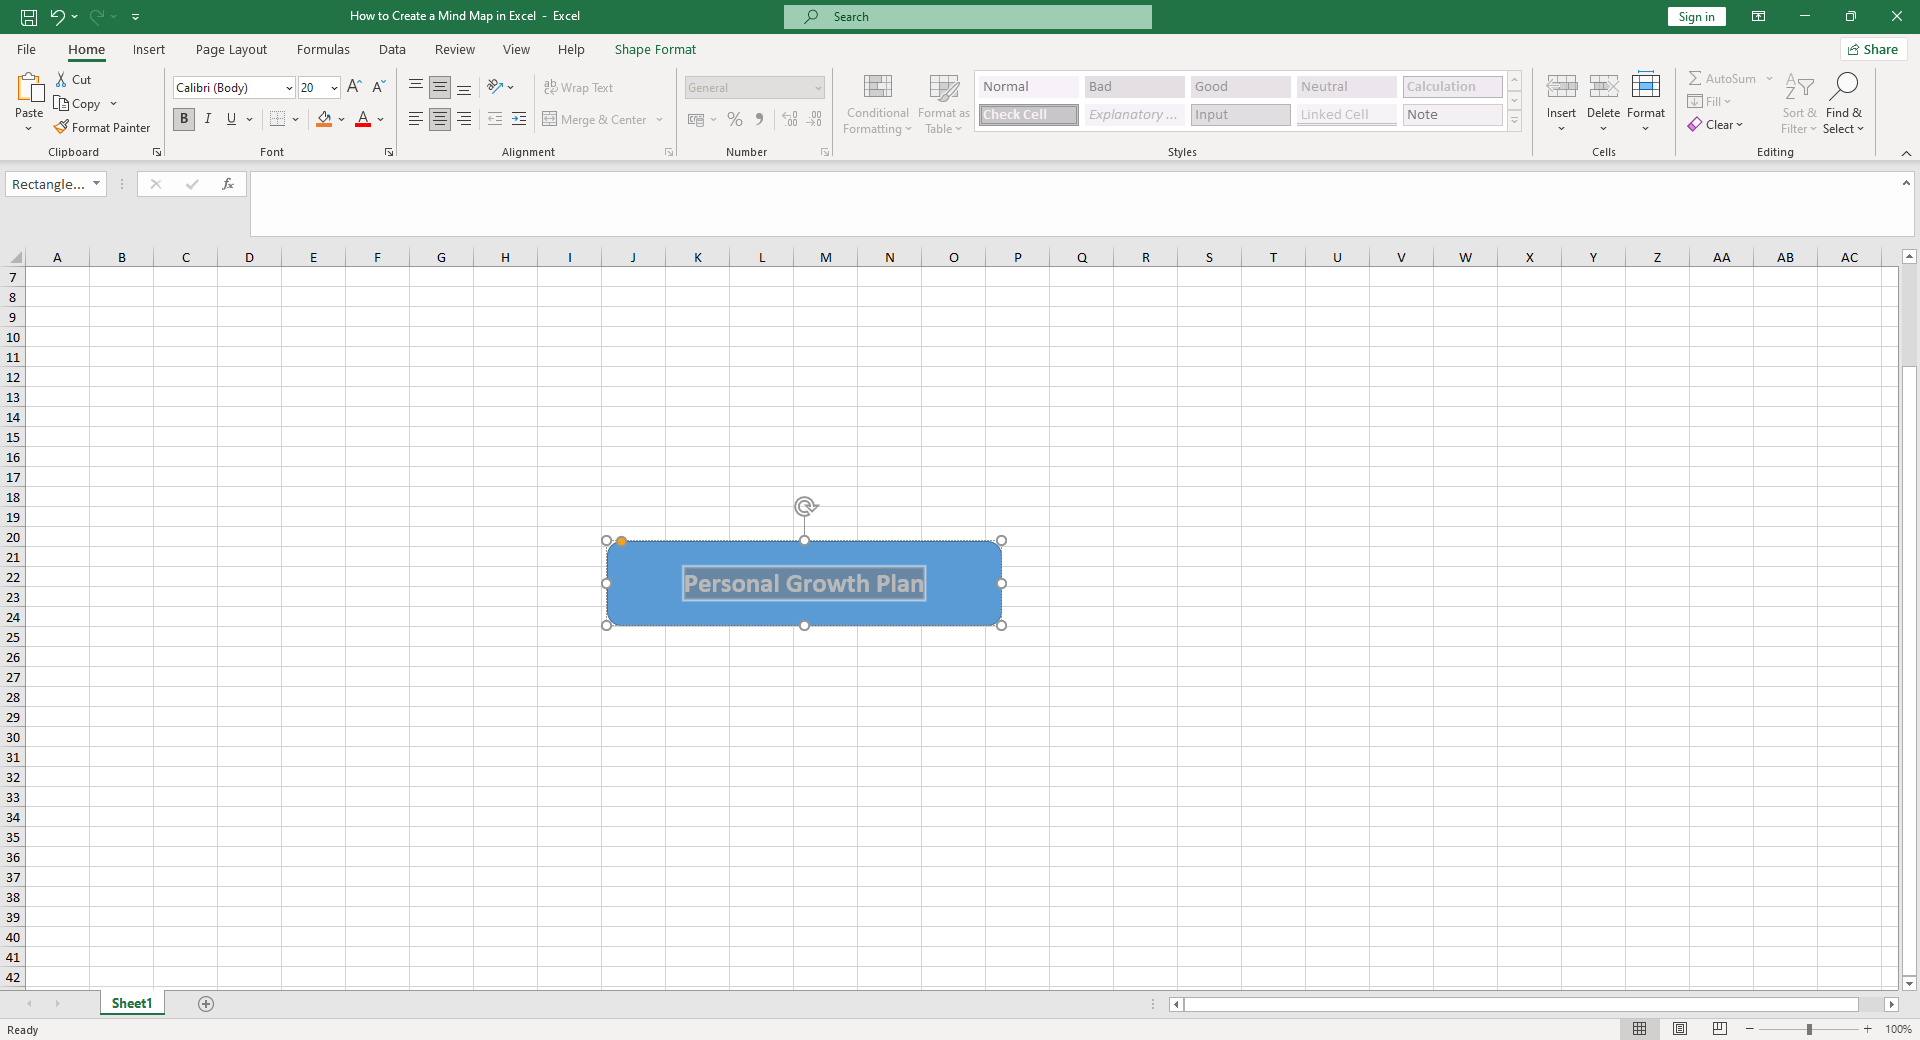
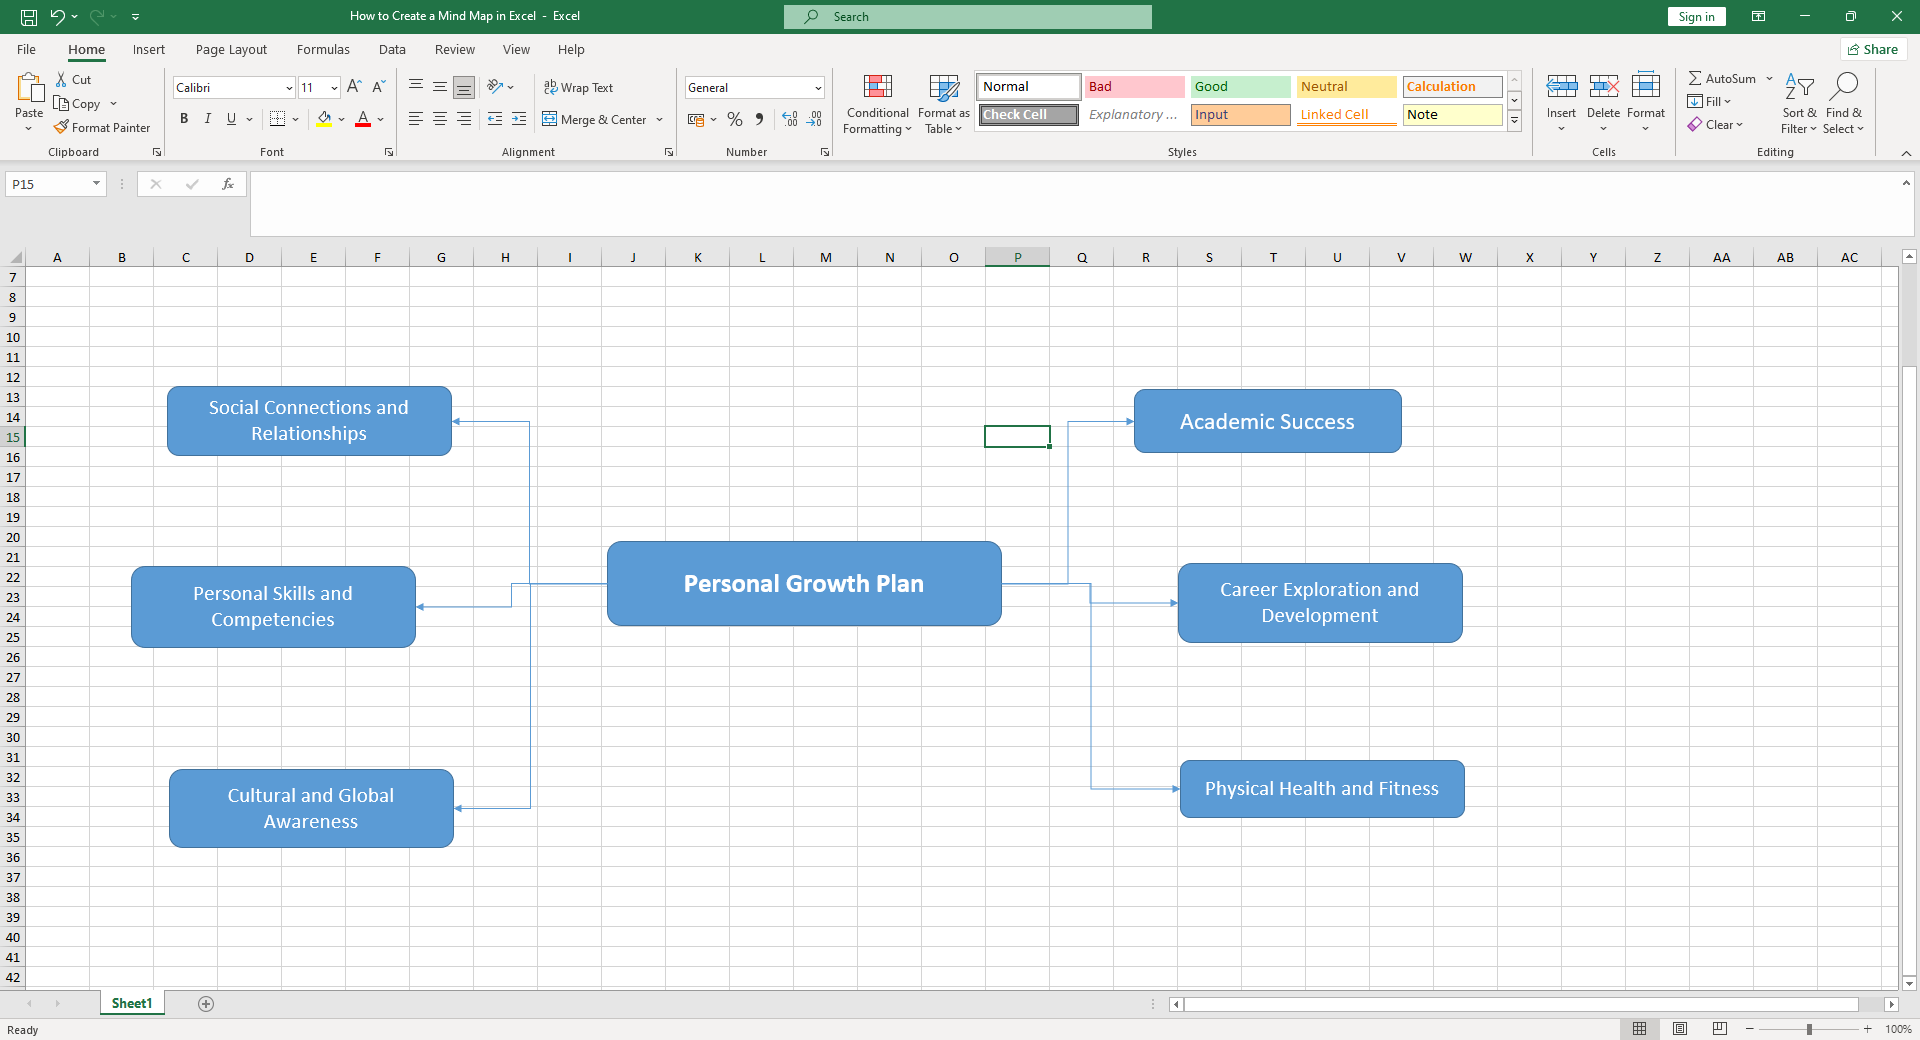
- Add More Shapes: Continue the process of adding, customizing, and editing shapes to create subtopics and details branching out from the central topic. The lines from the Shapes Library can be used to connect these shapes representing the relationships between your main topic and subtopics.
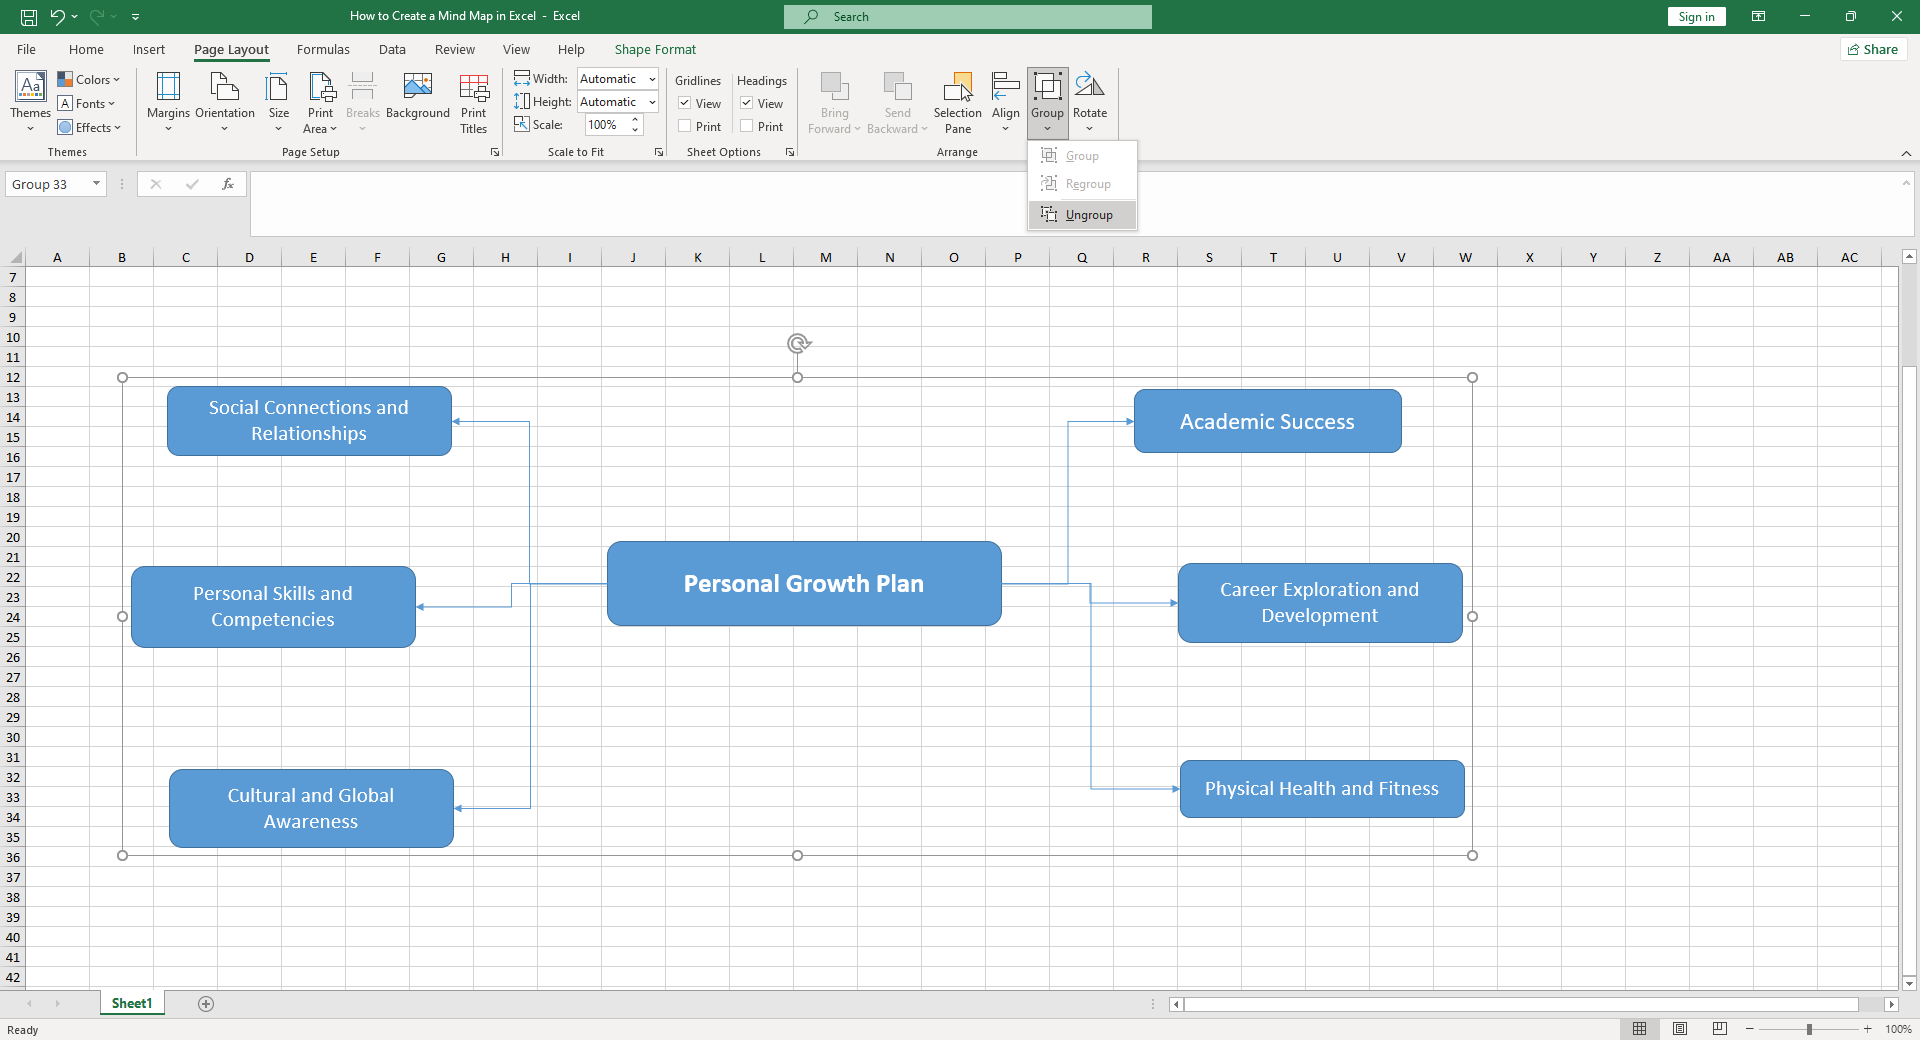
- Group Your Shapes: As your mind map expands, managing multiple shapes might become challenging. Here, Excel's Group feature comes handy. Click and drag your mouse to select multiple shapes at once, then right-click and choose Group to combine them. Now you can move or format these shapes as one unit, which simplifies the process significantly.
Method 2: Using SmartArt
The SmartArt feature in Excel provides a more structured, semi-automatic way of creating mind maps:
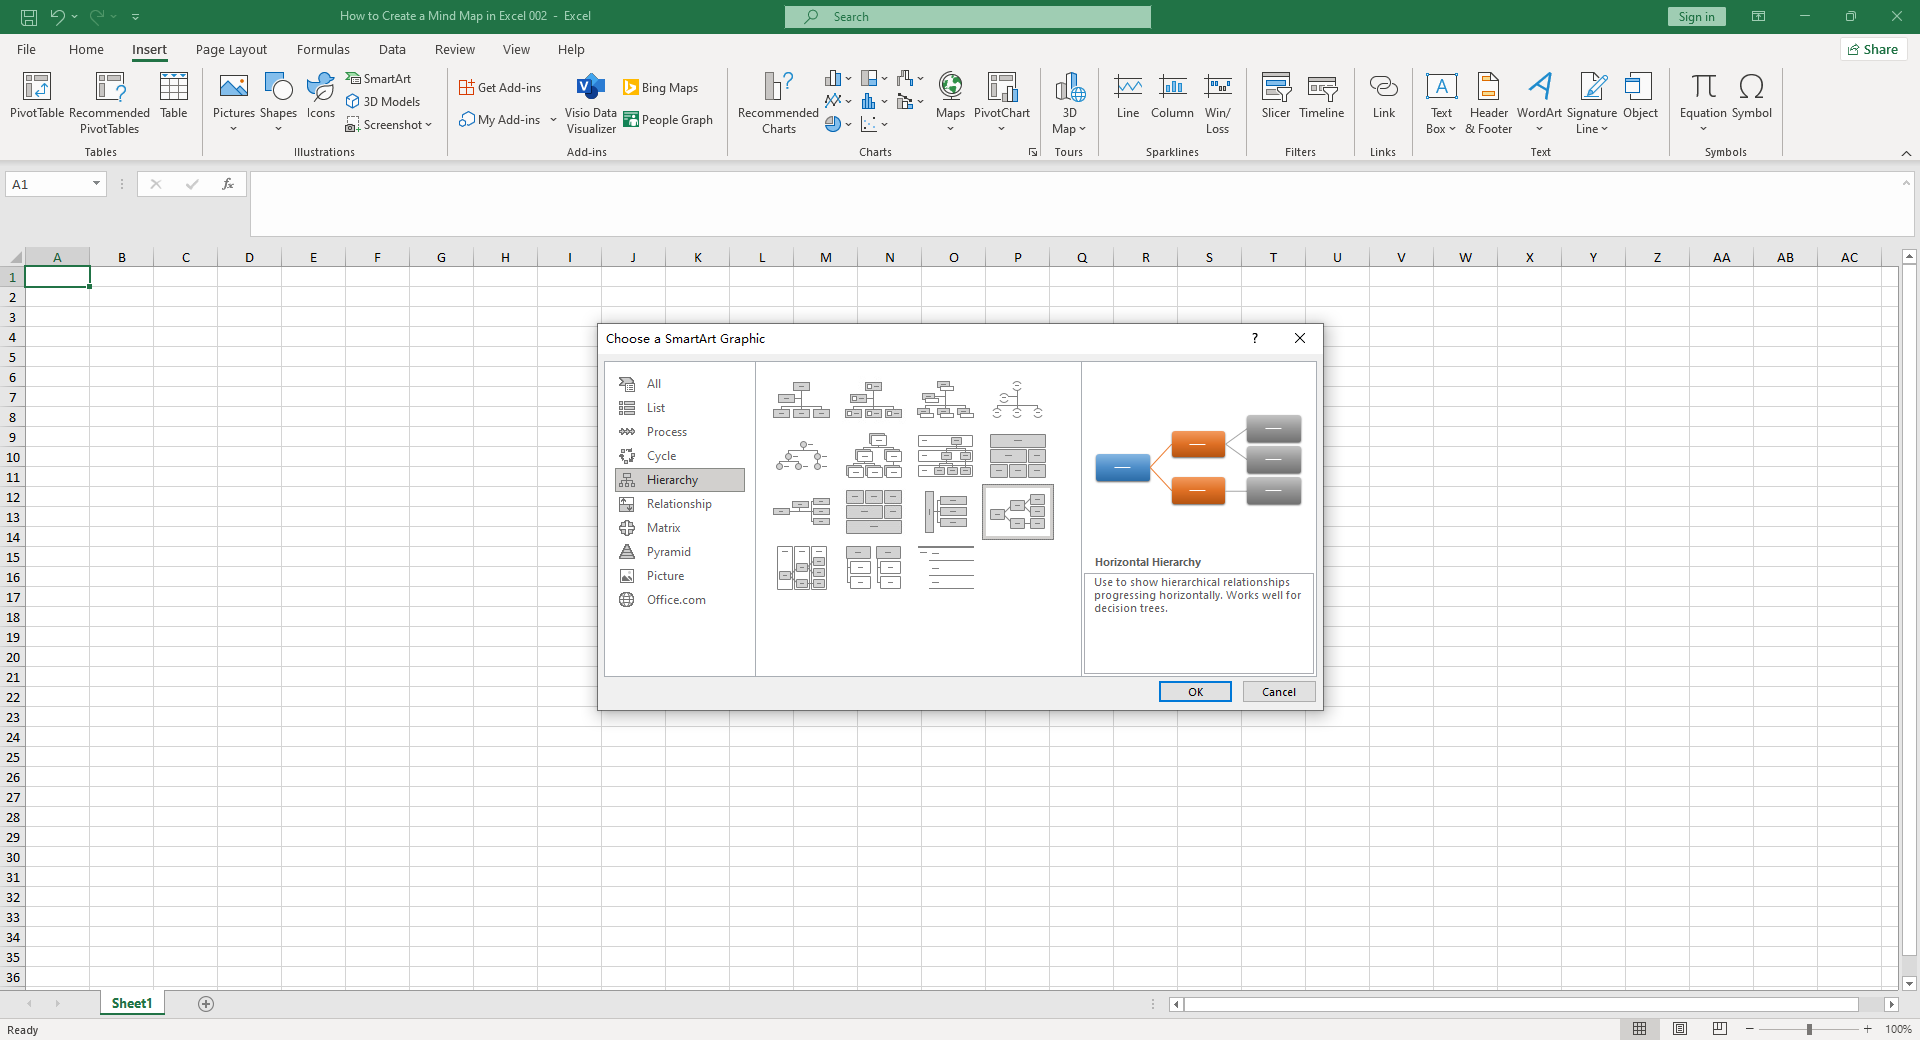
- Insert a SmartArt Graphic: Click on the Insert tab and choose SmartArt. In the dialogue box that opens, click on Hierarchy which provides a number of graphics suitable for mind maps.
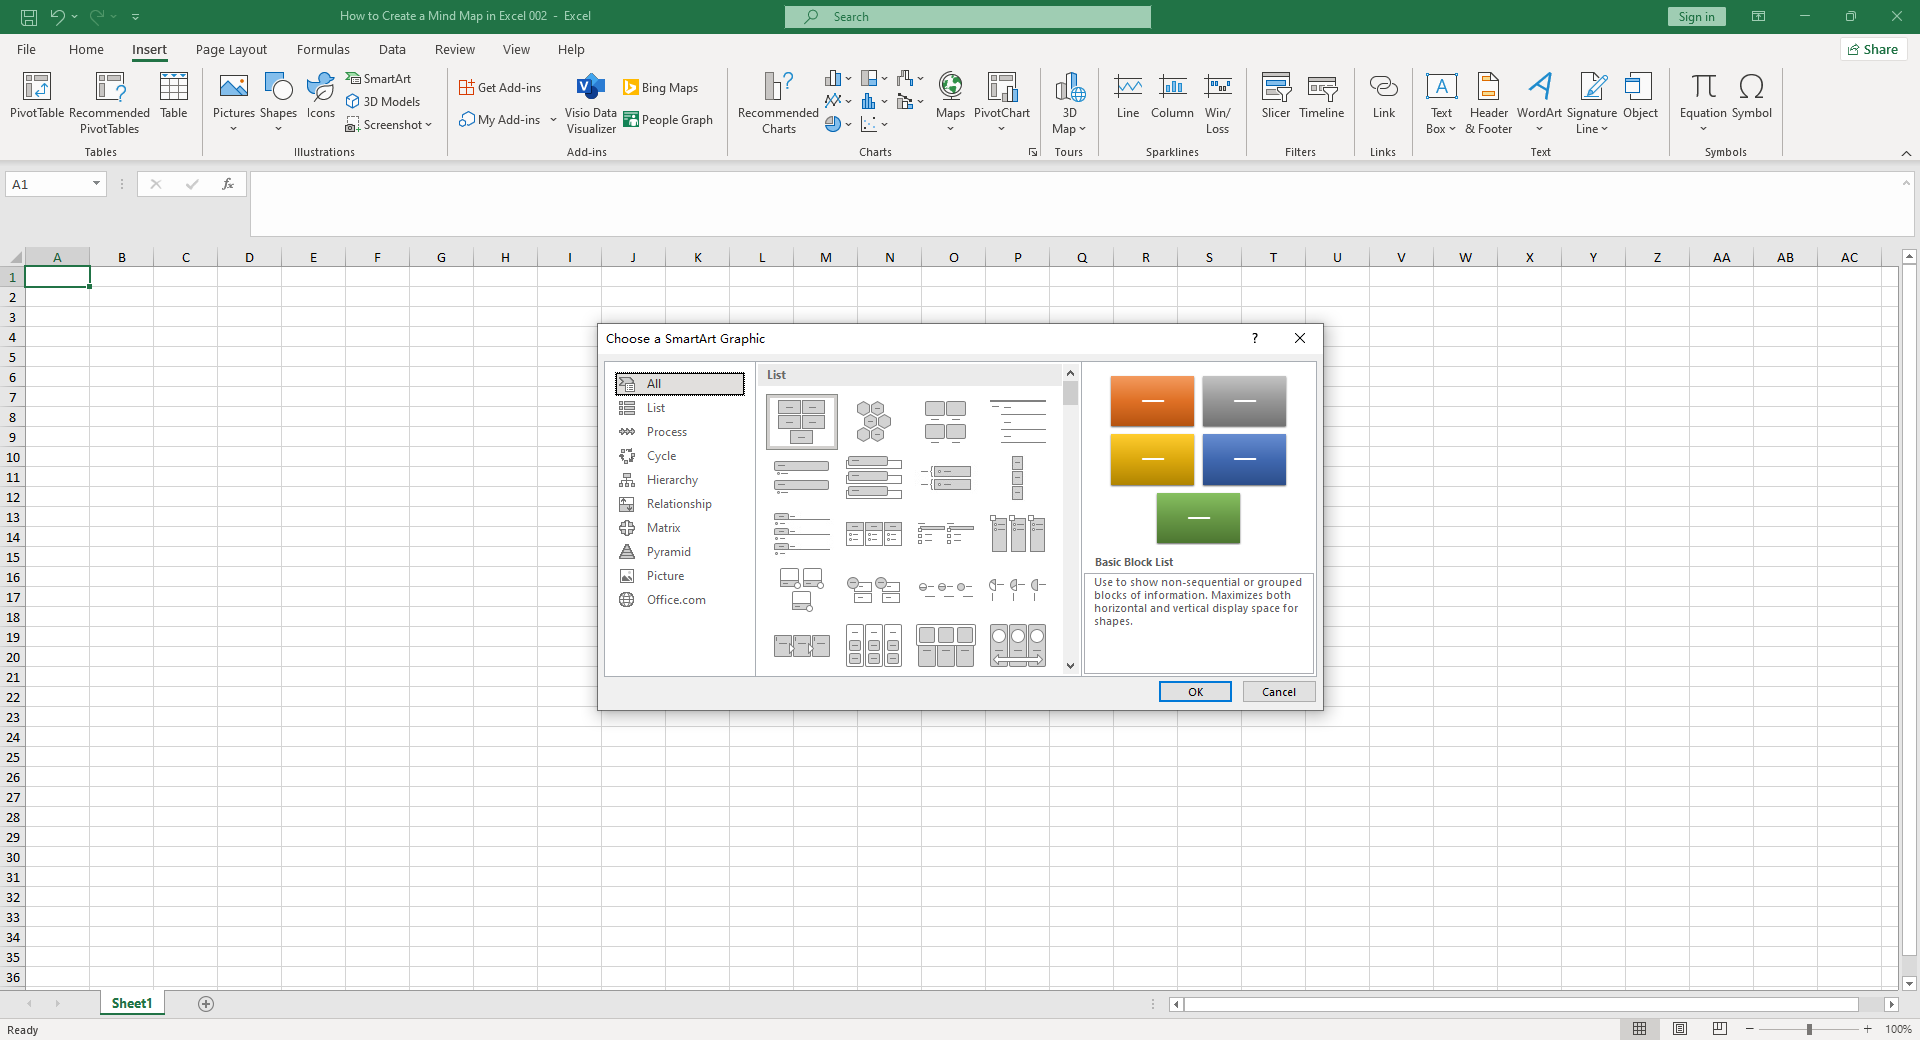
- Choose Your Layout: Browse through the different layouts available under Hierarchy. Select one that fits your needs and click OK to add it to your worksheet.
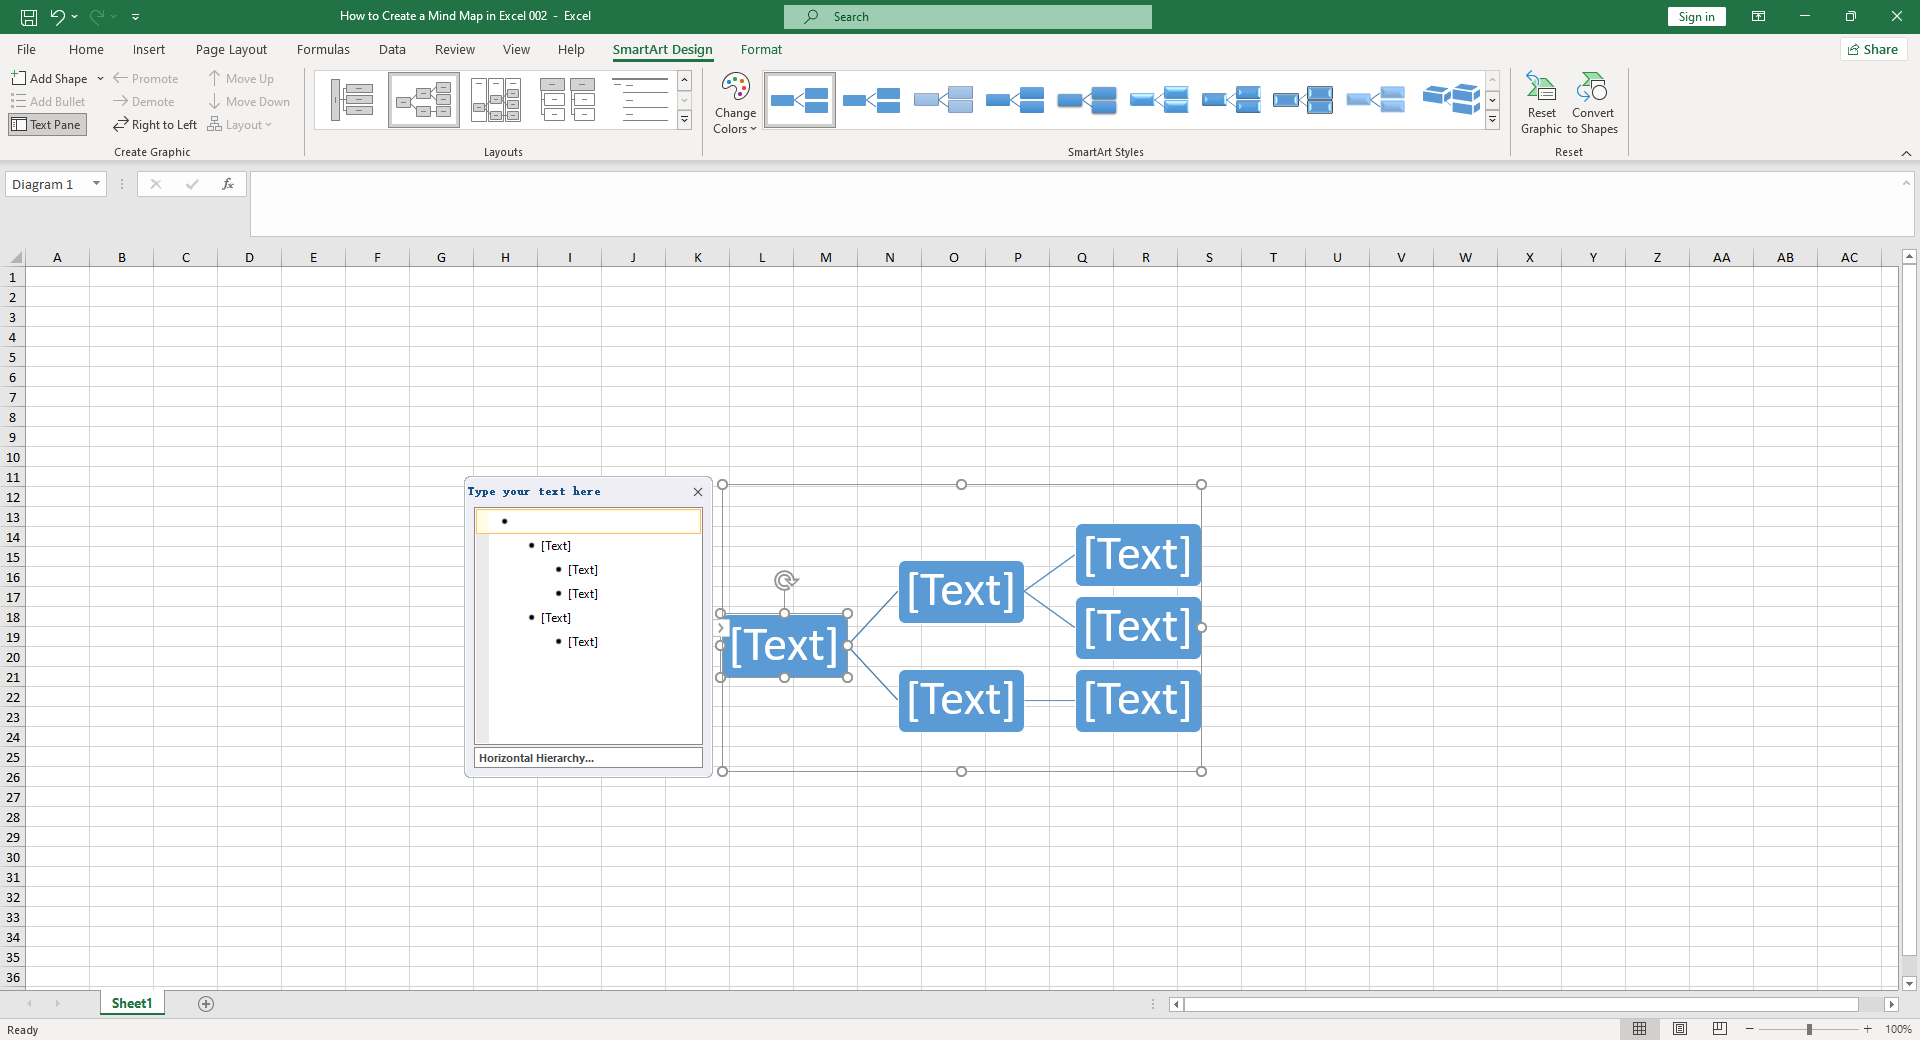
- Edit Text: Your new SmartArt graphic will have placeholder text that you can replace with your own information. Click on the text pane on the side (or click directly on the shapes) to insert your main topic, subtopics, and related details.
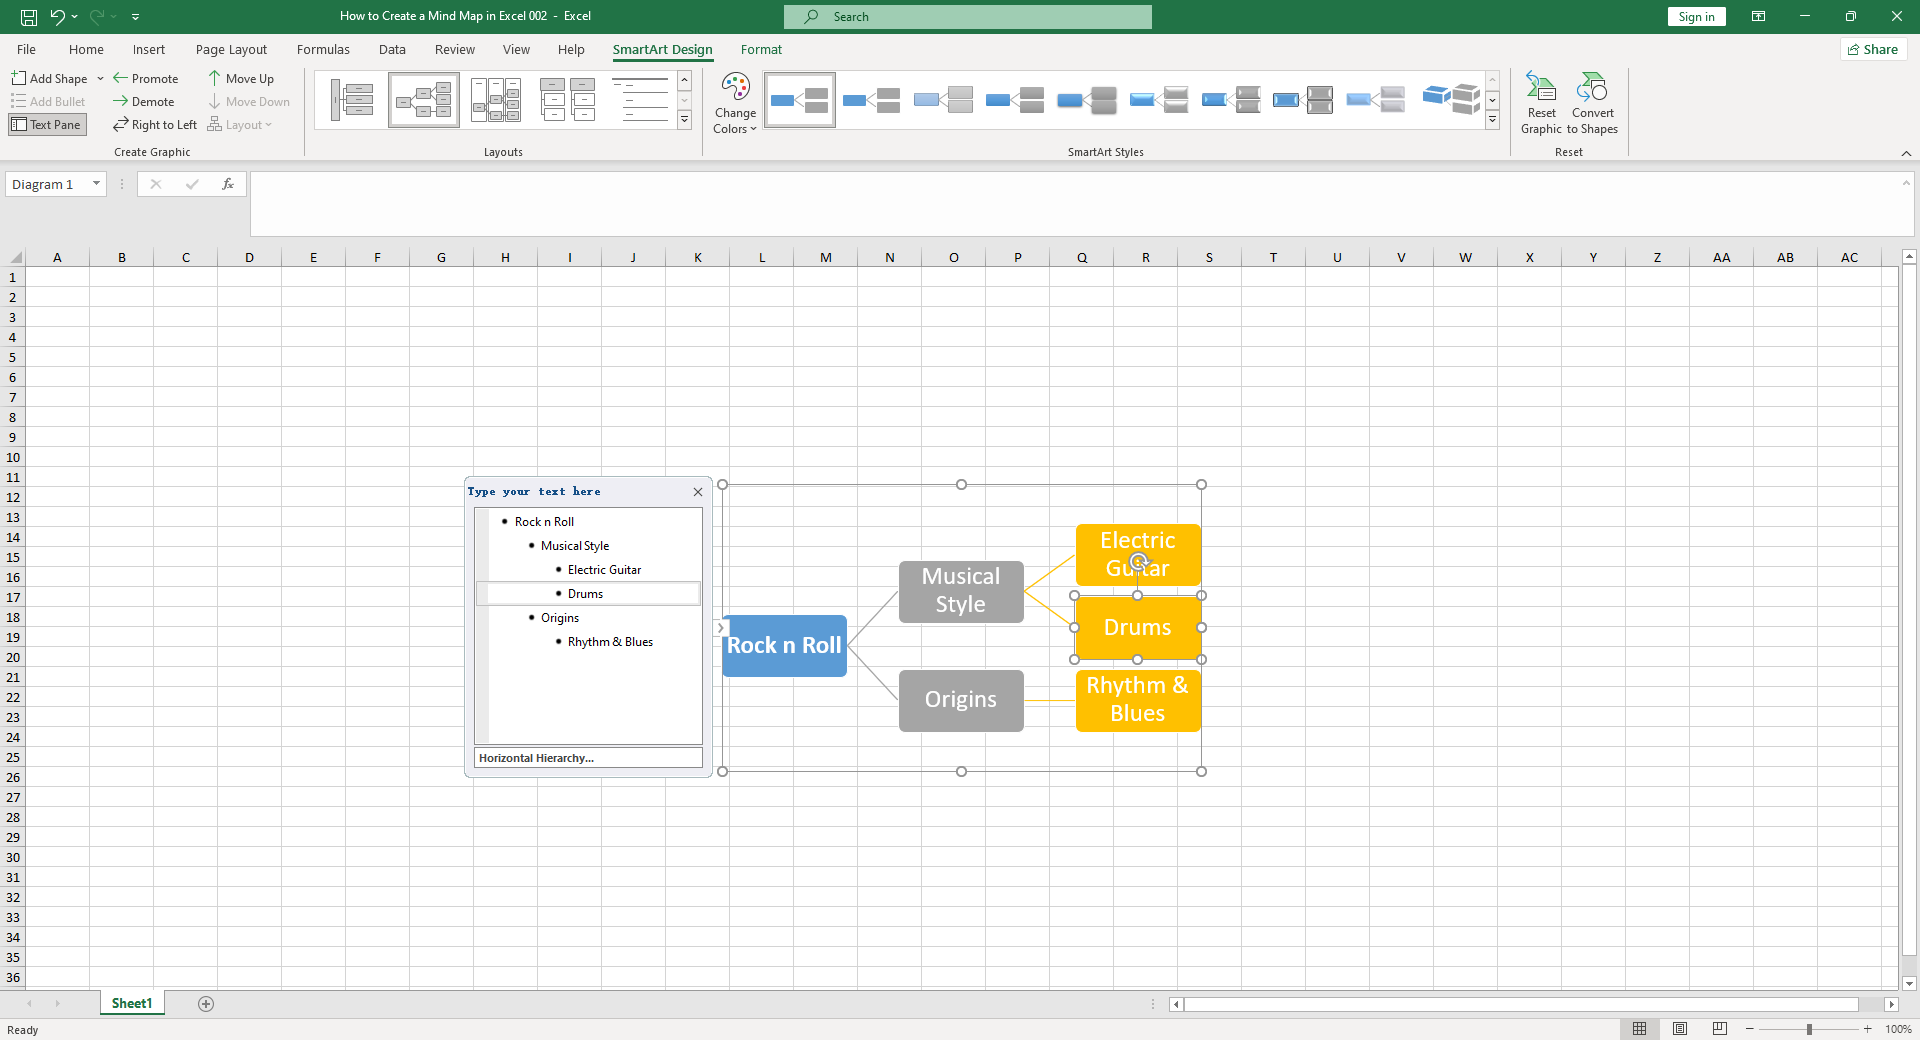
- Customize Your Graphic: Using the Design and Format tabs under SmartArt Tools, you can modify the style, color, and layout of your graphic to make it visually engaging.
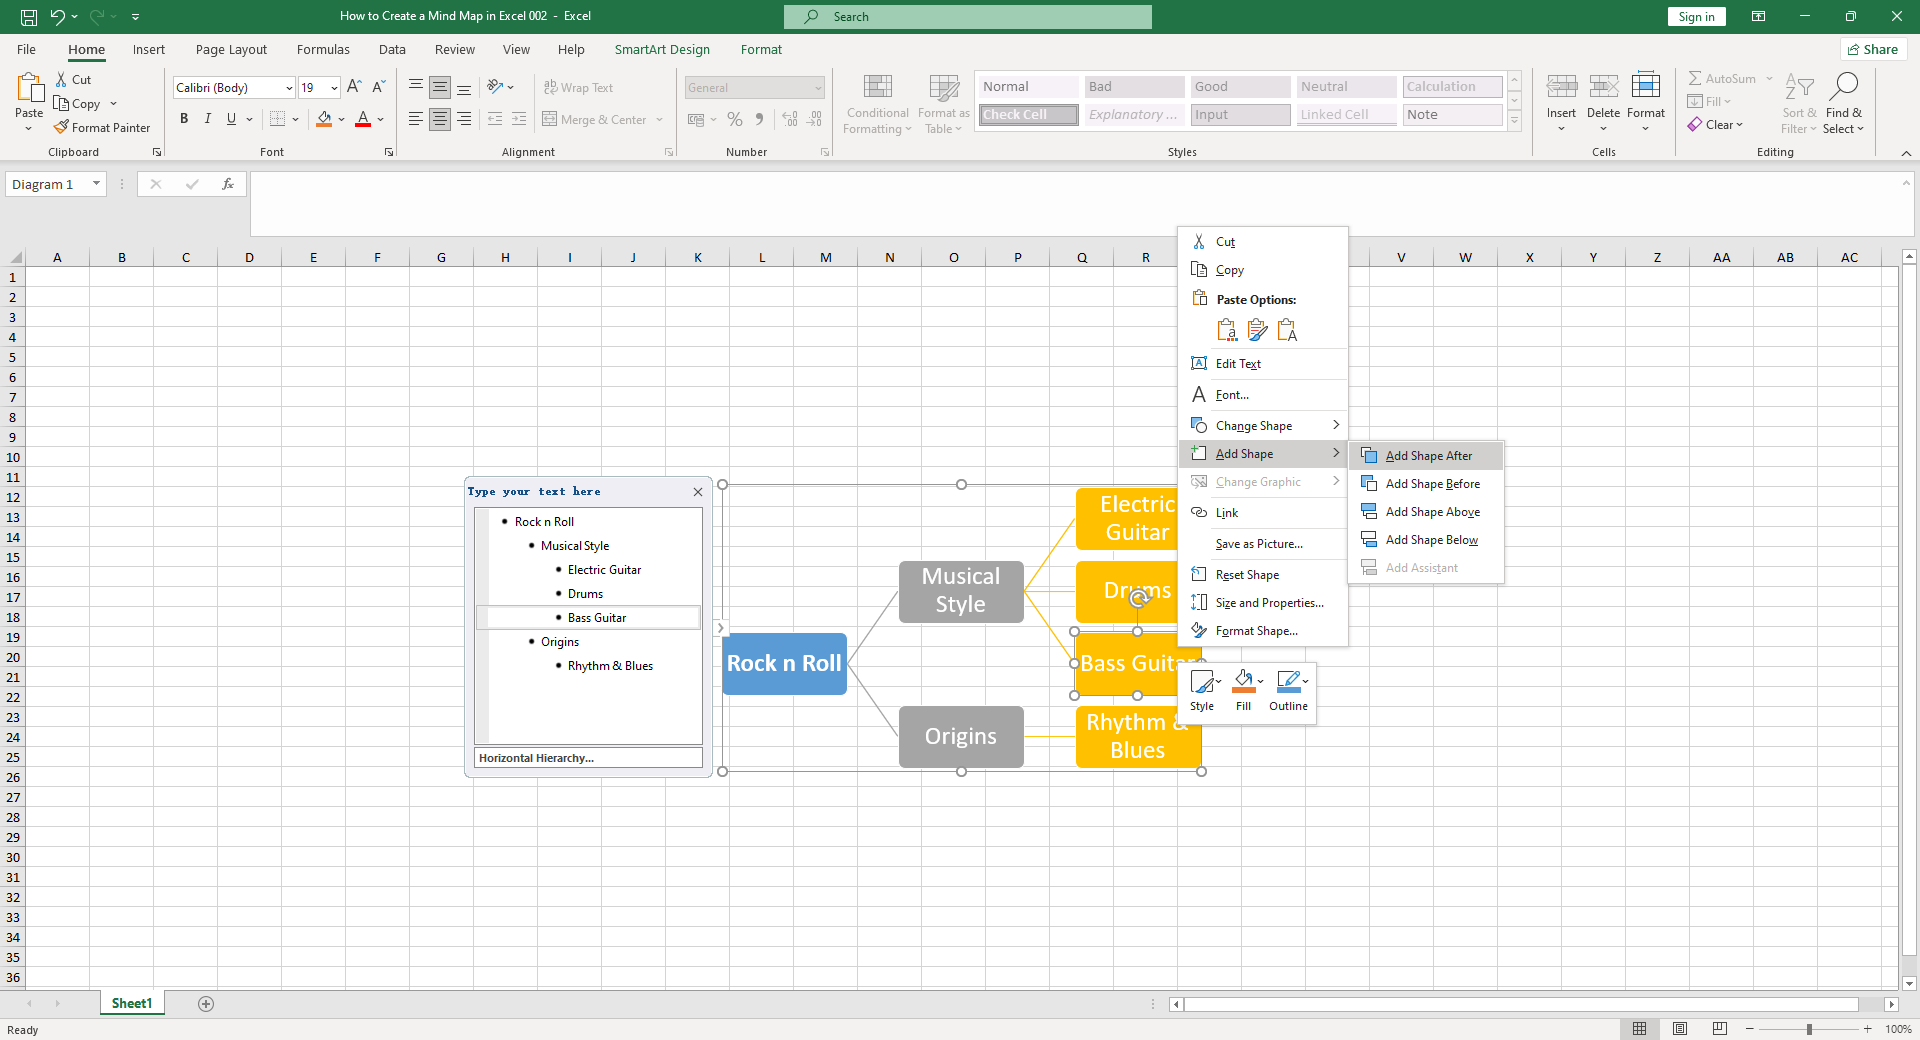
- Add More Shapes: If you need to add more ideas or subtopics to your mind map, simply select a shape near where you want the new one to go, then click Add Shape under the Design tab.
Major Drawbacks of Creating a Mind Map in Excel
Although possible, Excel does come with its own set of challenges when creating a mind map:
- Lack of Flexibility: Being a spreadsheet program at its core, Excel lacks the flexibility that dedicated mind map software provides. Changes aren't as easy to make and you often have to draw, customize, and connect your shapes manually.
- Limited Visual Appeal: While functional, Excel falls short in terms of aesthetic design options compared to dedicated mind mapping software.
- Difficult to Collaborate: With no built-in collaboration tools for mind maps in Excel, teamwork on the same mind map becomes challenging.
Create Effortless Mind Maps with Boardmix
For those who seek a more seamless and user-friendly experience in creating mind maps, Boardmix presents an effective solution. Designed specifically for mind mapping, it offers a suite of specialized features and functionalities that provide a much easier and visually appealing approach. Here's a detailed guide on how to create mind maps using Boardmix:
Method 1: Using Pre-Built or Blank Templates
One of Boardmix's major strengths lies in its diverse array of ready-to-use templates. These templates provide pre-arranged structures for various types of mind maps and save considerable time and effort:
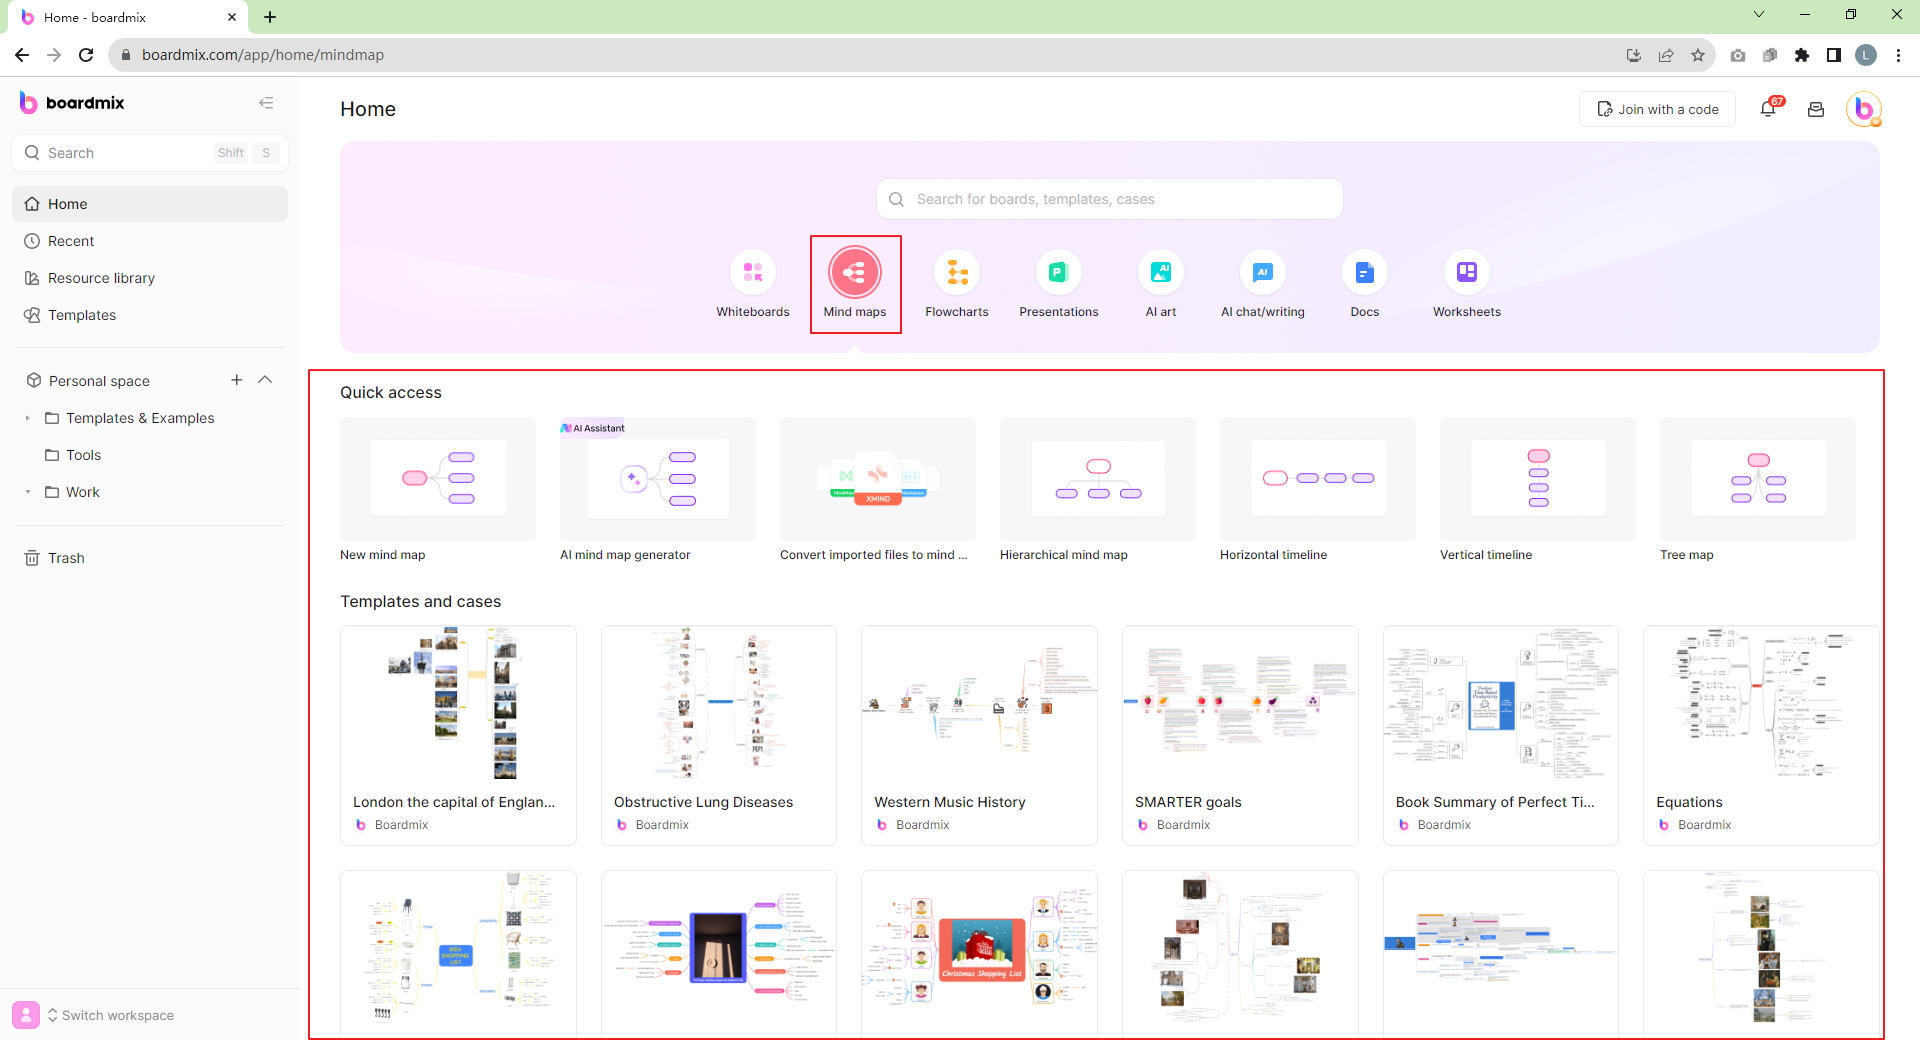
- Choose a Template: Start by navigating to the Home menu in the sidebar and go to Mind maps section on the right side. Browse through the selection of pre-built templates and choose one that suits your requirements.
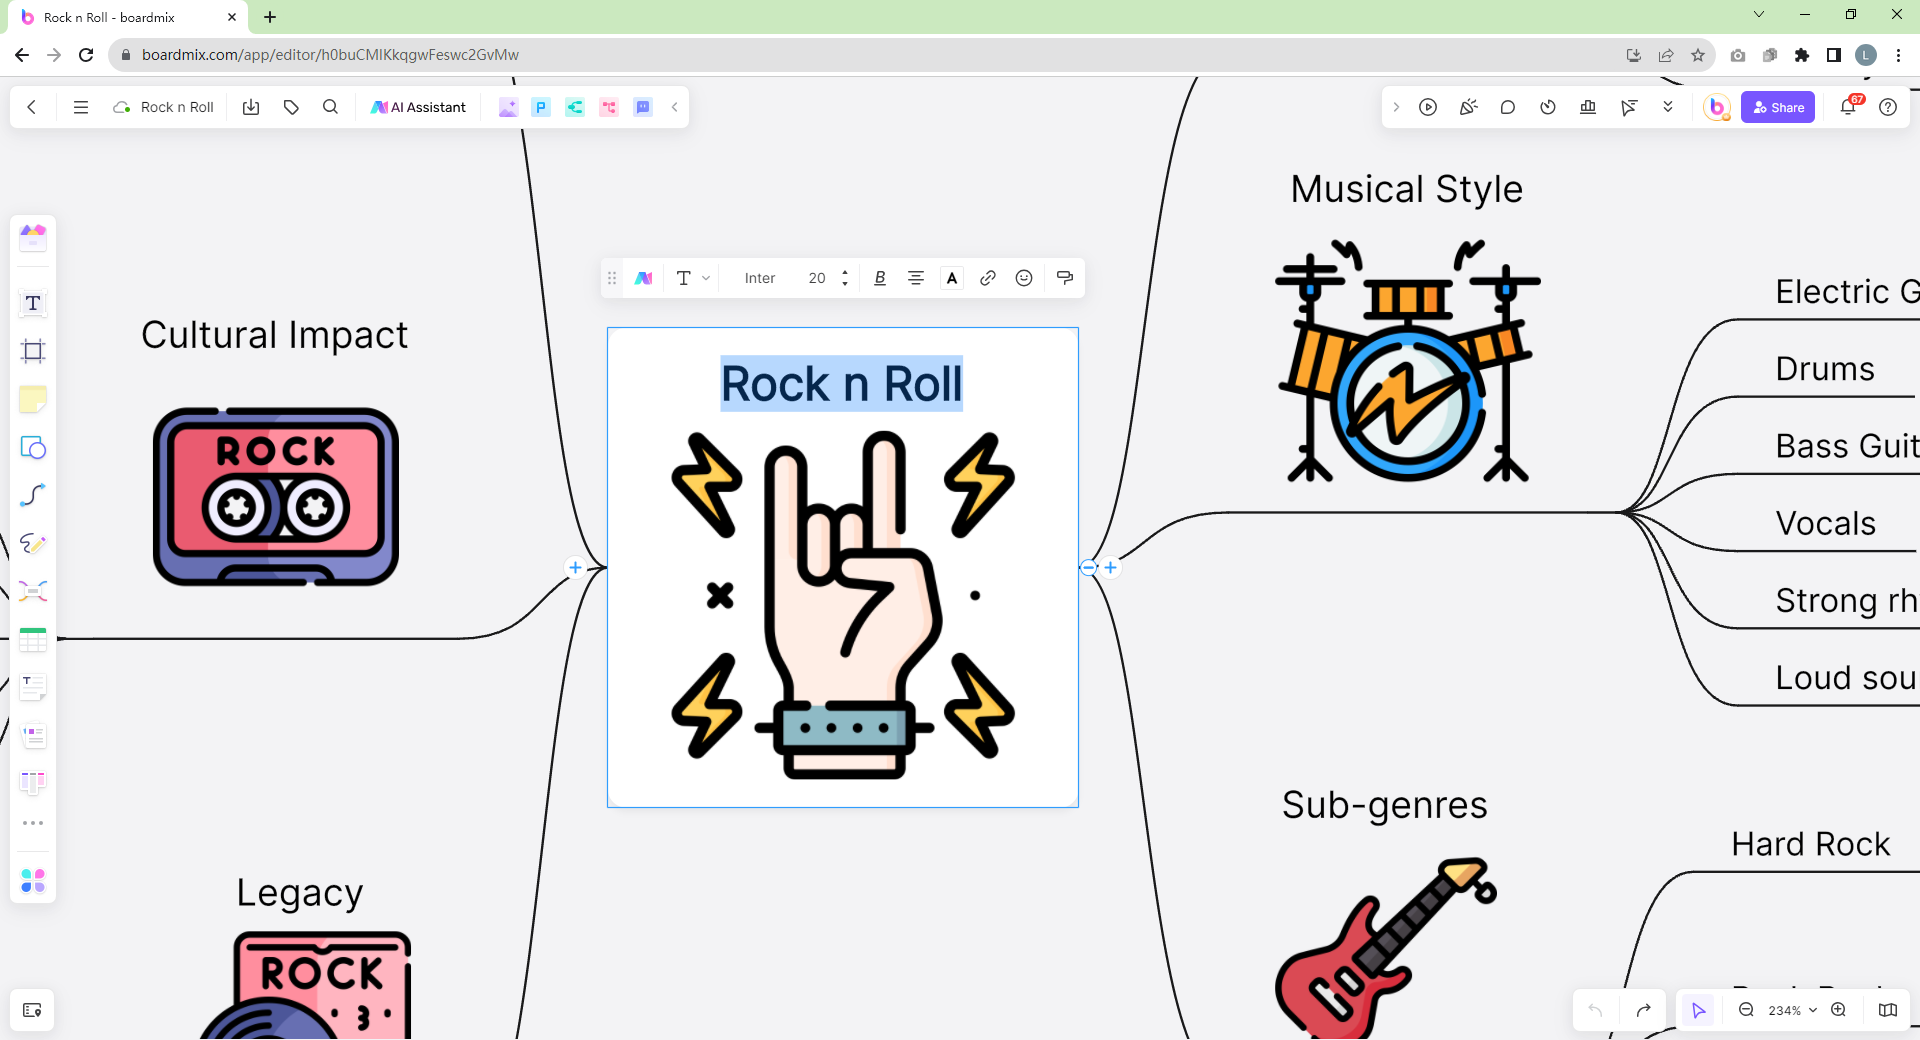
- Edit Text: Each template comes with placeholder text which can be replaced by clicking on it and typing your own information.
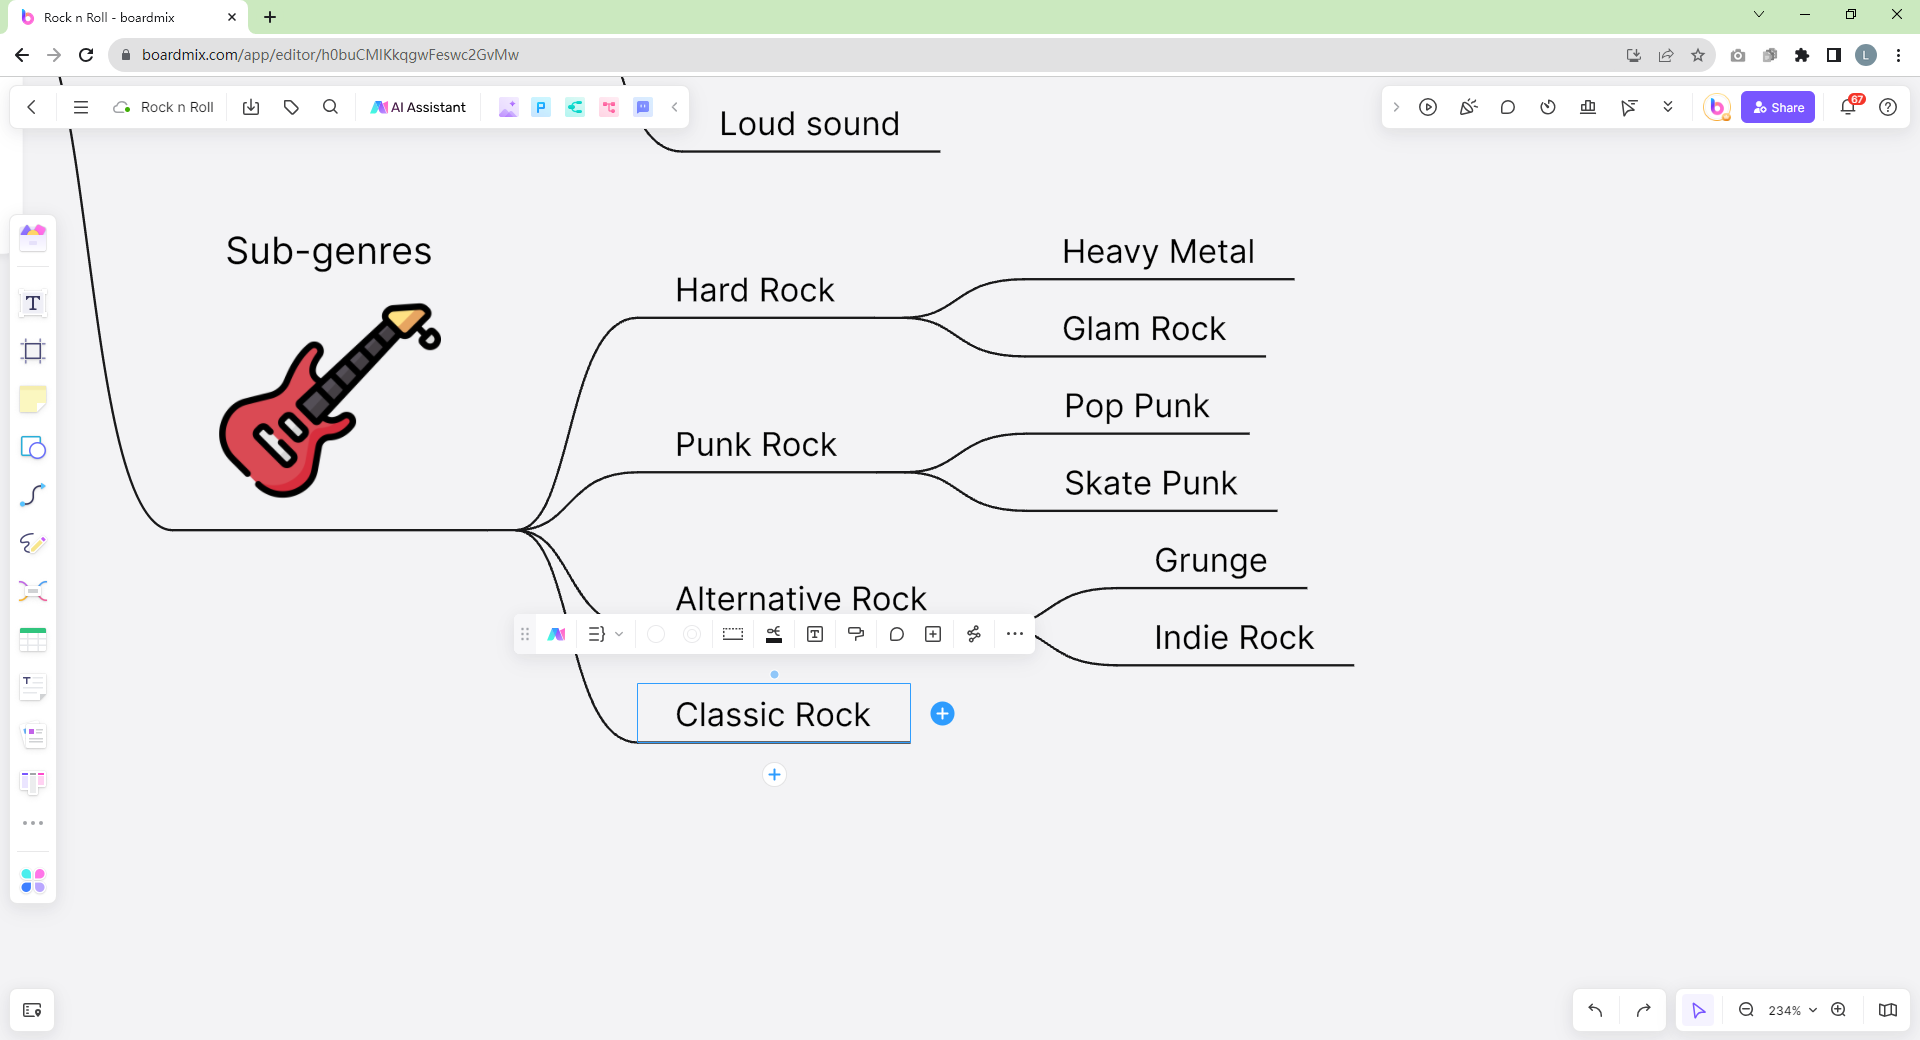
- Add More Nodes: Depending on your needs, you may want to add more nodes (topics, subtopics) to the template. To do this, simply select a node, click the plus icon (+) to add subtopics or sibling topics. You can also use the shortcut key: just press Enter to add sibling topics; and press Tab to add subtopics.
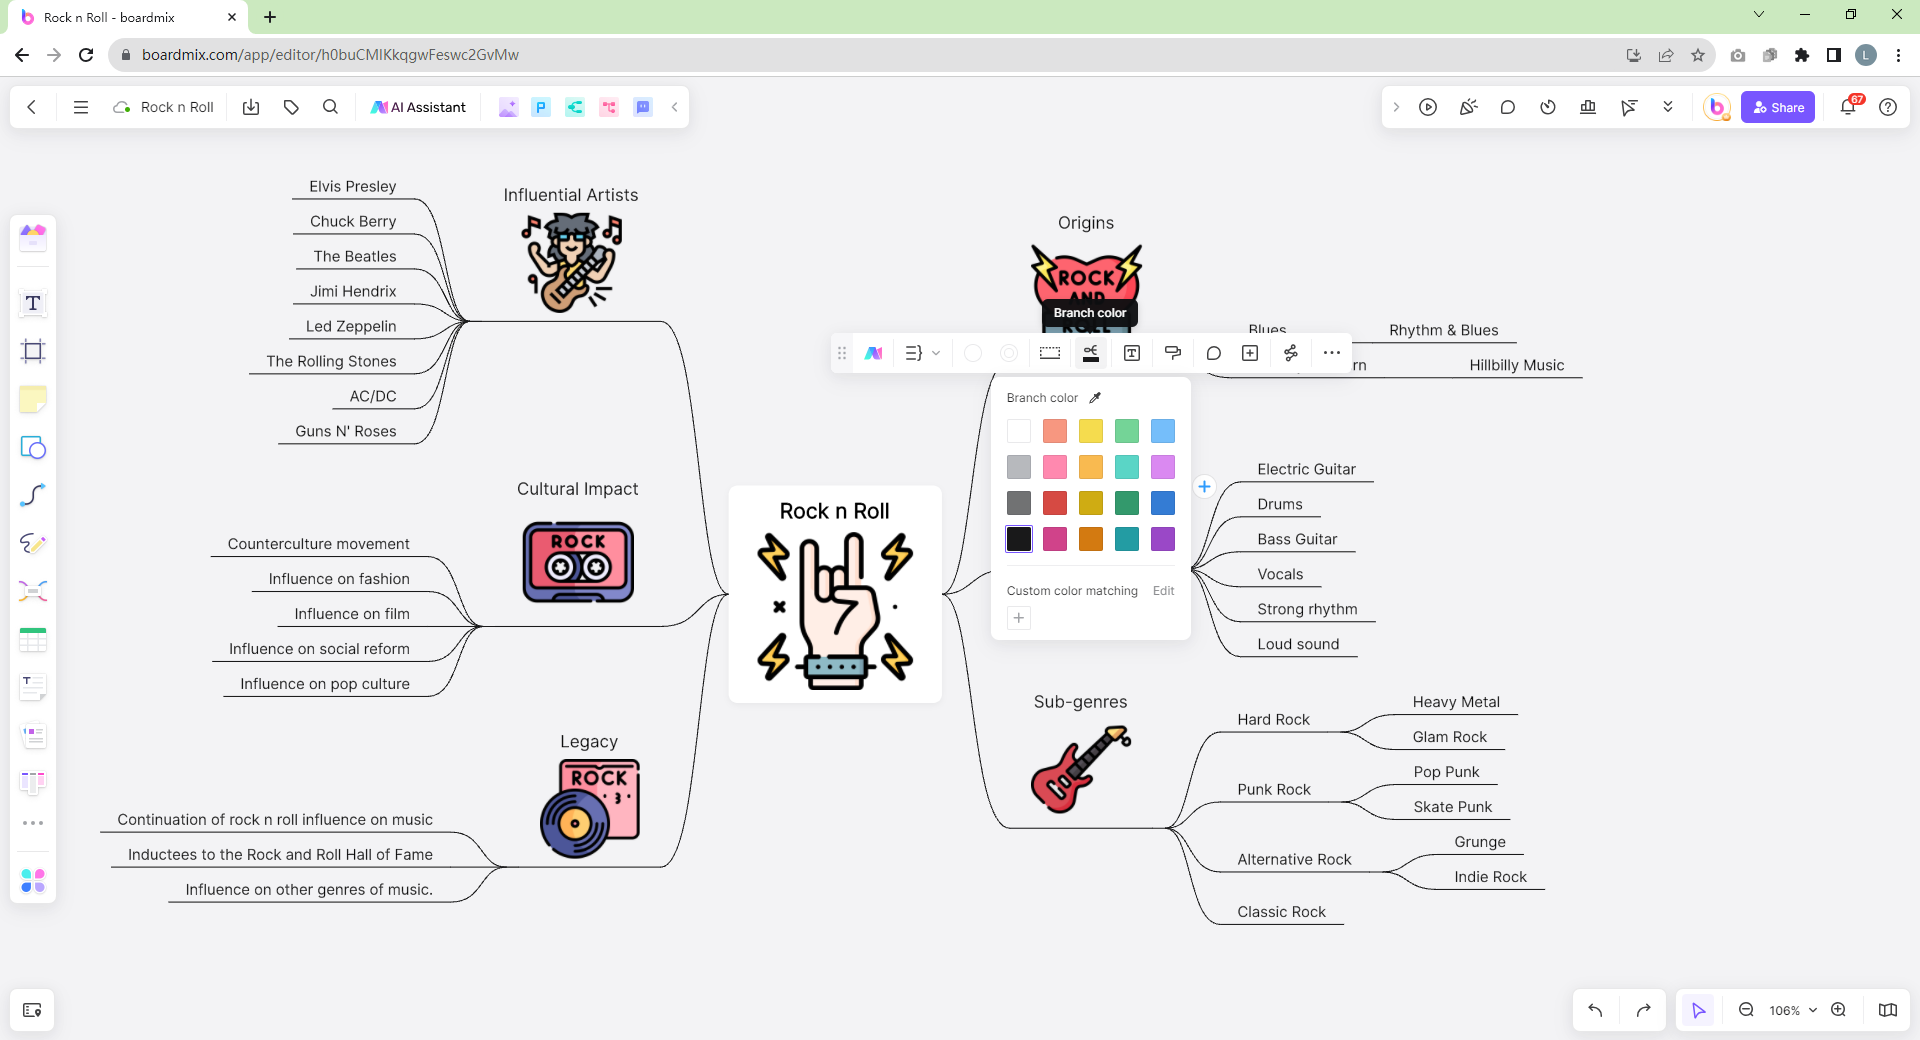
- Customize Nodes: You can customize individual nodes by changing their color, shape, or text formatting. The options for these can be found in the floating toolbar above the selected node.
Method 2: Creating from Scratch
If you prefer more control over the layout and design of your mind map, Boardmix allows you to create one from scratch:
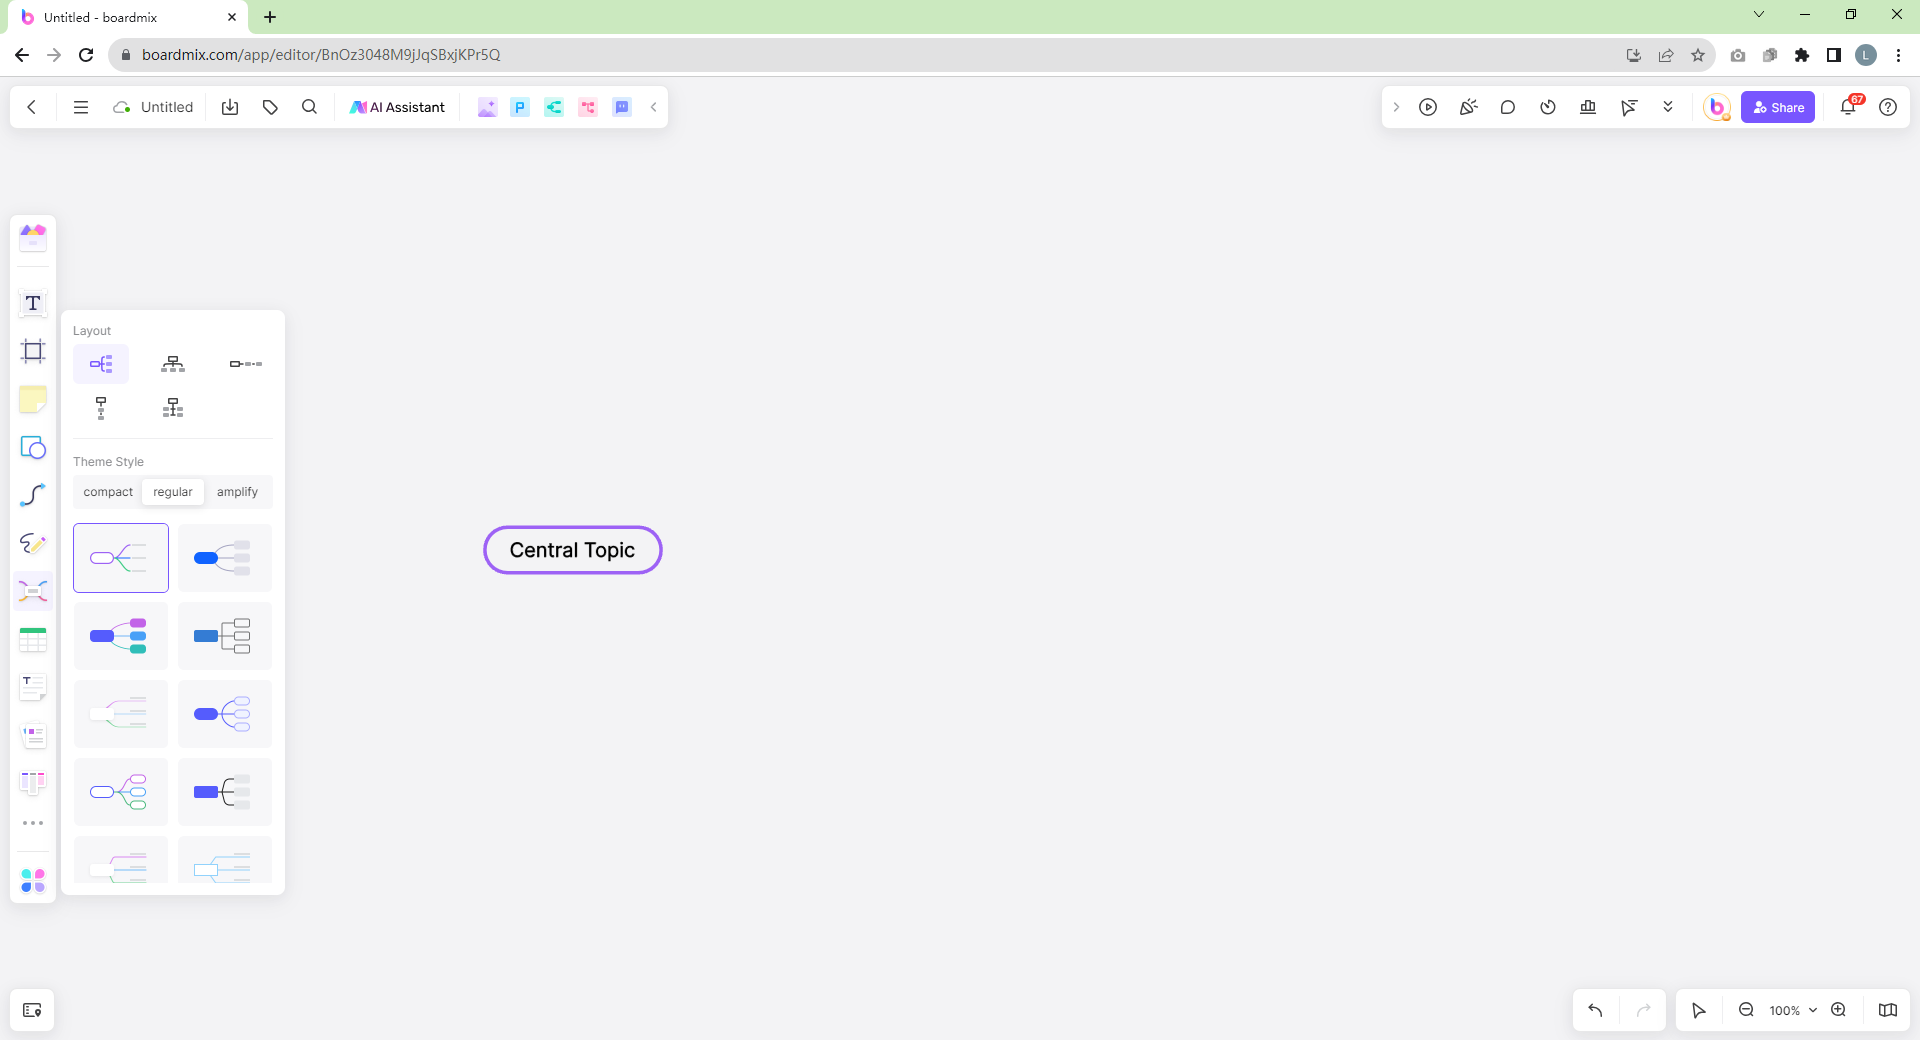
- Add Your Central Node: In a blank whiteboard, click the Mind map icon on the left-side toolbar or press the shortcut key M then click on the canvas wherever you want. The central idea or topic of your mind map will be created on the clicked position.
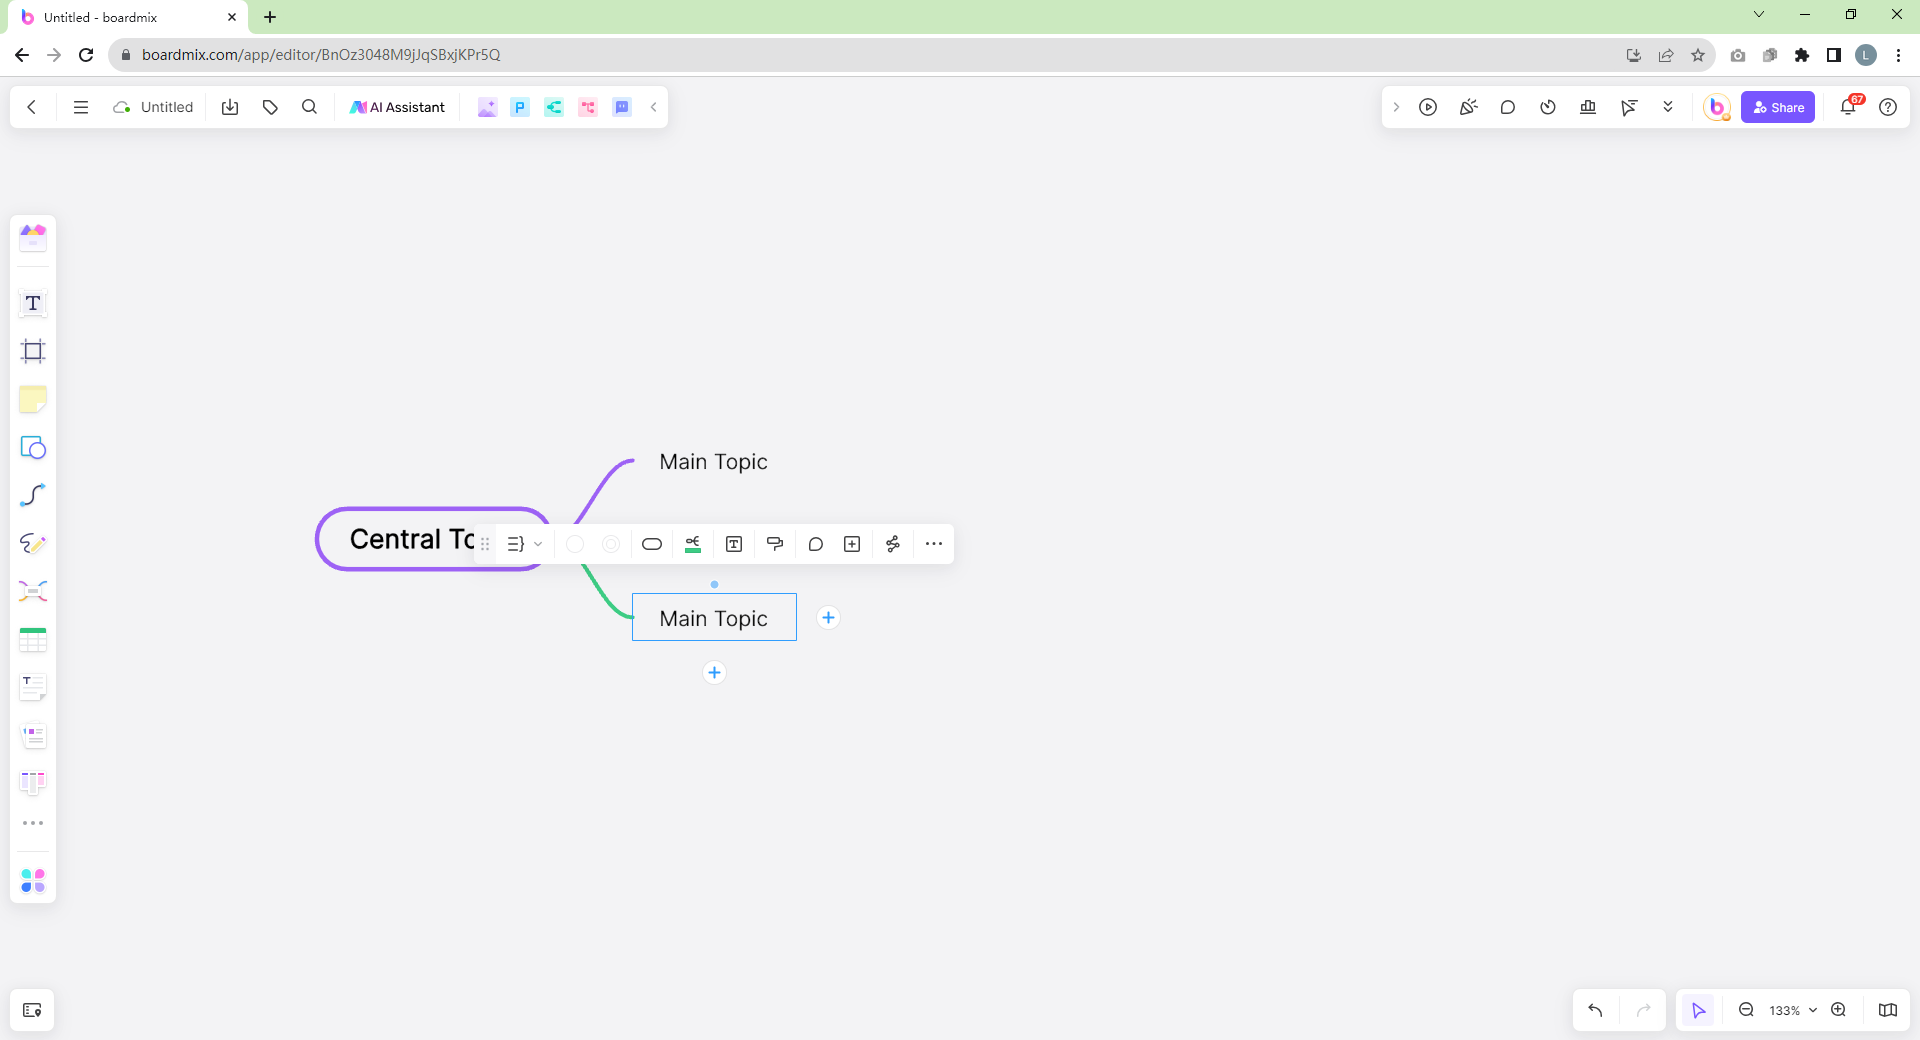
- Insert Subnodes: click the plus icon (+) to add subtopics or sibling topics. You can also use the shortcut key: just press Enter to add sibling topics; and press Tab to add subtopics.
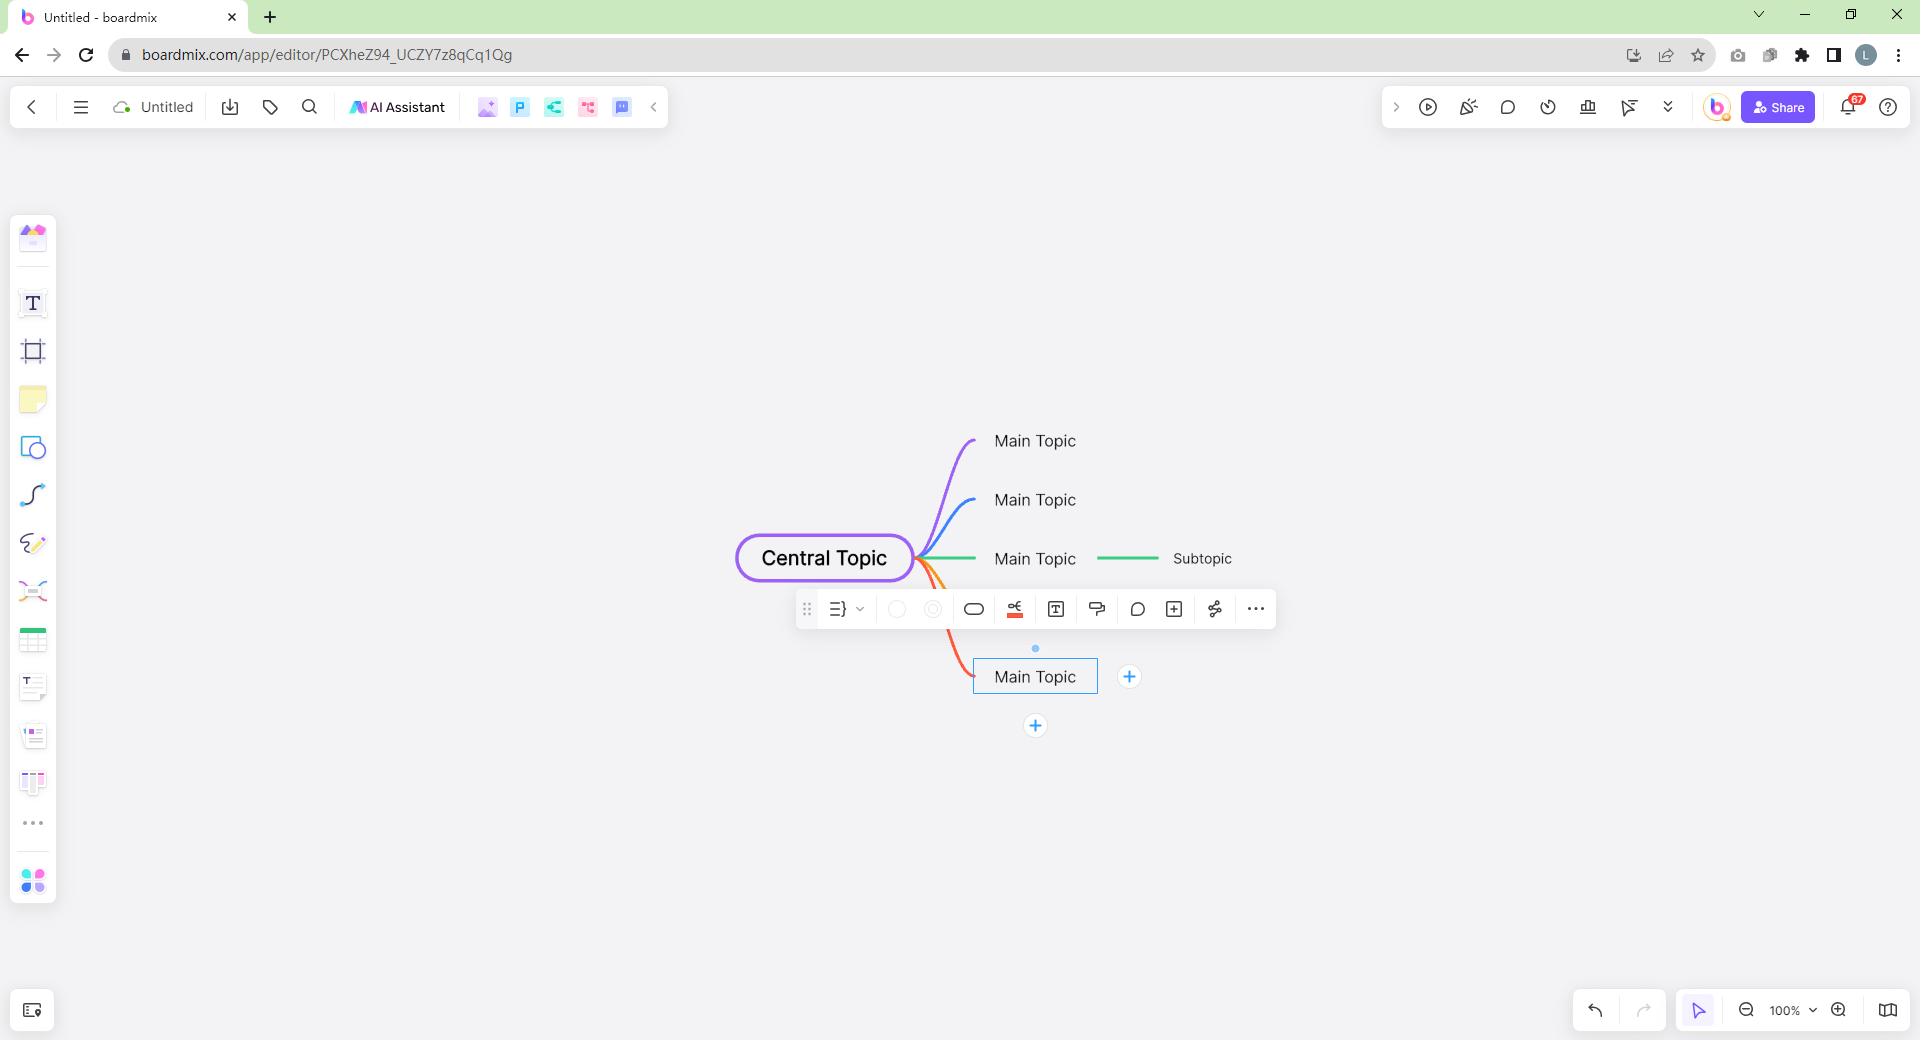
- Continue Building Your Map: Continue adding nodes and subnodes as required to represent all your ideas and their connections.
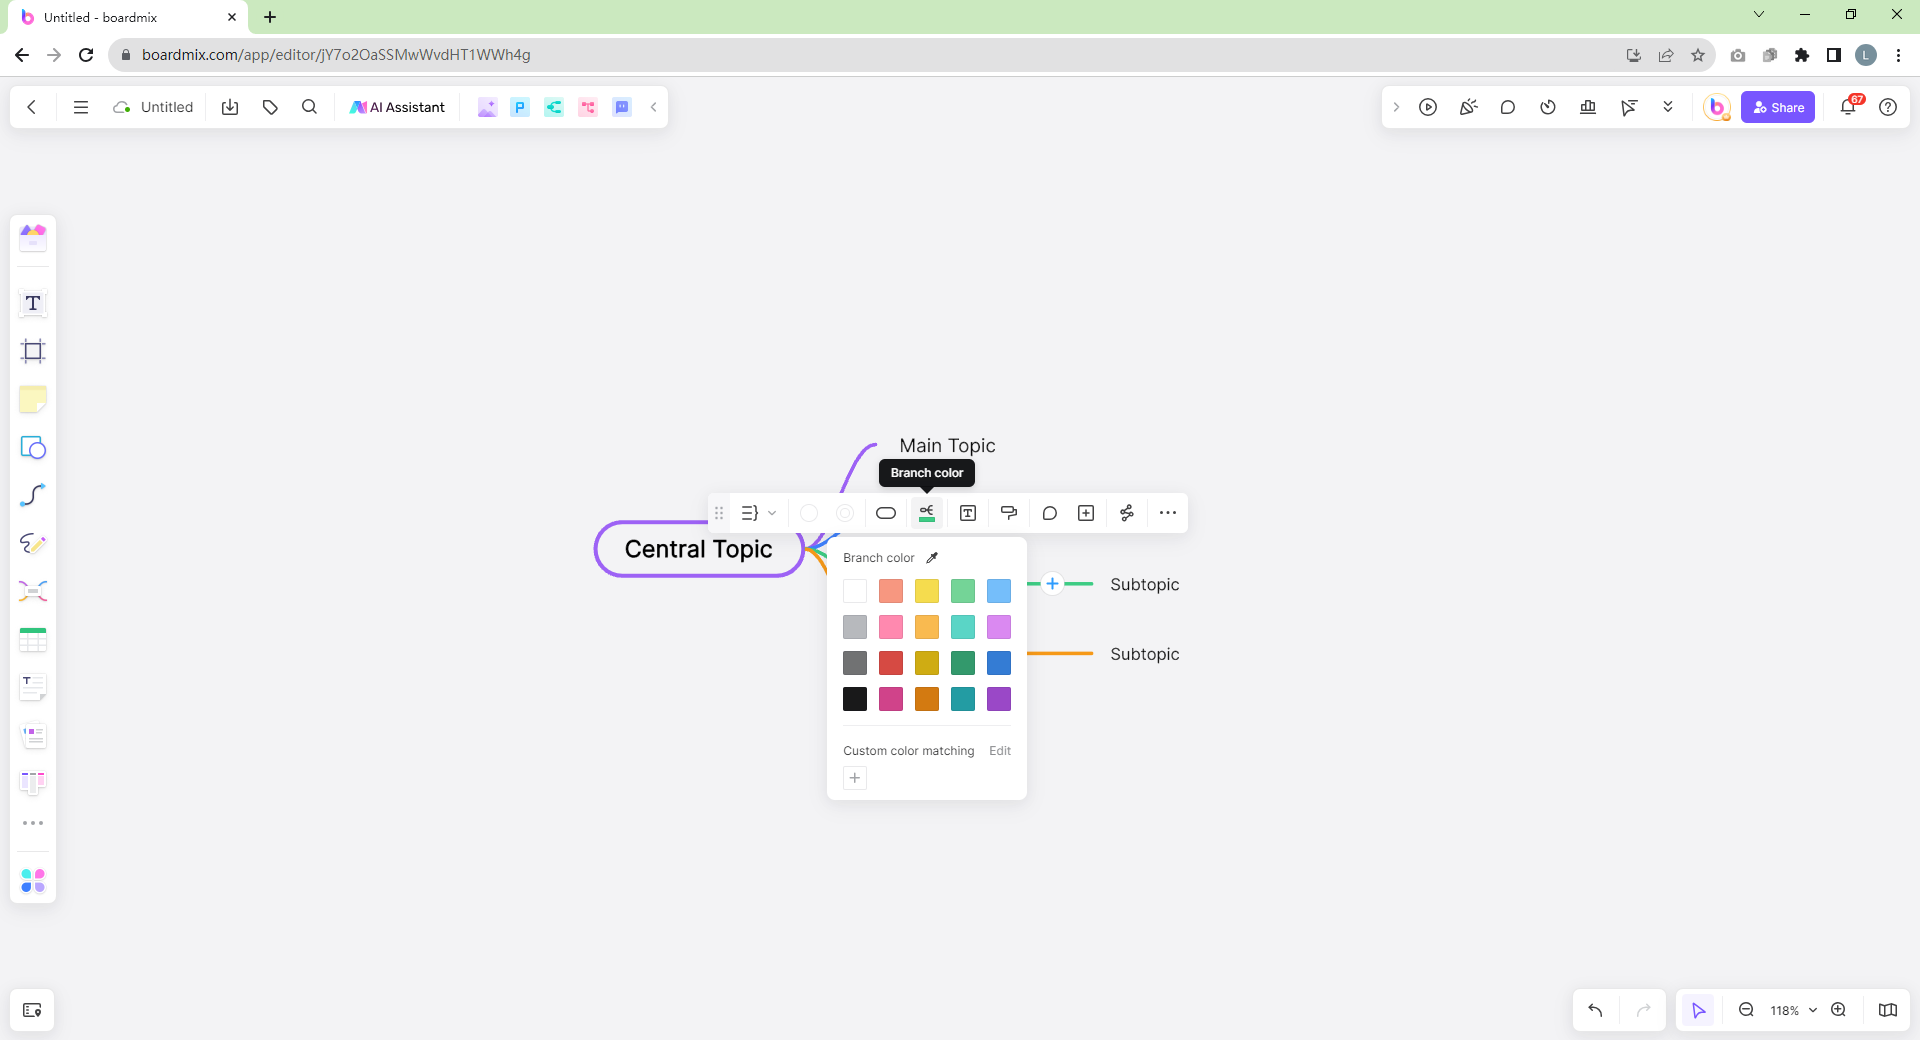
- Customize Your Map: Much like with the templates, you can customize each node in terms of shape, color, and text style.
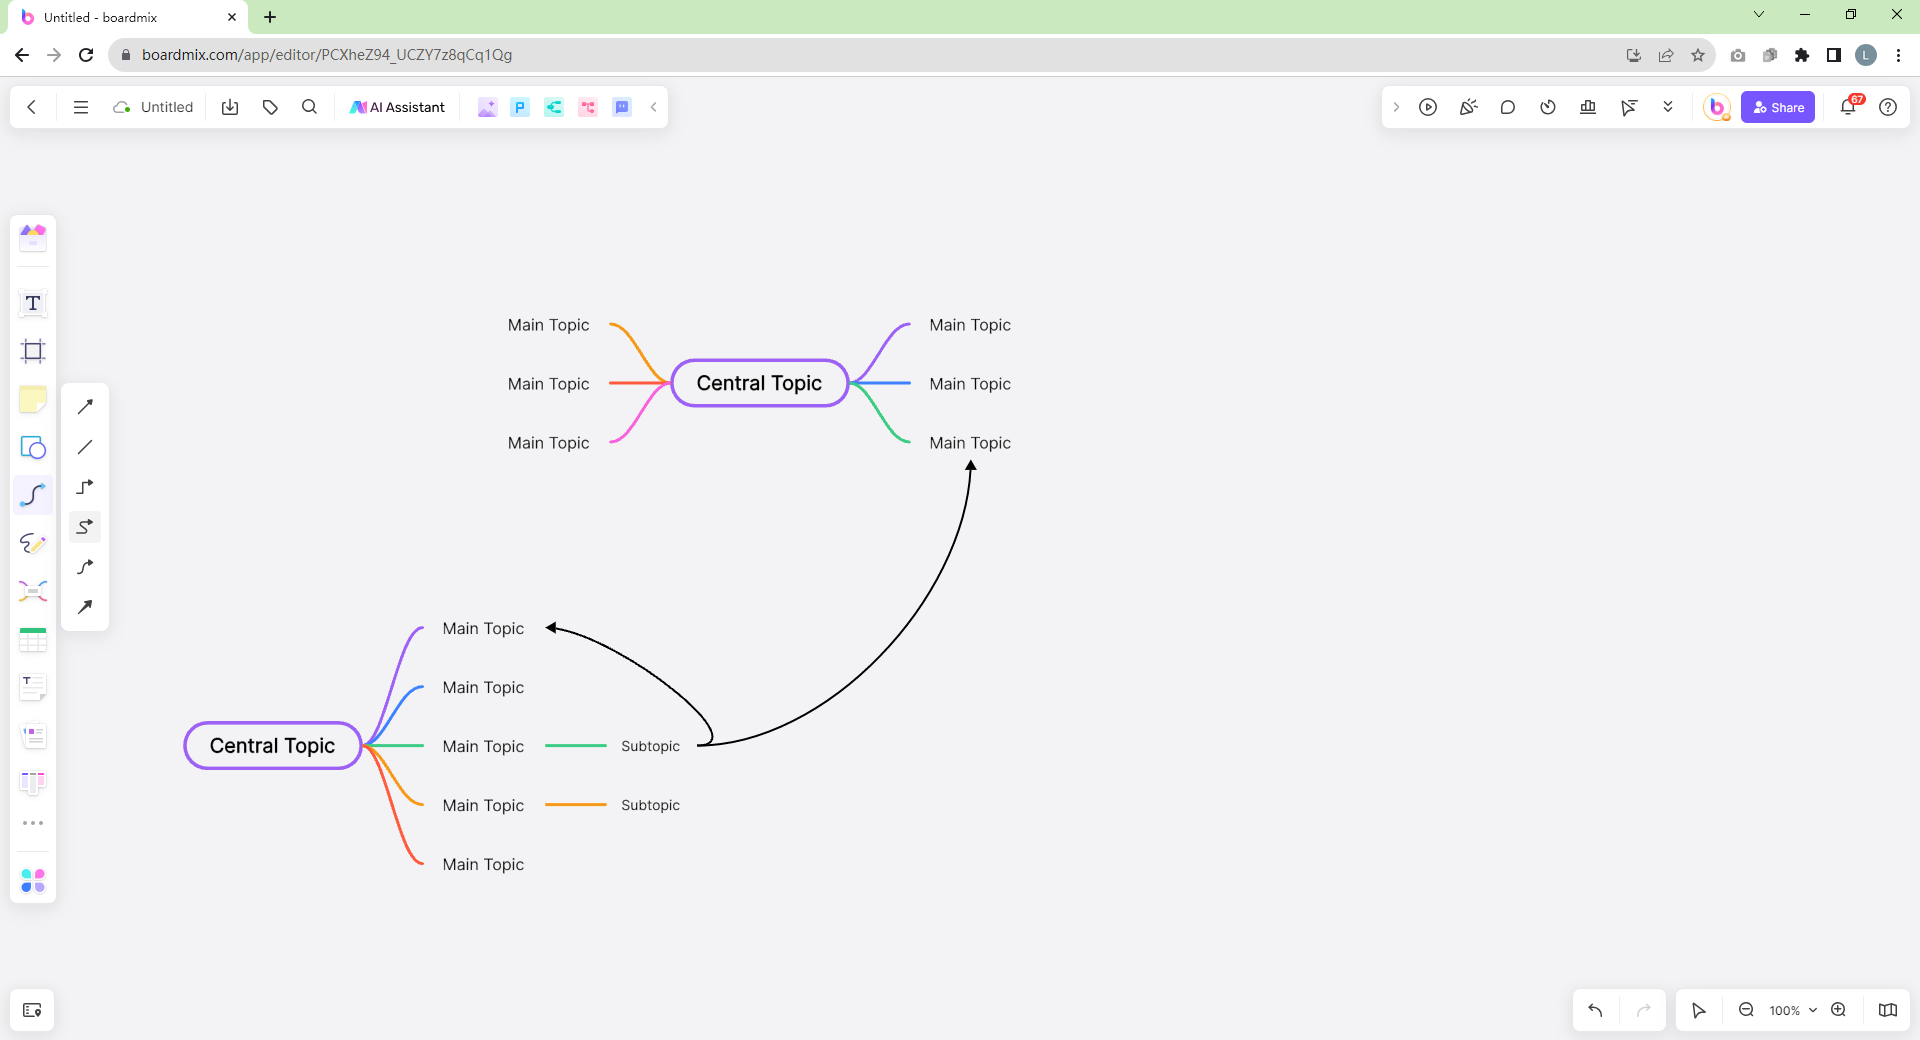
- Add Connections: Besides parent-child relationships (main topic to subtopic), you may want to indicate other relationships between nodes. You can do this by adding Connection line found on the left toolbar.
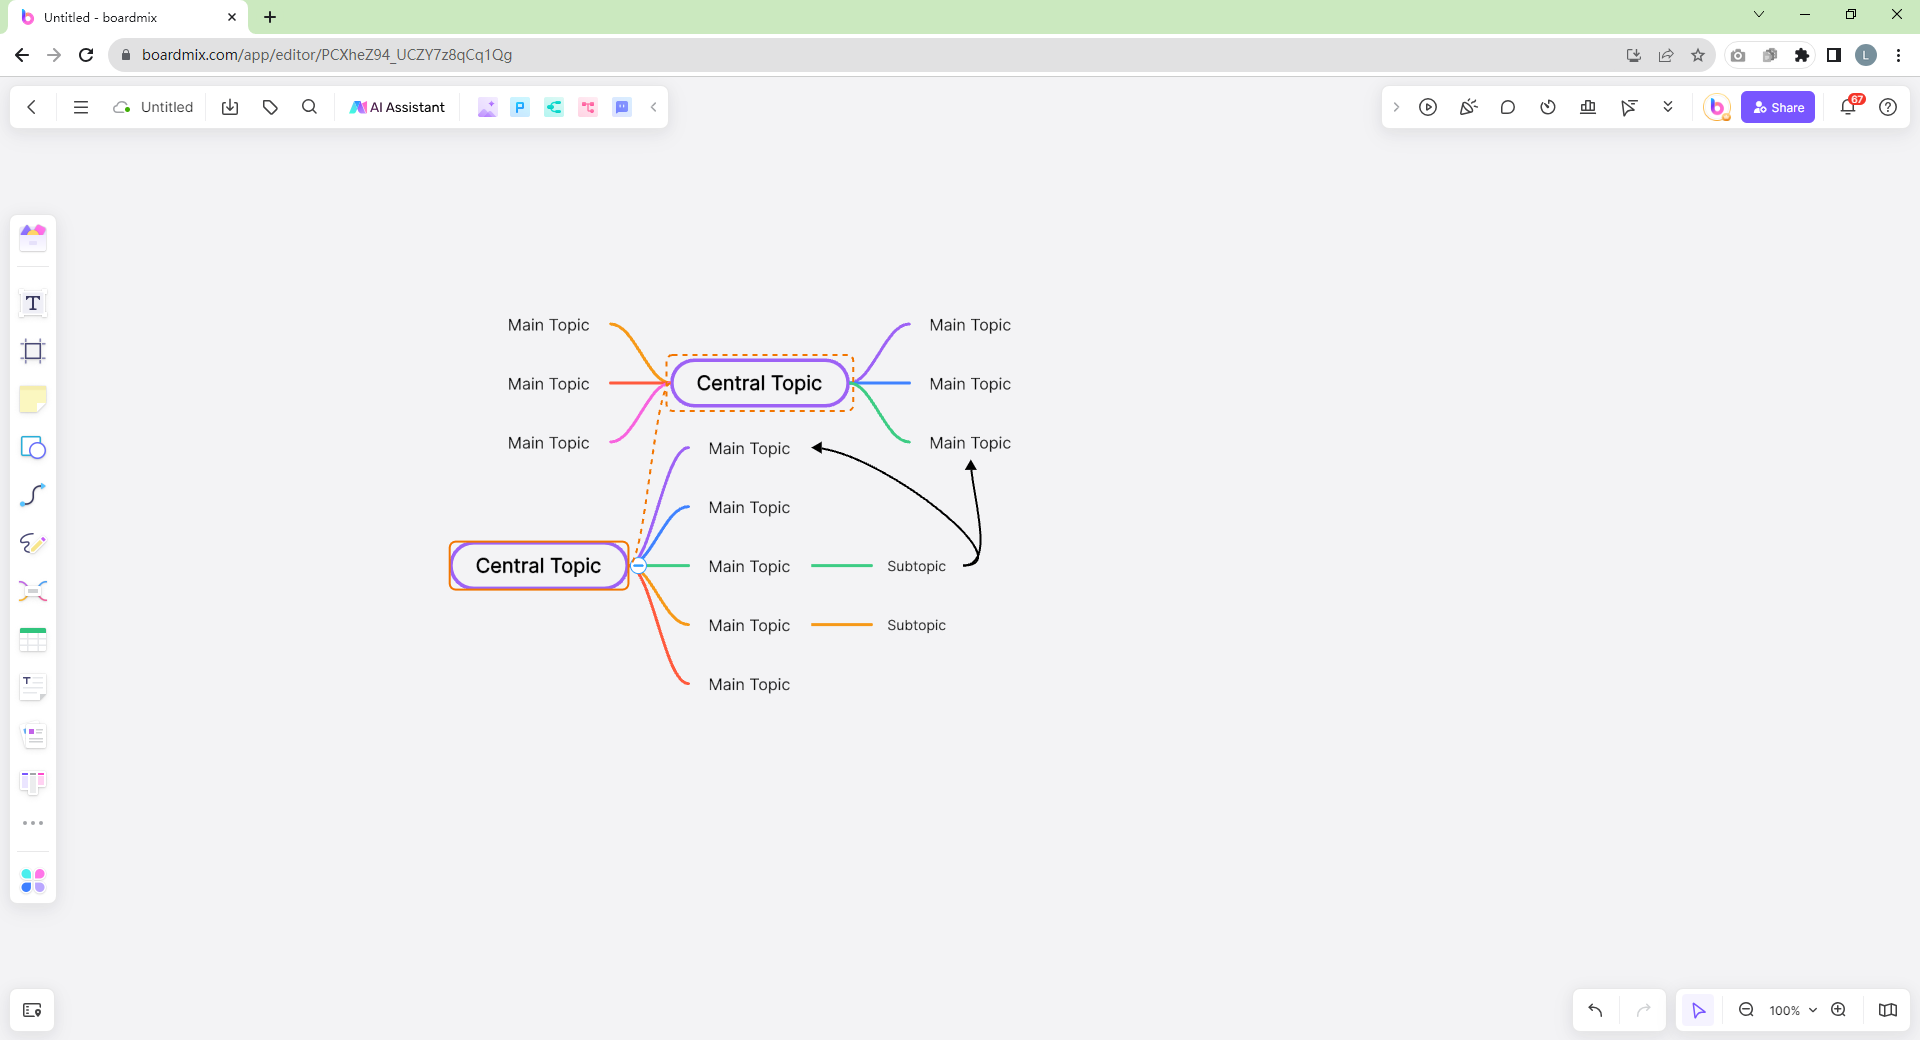
- Rearrange Nodes: If you need to rearrange the positions of the nodes, simply click and drag them around the workspace. The connecting lines will automatically adjust to maintain the structure of your mind map.
With Boardmix, creating mind maps is no longer a chore but an effortless and creative process. It's an excellent tool for organizing thoughts, brainstorming new ideas, visualizing relationships between concepts, and aiding recall and understanding.
Which One is a Better Mind Map Maker: Excel or Boardmix?
While Excel provides a decent array of tools for creating a mind map, its lack of flexibility, visual appeal, and collaboration capabilities make it less than ideal for this purpose. Boardmix, on the other hand, being a dedicated mind mapping software, offers a much more user-friendly and visually appealing platform for creating mind maps.
Regardless of the tool you choose, remember that the goal of creating a mind map is to simplify complex ideas and improve cognitive functions. So, choose the tool that best helps you achieve this. Happy mind mapping!


