Creating swimlane diagrams can significantly streamline project management and process workflows. Among the array of tools available for creating these diagrams, Microsoft Visio stands out with its advanced features and versatility. This comprehensive guide provides an in-depth tutorial on how to make a swimlane diagram in Microsoft Visio, allowing you to master this useful feature and optimize your workflow.
What is a Swimlane Diagram?
Swimlane diagrams, also known as process maps or cross-functional flowcharts, provide a clear visual representation of a process flow across different departments or responsibilities. The “swimlanes” separate distinct roles, helping users identify specific tasks and responsibilities assigned to different departments or individuals.
Creating a swimlane diagram enhances communication, efficiency, and clarity within a project, making it an invaluable tool for project managers and team leaders. Understanding the process flow and everyone's roles reduces confusion, prevents bottlenecks, and ensures smooth operations.
How to Make a Swimlane Diagram in Microsoft Visio?
Microsoft Visio offers a simple way to create detailed and efficient swimlane diagrams. Here's a step-by-step guide:
Step 1: Launch Microsoft Visio
Open your Microsoft Visio software from the start menu or your desktop. Once it opens, click on "File" in the top menu bar and then select "New." A new window will pop up.
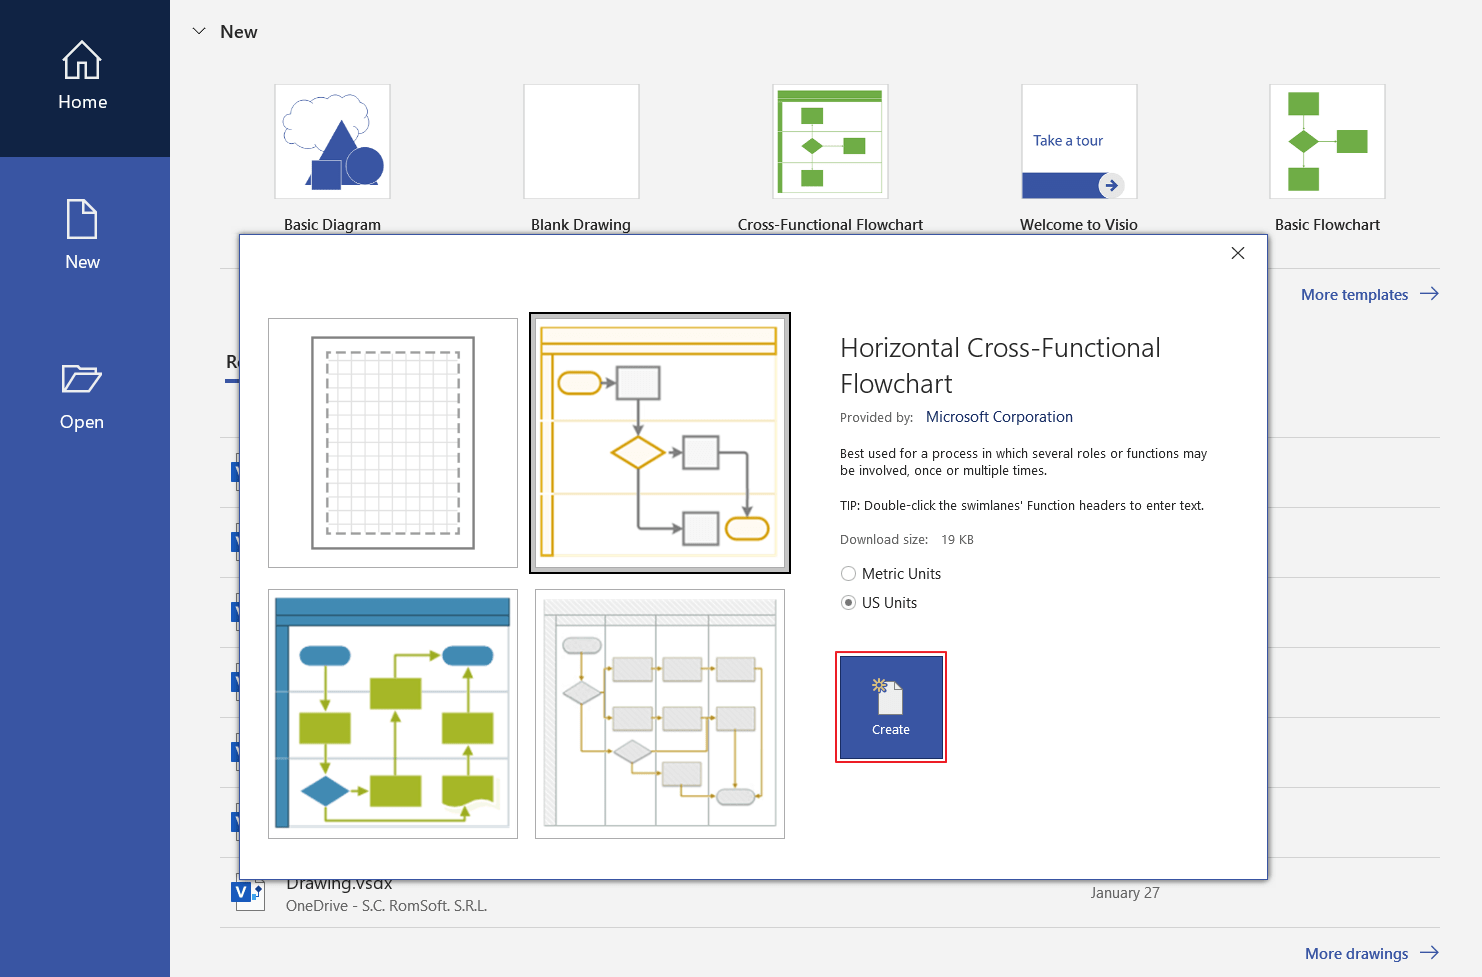
Step 2: Select the Cross-Functional Flowchart Template
From the New window, scroll down through the template options until you find 'Flowchart'. Under 'Flowchart', you will find a template named 'Cross-Functional Flowchart'. Select this template.
Step 3: Configure Swimlanes
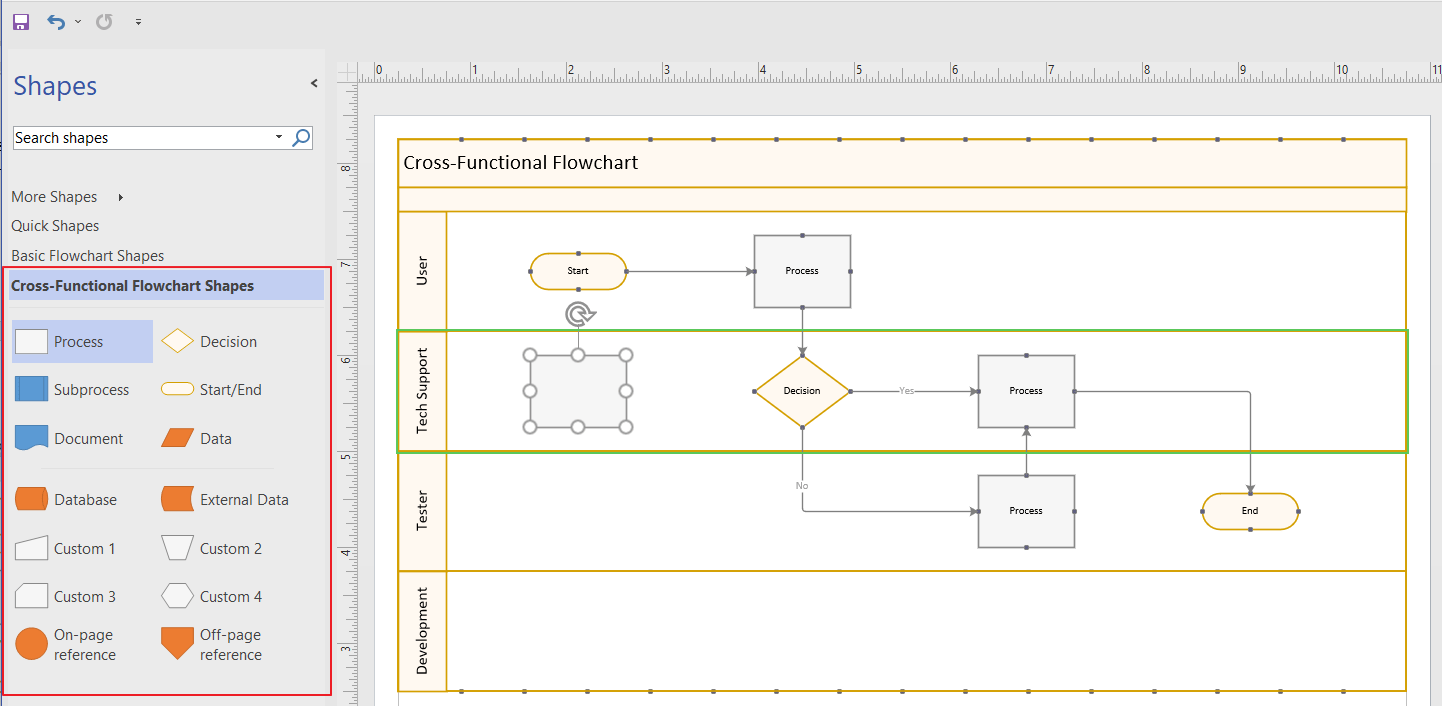
On opening the 'Cross-Functional Flowchart' template, you'll notice it already has a couple of swimlanes added by default.
To add more swimlanes, right-click on any existing swimlane and select 'Insert Swimlane' from the drop-down menu. If you wish to delete a swimlane, simply right-click on the unwanted swimlane and select 'Delete'. You can also rename each swimlane by clicking on its title and typing the desired name.
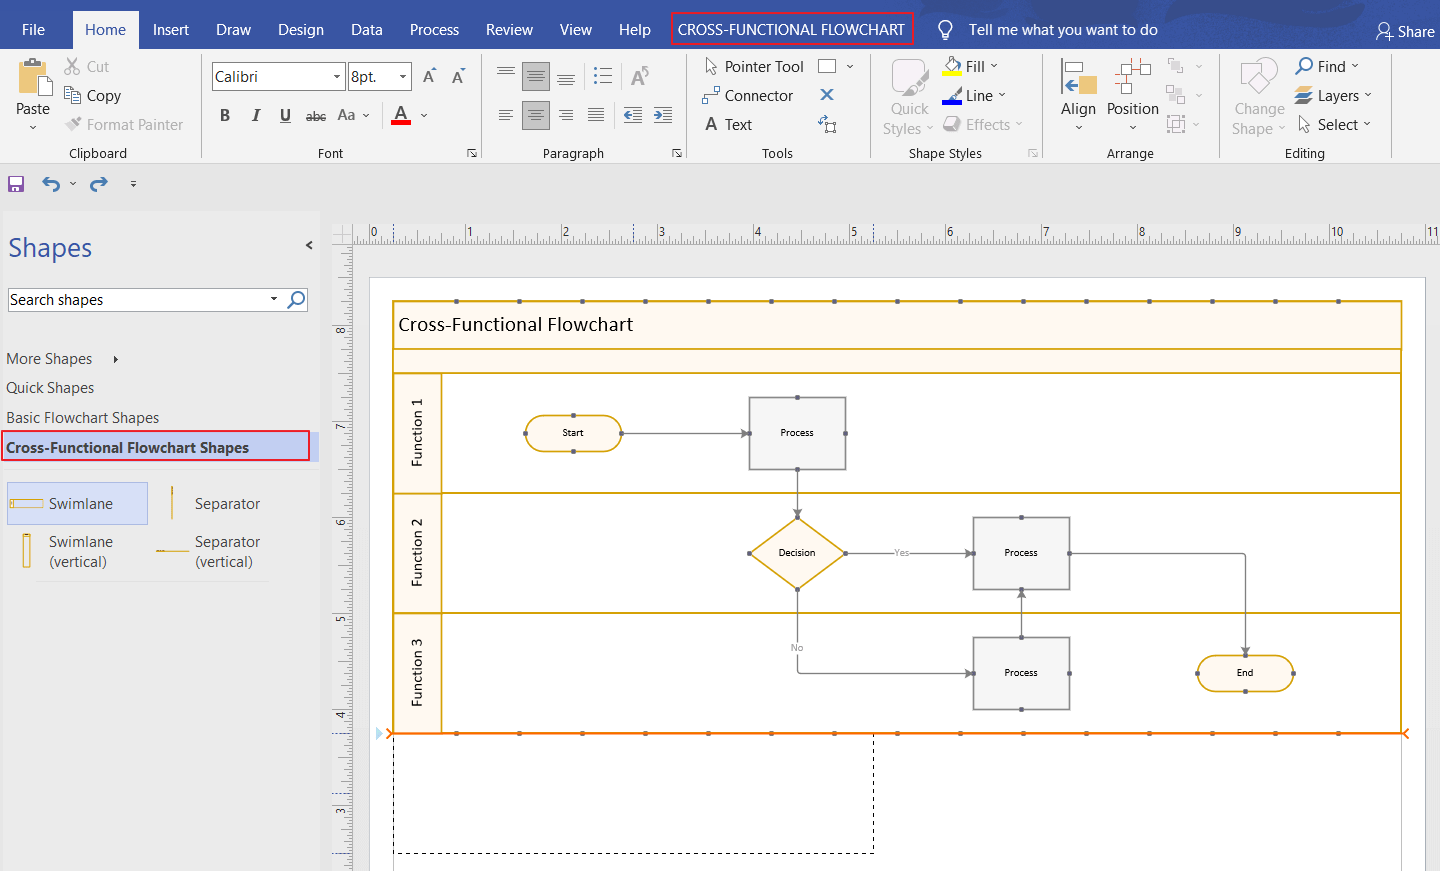
Step 4: Add Shapes to Your Diagram
Once your swimlanes are set, you can start building your process flow within them. On the left-hand side of the screen, you will see a Shapes panel with various shapes that represent different stages or actions within a process.
Click on a shape and drag it to the appropriate position within your chosen swimlane. Remember that each shape should represent a distinct step in your process.
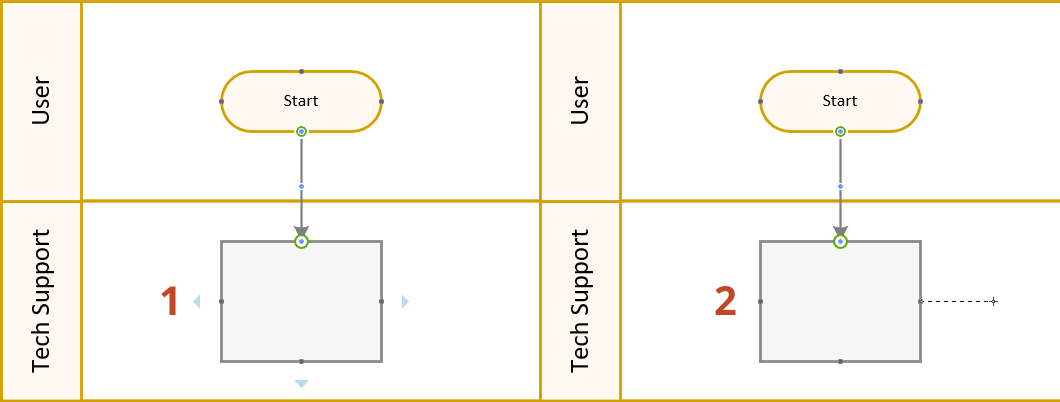
Step 5: Connect Shapes to Indicate Process Flow
Now that you've added shapes to represent different tasks, connect them using arrows to show the flow of processes. From the Shapes panel, select an arrow and drag it from one shape to another. An arrow's direction indicates the sequence of tasks.
Step 6: Customize Your Diagram
Finally, give your diagram a professional finish by customizing its look and feel. Visio allows you to change the color of your shapes, add text labels, adjust fonts, and tweak layout options to your liking.
Remember to utilize Microsoft Visio's array of design tools for a professional and easy-to-understand diagram. As you get more comfortable with the tool, you can explore additional features and customizations for even more detailed and efficient swimlane diagrams.

Major Drawbacks of Creating a Swimlane Diagram in Microsoft Visio
Despite being a powerful tool for creating swimlane diagrams, Microsoft Visio comes with its set of drawbacks that potential users should be aware of.
Steep Learning Curve: Microsoft Visio is packed with numerous features and functions. While this richness can be highly beneficial to those who have mastered the software, it can present a daunting challenge to newcomers. Navigating through the software's intricacies and learning how to use its various features effectively can be a time-consuming process, making it less suitable for those looking for a quick solution.
Cost Considerations: Unlike many basic applications that come bundled with the Microsoft Office suite, Microsoft Visio is not part of the standard Office 365 package. This means that access to Visio requires an additional subscription, which can be costly, especially for small businesses or individual users. The cost factor can be a significant deterrent for those who only need to create swimlane diagrams occasionally or have a tight budget.
Limited Collaboration Features: In today's connected workplace, the ability to collaborate and share work with team members in real-time is vital. While Visio does provide some collaboration features, they are somewhat limited compared to other modern diagramming tools. For example, real-time co-editing is not available, making collaborative design sessions difficult.
Lack of Pre-built Templates: Although Visio does provide some templates for creating diagrams, the options are relatively limited. This lack of pre-built templates may lead to more time spent creating diagrams from scratch, impacting productivity.
Create Effortless Swimlane Diagrams with Boardmix
Boardmix is an alternative to Visio that offers a simpler, more intuitive way to create swimlane diagrams. Its user-friendly interface and impressive feature set make it an attractive option for teams looking for a simpler yet powerful solution.
Real-Time Collaboration
One of the standout features of Boardmix is its capability for real-time collaboration. Team members can co-create and edit diagrams simultaneously, enabling dynamic brainstorming sessions, immediate feedback, and seamless workflow. This contrasts with Visio, where the lack of real-time co-editing can often hinder the collaborative design process.
Ease of Use
Boardmix's user interface is designed with simplicity in mind. Unlike Visio's steep learning curve, even new users can quickly grasp how to create detailed diagrams with Boardmix. With drag-and-drop functionality, creating and arranging elements in your swimlane diagram becomes effortless.
Creating Swimlane Diagrams with Boardmix
- Using Pre-Built Templates:Boardmix's collection of pre-built templates caters to a range of use cases. These templates serve as excellent starting points for creating swimlane diagrams, helping save time and providing inspiration for your own design.
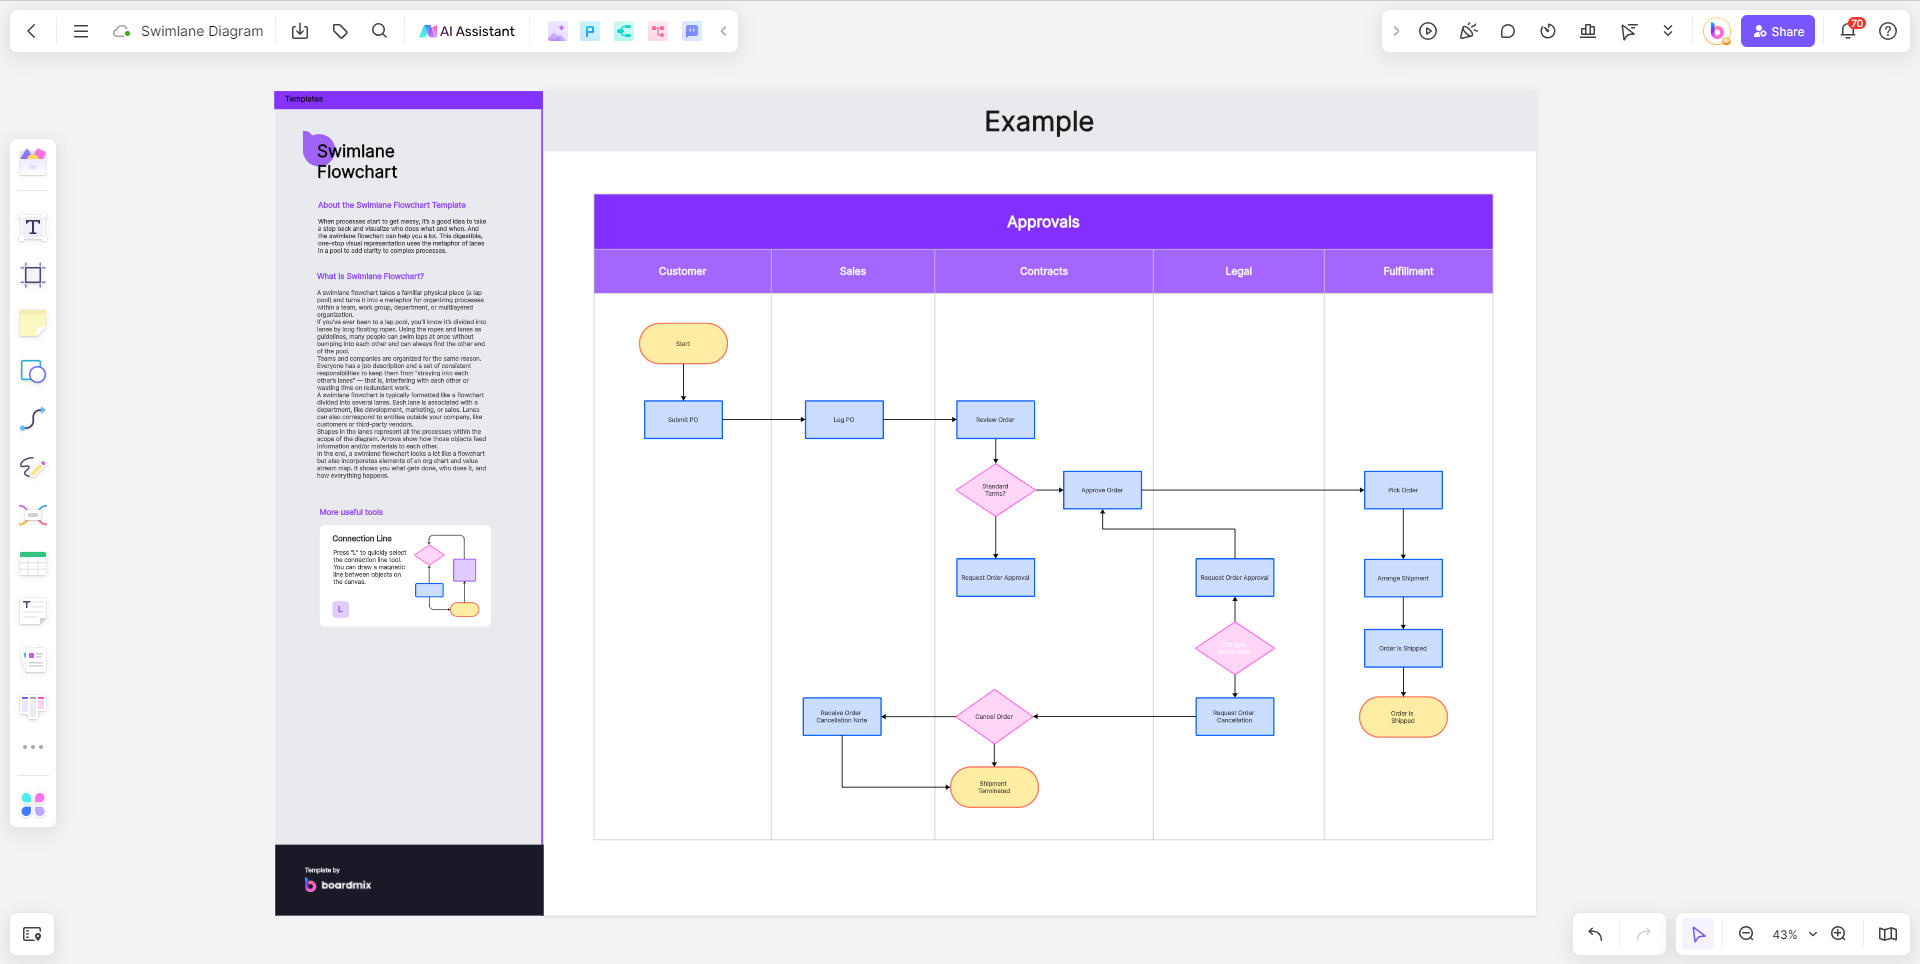
- Creating from Scratch:If you prefer starting from scratch, Boardmix's easy-to-use tools make this a breeze. You can add swimlanes, drag and drop shapes representing different tasks or process stages into them, and easily connect the shapes with arrows to show process flow.

Affordable
Boardmix offers affordable pricing plans compared to Visio's additional cost on top of the Microsoft 365 subscription. It also offers a free version with basic features, making it a cost-effective choice for small businesses or individuals with budget constraints.
Platform Compatibility
Unlike Visio, which is mainly for Windows users, Boardmix is a cloud-based solution accessible from any device with an internet connection - whether you're on a PC, Mac, or even a tablet.
Which One is a Better Swimlane Diagram Maker: Microsoft Visio or Boardmix?
While Microsoft Visio offers extensive features for creating detailed swimlane diagrams, its complexity and cost may deter some users. On the other hand, Boardmix offers an accessible, cost-effective solution that caters to both beginners and experienced diagram creators. In choosing between the two, consider your team's specific needs, available resources, and proficiency level.
If you're looking for an alternative to Microsoft Visio for creating swimlane diagrams, Boardmix is a reliable and user-friendly option. With its real-time collaboration feature, intuitive interface, and affordability, it offers a compelling case for teams and individuals alike.