To change colors on a whiteboard, select the object you want to edit and use its fill or color controls. In Canva, the available color tiles depend on the selected element. In Boardmix, the example below changes a table cell's fill. Neither action should be confused with changing the background of an entire infinite canvas.
This guide covers four Canva color controls and seven Boardmix steps, with a simple project-status example you can reproduce on an online whiteboard. The screenshots demonstrate object formatting; their interface appearance may differ from the current editor.
How Changing Colors Helps You with Whiteboarding


Color is useful when its meaning is clear. For a small project board, use three labeled states: Planned with light gray #F3F4F6, In progress with pale yellow #FEF3C7, and Done with pale green #DCFCE7. These are example choices, not built-in workflow settings. Keep dark text and visible state labels so readers do not have to identify a task by color alone.
Focus and clarity: Reserve the most noticeable treatment for the item that needs attention. If every card has a bright fill, an urgent task may be harder to find. A written “Blocked” label is clearer than assuming everyone understands a red card.
Readability: Check text against its actual fill at normal reading size. Light yellow text on a pale card can disappear even if the palette looks attractive. A softer background is not a guarantee of reduced eye strain; readable labels, sufficient contrast, and a suitable zoom level matter.
Organization: Apply one rule consistently across the board. In the status example, change both the label and fill when a task moves from Planned to In progress. Add a small legend if guests will not know your convention.
Appearance: A limited palette makes the board easier to scan and can match a team's visual style. Use shapes, headings, and spacing alongside color. This keeps the structure understandable in a grayscale export or for someone who distinguishes colors differently.
How to Change an Element's Color in Canva
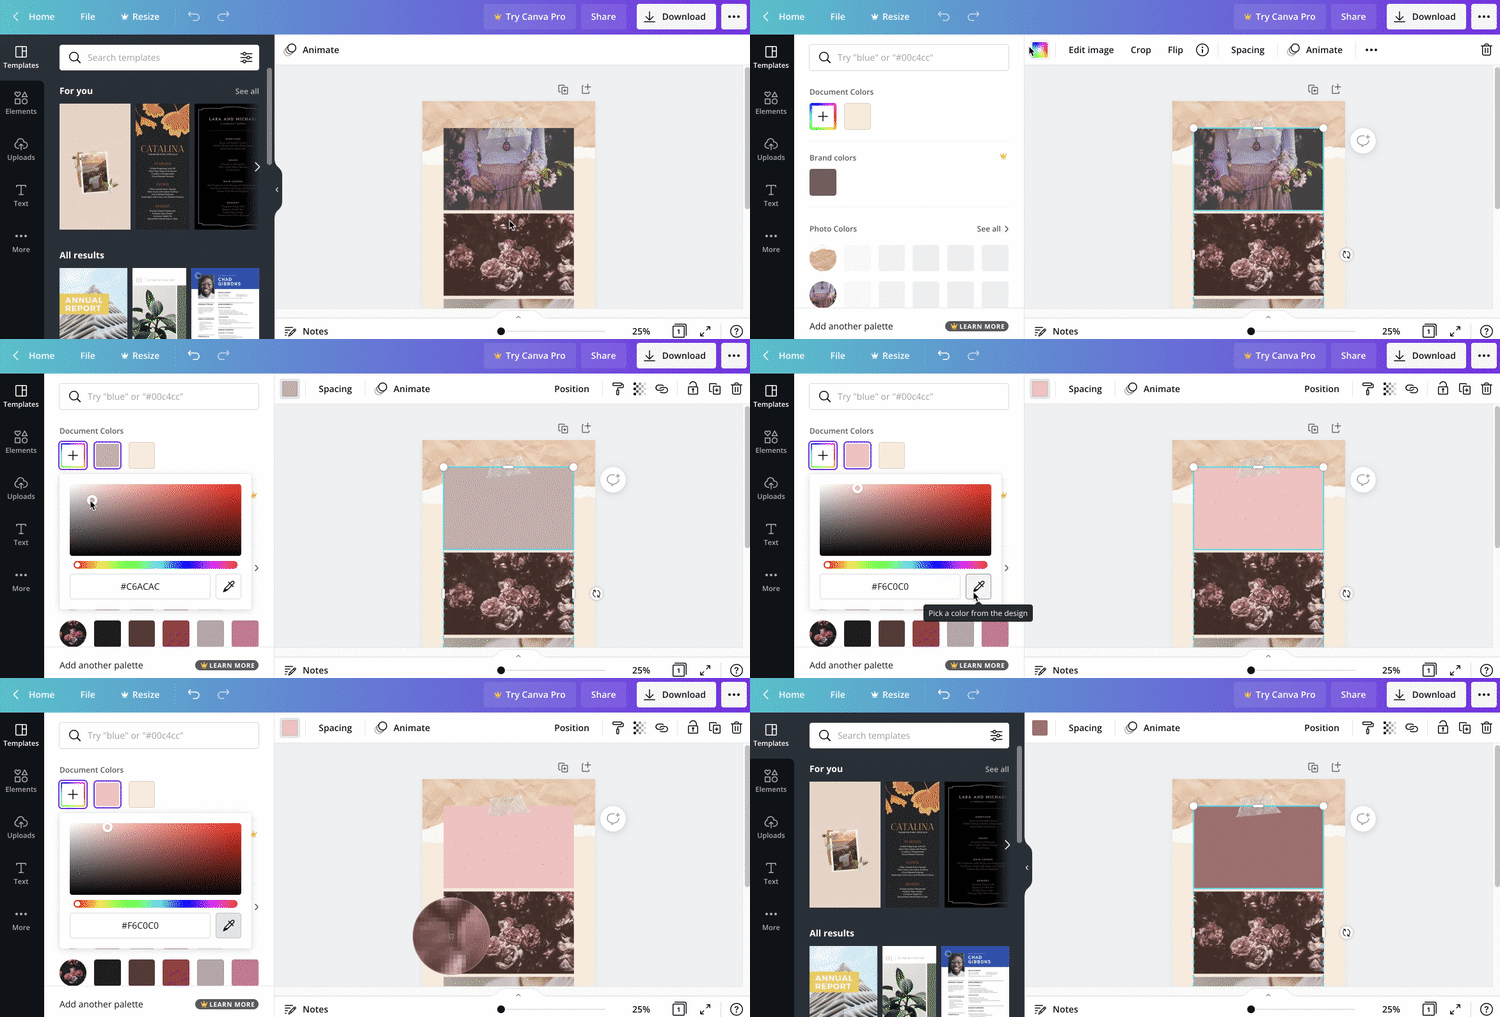
Canva supports whiteboards and other design formats. The animation shows color controls in a design example; it does not demonstrate recoloring the surface of an infinite whiteboard. The following actions apply to selected elements that expose editable colors, as described in Canva's element color guide.
1. Select the element to edit. Click the shape or other editable element. One or more color tiles may appear in the toolbar, depending on that element. If no color tile appears, do not assume the object supports direct recoloring: a photograph, flattened image, or some graphics may need a different editing method.
2. Choose the color channel. Click the tile corresponding to the part you want to change. A multicolor graphic can have several tiles, so first confirm whether you are editing a fill, a border, or another colored region. Choose from the document colors or other options shown in the panel.
3. Apply a new color. Select a swatch, or use Add a new color to choose a custom value. Enter a hex code when you need an exact match, such as #FEF3C7 for the example In progress card. Gradient availability depends on the selected element and controls; a gradient is not required for a readable status board.
4. Use the color picker when available. In the color panel, open the custom color controls and use the eyedropper or color picker to sample a color from your design. Labels and availability can vary by editor and device. If the picker is unavailable, enter the known hex value instead. Check the selected object afterward to make sure you sampled the intended color.
If you changed the wrong object or color channel, undo the change, select the correct element, and try again. Selecting a large background-shaped object changes that object; it does not establish that the application's entire canvas background has changed.
Boardmix for Color-Coded Collaborative Whiteboards

Boardmix combines object formatting with a shared workspace for diagrams, project planning, and discussion. It is a useful option when your color rules belong to an evolving board that several people maintain. Choose between tools based on that workflow and the design format you need.
Object customization: Edit the available fill, border, and text settings of the selected object. Custom colors let you repeat a known palette. Boardmix's release notes describe gradients for shapes and texture backgrounds for containers; these are specific object features, not evidence that every canvas surface or object supports the same treatment.
Collaboration: Invite colleagues with suitable permissions to work on the board. Agree on the meaning of colors before editing together. If color represents status, avoid also using it to represent the author of a card, since the two rules can conflict.
Templates: Start from a project or teaching template and adjust its editable objects to your palette. Inspect existing labels and legends before changing colors so you do not erase a distinction the template relies on. Images embedded in a template may not have the same color controls as native shapes.
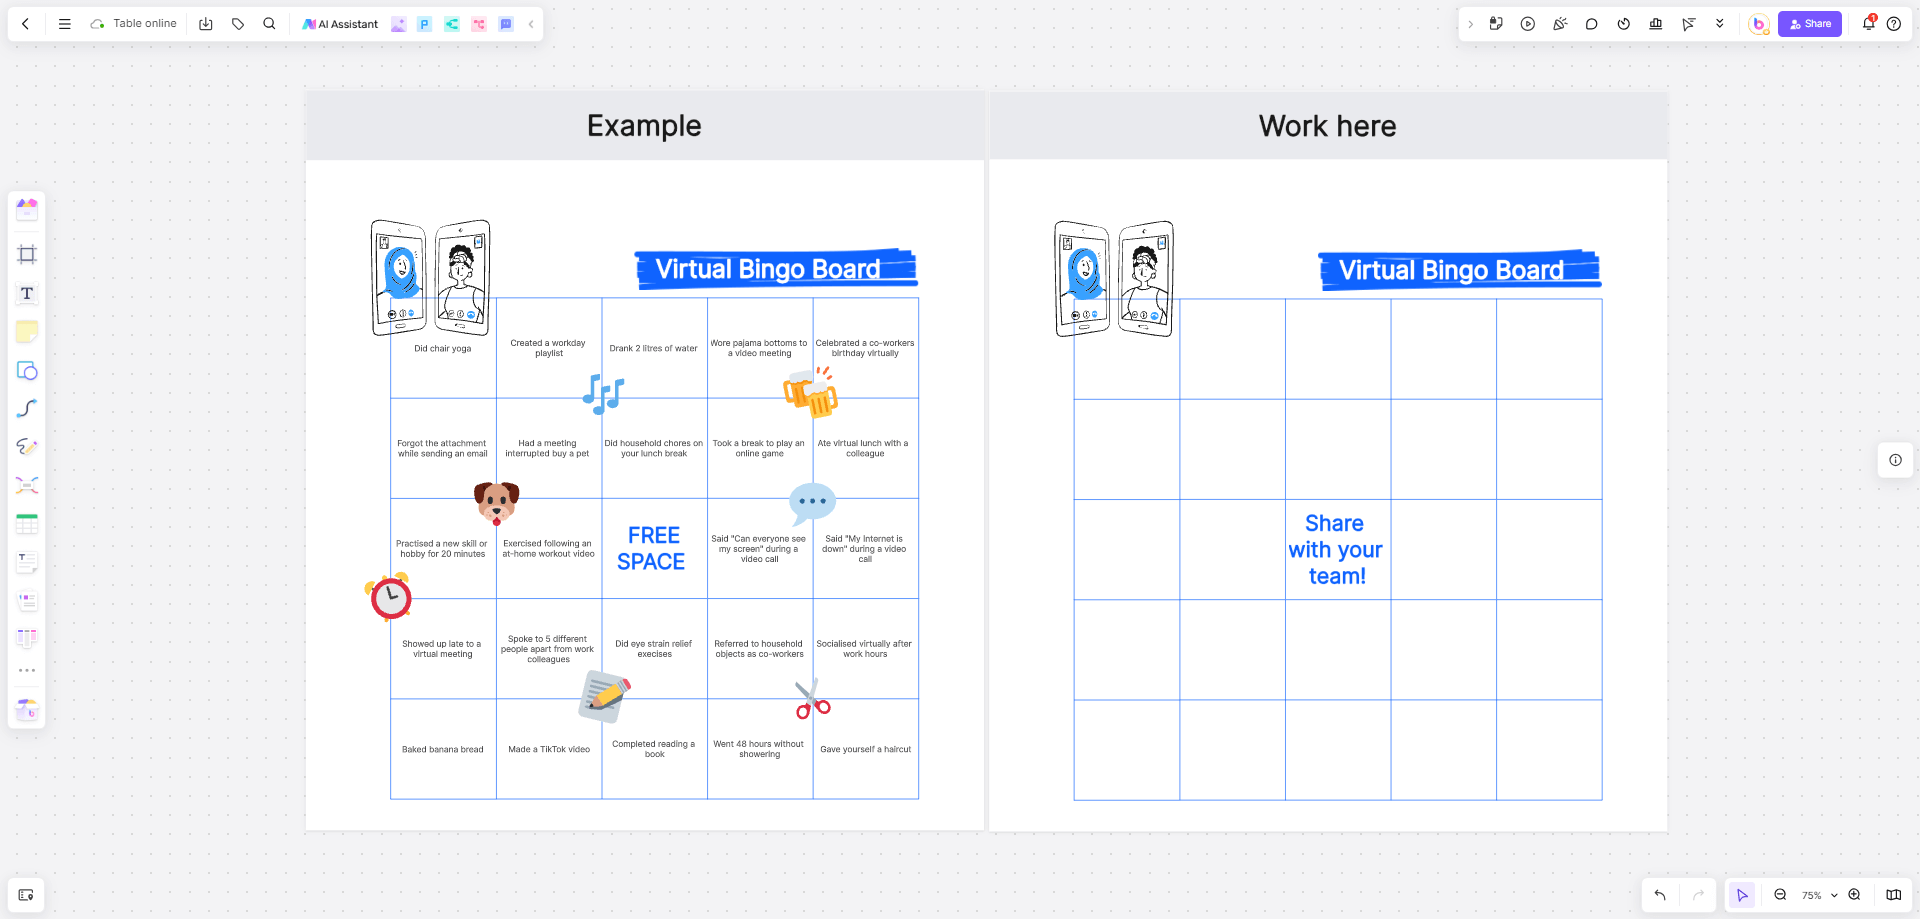
Selection and controls: The toolbar changes with the selected object. A table cell, a text label, and a shape can expose different options. Confirm what is selected before choosing a color; the animation in the next section specifically shows a table cell.
Device access: You can open a board on supported devices, but controls and editing gestures may differ between a desktop browser and a smaller screen. Use the available editor controls rather than expecting every device to show an identical floating toolbar or eyedropper.
How to Change an Object's Color in Boardmix
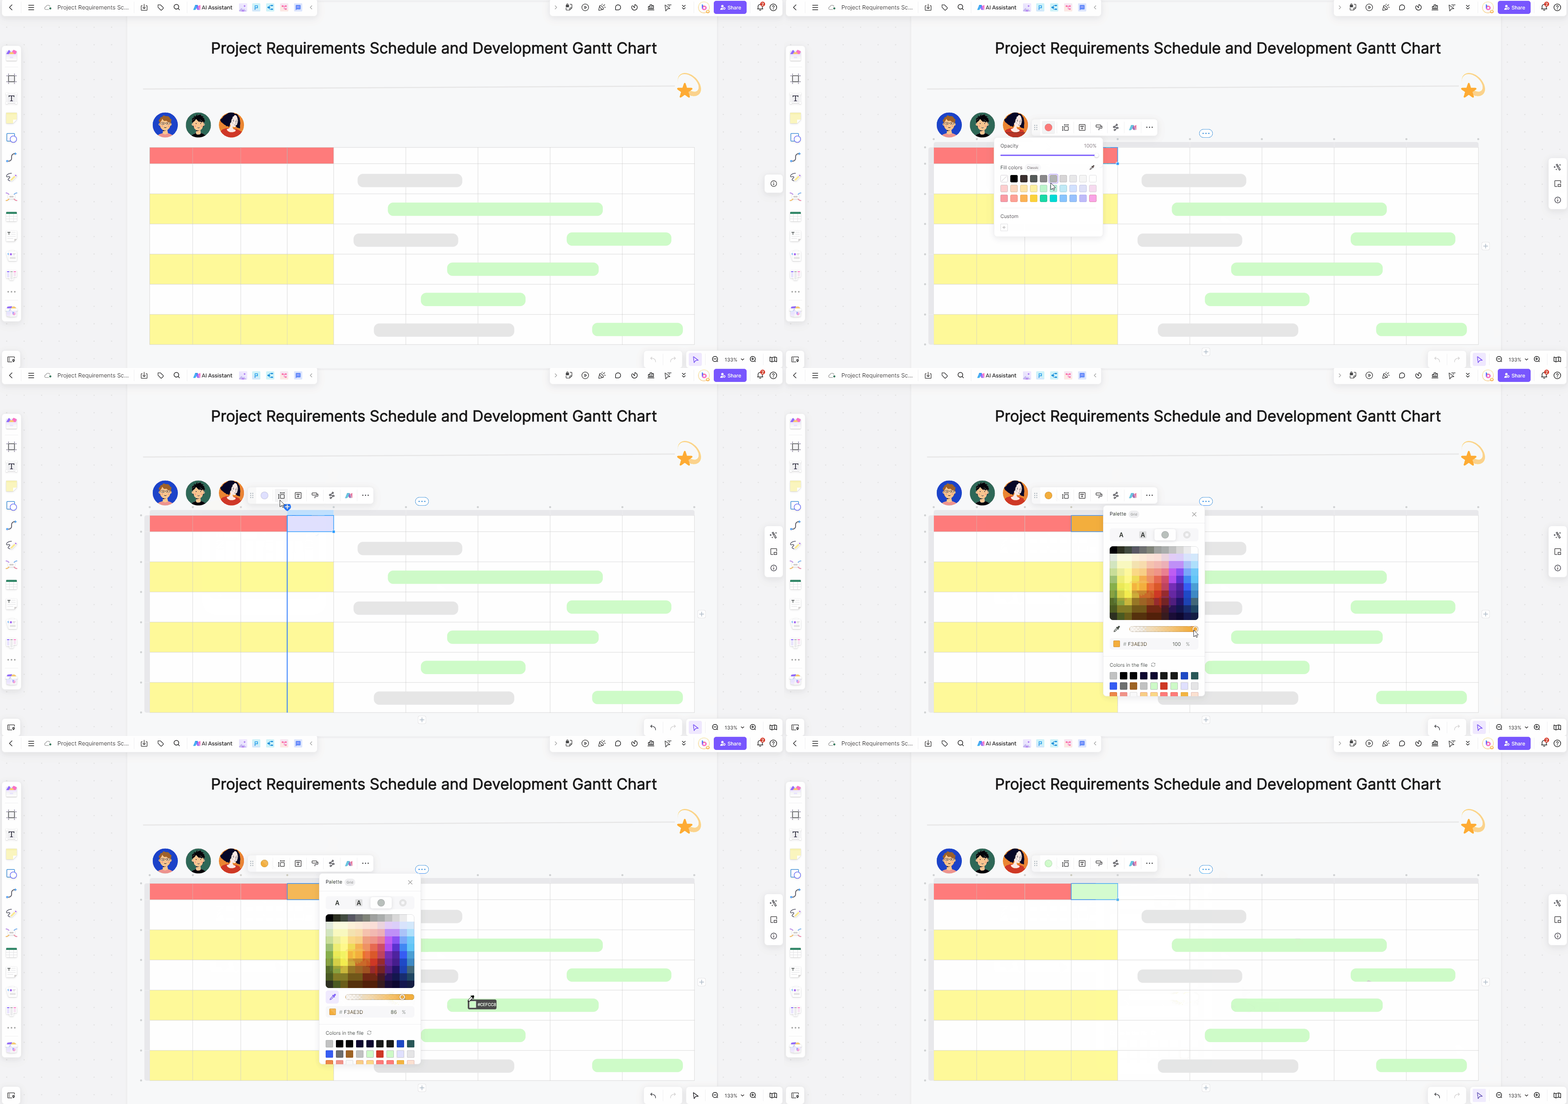
Use these seven steps to apply the example status palette to a table cell or another object with a fill control. The animation illustrates selection, fill colors, custom colors, and a color picker. It does not show an entire canvas changing color.
1. Sign in to Boardmix. Open your account, or create one if needed. Confirm that you have permission to edit the board. A view-only link lets you inspect content but does not grant the ability to change its colors.
2. Create or open a board. Use an existing project board or start with a blank one. For the example, add three labeled cells or cards: Planned, In progress, and Done. These labels provide the meaning that the colors will reinforce.
3. Select the element. Click the particular shape or table cell you want to recolor. Check the selection outline and toolbar. If you selected the whole table or a group instead of one cell or object, adjust the selection before continuing.
4. Open the correct color control. Choose the fill or background-color control for that selected object. Avoid confusing it with text color or border color. The screenshot's table cell has its own fill control; another object type may present a different set of options.
5. Apply the new color. Select a palette swatch, or open Custom and enter a hex value where offered. Apply #F3F4F6 to Planned, #FEF3C7 to In progress, and #DCFCE7 to Done. Keep the text dark and readable. The color field's gradient-style selector is a way to choose a solid color; it does not by itself mean you have applied a gradient fill.
6. Match another color if needed. If the current editor offers a color picker for your selection, use it to sample an existing object, then check the result. Use an exact hex value when the sample is difficult to target or the picker is unavailable. Undo an unintended change rather than continuing with an inconsistent palette.
7. Confirm and share the result. Check that changes have synchronized before leaving the board. Share a link with the appropriate access settings, or use the export options available to your account when you need an image or PDF. Review the exported result as well: a static file does not allow a colleague to edit the original objects.
Check the Board Before Sharing
Read the board once without relying on color. Each status should still have a label, the legend should match the objects, and the text should be legible at the intended viewing size. When a task changes status, update its label and fill together.
Canva's element controls are useful within its design and whiteboard formats. Boardmix provides another setting for maintaining the same color rules on a collaborative board. In either tool, distinguish object fill from the canvas background, and check the controls offered for the object you actually selected.