Flow charts are essential tools for visualizing processes, simplifying complex systems, and enhancing communication. Creating a flow chart in Word is a common method due to the widespread use of Microsoft Word. However, there are more specialized tools available, like Boardmix, which offer advanced features for flow chart design.
This article will provide a step-by-step guide on how to make a flow chart in Word and introduce Boardmix as a comprehensive alternative.
Part 1: How to Make a Flow Chart in Word
Prepare
Before diving into the step-by-step guide, it's crucial to have a clear understanding of the process you want to visualize.
Outline the key steps and decision points, and gather any relevant information. This preparation will make the flow chart creation process smoother and more efficient.
Step-by-Step Guide: Draw a Flow Chart in Word
1. Open Microsoft Word:
Start by opening a new document in Microsoft Word.
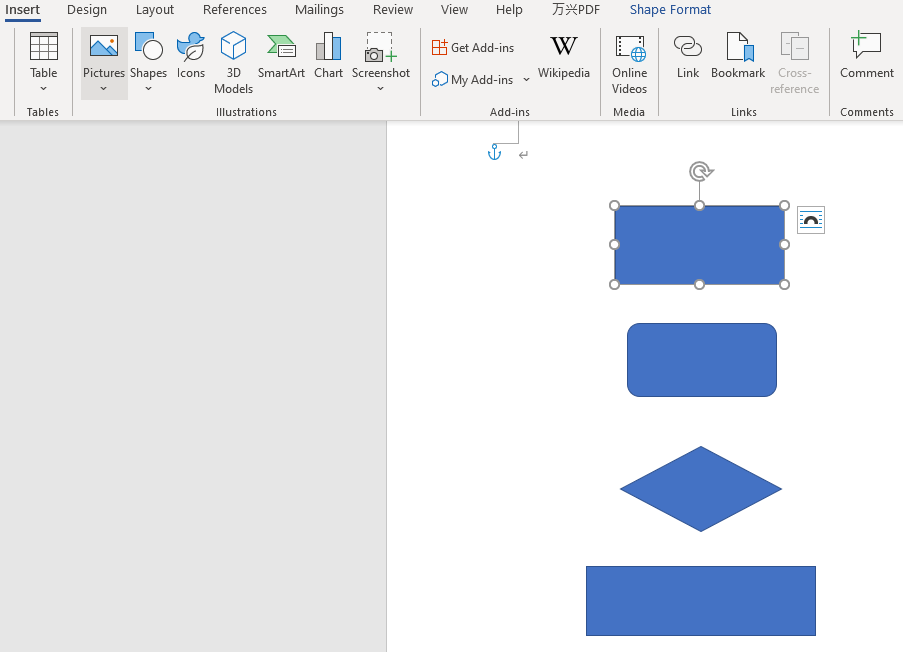
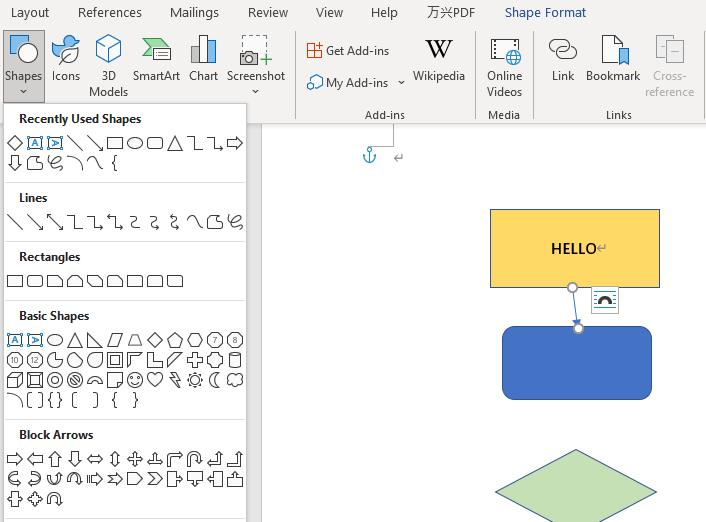
2. Insert Shapes:
- Go to the “Insert” tab on the ribbon.
- Click on “Shapes” in the Illustrations group.
- Choose from the variety of shapes available under the “Flowchart” category. Common shapes include rectangles for steps, diamonds for decision points, and arrows for connections.
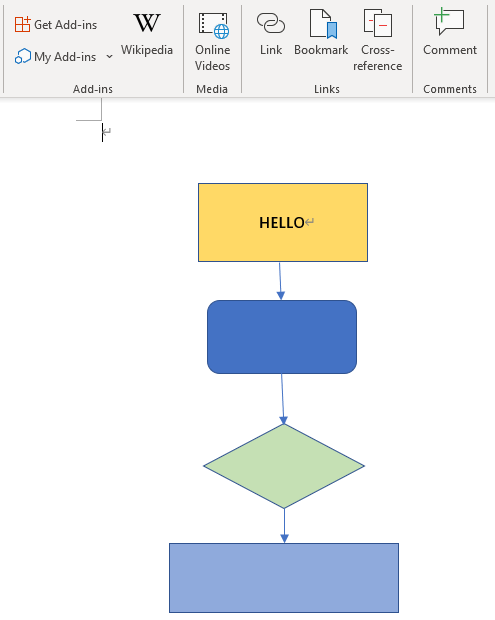
3. Draw the Flow Chart:
- Click and drag to draw the shapes onto your document.
- Resize and position each shape to fit your flow chart layout.
4. Add Text to Shapes:
- Click inside each shape to add text.
- Type the description of each step or decision point.
5. Connect the Shapes:
- Go back to the “Insert” tab, select “Shapes,” and choose an arrow or connector line.
- Draw lines between shapes to indicate the flow of the process.
6. Customize Your Flow Chart:
- Use the “Format” tab to customize the appearance of your flow chart.
- Change the shape fill, outline color, and text font to improve readability and visual appeal.
7. Save and Share:
- Save your document once the flow chart is complete.
- Share the document as needed, or export it as a PDF for wider accessibility.
Creating a flow chart in Word is straightforward and utilizes a tool most people are familiar with. However, for more advanced flow chart design, you can consider using specialized software like Boardmix.
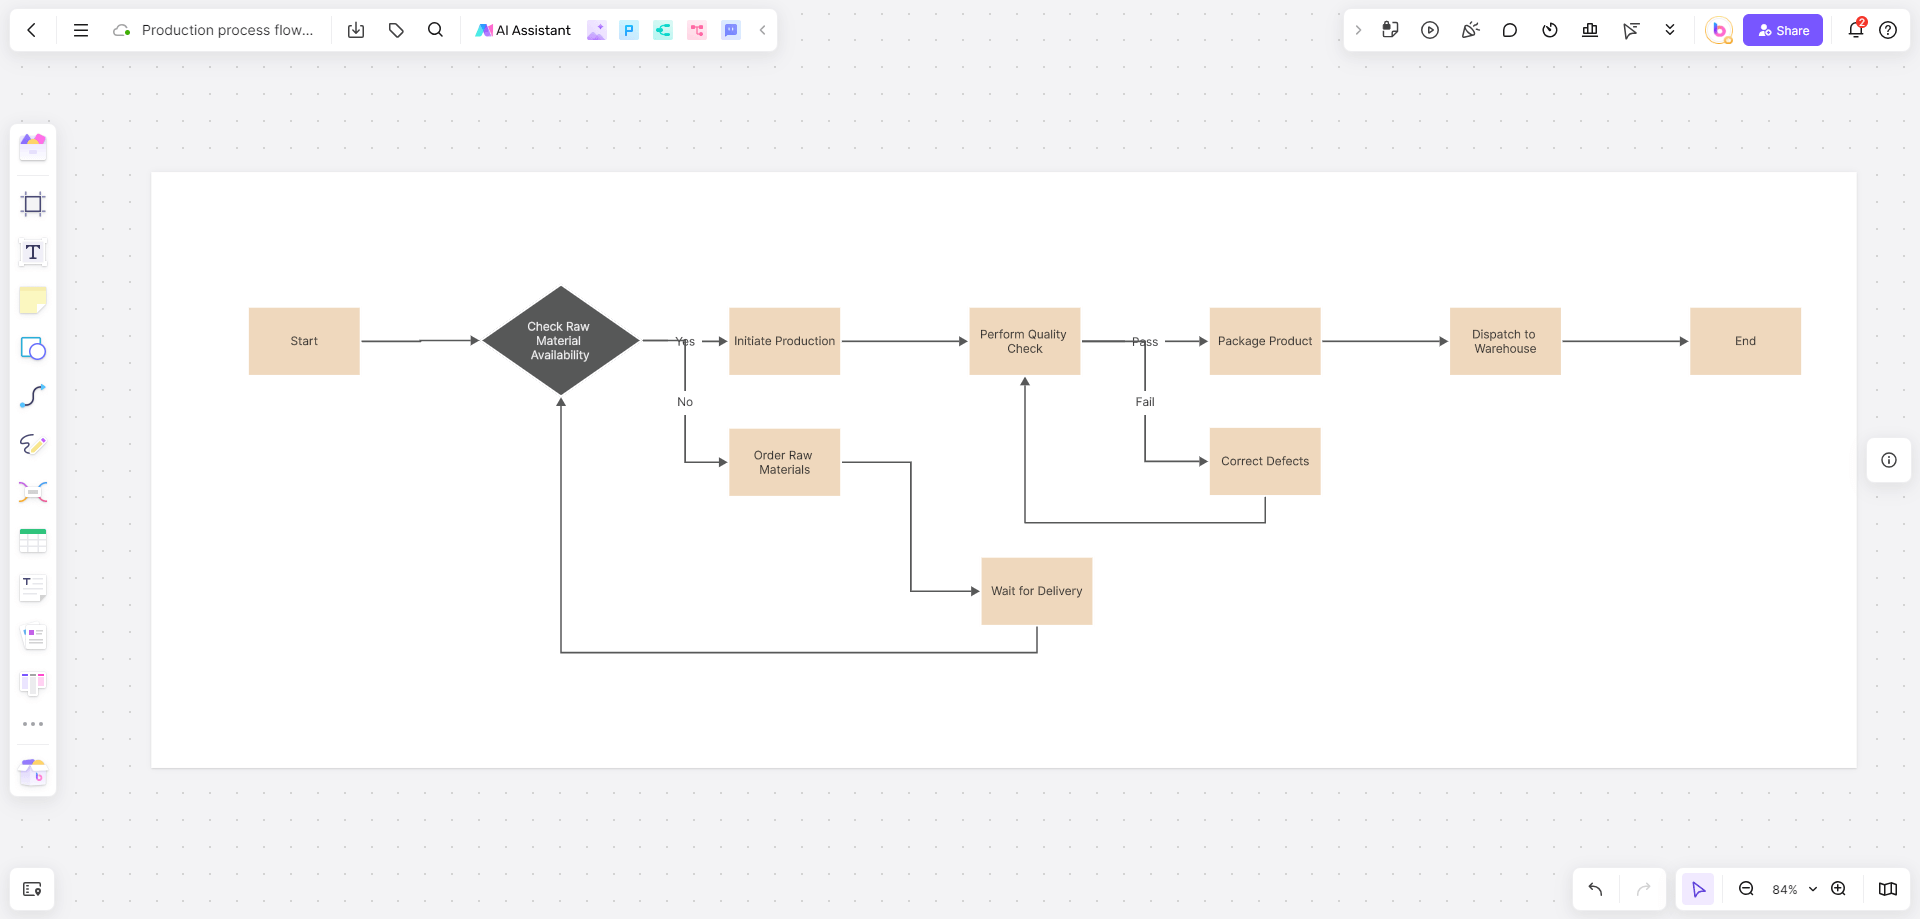
Part 2: Flow Chart Alternative: Boardmix
What is Boardmix Flow Chart Maker?
Boardmix is a powerful online white board tool designed for creating professional flow charts and diagrams. It offers a range of features that enhance the flow chart creation process, making it more efficient and visually appealing. Boardmix provides an extensive library of shapes, real-time collaboration capabilities, and seamless integration with other tools.
Flow Chart in Word vs. Flow Chart in Boardmix
- Ease of Use:
- Word: Familiar interface but limited in advanced features.
- Boardmix: User-friendly with drag-and-drop functionality and intuitive design tools.
- Shape and Color Libraries:
- Word: Basic shapes and limited color customization.
- Boardmix: Extensive shape library and customizable color themes for professional designs.
- Collaboration:
- Word: Limited real-time collaboration capabilities.
- Boardmix: Real-time collaboration with team members, including comments and chat features.
- Integration and Export Options:
- Word: Supports basic file formats like DOCX and PDF.
- Boardmix: Supports a wide range of formats (PDF, PNG, SVG) and integrates with tools like Google Drive, Microsoft Teams, and more.
- Customization and Templates:
- Word: Basic customization with no templates specifically for flow charts.
- Boardmix: Offers pre-built templates and extensive customization options tailored for flow charts.
Step-by-Step Guide: Make Flow Chart in Boardmix
1. Sign Up and Log In:

- Visit the Boardmix website and create a new account using your email or social media credentials.
- Log in to access the full suite of flow chart design tools.
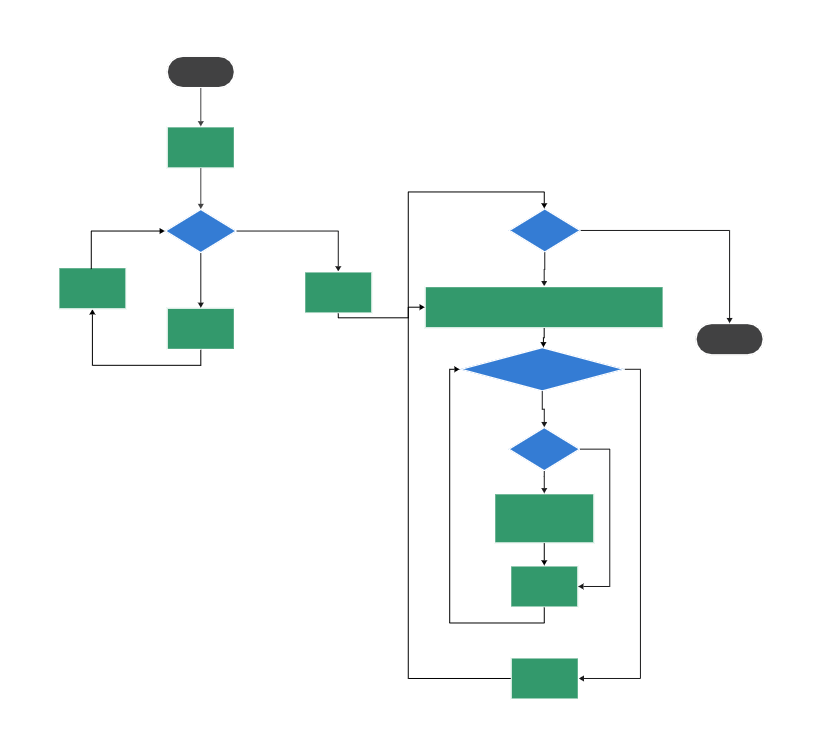
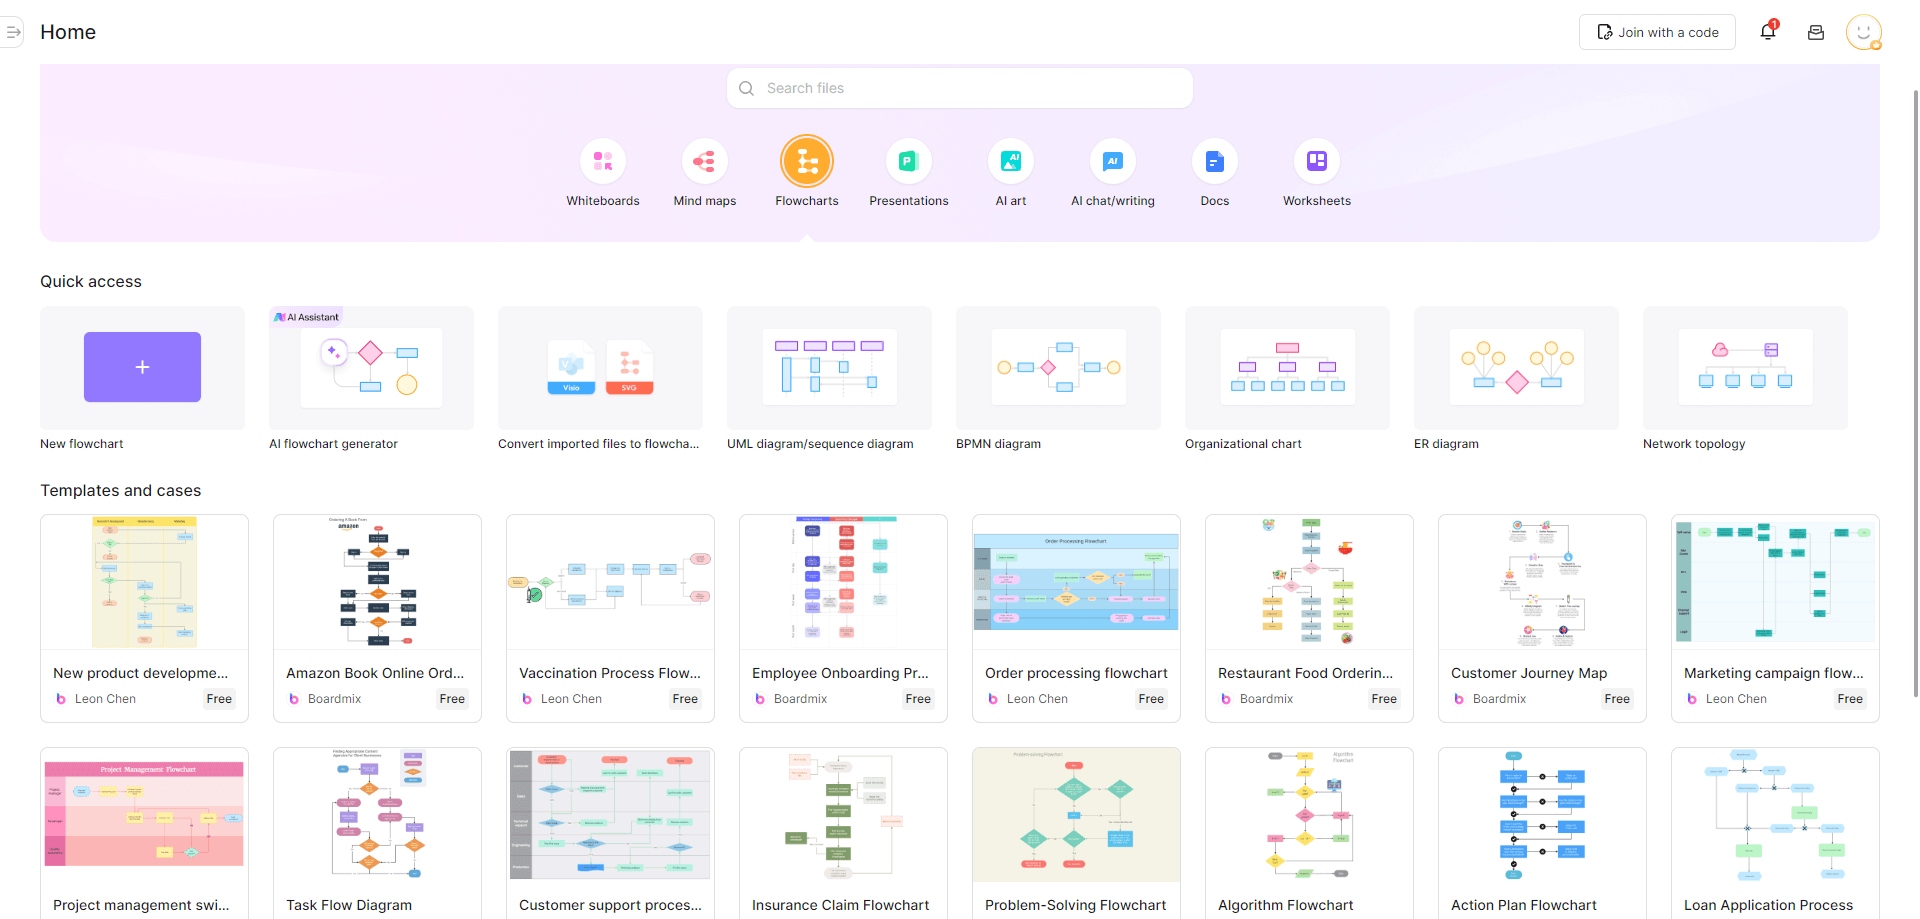
2. Start a New Flow Chart:
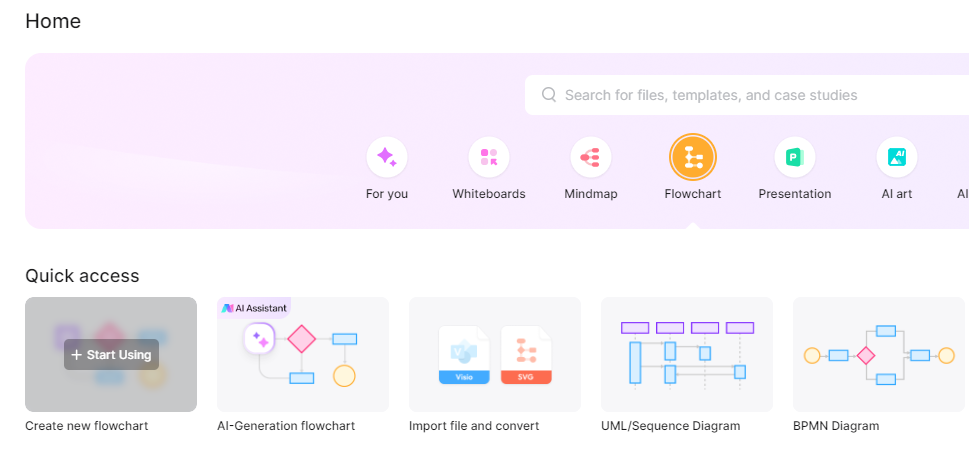
- Navigate to the dashboard and click on the "Create New Flowchart" button to start a new project.
- Boardmix provides a clean and intuitive workspace to begin your design.
3. Add Shapes and Elements:
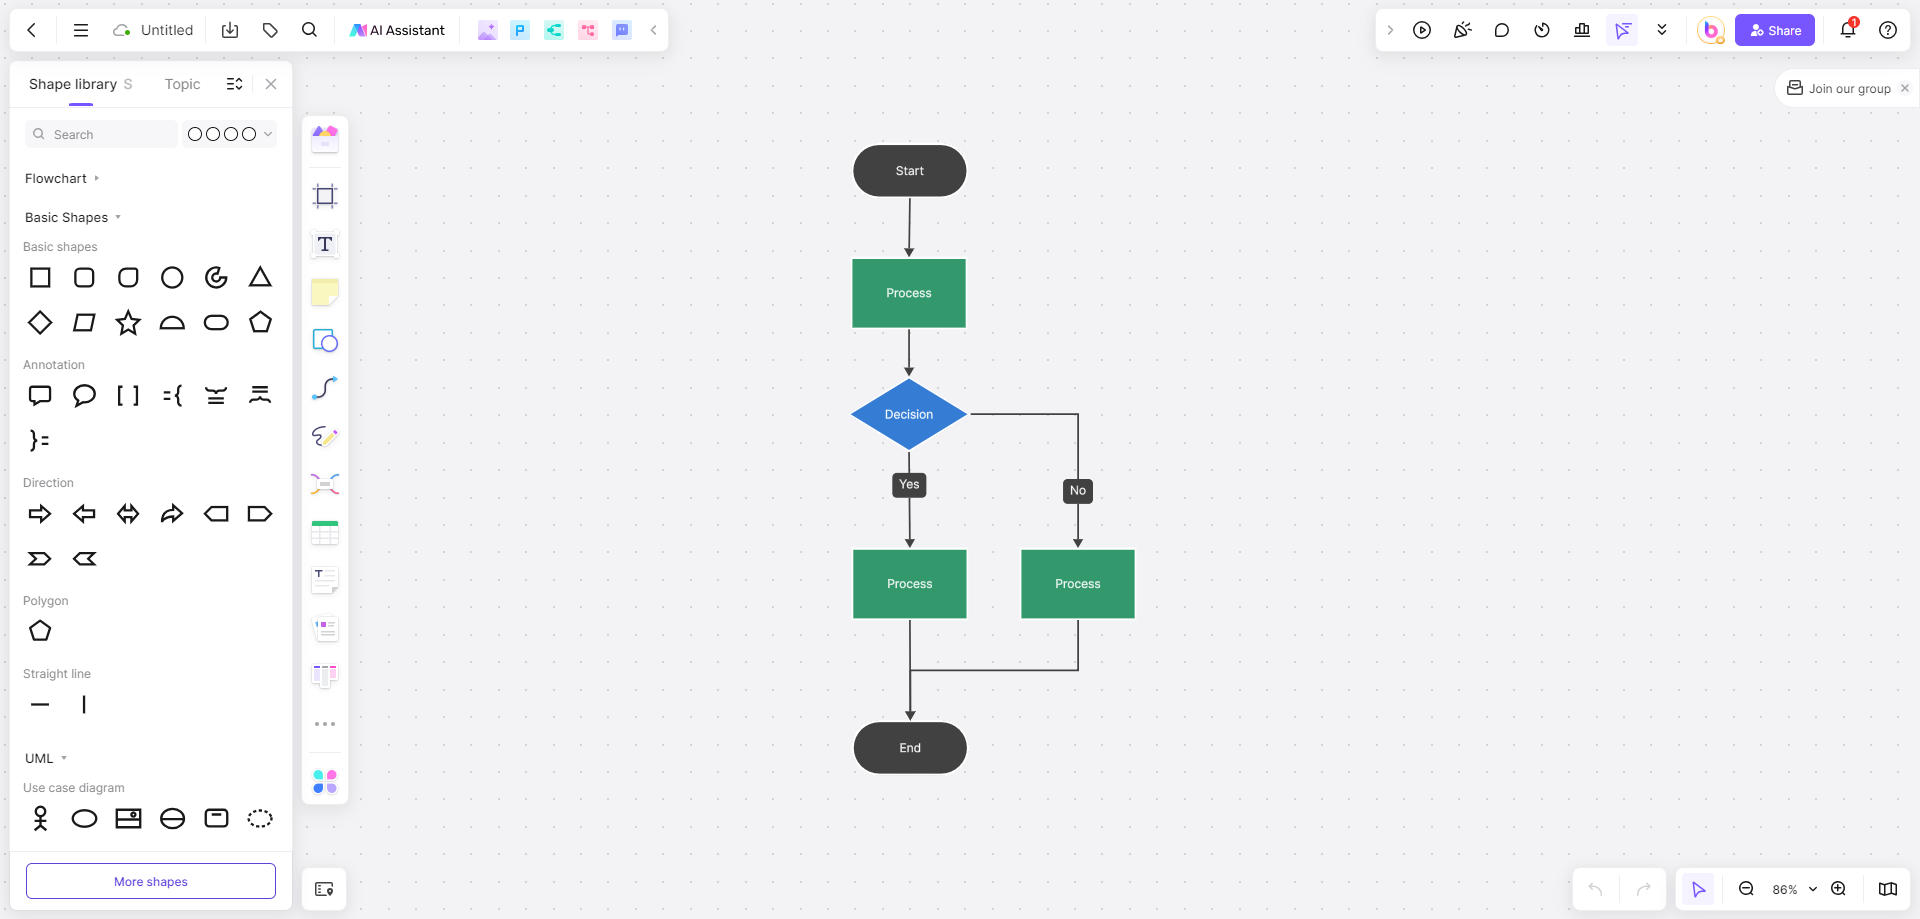
- Utilize the extensive shape library to drag and drop a variety of shapes onto your canvas. Boardmix includes standard shapes like rectangles, circles, and diamonds, as well as industry-specific shapes for UML, BPMN, and more.
- Customize each shape by adjusting its size, color, and labels to fit your needs perfectly.
4. Connect the Elements:
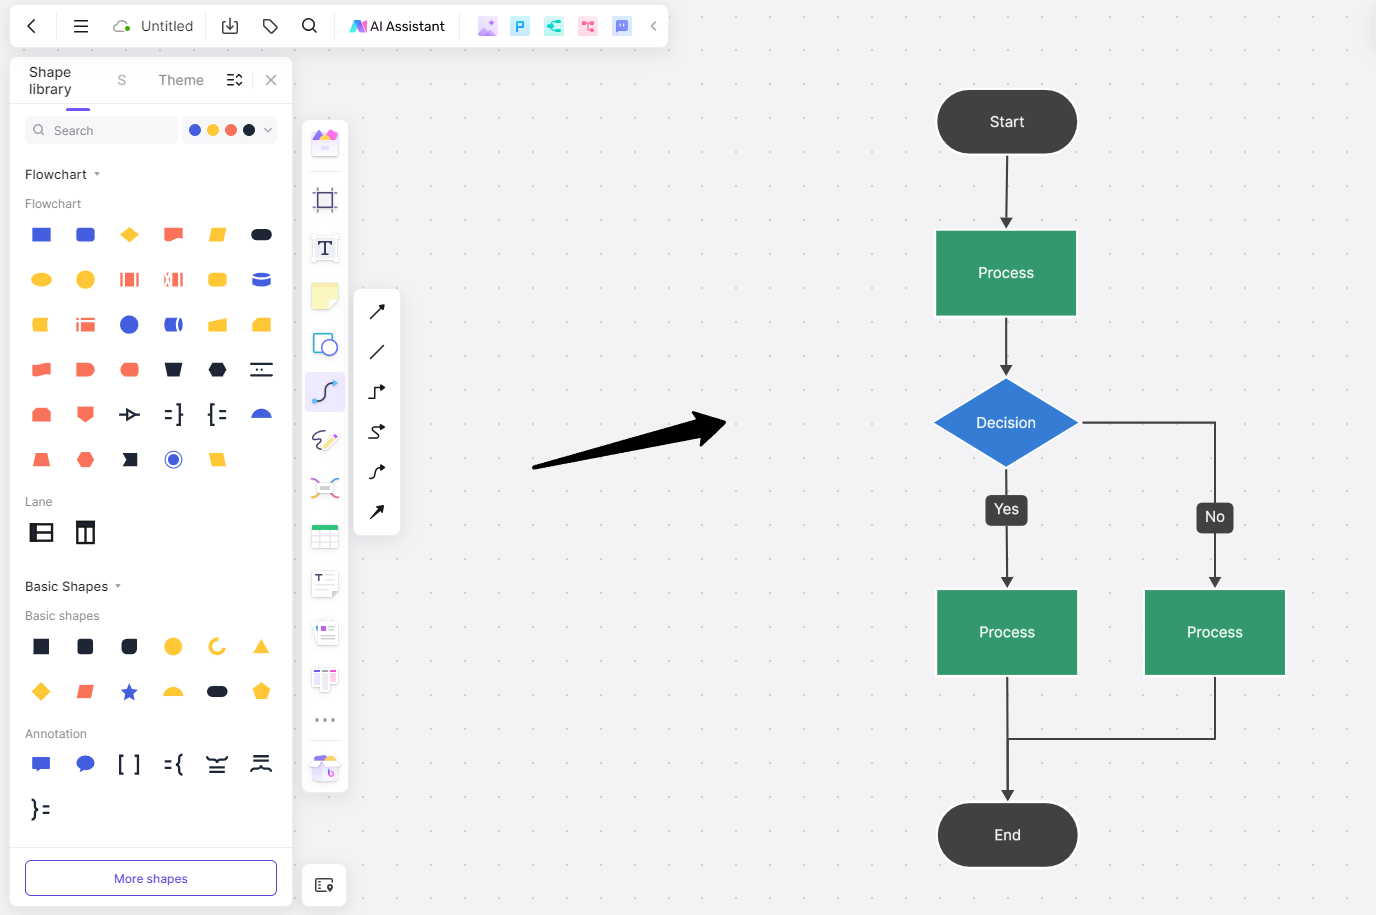
- Use the various line styles provided by Boardmix to connect your shapes, indicating the flow of the process. Whether you need straight lines, curved connectors, or dashed arrows, Boardmix offers options to clearly represent different types of connections and dependencies.
5. Integrate with Other Tools:
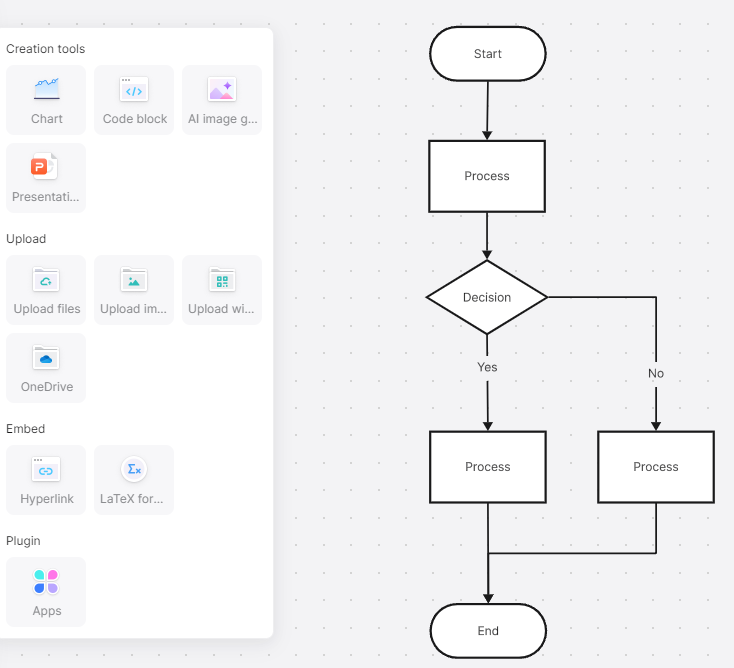
- Import data or files from other tools and platforms directly into Boardmix. The app supports a wide range of file formats, including PDF, Word, Excel, Visio, and more. This seamless integration capability allows you to incorporate existing documents and datasets effortlessly.
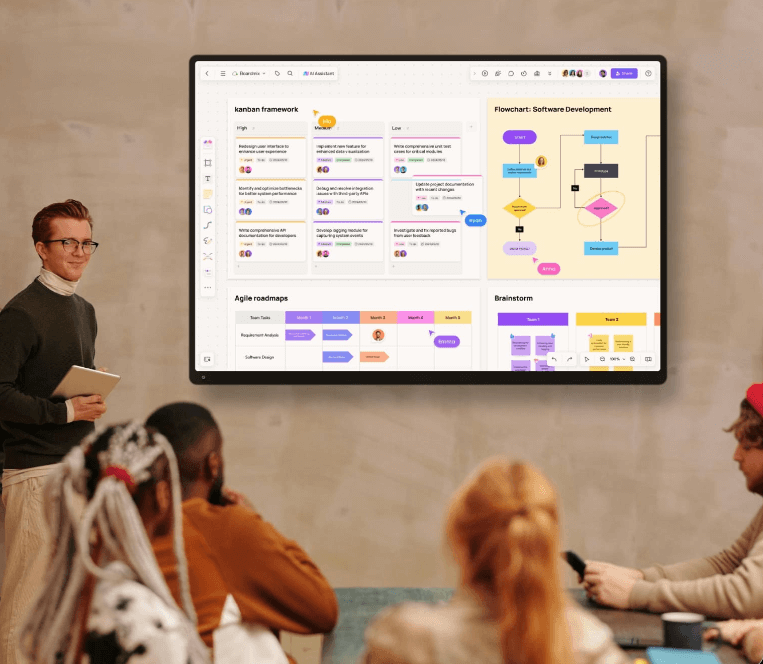
6. Collaborate in Real-Time:
- Boardmix's real-time collaboration features enable multiple users to work on the same flow chart simultaneously. Invite team members, share the document, and use the built-in comment and chat features to communicate and make real-time adjustments. This functionality is crucial for teamwork and ensures everyone is on the same page.
7. Save and Export:
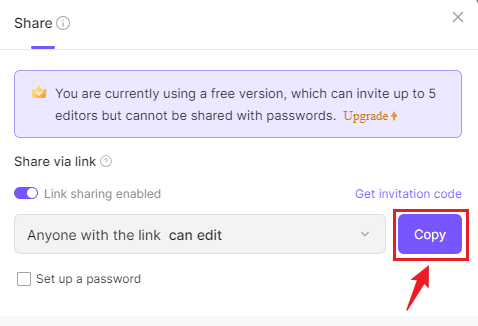
- Once your flow chart is complete, save your work to the cloud with Boardmix’s secure storage options.
- Export the flow chart in various formats such as PDF, PNG, or SVG for easy sharing and integration into presentations, reports, and other documents. The export feature ensures that your flow chart maintains its quality and formatting across different platforms.
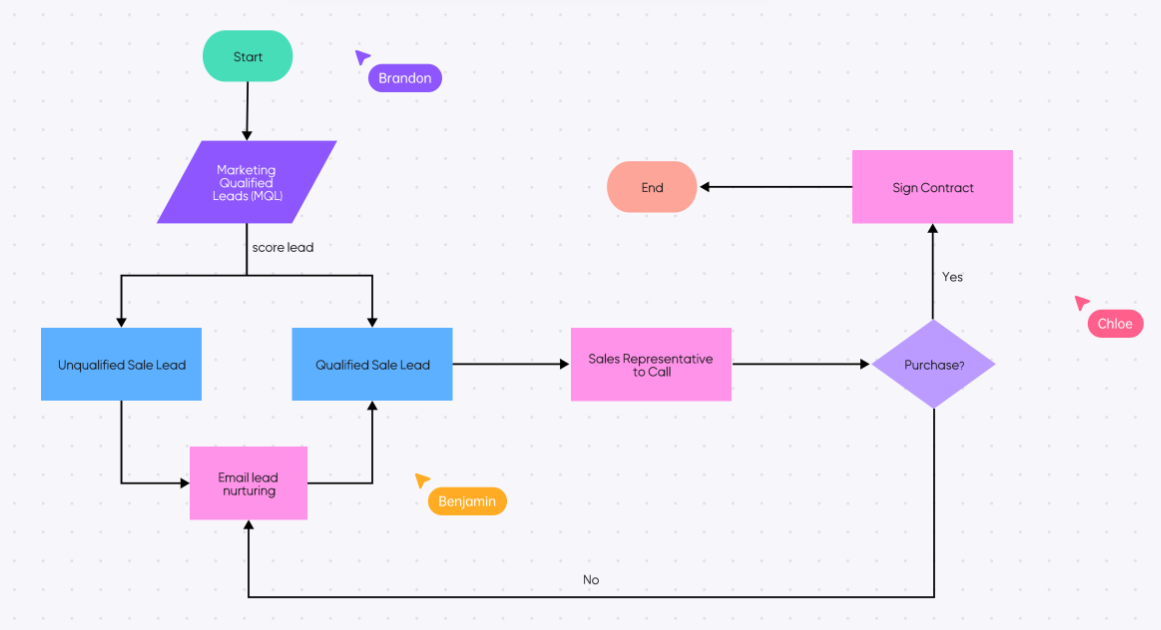
Case Studies: Flow Chart Examples
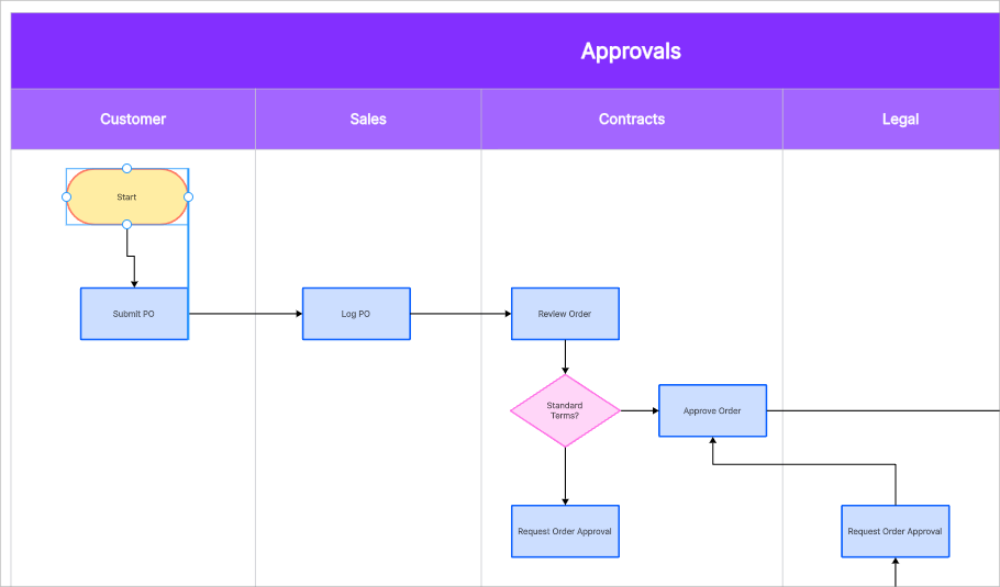
Example 1: Customer Service Process Flow Chart
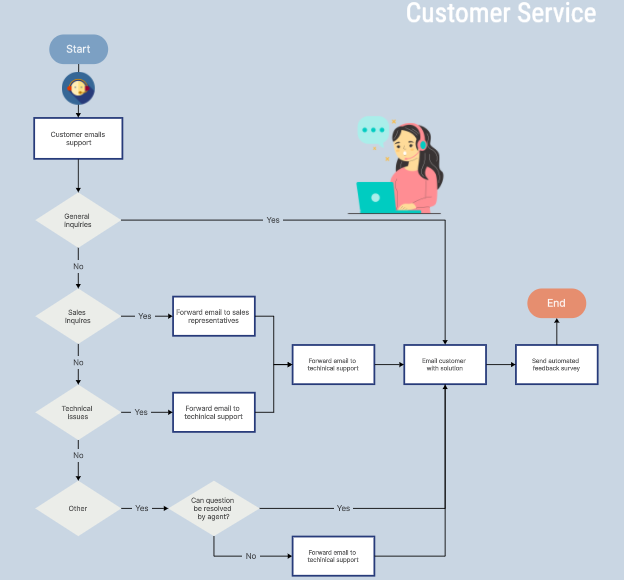
1. Define the Process:
- Begin by outlining the key steps in the customer service process. Identify stages such as receiving a customer query, categorizing the query, resolving the issue, and following up.
2. Add Shapes and Connectors:
- Use Boardmix’s shape library to add rectangles for the process steps and diamonds for decision points. Connect the shapes with arrows to indicate the direction of the workflow.
3. Customize the Design:
- Apply a custom theme that matches your company’s branding using Boardmix’s color customization options. Use different colors to highlight various types of steps.
4. Collaborate with Team Members:
- Share the flow chart with the customer service team for feedback. Use Boardmix’s real-time collaboration features to allow team members to make suggestions and modify the flow chart.
5. Finalize and Export:
- Once finalized, export the flow chart as a PDF to include in the customer service training manual.
Example 2: Project Management Timeline
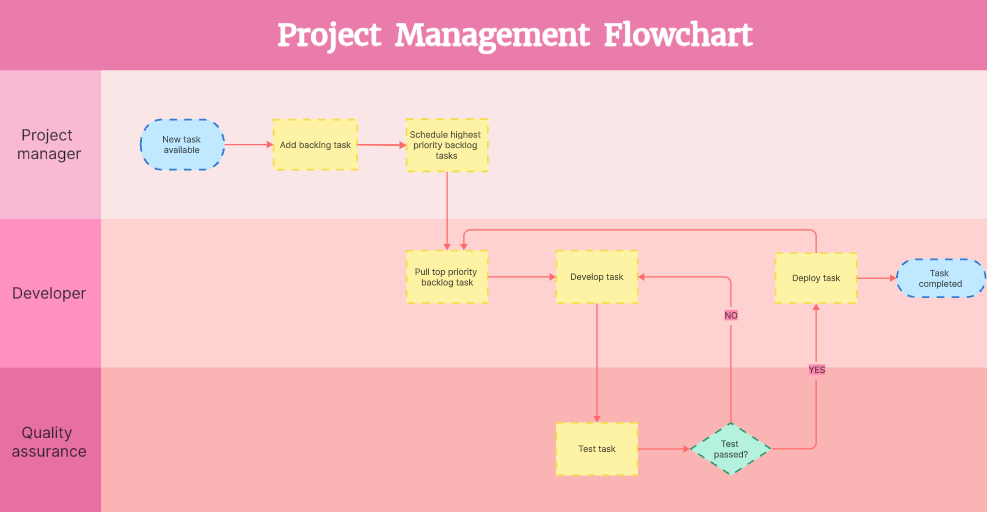
1. Define the Process:
- Outline the key phases of the project, including initiation, planning, execution, monitoring, and closing.
2. Add Shapes and Connectors:
- Use Boardmix’s shape library to represent each phase with rectangles and milestones with circles. Connect these shapes to show the project timeline.
3. Customize the Design:
- Apply a color scheme that differentiates each phase of the project. Customize shapes to include dates and responsible team members.
4. Collaborate with Team Members:
- Invite project stakeholders to review the timeline. Use the comment feature to gather feedback and make necessary adjustments.
5. Finalize and Export:
- Export the finalized timeline as an image or PDF for inclusion in project reports and presentations.
Conclusion
While creating a flow chart in Word is convenient and accessible, using a specialized tool like Boardmix offers significant advantages in terms of functionality, customization, and collaboration. Boardmix streamlines the flow chart creation process, providing an extensive library of shapes, real-time collaboration features, and seamless integration with other tools.
Whether you are working on simple flow charts or complex diagrams, Boardmix is a powerful alternative that enhances productivity and visual communication.