The timeline connects one or more events in chronological order to form a relatively complete record system, which is then presented to the user in the form of graphics and text. Timeline can be used in different fields, and its greatest function is to systematize, complete, and precise things in the past.
Through the visual presentation of the timeline, one can understand any type of development, the progression of trends, the outline of historical events, the phases of projects, business milestones and other information. Making good use of the timeline can simplify complex information, making it easy to understand and track, highlighting important moments or milestones in time. This article, boardmix, will take the planning of an overseas crowdfunding project as an example to explain in detail how to create a project timeline. Come and take a look!
Step 1. Gather Information
Whether it's a project timeline, agenda, or an outline of historical events, you need to understand the details you will present in your timeline. We can store the date, time, location, and other information in the blank space of the boardmix whiteboard so that it can be directly dragged and used later. You can also add other detailed information according to the purpose.
If you want to achieve complete crowdfunding through an overseas crowdfunding platform (the world's largest crowdfunding platform), you need to collect picture materials and video shooting and editing, prepare text materials, product project establishment, production cycle, delivery cycle, and funds Fundraising time, regular update plan and other information.
Step 2. Create an Outline of Project Timeline
(1) Create a rough outline, which can help you filter and list the key details from the previous step.
(2) List important dates, times, places, names, and other key events.
(3) Determine the dates when the timeline begins and ends, and list the events in between in chronological order.
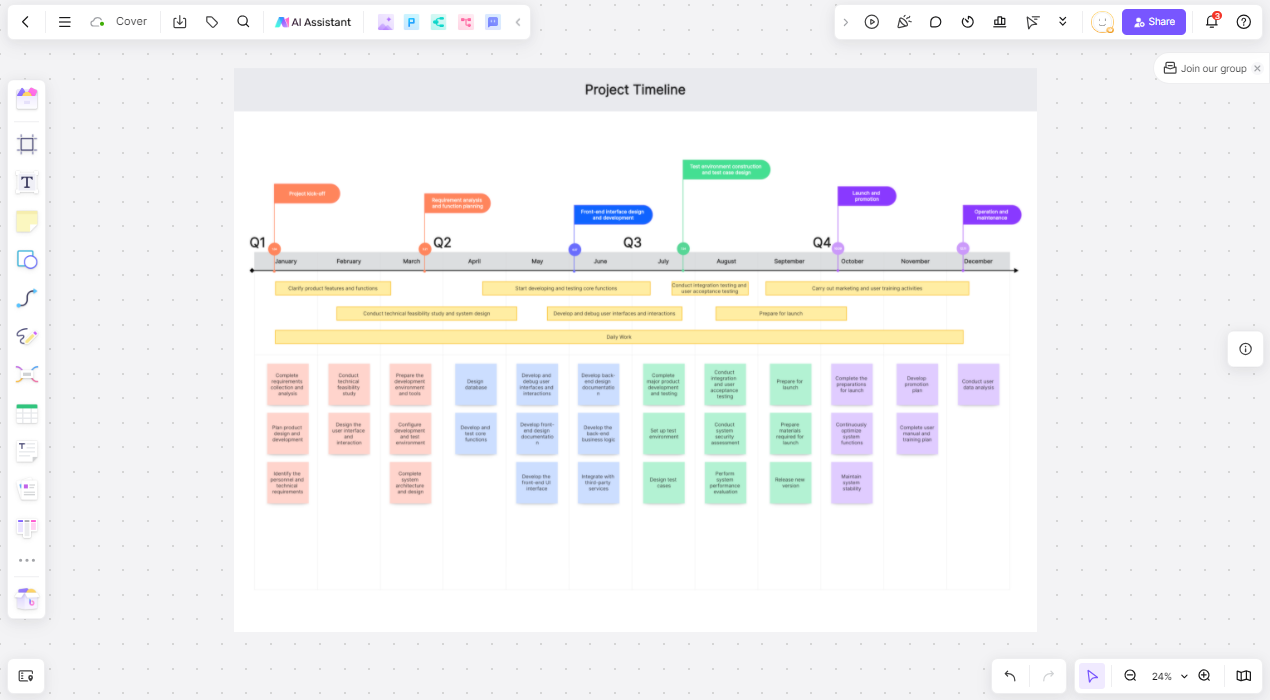
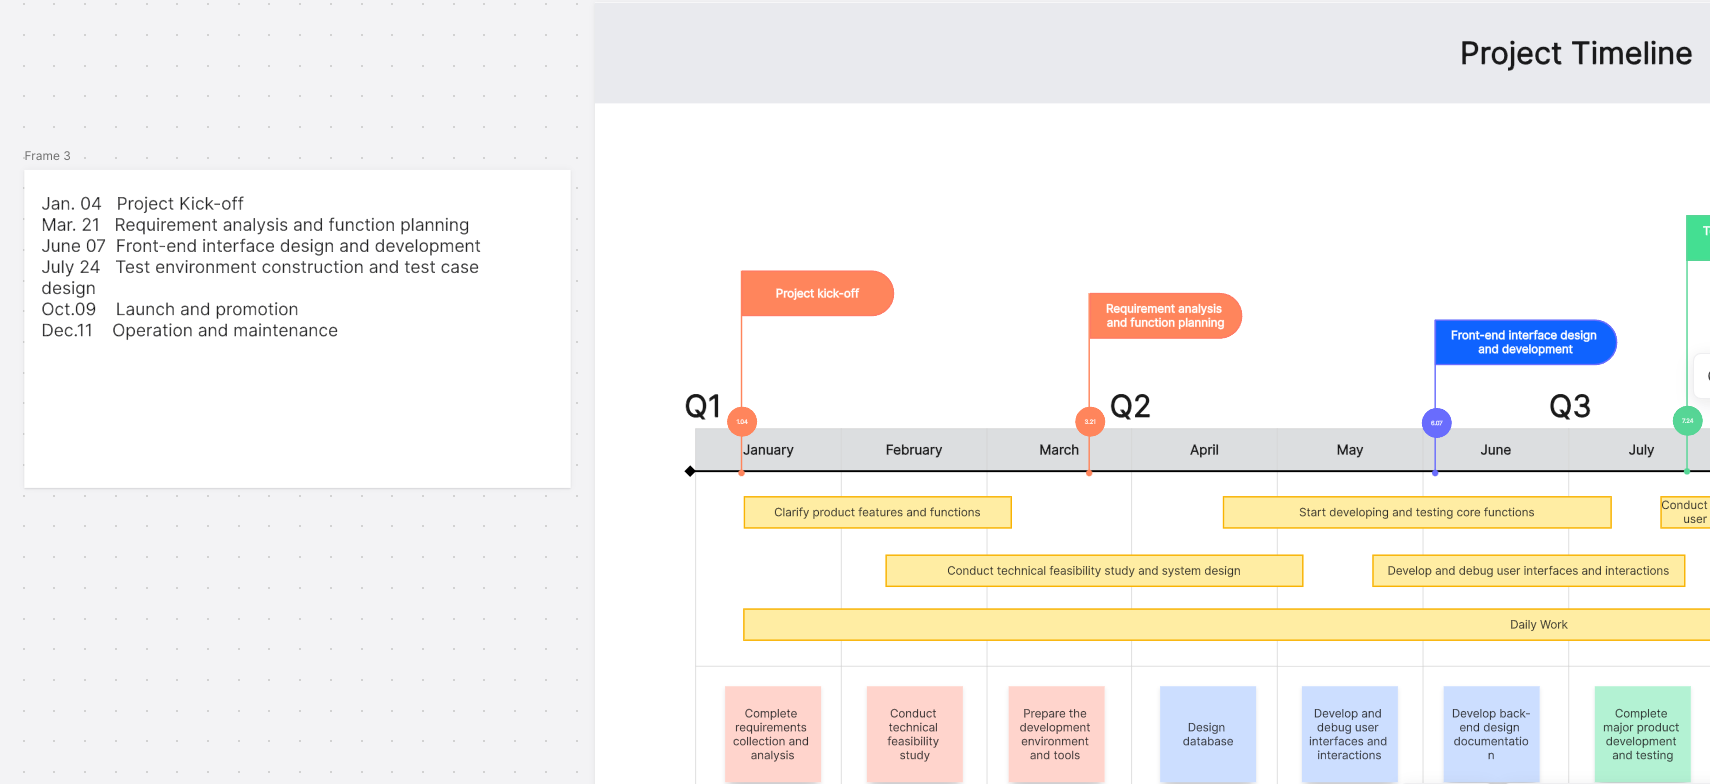
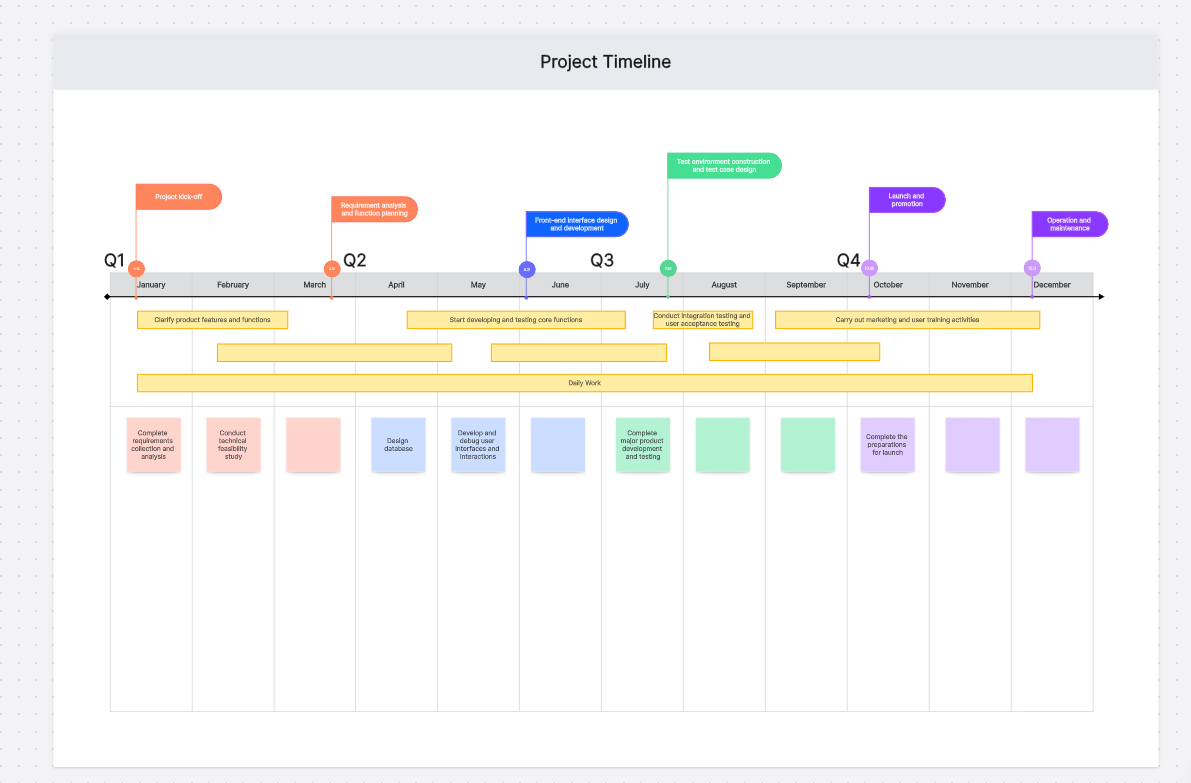
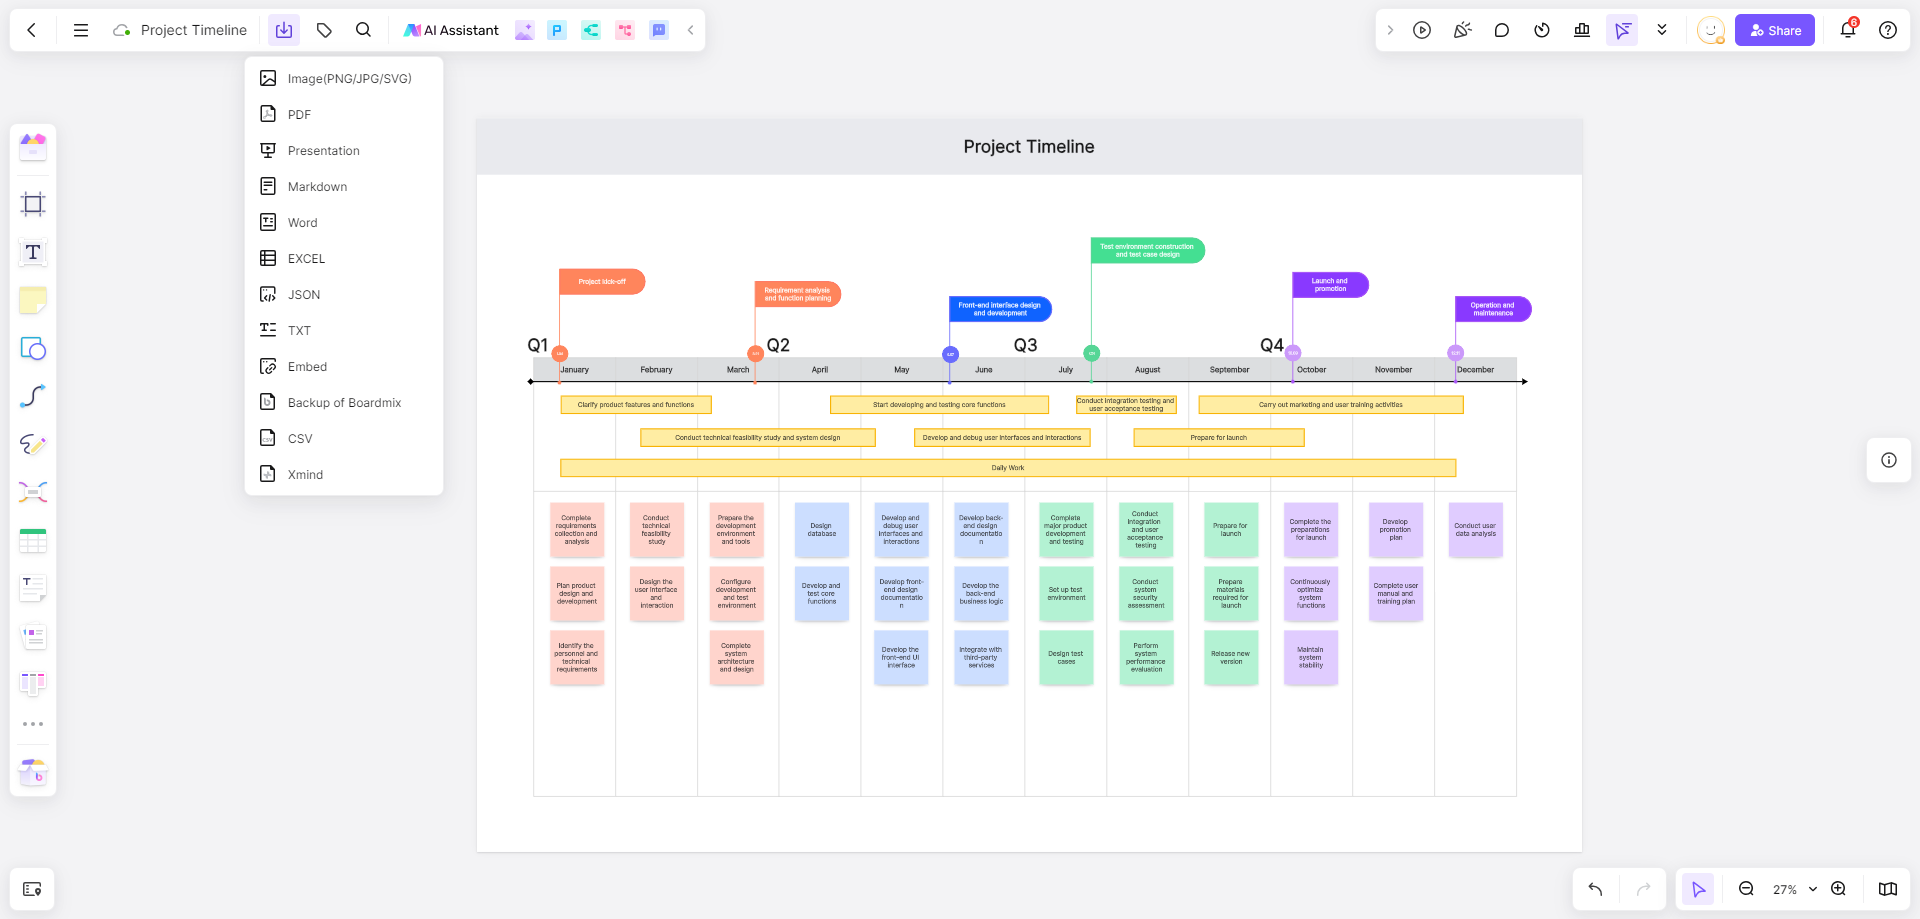
In overseas crowdfunding, the timeline can be divided into three parts. The first is the preliminary preparation work. We can put the product project establishment, preparation of promotional materials, establishment of advertising accounts, etc. in this section; the second Partly during the crowdfunding launch period, we can put the execution and optimization of ad groups, broaden external cooperation resources, and find external publicity support through fever and other platforms into this section; the third section is after the fundraising period is over, we can put product production, logistics arrangements, follow-up fan maintenance, and continuous product upgrade plans into this section.
Step 3. Choose Appropriate Type of Project Timeline
Depending on the number of time points and the events described, different timelines are selected. There are three types of timelines:
a) Vertical Timeline
A vertical timeline is suitable for events with many points in time because scrolling down is always easier than scrolling sideways. Additionally, it leaves plenty of room for adding graphics, and the vertical timeline can be left-aligned (best for longer descriptions) and centered (ideal for adding graphics).
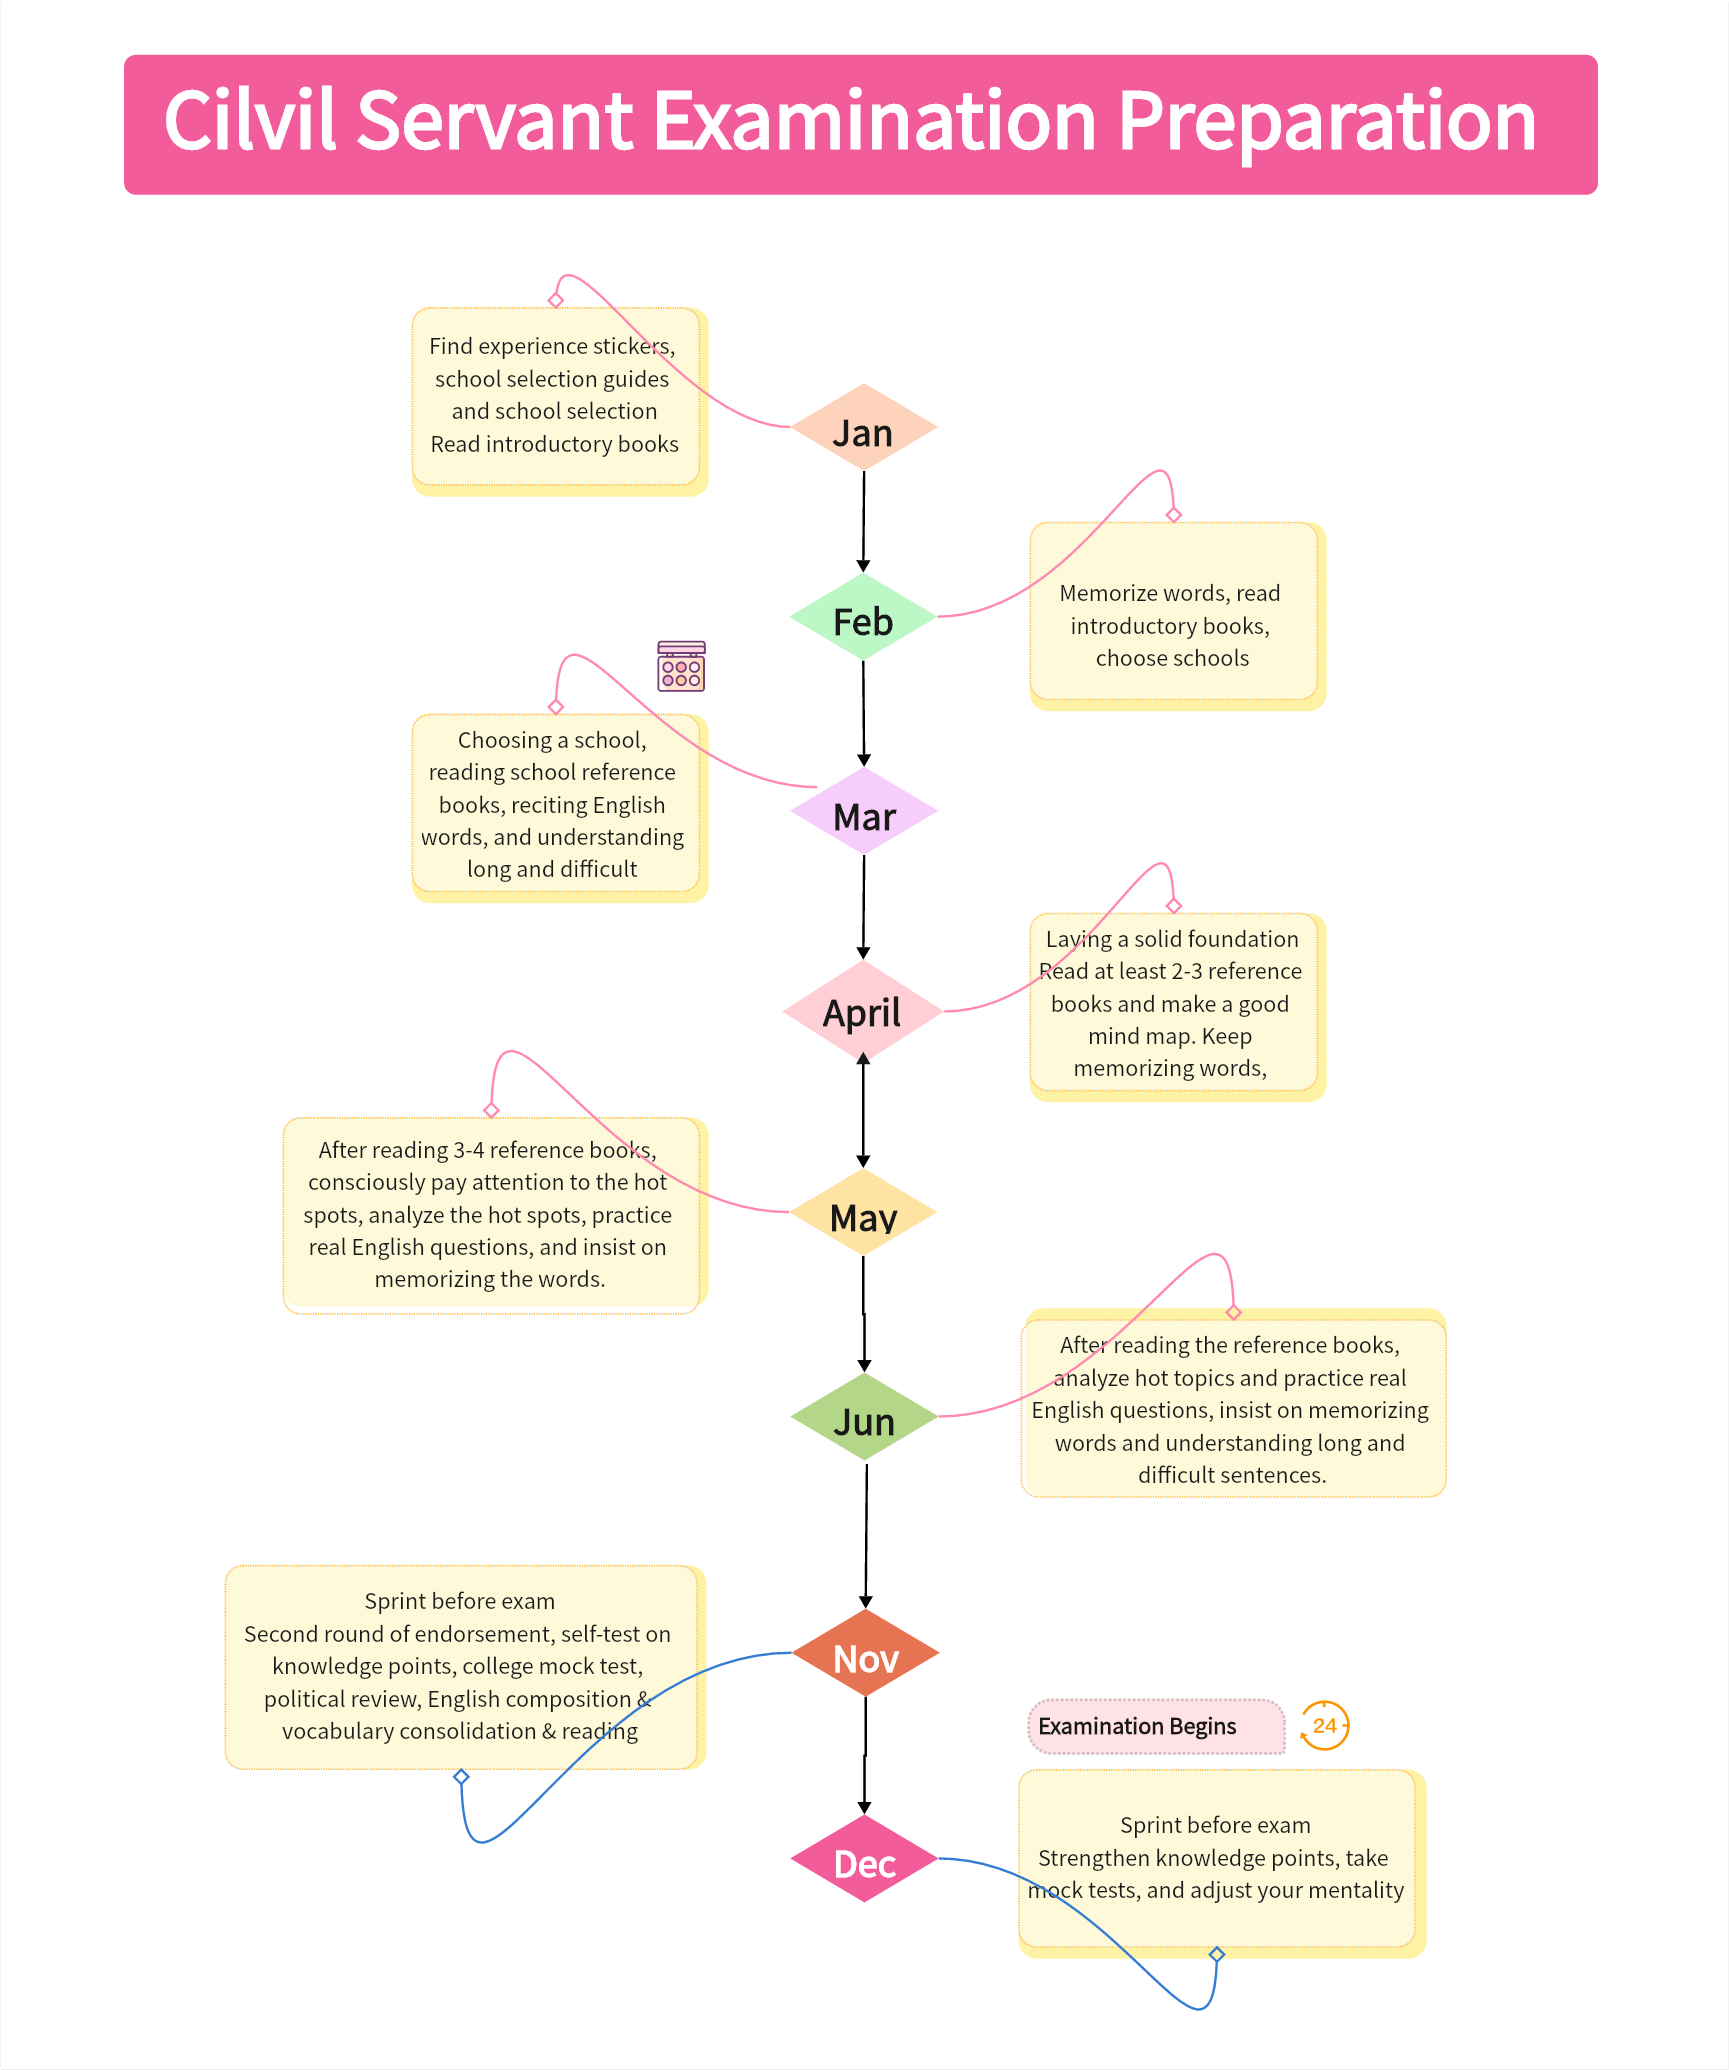
This type can be used when there are fewer time points on the timeline. At the same time, it is also suitable for presentation through presentation slides.
b) Horizontal Timeline
This type is suitable for events where only a small amount of text needs to be filled in. If you want your timeline to appear on a single page, you can use the snake timeline. Additionally, it has space to add images.
c) Roadmap Timeline

In this overseas crowdfunding, we used the horizontal timeline because it can show the team the next time plan and task arrangement through the online meeting function of Boardmix.
Step 4. Develop Project Timeline Collaboration
Upload pictures
In the production of timeline, adding pictures can make the timeline more visual. The Boardmix whiteboard supports inserting images in JPEG/JPG/PNG format, uploading SVG format files, and importing PDF/Word/PPT/WPS documents.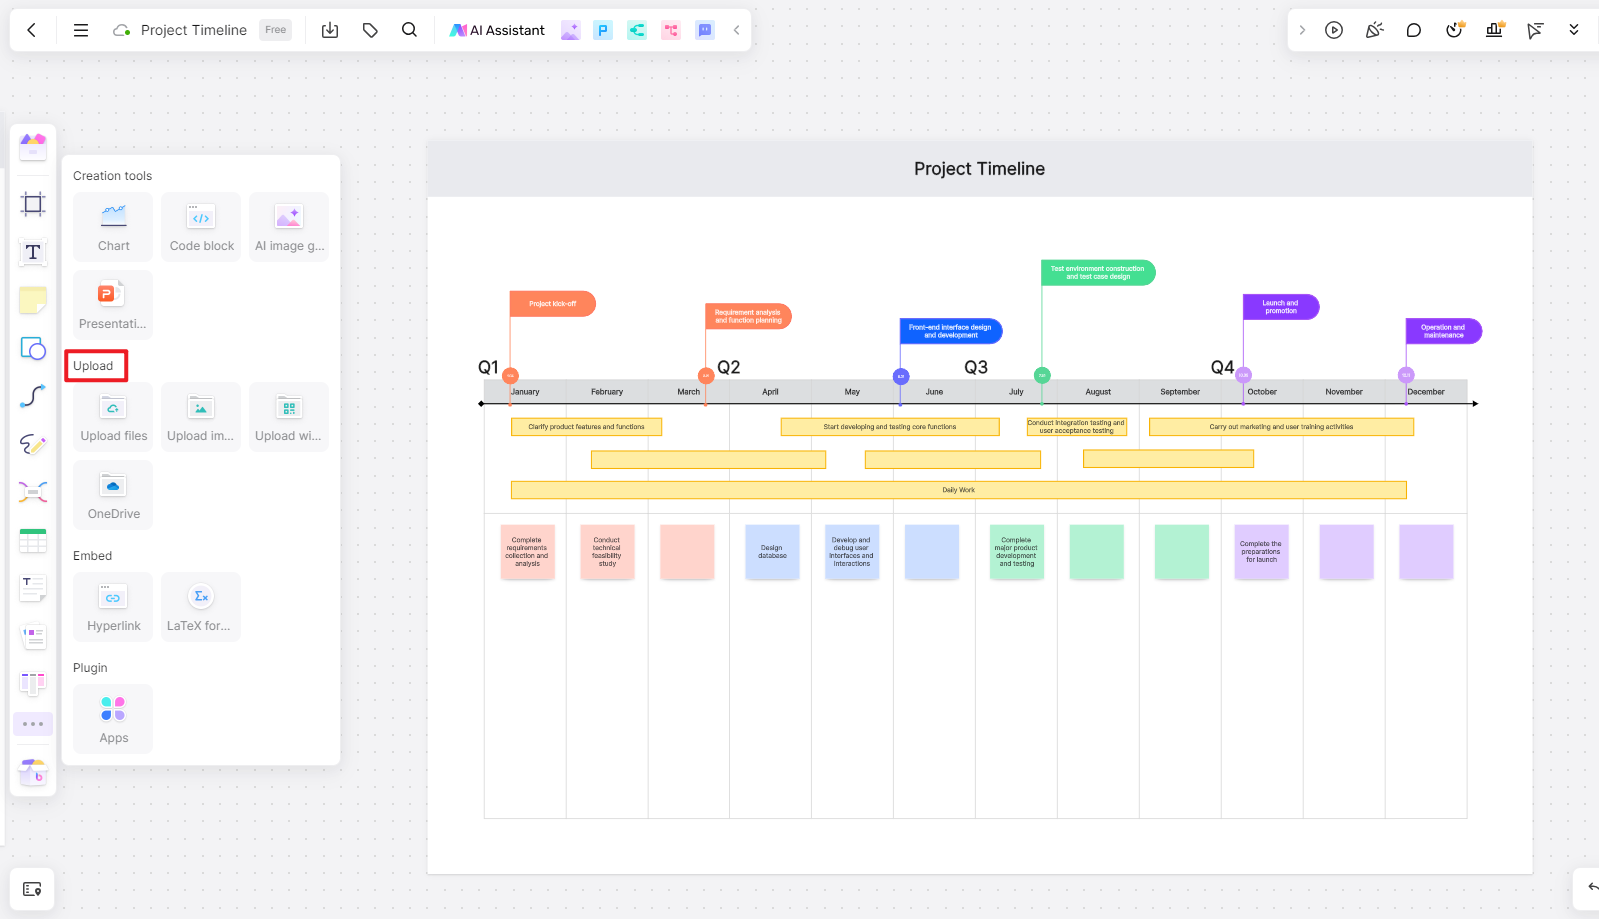
Export chart
After completing the timeline production, the boardmix whiteboard can be exported to files in PNG/JPG/PDF/SVG and other formats. The resolution and export area can also be adjusted during export.
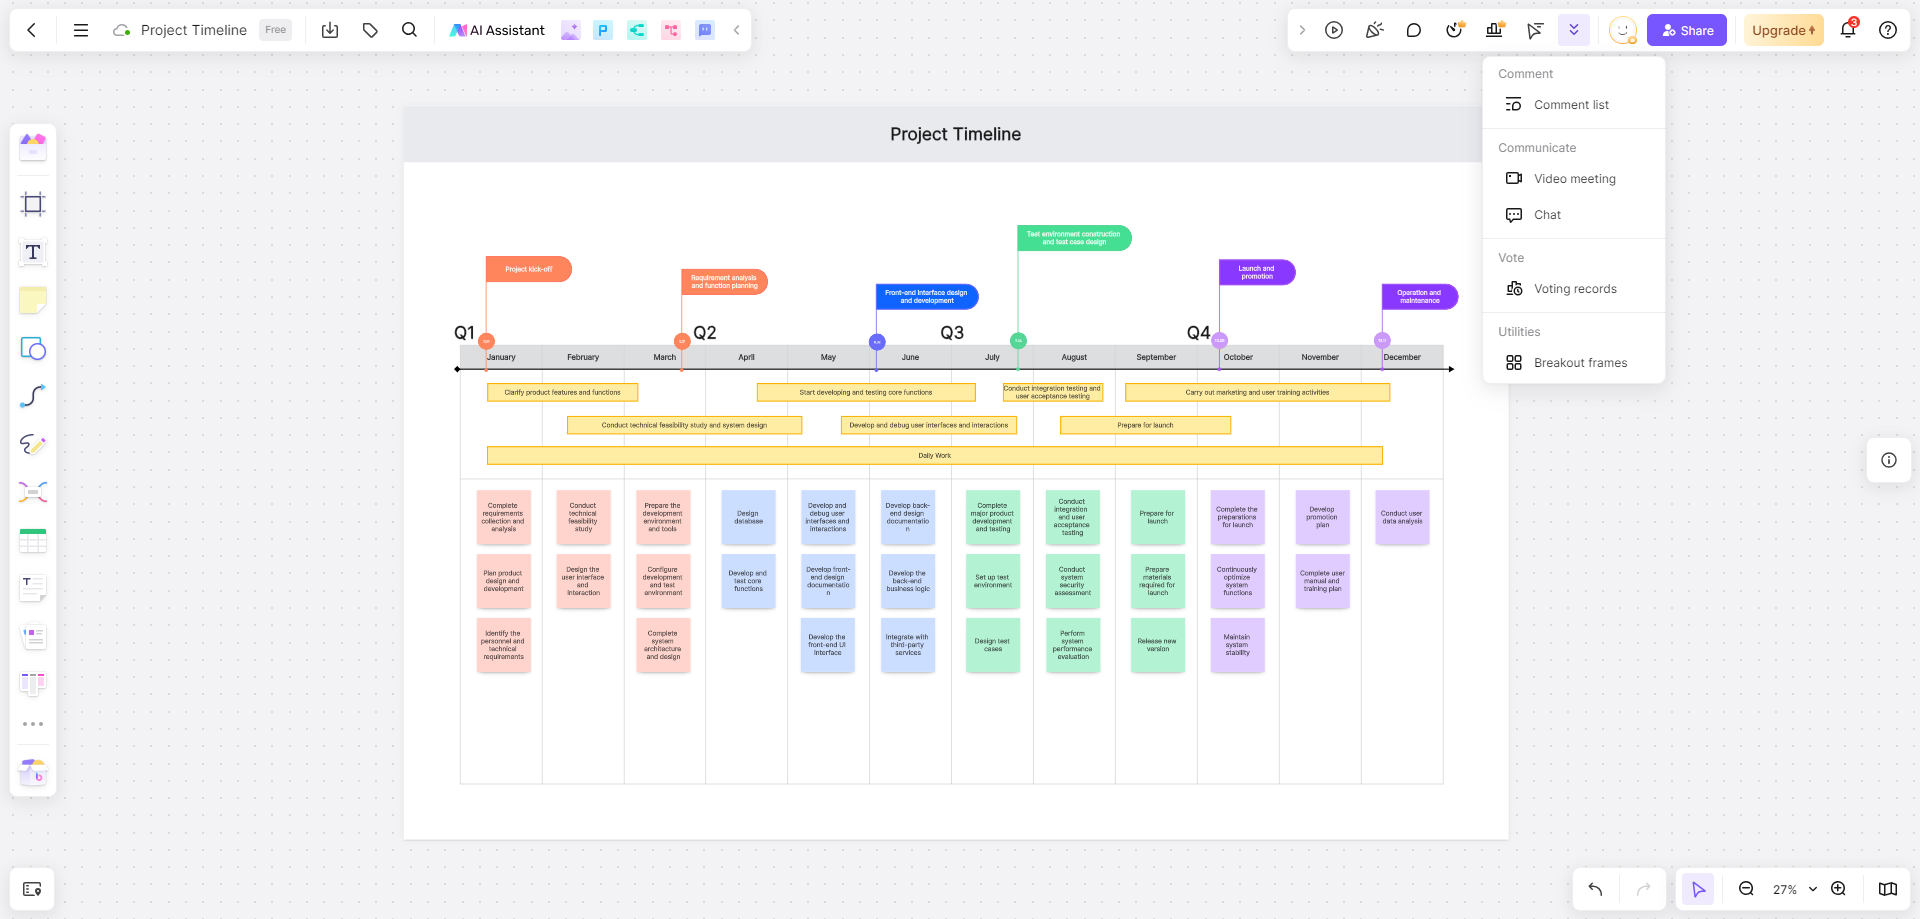
When creating a product or project timeline, team members often need to work together. The Boardmix whiteboard supports multi-person online collaboration and allows you to edit the same timeline with team members. It also supports access to third-party voice/video conferencing software such as Zoom, Focus, Tencent Conference, DingTalk Conference, etc.
Through various convenient drawing tools in the Boardmix whiteboard, you can clearly mark various points that need to be emphasized through different colors or different patterns. Finally, you can directly share the completed timeline with others, or directly on the boardmix whiteboard Start an online meeting.
Share Timeline
The above is the timeline production process of an overseas crowdfunding launch completed through the Boardmix whiteboard. Once we are familiar with using the timeline, we can arrange personal growth plans, study plans or travel plans, as well as product plans at work. The rich templates of Boardmix whiteboard allow everyone to create a timeline with one click, without starting from scratch! It is currently free to register and use, click on Boardmix to experience it!