What is Project Planning
Project planning is the process of defining the goals, objectives, tasks, and resources required to complete a project successfully. A shared online whiteboard in Boardmix gives the team one place to map tasks, milestones, and discussion notes. It involves identifying and organizing the necessary steps, timelines, and responsibilities to achieve the desired outcome. Project planning helps in setting realistic expectations, allocating resources efficiently, and managing risks effectively. It also provides a roadmap for the project team, enabling them to stay focused and on track throughout the project's lifecycle. Effective project planning helps a team balance deadlines, budget, and quality, and makes trade-offs visible when conditions change.
Worked example: if design review takes two extra days, move the dependent copy-review task and launch checkpoint, then record the new owner and review date.
Worked dependency example: if design review takes two days longer than planned, move copy review and the dependent launch checkpoint together, then record the new owner and review date.
Key Components of Project Plans
Project plans typically include several key components. These components provide a structured approach to managing and executing a project. Here are some of the key components you should consider including in your project plan:
- Project Objective: Clearly define the objective of the project. This should explain what you aim to achieve through the project and what success looks like.
- Scope: Define the boundaries and deliverables of the project. This includes what is included in the project and what is not. It helps to set expectations and help the team share the same view.
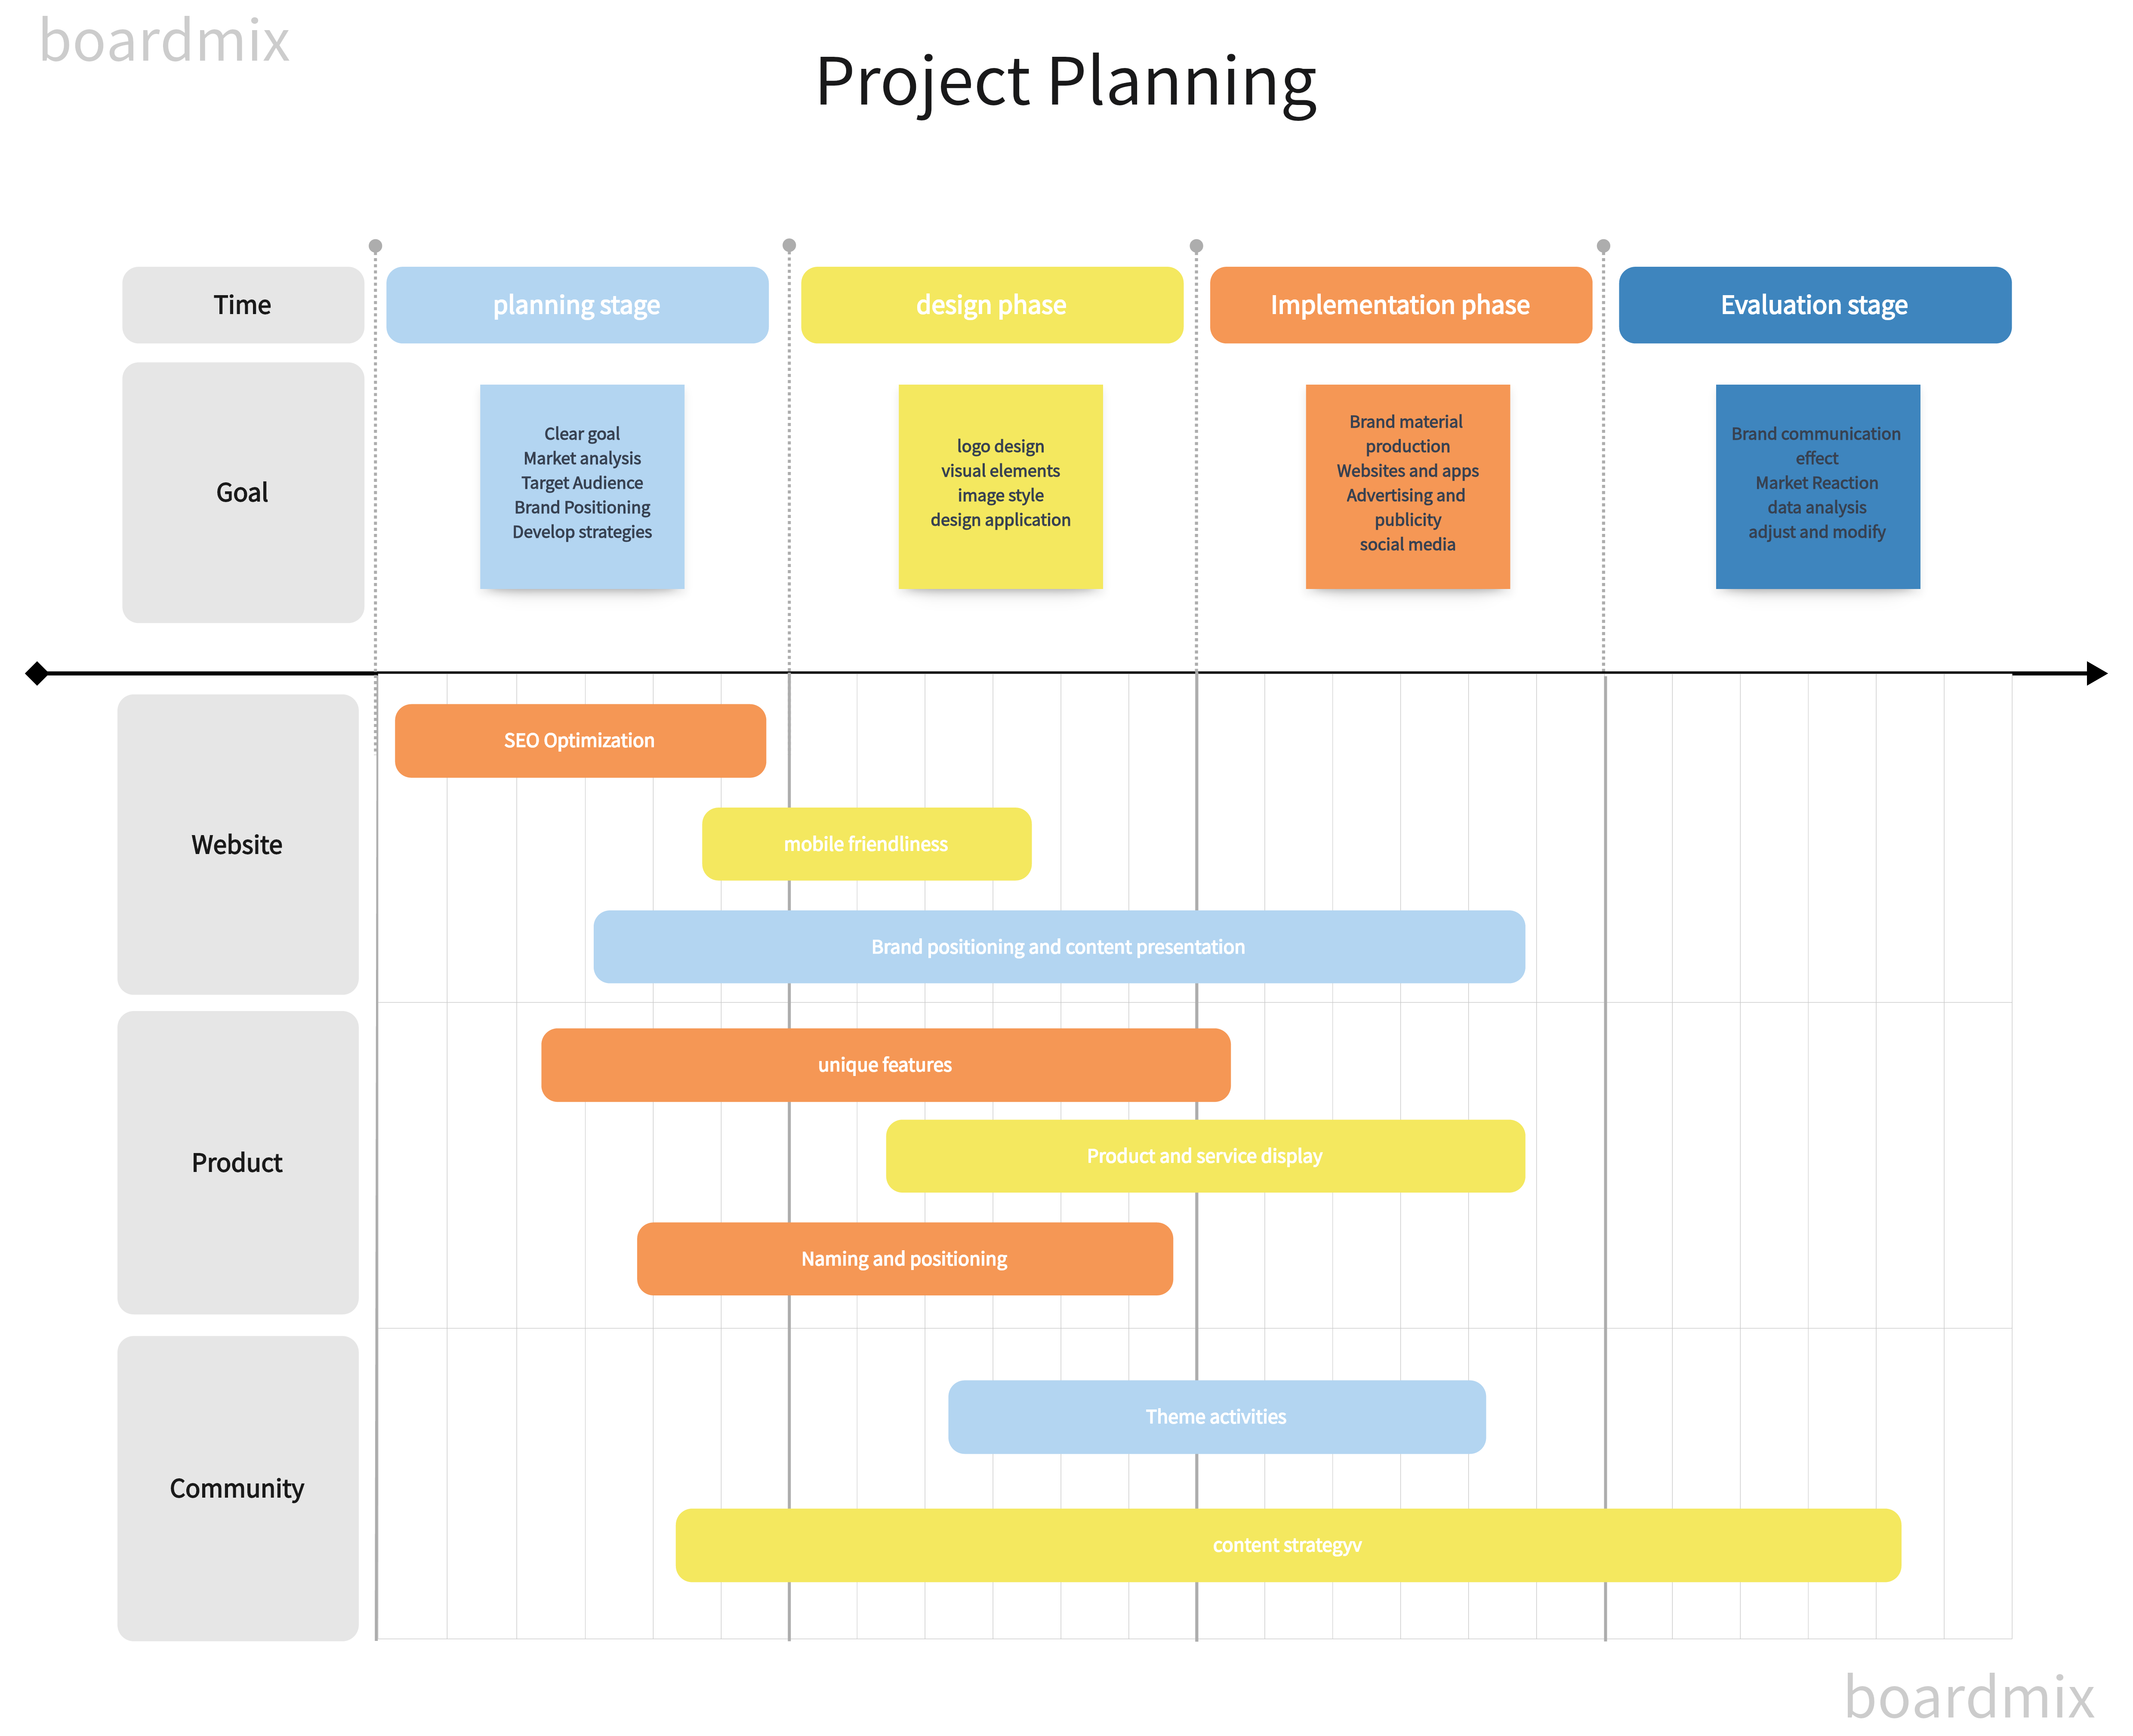
- Timeline: Create a timeline that outlines the start and end dates of the project, as well as any major milestones or deadlines. This makes planned dates visible so the team can compare progress with the schedule.
- Tasks and Activities: Break down the project into smaller tasks and activities. Assign responsibilities to team members and provide details on what needs to be done, when, and by whom.
- Resources: Identify the resources required for the project, such as personnel, equipment, and materials. Allocate resources accordingly to make availability visible before work starts.
- Budget: Develop a budget for the project that outlines the estimated costs for each task or activity. This gives the team a baseline for tracking spending and discussing cost changes.
- Risks and Issues: Identify potential risks and issues that could impact the project. Develop strategies to mitigate these risks and have a plan in place to address any issues that arise.
- Communication Plan: Establish a plan for how information will be communicated throughout the project. This includes regular meetings, status updates, and reporting mechanisms.
- Stakeholder Management: Identify key stakeholders and their roles in the project. Develop strategies to engage and communicate with stakeholders effectively.
- Evaluation and Measurement: Determine how the success of the project will be measured and evaluated. This could include specific metrics or key performance indicators (KPIs) that will be used to assess progress and outcomes.
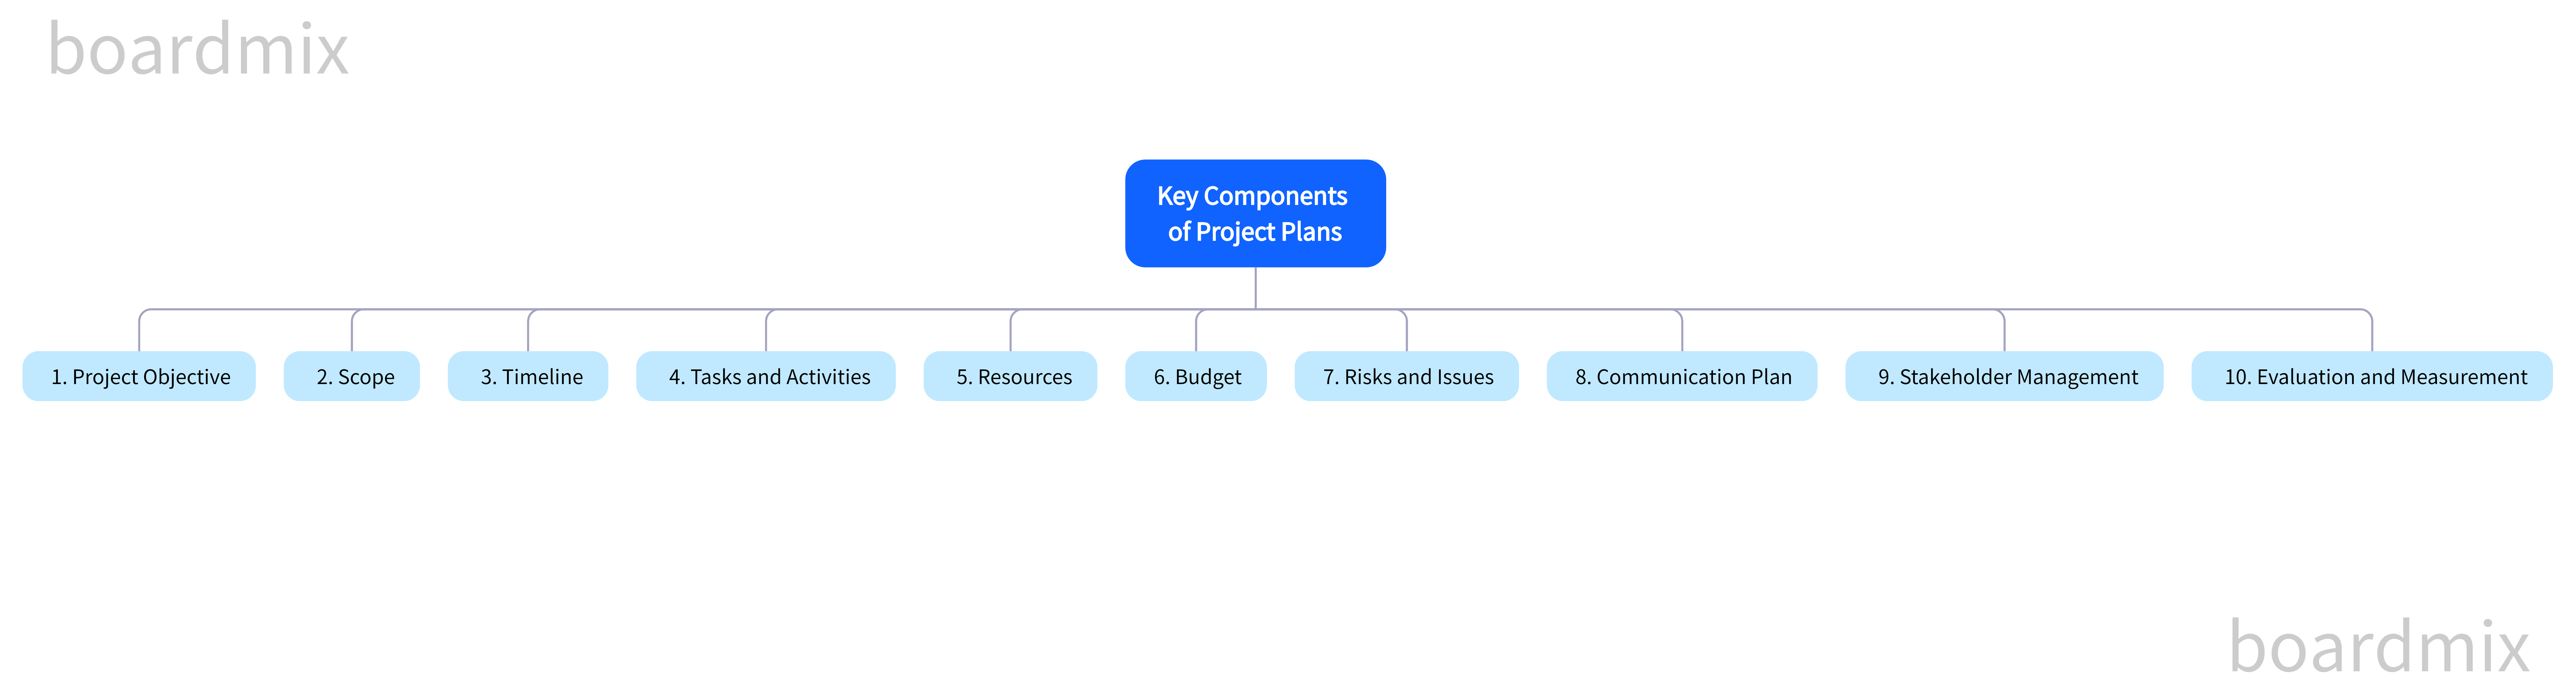
Use these fields to connect the goal to the work: each deliverable needs tasks, an owner, dates, and an agreed way to judge whether it is complete.
How to Utilize Timeline Template for Efficiency
Utilizing a timeline template can greatly improve efficiency in project planning and management. Here are some steps to effectively utilize a timeline template.
- Choose the right template: There are many different timeline templates available, so choose one that best suits your project's needs. Consider factors such as the level of detail required, the number of tasks and milestones, and the overall timeline duration.
- Customize the template: Once you have selected a template, customize it to fit your specific project requirements. Add or remove rows or columns as needed and adjust the time intervals to accurately reflect the project timeline.
- Identify key milestones: Identify the major milestones or deadlines in your project and add them to the project plan and timeline template. This gives the team clear checkpoints for reviewing progress and discussing delays.
- Break down tasks: Break down the project into smaller tasks or activities and add them to the timeline template. Assign start and end dates for each task and allocate resources accordingly.
- Set dependencies: Determine if there are any dependencies between tasks, where one task must be completed before another can begin. Indicate these dependencies in the timeline template so the team can see which tasks must wait for earlier work.
- Update and monitor progress: Regularly update the timeline template with the actual progress of each task. This will help you track project performance and identify any delays or issues that may arise.
- Communicate and collaborate: Share the timeline template with your project team and stakeholders to ensure everyone is aware of the project's timeline and progress. Encourage collaboration and communication to keep everyone aligned and informed.
- Adjust as needed: As the project progresses, you may need to make adjustments to the timeline template. This could include extending or shortening task durations, reassigning resources, or revising milestones. Be flexible and update the template accordingly.
Keep a baseline of the original schedule alongside the current forecast. A moved task should show why it moved and which dependent tasks are affected.

Worked example: a small website launch
Suppose a team is preparing a five-page website. Number the working days rather than calendar days, give each task one accountable owner, and state what must finish before the next task can start.
| Task | Owner | Planned days | Depends on | Done when |
|---|---|---|---|---|
| A. Approve page content | Content lead | 1–2 | Agreed page list | All five pages have approved copy |
| B. Approve layouts | Designer | 3–4 | A | Page layouts are approved for build |
| C. Build the pages | Developer | 5–7 | B | Pages are available in the test environment |
| D. Test and fix release blockers | QA lead | 8–9 | C | Agreed release-blocking checks pass |
| E. Publish | Release owner | 10 | D | The approved pages are live |
If layout approval moves from day 4 to day 6 and the later task durations stay unchanged, the build moves to days 7–9, testing to days 10–11, and publication to day 12. Mark the original day-10 milestone as the baseline, add the revised date, and record the reason. Do not shorten testing silently to make the drawing fit the old deadline.
In Boardmix, place each task on the timeline, add its owner and completion condition, and connect B to C, C to D, and D to E. Move the cards and update their labels after the team agrees on a change; the visual plan does not automatically reschedule work in another project tool.
Boardmix: Online Project Plan and Timeline Template Tool
Boardmix is an online whiteboard with templates for visual project plans and timelines. Add tasks, owners, dates, and milestones to a shared canvas, then update them together as work progresses. The templates can be adapted to the level of detail your project needs.
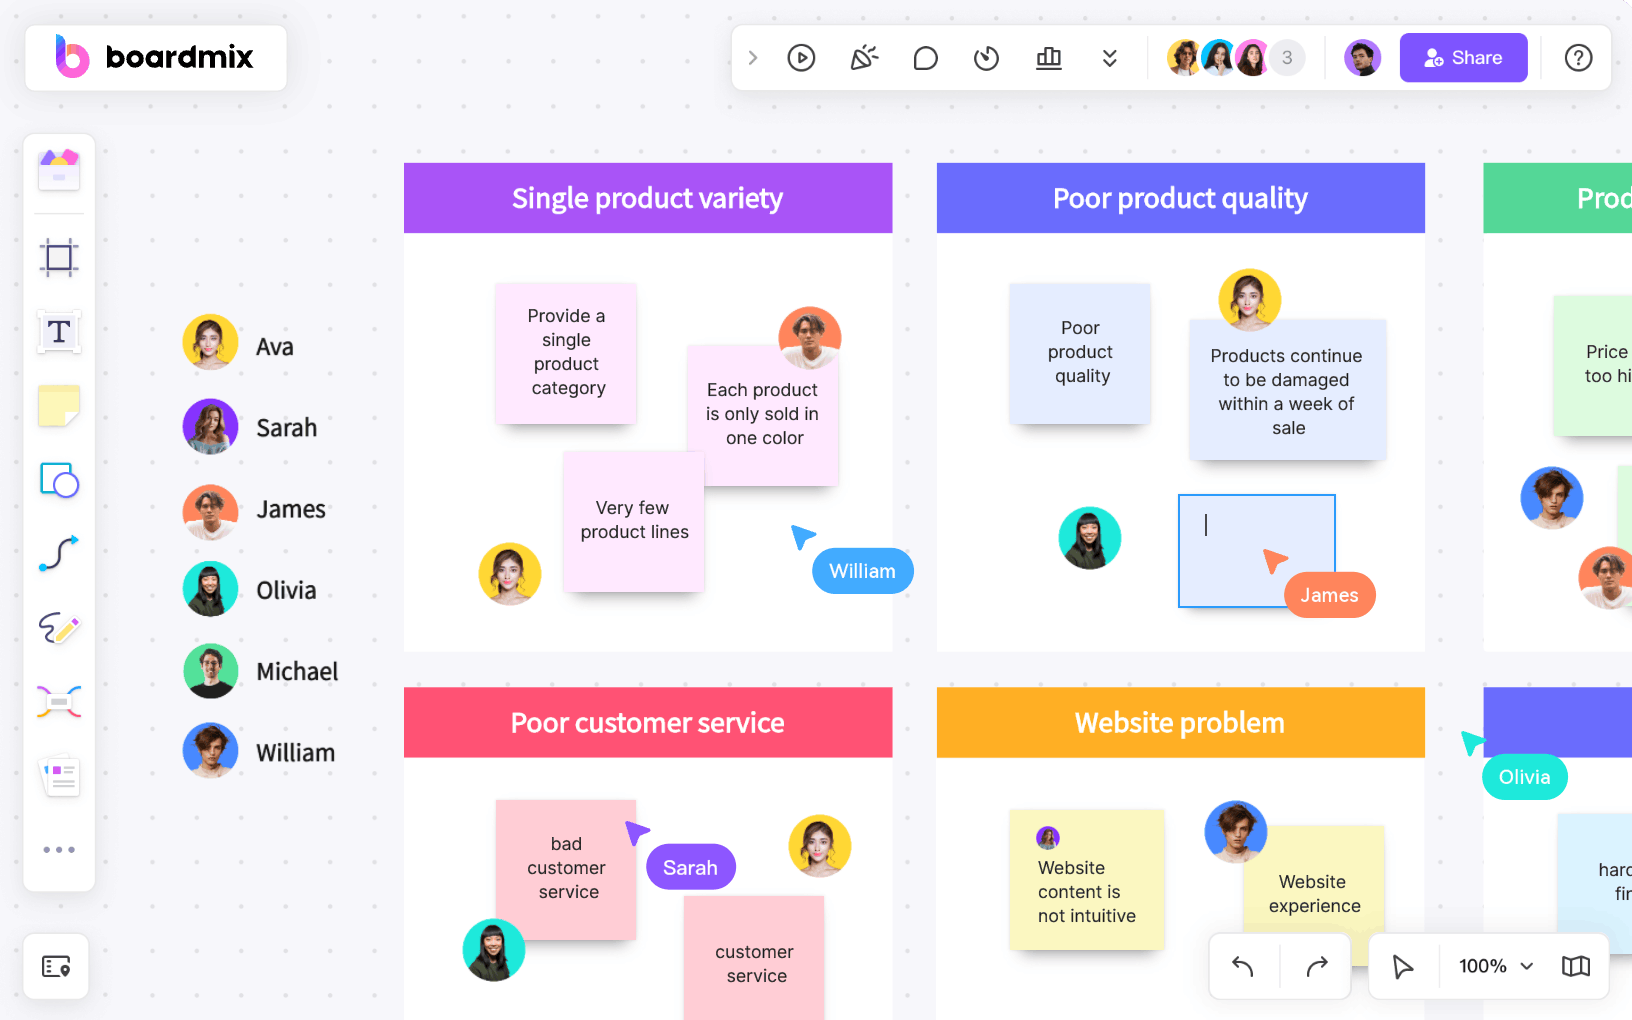
Key features of Boardmix
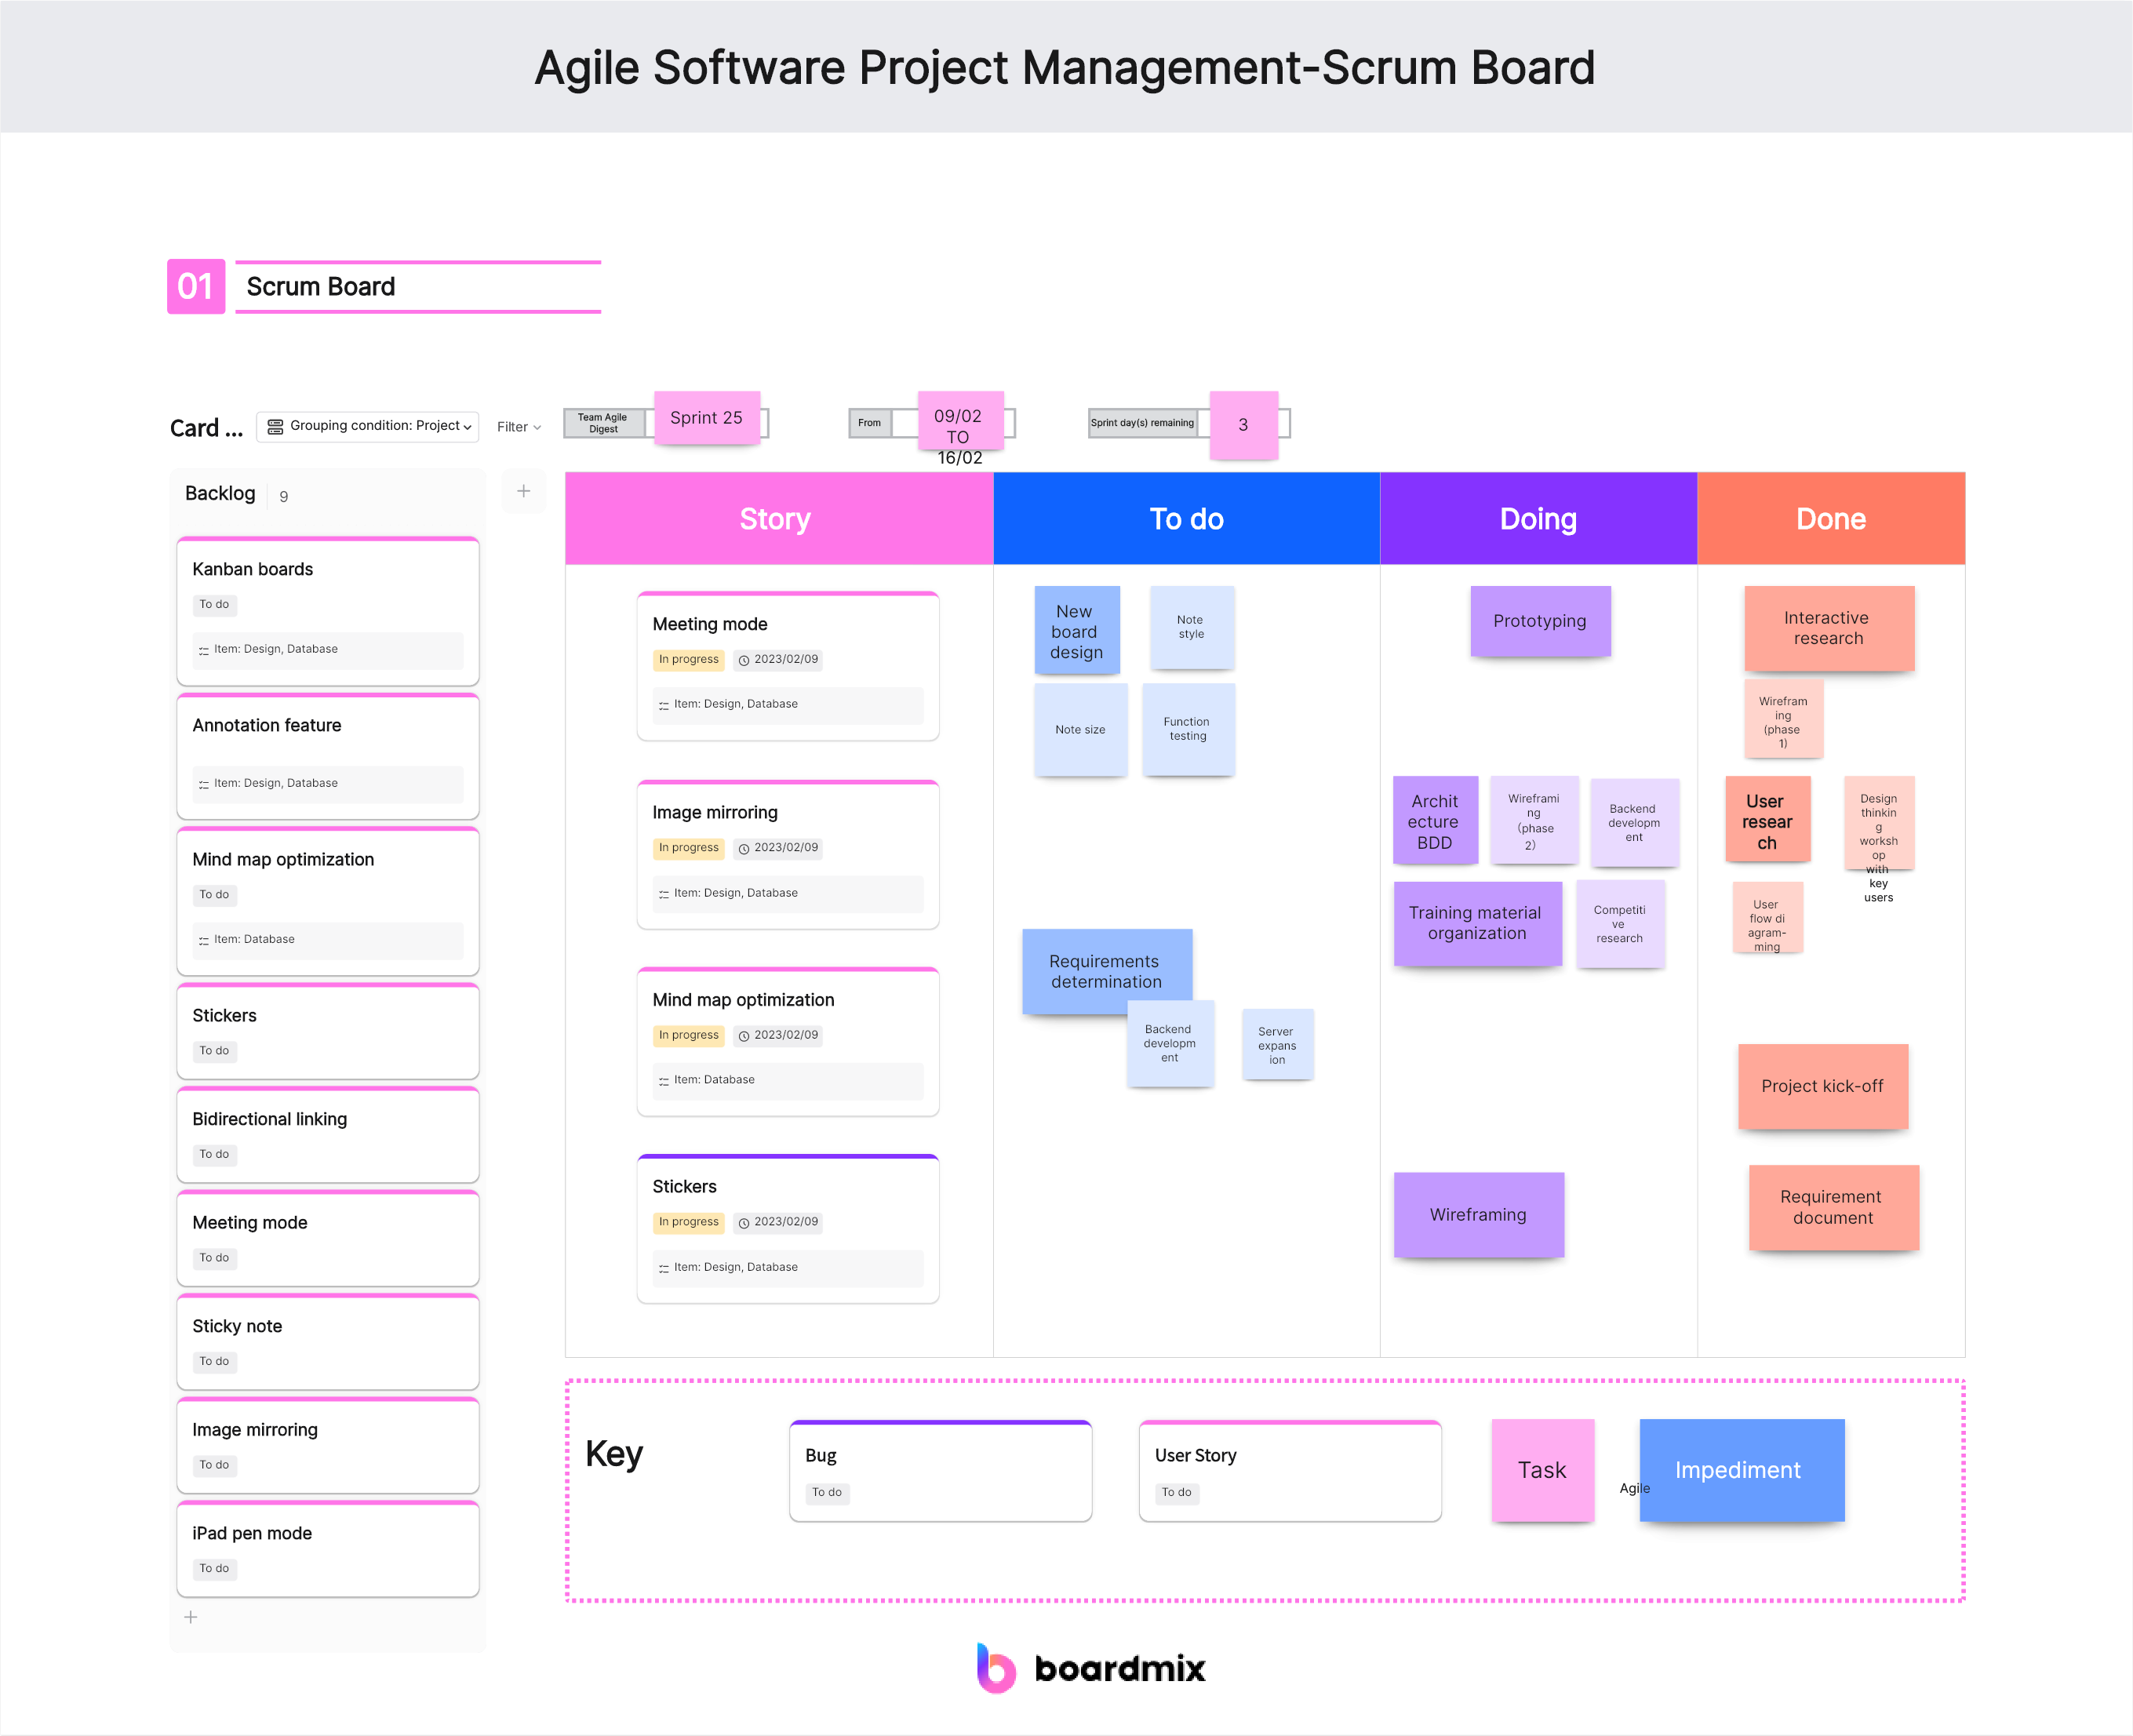
- Project planning: Arrange tasks, subtasks, and milestones on the canvas. Record an owner and deadline for each task so the plan is clear.
- Timeline management: Place tasks and milestones along a visual timeline. Move their shapes or cards when dates change and redraw dependency connectors as needed.
- Responsibilities and collaboration: Add each owner’s name to the relevant task and discuss updates through comments on the board.
- Resource planning: List the people, equipment, and materials needed for each task. Review availability with the team and update the list manually.
- Shared updates: Collaborators can see edits to the board as they happen. During a status review, update completed work, delayed tasks, and revised dates together.
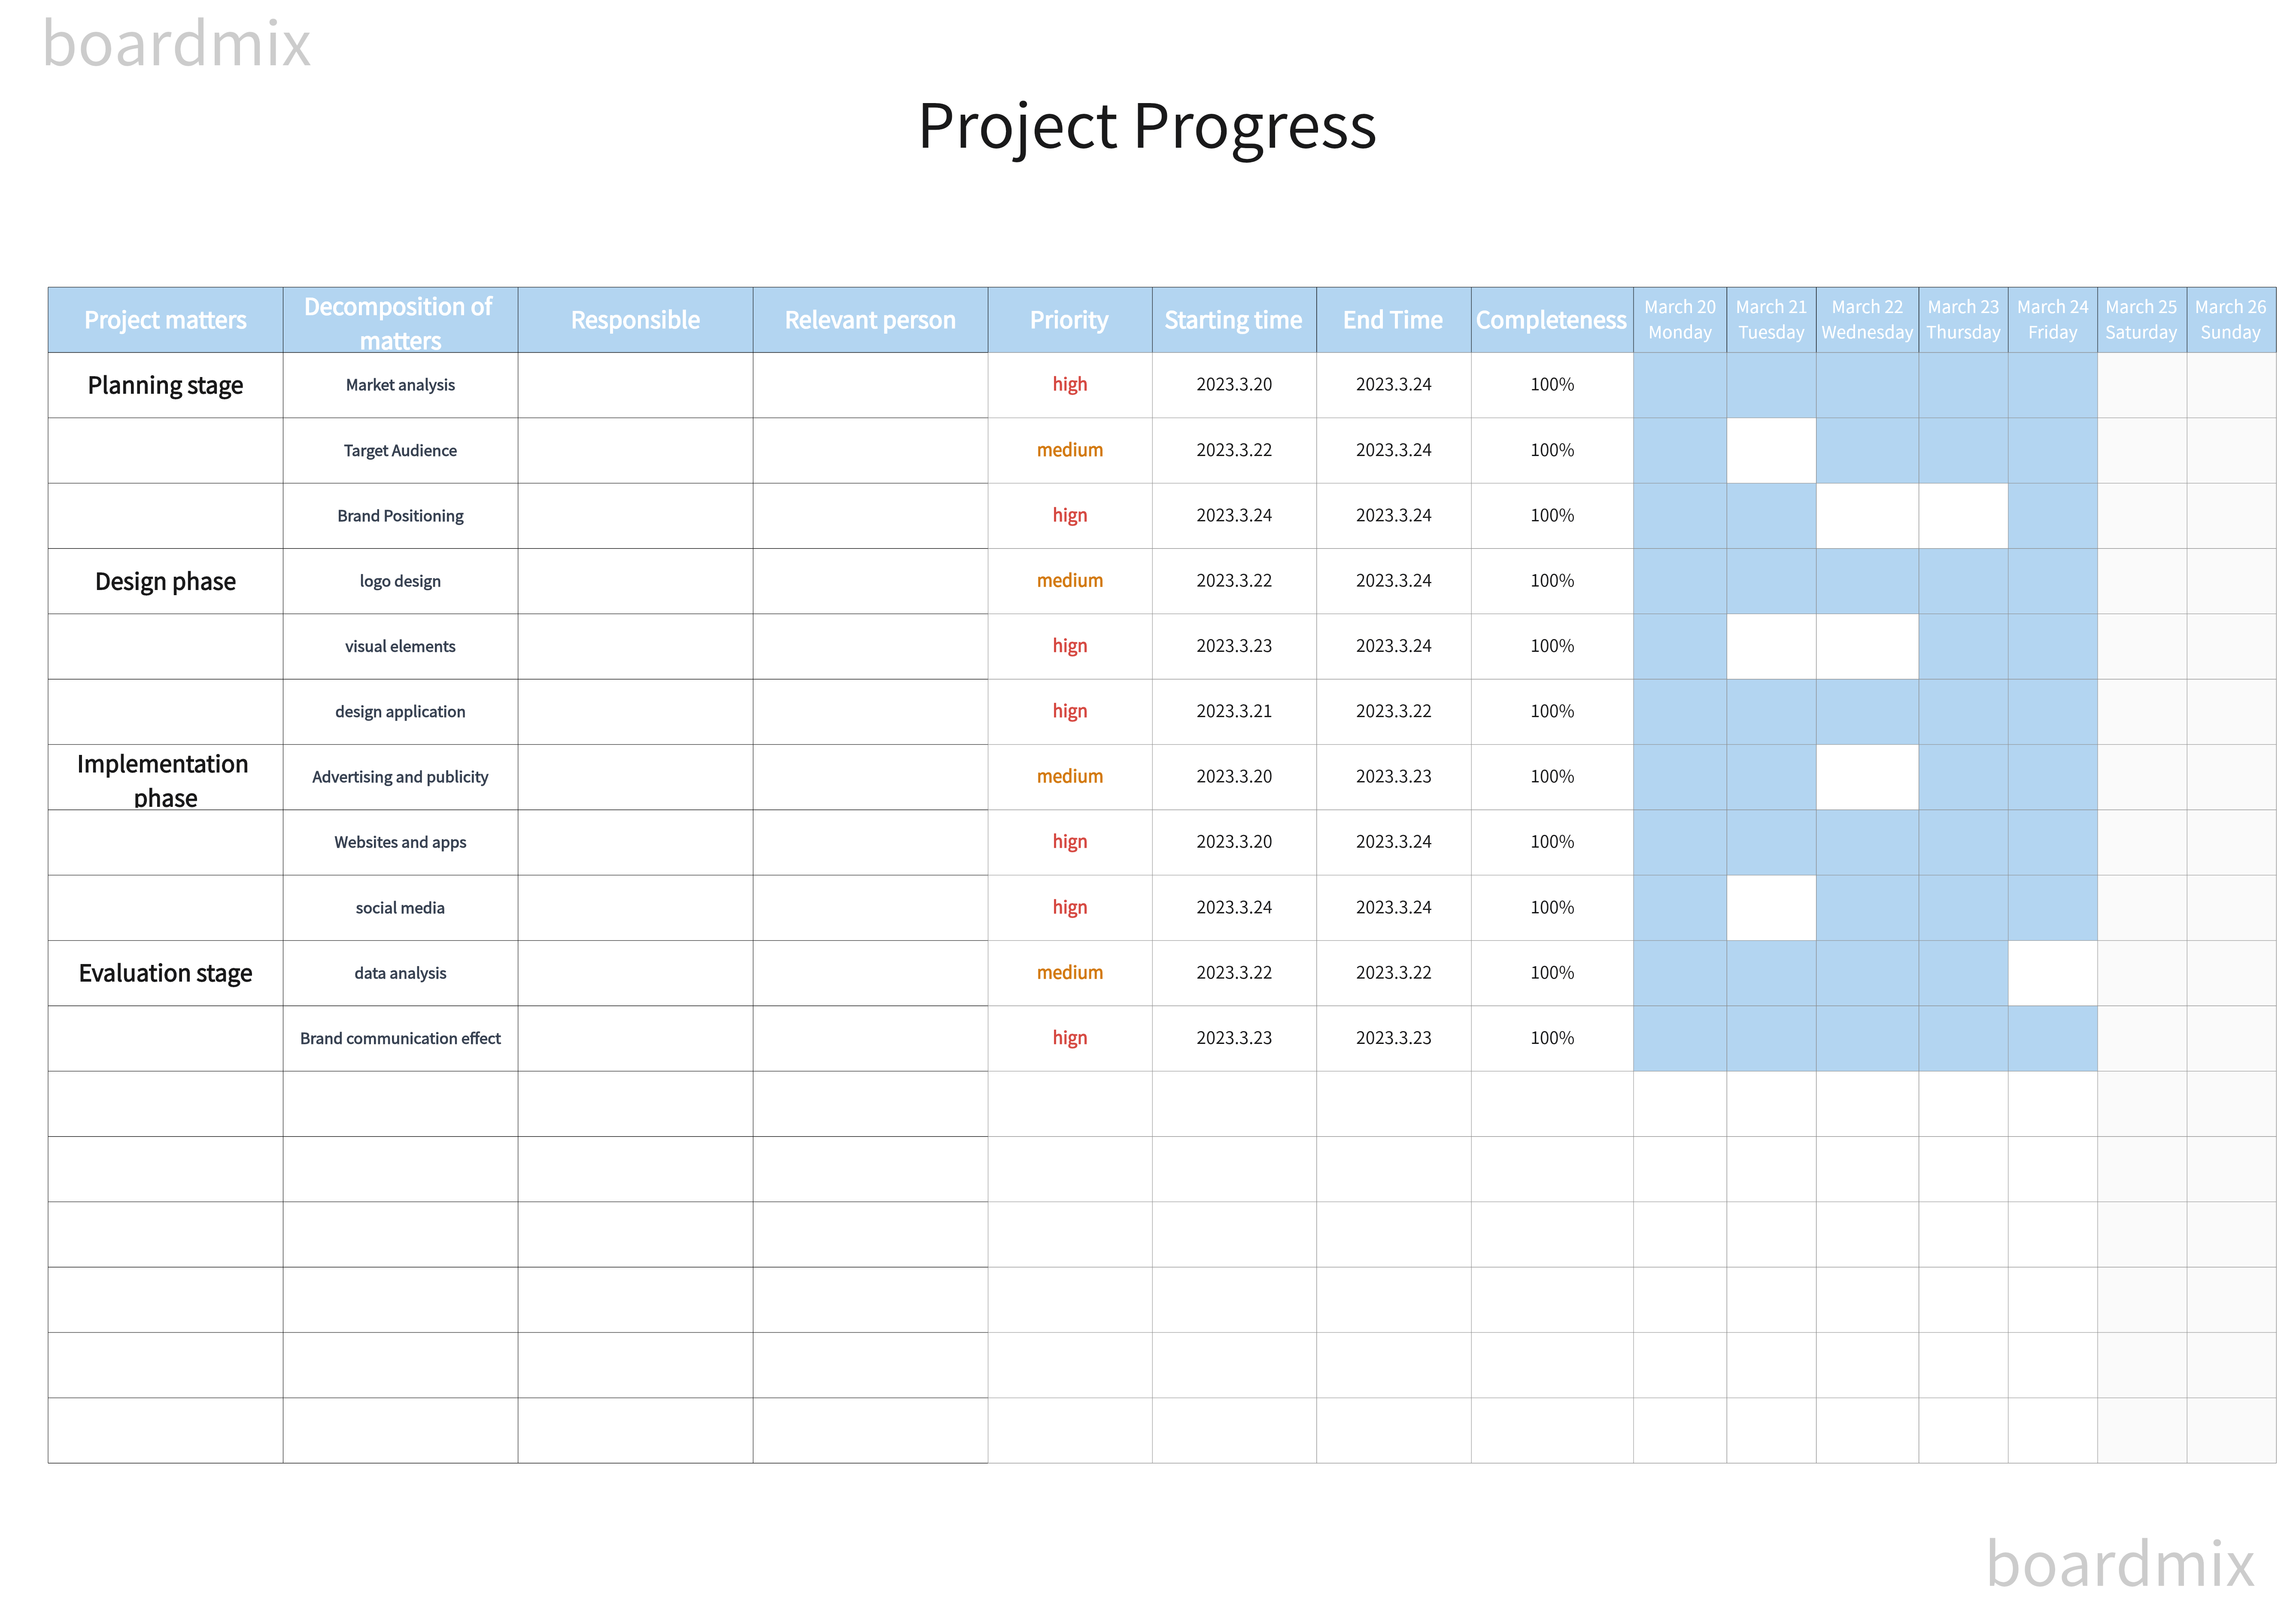
- Progress review: Use a table or a status section to summarize completed tasks, blockers, and next milestones. Keep the figures aligned with the team’s source records.
- Project references: Place links to the relevant tasks and documents beside the project plan so reviewers can trace each item to its source.
Use the shared plan during team reviews to explain progress and agree on changes. Keep detailed task records in the system your team already uses, and link those records from the board when helpful.
Reviewing and Updating the Project Plan
A plan needs attention during delivery, not just at kickoff. Use the following practices to discuss progress, identify changes, and decide what to do next.
- Define clear objectives: Start by clearly defining the objectives of your project. What are you trying to achieve? This will provide a clear direction for your project and help you stay focused.
- Break down the project into phases: Divide your project into smaller phases or stages. This will make it more manageable and easier to track progress. Each phase should have its own set of tasks and milestones.
- Create a detailed project plan: Develop a detailed project plan that includes all the tasks, resources, and timelines. This will serve as a roadmap for your project and help you stay organized.
- Assign responsibilities: Clearly define roles and responsibilities for each team member. Assign tasks to individuals based on their skills and expertise. This makes ownership clear when the team reviews progress or resolves a blocker.
- Communicate effectively: Communication is key to successful project execution. Regularly communicate with your team members to keep them informed about the project's progress, changes, and any challenges that may arise.
- Monitor progress: Regularly monitor the progress of your project. Keep track of tasks that have been completed, those in progress, and any that are delayed. This will help you identify potential issues early on and take corrective action.
- Manage risks: Identify potential risks and develop strategies to mitigate them. Proactively address any risks that may impact the success of your project. Regularly review and update your risk management plan.
- Adapt to changes: Projects rarely go exactly as planned. Be prepared to adapt and make changes as needed. Stay flexible and open to new ideas and approaches that may arise during the project execution.
- Celebrate milestones: Celebrate the achievement of key milestones along the way. This will help motivate your team and keep morale high.
- Learn from the experience: After the project is completed, take time to reflect on the experience and identify lessons learned. Use these insights to improve your future project planning and execution.
When a task slips, discuss the dependency and the available choices: move the milestone, reduce scope, or change resources. Record the agreed decision so the plan reflects what the team can actually deliver.
Conclusion
Start with the next deliverable, name its owner, and work backward from the deadline. The most useful timeline is one the team can explain: what must happen first, what can run in parallel, and what changes when a task is late.
Use Boardmix to place that timeline beside the project scope and discussion notes. During a review, update the affected cards and connectors together, while keeping detailed task records linked from the board.