In 2015, Martin C. Carlisle designed a Windows-supported flowchart interpreter that goes by the name of Raptor. It can be used by users—students and employees—to draw flowcharts and visualize their algorithms.
In this blog, you will learn everything you need to know about using Raptor flowchart, how you can make a flowchart in Raptor, and possibly explore an alternate tool that helps you create flowcharts. Keep reading to discover all the info.
Part 1. What Is A Raptor Flowchart?
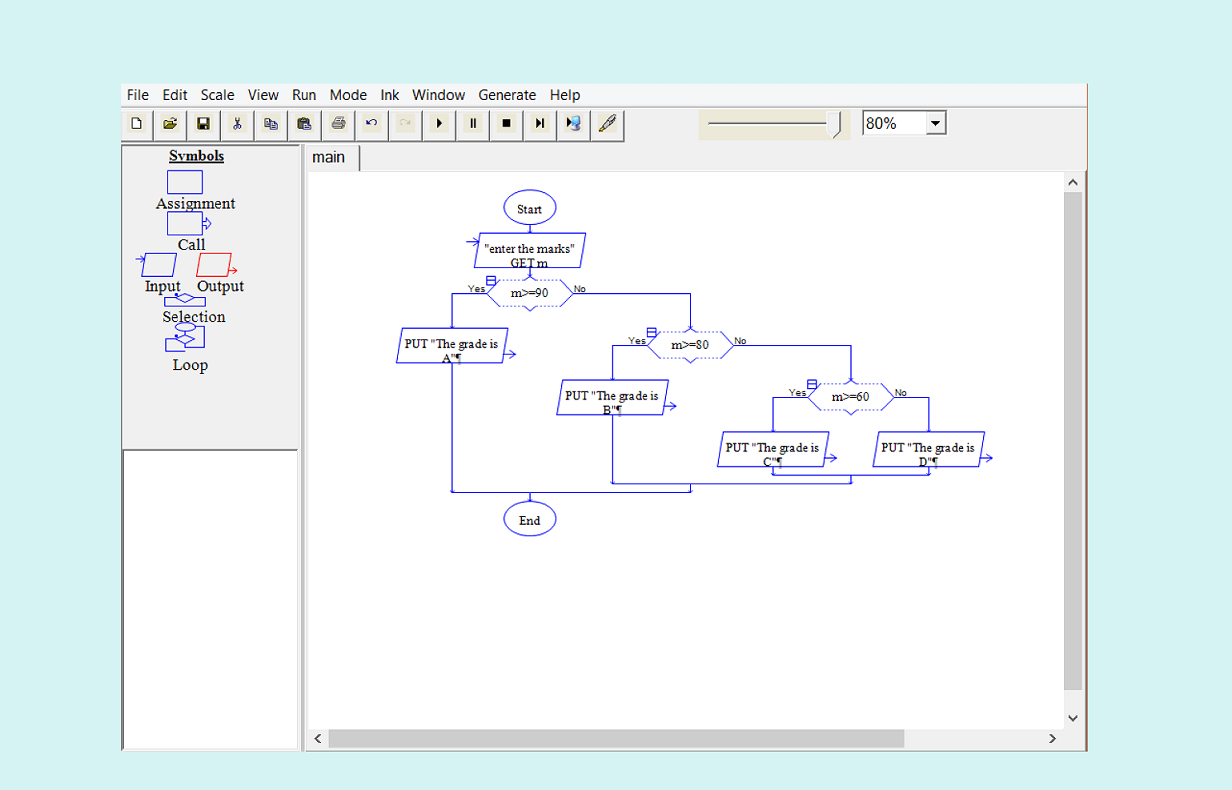
Raptor is a visual learning environment that focuses on flowchart-based programming. It is specifically designed to enable students to visualize their algorithms and avoid syntactic baggage.
Students make use of flowcharts as a way to express their algorithms, and they find success in creating it with Raptor compared to using traditional language.
Part 2. Can You Run Flowcharts in Raptor?
Raptor is very easy to use and it enables users to create executable flowcharts as per their vision and requirements. Its simple language and graphical elements make it a well-designed interface to educate major programming knowledge and ideas to students. It was originally designed for the US Air Force Academy but is now seen as one of the most useful tools for Computer Science.
Raptor consists of six symbols that make it possible to run flowcharts. Its top four statement types are:
- Input: An input statement or symbol enables users to enter data and values into the program.
- Assignment: The assignment symbol is utilized for performing computation and storing results in a variable.
- Procedure Call: A procedure statement or symbol denotes a collection of programming statements that is possible to complete a specific task.
- Output: Finally, an output statement or symbol reveals a value after the program is executed.
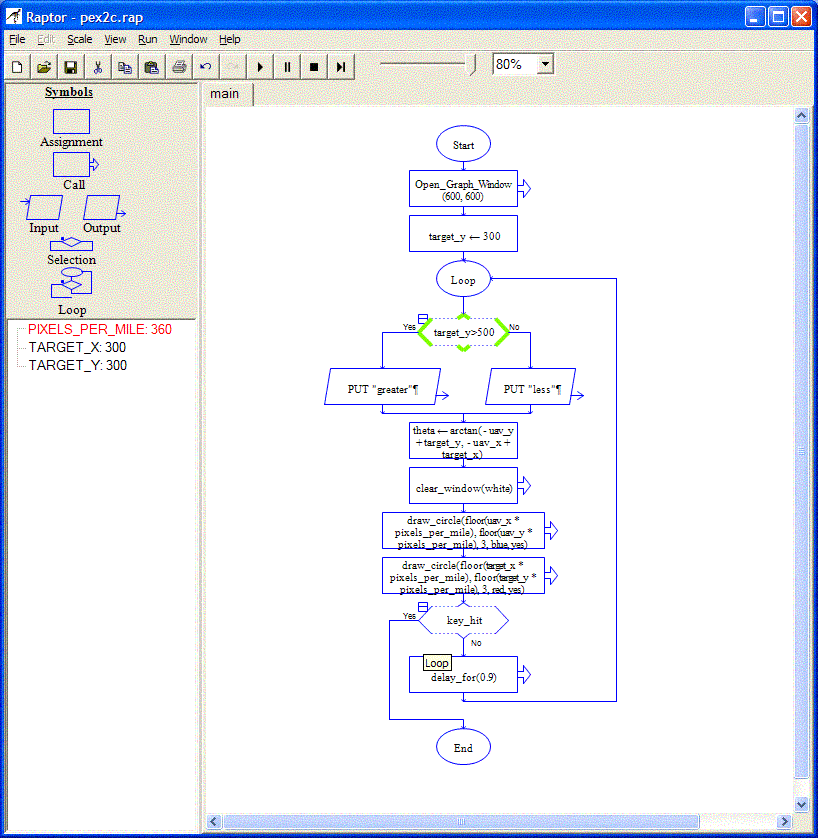
Source: Raptor
Part 3. How Do You Make A Flowchart in Raptor?
Now, let us go through each step involved in creating a flowchart in Raptor.
Step 1. The first step is to save the flowchart file with a .rap file extension which means Raptor files.
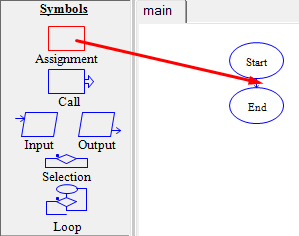
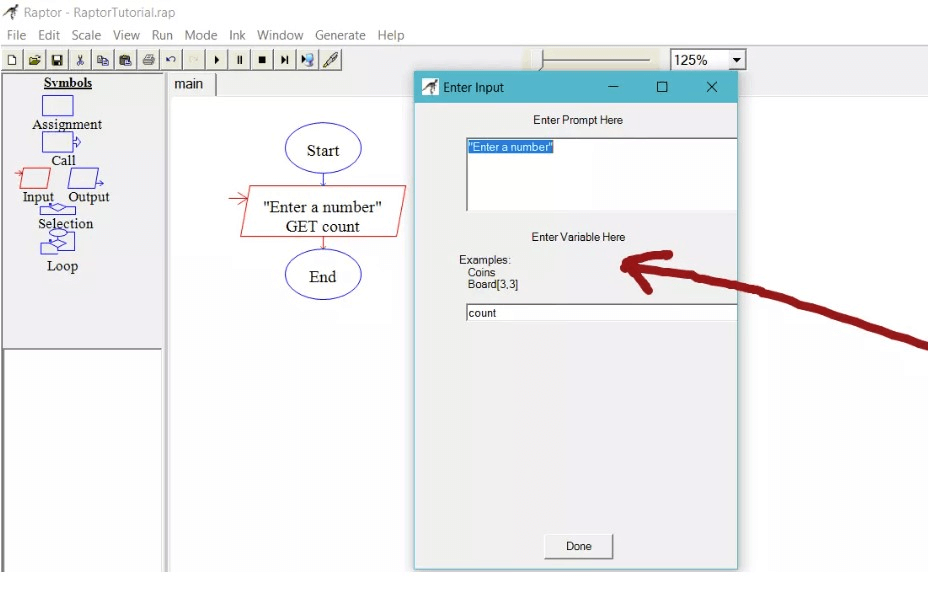
Step 2. On the left-hand side panel, you will find symbols to use. Insert an input symbol in the canvas by clicking the symbol once and add it between your Start and End components.
Step 3. Then, double-click the input symbol and add “Enter a number” under the Enter Prompt Here section. After that, use count under Enter Variable Here section.
Step 4. The next step is to add one Loop and edit the expression to the following: Count < 0
Step 5. Then, insert an Output symbol on the screen. Moreover, insert an Assignment symbol and edit the value to the following: Count = Count - 1.
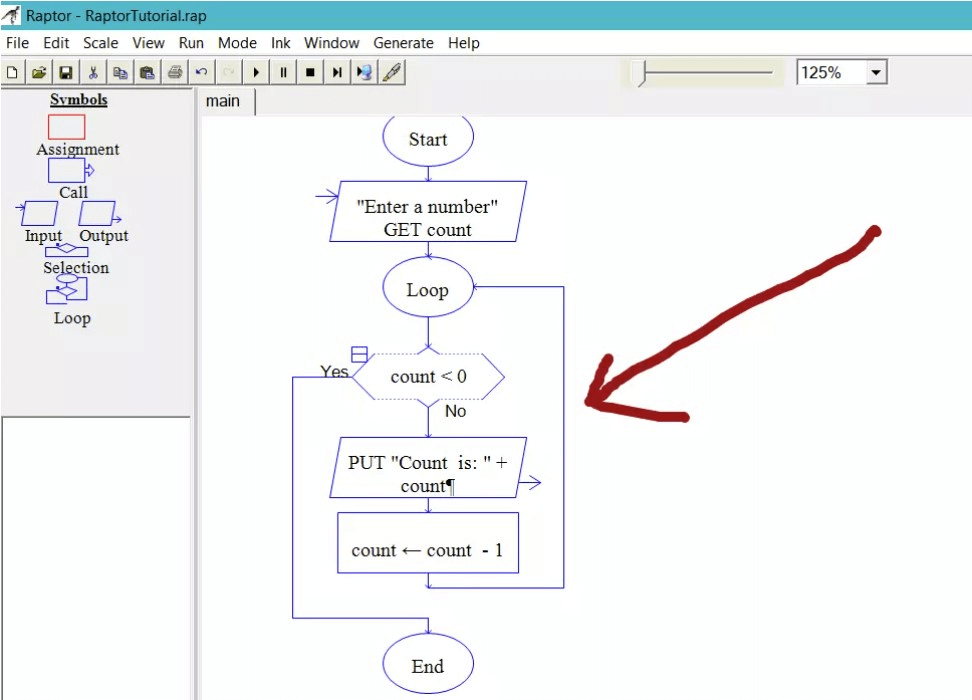
Step 6. Once you have prepared the flowchart, you can finally run it by clicking on the play or forward arrow button from the above toolbar.
Part 4. Bonus Tip: Free Alternative to Raptor Flowchart Maker
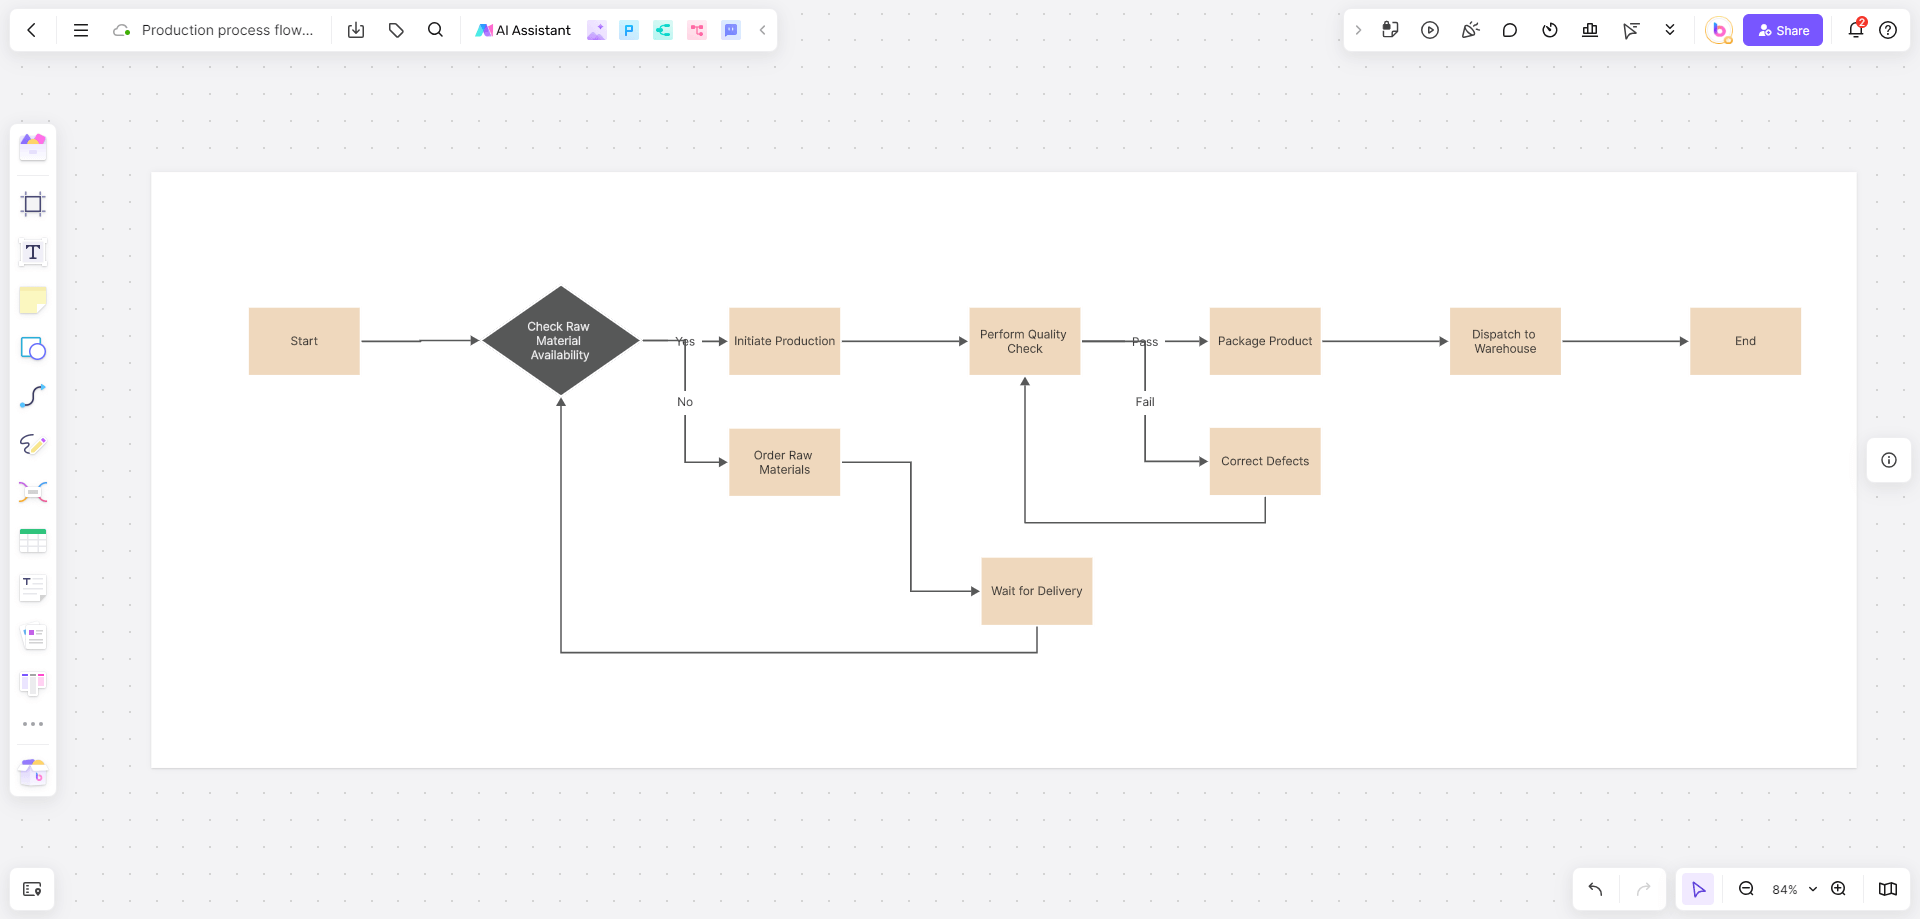
Do you know there is another alternative for creating flowcharts with ease and you can do it almost instantly? Boardmix is a highly collaborative online whiteboard that makes it possible to create unlimited amounts of flowcharts for any projects you are working on.
Boardmix offers multiple free templates and users can freely add, remove, and drag elements however they want to make their unique flowchart.
Boardmix ensures users have the freedom to roam around and put their creative thoughts into executing the perfect flowchart without limiting themselves to programming technicalities as we have seen in Raptor.
Here is how you can create a simple flowchart in Boardmix:
Step 1. Open a new file. Insert a frame by clicking on the frame icon on the left-hand side panel or pressing the F key.
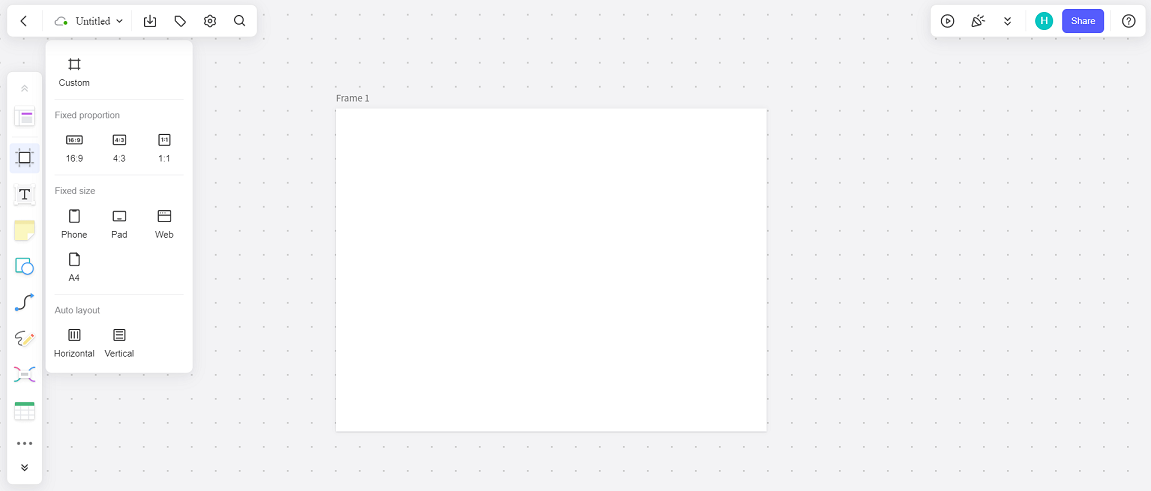
Step 2. From the left-hand side panel, you can select different shapes by clicking on the shape icon or pressing the S key. After adding shapes, you can drag each corner of the shape and adjust the dimensions to your liking.
Step 3. Add text to each shape by clicking on the text icon or by pressing the T key to label all your flowchart elements.
Step 4. Lastly, you can connect your flowchart by choosing the connection line tool from the left-hand side panel or simply pressing the L key. Over here, you can find lines with arrows and without arrows to connect your components and even make the Assignment symbol that requires a small right arrow beside the shape.
Faster Way to Create Flowcharts
Another way to make your flowcharts quickly is by using templates. Click on the template icon on the left-hand side panel. Once the template pop-up box appears in front of you, head over to the Draw & Diagram section and add a Flowchart to your canvas.

Then, edit each shape and line according to your liking. If you like a specific template you have made, you can always export it by saving it under the following formats: .png, .jpg, .pdf, .svg, and .bdx (Boardmix format) files.
Start Making Flowcharts with Ease…
This blog has taught you about using Raptor flowchart interpreter and running flowcharts in it. It may look intimidating if you don’t have programming knowledge but it is quite easy to use and has a user-friendly interface.
If you want to create flowcharts quickly and make use of templates and use them multiple times, then use Boardmix today and create your flowcharts with ease.