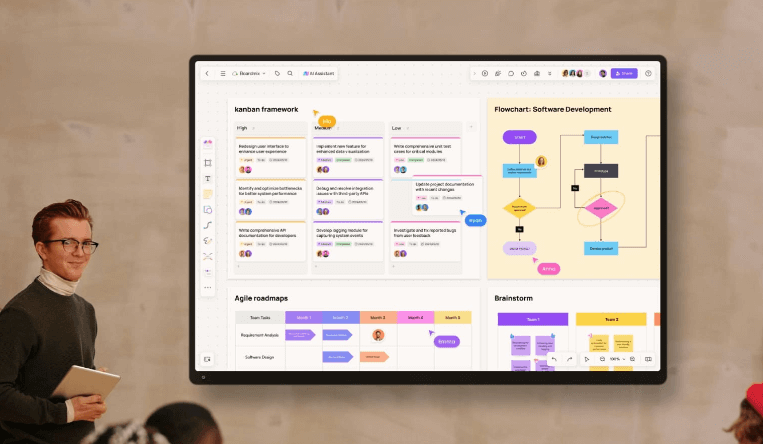
An online whiteboard lets a team add ideas, diagrams and feedback to a shared canvas. This guide uses Boardmix for a shared team workspace to build one product-launch board: set out objectives, organize ideas, assign next steps and invite a reviewer.
Use the illustrated product-launch exercise first, then consult the tool reference when you need more detail. The screenshots show an existing Boardmix example; controls may appear in different positions in your workspace.
Build Your First Product-Launch Board
The exercise produces a board named “New Product Launch Planning,” with one objective, audience and channel ideas, and a short task list. Bring a product description, a launch date and the name of a colleague who can review the plan.
To make the steps concrete, imagine you are launching a meal-planning app that turns weekly recipes into a shared shopping list. Your sample goal is to recruit 20 pilot users from an existing newsletter by November 30. These are practice inputs, not results from a real launch; replace them with your own product and date as you work.
Your first version only needs an objective, a few notes and two tasks. The mind map and table below show how to expand it when you need to compare a message or channel.
Creating a New Whiteboard
Log into your Boardmix account:


Open your browser and navigate to the Boardmix login page.
Enter your credentials and log in to your account.
Create a new whiteboard:
First check which personal or team space is selected in your workspace; that is where the new file will belong. Choose the option to create a whiteboard and start with a blank canvas for this exercise. Boardmix's board-creation instructions explain the workspace and template entry points.
If you start from a template, keep only the sections relevant to your launch objective.
Setting Up Your Whiteboard Workspace

Familiarize yourself with the layout:
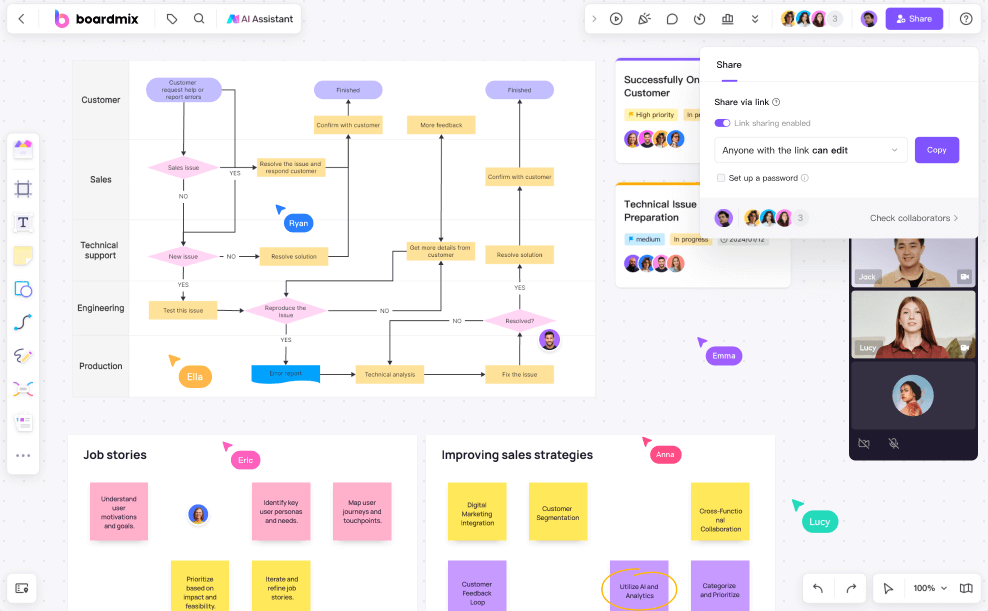
In the illustrated layout, creation tools sit on the left, file controls at the upper left and sharing controls at the upper right. The canvas controls change the view; the roadmap helps you navigate a larger board. For now, keep the launch material close enough to read together.
If dragging moves a note when you meant to move the view, switch to the Hand tool. Use the Mouse tool to select and move objects; a selected object has a border and control points. The mouse and hand-tool guide also covers zooming and selection. This distinction makes it much easier to work without disturbing the layout.
Name your whiteboard:
Click on the whiteboard's title area at the top of the screen.
Enter a name that reflects the project, such as “New Product Launch Planning.”
Before inviting a colleague, return to your workspace and reopen the named board to check that your work is available under the expected account.
Add the Launch Plan to the Canvas
Choose a tool for each part of the exercise:
Use text for the objective, notes for ideas that may move, and connectors for a relationship you want someone else to follow. Arrange three areas from left to right: Goal and message, Audience and channels, and Launch tasks. These can be simple text headings; an elaborate template is unnecessary for the first version.
Insert text:

Select the text tool from the toolbar.
Click on the canvas where you want to add text.
Type “Product Launch Objectives” and add “Recruit 20 pilot users from our newsletter by November 30.” Beside it, add “Key Marketing Messages” with the draft “Plan the week's meals and make one shared shopping list.” The first line says what success would mean; the second is wording your reviewer can challenge.
Customize the font, size, and color as needed.
Draw shapes:

Choose the shape tool from the toolbar.
Select a rectangle, place it on the canvas and label it “Invitation email.” Add two more rectangles labeled “Pilot sign-up” and “First-week feedback.” Connect them in that order with the connector tool.
You now have a simple launch path. Leave space beside the last arrow for a question: “Who asks for feedback?” That question will become a task later, so the diagram helps plan work rather than simply decorate the board.
Add sticky notes:

Select the sticky note tool.
Click on the canvas to place a sticky note.
Use “Target Audience” and “Marketing Channels” as group labels. Add “Newsletter subscribers who already plan weekly meals” under the first and “Pilot invitation email” under the second. Add a separate note, “Will subscribers try a new app?” and mark it as an open question.
Drag related notes together. Keep the audience, proposed route to reach it and unanswered question visible at once. If a note contains three different suggestions, split it into three notes so the team can discuss or move each one independently.
Use the mind mapping tool:

Choose the mind mapping tool from the toolbar.
Start with “Product Features” in the center and add the branches “Core Benefits” and “Differentiators,” as in the screenshot.
For the meal-planning example, put “Plan the week in one place” under Core Benefits and “One shopping list shared with the household” under Differentiators. Treat these as proposed messages. If the team cannot explain how a feature supports the launch objective, leave it out of the invitation rather than crowding the message.
Create tables:
Select the table tool from the toolbar.
Click on the canvas to insert a table.
Use three columns—Channel, Why consider it, and Open question—and two rows. For “Newsletter,” enter “Existing way to reach readers” and “How many readers want a pilot invitation?” For “Parent-group post,” enter “Could reach a relevant audience” and “Will the group allow promotion?”
The table makes the choice comparable. For this exercise, start with the newsletter and park the group post until permission is known. If you only have one realistic channel, skip the comparison and go straight to the task list.
Set up a Kanban board:

Choose the Kanban board tool from the toolbar.
Create columns for different stages of your project, such as “To Do,” “In Progress,” and “Completed.”
Add “Draft pilot invitation — Alex — November 20” and “Review sign-up page — Sam — November 22” as sample cards. Turn the question from your diagram into a third task: “Prepare first-week feedback questions — Alex — November 24.” Use real names and dates for your project.
Keep a card in To Do until someone starts it, then move it to In Progress. Move “Review sign-up page” to Completed only after the reviewer has checked the link and recorded any needed corrections. Update the cards as work changes; arrange reminders separately if your team needs them.
Collaborating on Whiteboard in Real-Time

Share the whiteboard link:
Click on the share button at the top right corner.
For feedback on this board, use its sharing options and choose the access your colleague needs. Boardmix distinguishes sharing a file with an external guest from inviting someone into a team or project; the invite-and-share guide explains the difference. Check the scope shown in the dialog before copying the link.
Ask one colleague to open the link and add a note or comment before sharing it with the whole group. If they can see the board but cannot contribute, check the granted role and the account they used. If an upgrade is requested, check the plan's collaboration allowance; sending the same link again will not change it.
Engage with your team:
Ask the reviewer a specific question beside the relevant material: “Is the shopping-list benefit clear enough for the invitation?” Then ask them to add one missing task.
Suppose they reply, “Explain whether another household member can use the list.” Mark that as something to verify in the product, then revise the message only after it is confirmed. Keep the agreed wording beside the original objective so the reviewer can see what changed and why.
Utilize the AI assistant:
If your plan includes the AI tool you need, use it to draft alternatives for the launch message or a mind-map structure. Keep the original objective beside the draft so you can judge whether the suggestion fits.
Review generated claims and wording before using them. AI is optional for this exercise; text, notes and shapes are sufficient to complete the launch board.
Finish with a Shareable Result
Add a short decision beside the objective: “Start with a newsletter invitation; Alex drafts it, Sam reviews the sign-up page, and the feedback questions are prepared before launch.” Keep the unresolved product question beside the message. A colleague should be able to find the goal, current choice and next owner without a narrated tour.
Keep the board link for continued editing. If someone needs a file, export the launch area as an available image or PDF and open the result before sending it. If the text is tiny, a full-canvas export may include too much empty space; arrange the relevant material more closely or use a smaller export area where offered. Export quality, collaboration and AI allowances depend on the current Boardmix plan.
How Do Online Collaboration Whiteboards Work?
Online collaboration whiteboards typically provide a blank canvas where users can add text, images, drawings, and other elements. They often come equipped with various tools such as sticky notes, shapes, and connectors, allowing users to brainstorm ideas, plan projects, and visualize concepts. The key feature is real-time collaboration, where multiple users can interact on the same board and see changes as they work.
Common Application Scenarios of Online Collaboration Whiteboards
Remote team collaboration: Teams in different locations can contribute to the same canvas. Check access and agree on a structure before the session so participants know where to work.
Project management: Organize tasks, assign responsibilities and show progress visually. Use timelines or connected shapes to discuss dependencies; a visual relationship does not by itself create an automated project schedule.
Education: Teachers and students can interact dynamically in online classrooms. Tools like digital pens and interactive notes make learning more engaging.
Creative Design: Designers can brainstorm ideas, create mockups, and get instant feedback. Collaborative sketching and wireframing are made simpler and more interactive.
Tool Reference for the Exercise
Use this reference for the notes, text, shapes and task cards in the exercise. Boardmix's official user guide also covers creation tools, sharing, presentation and import/export.
Main Functions of the Toolbar
The following illustrated reference covers each tool used above. Return to the item you need; you do not have to use every tool on a board.
Templates

Boardmix offers a variety of templates that users can insert and customize, speeding up the process of setting up a new board.
How to Use:
Access the Template Library: Click on the template icon on the toolbar to open the library.
Choose a Template: Browse through the available templates and select one that fits your needs.
Insert and Customize: Click to insert the template onto your canvas, then customize it by adding or modifying content.
Text Editing
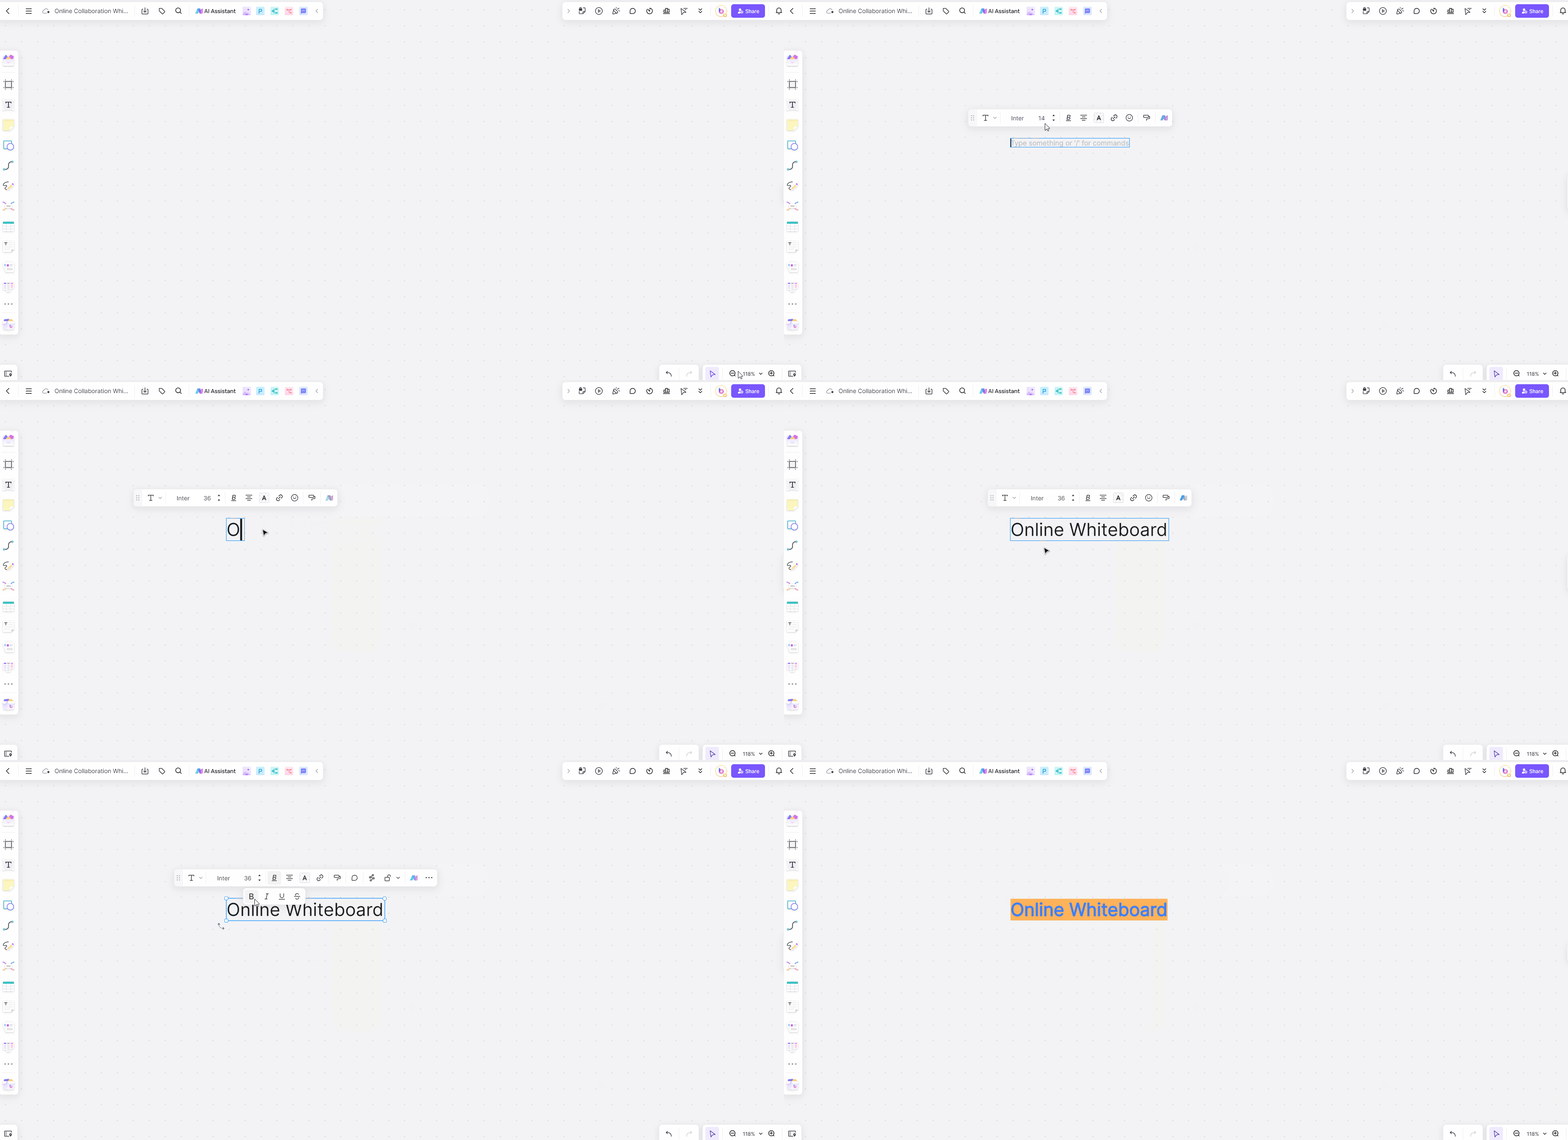
Text editing on Boardmix allows users to input text, select font styles, and adjust colors. This feature is essential for labeling and annotating different parts of the whiteboard.
How to Use:
Click on the Text Tool: Located on the toolbar, the text tool is usually represented by a "T" icon.
Type Your Content: Click anywhere on the canvas to start typing.
Customize Text: Use the toolbar options to select different fonts, adjust the size, and change colors. You can also make the text bold, italic, or underlined to emphasize key points.
Move and Resize: Click and drag the text box to move it around. Resize it by dragging the corners.
Drawing Shapes
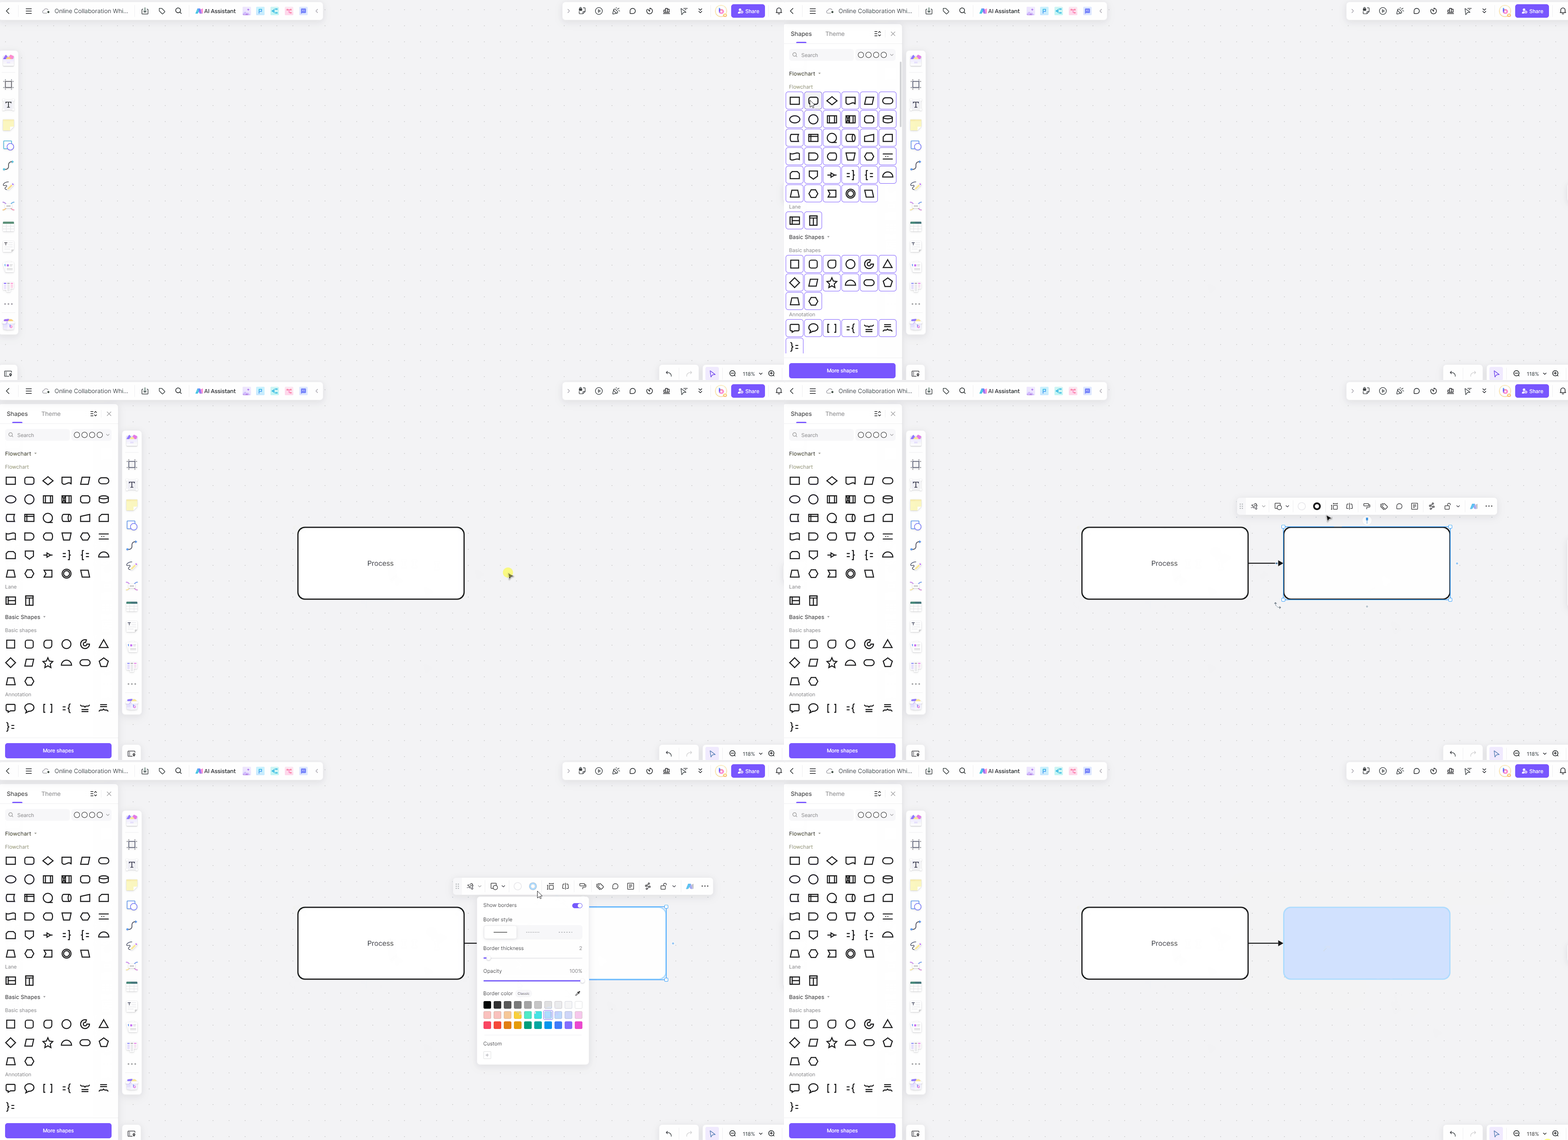
Boardmix allows users to draw various shapes like circles, rectangles, and arrows to create diagrams and flowcharts.
How to Use:
Select the Shape Tool: This is usually represented by a shapes icon on the toolbar.
Choose the Desired Shape: Options typically include rectangles, circles, arrows, and more.
Drag onto the Canvas: Click and drag to draw the shape on the canvas.
Resize and Position: Adjust the size by dragging the corners and move the shape by clicking and dragging it.
Sticky Notes
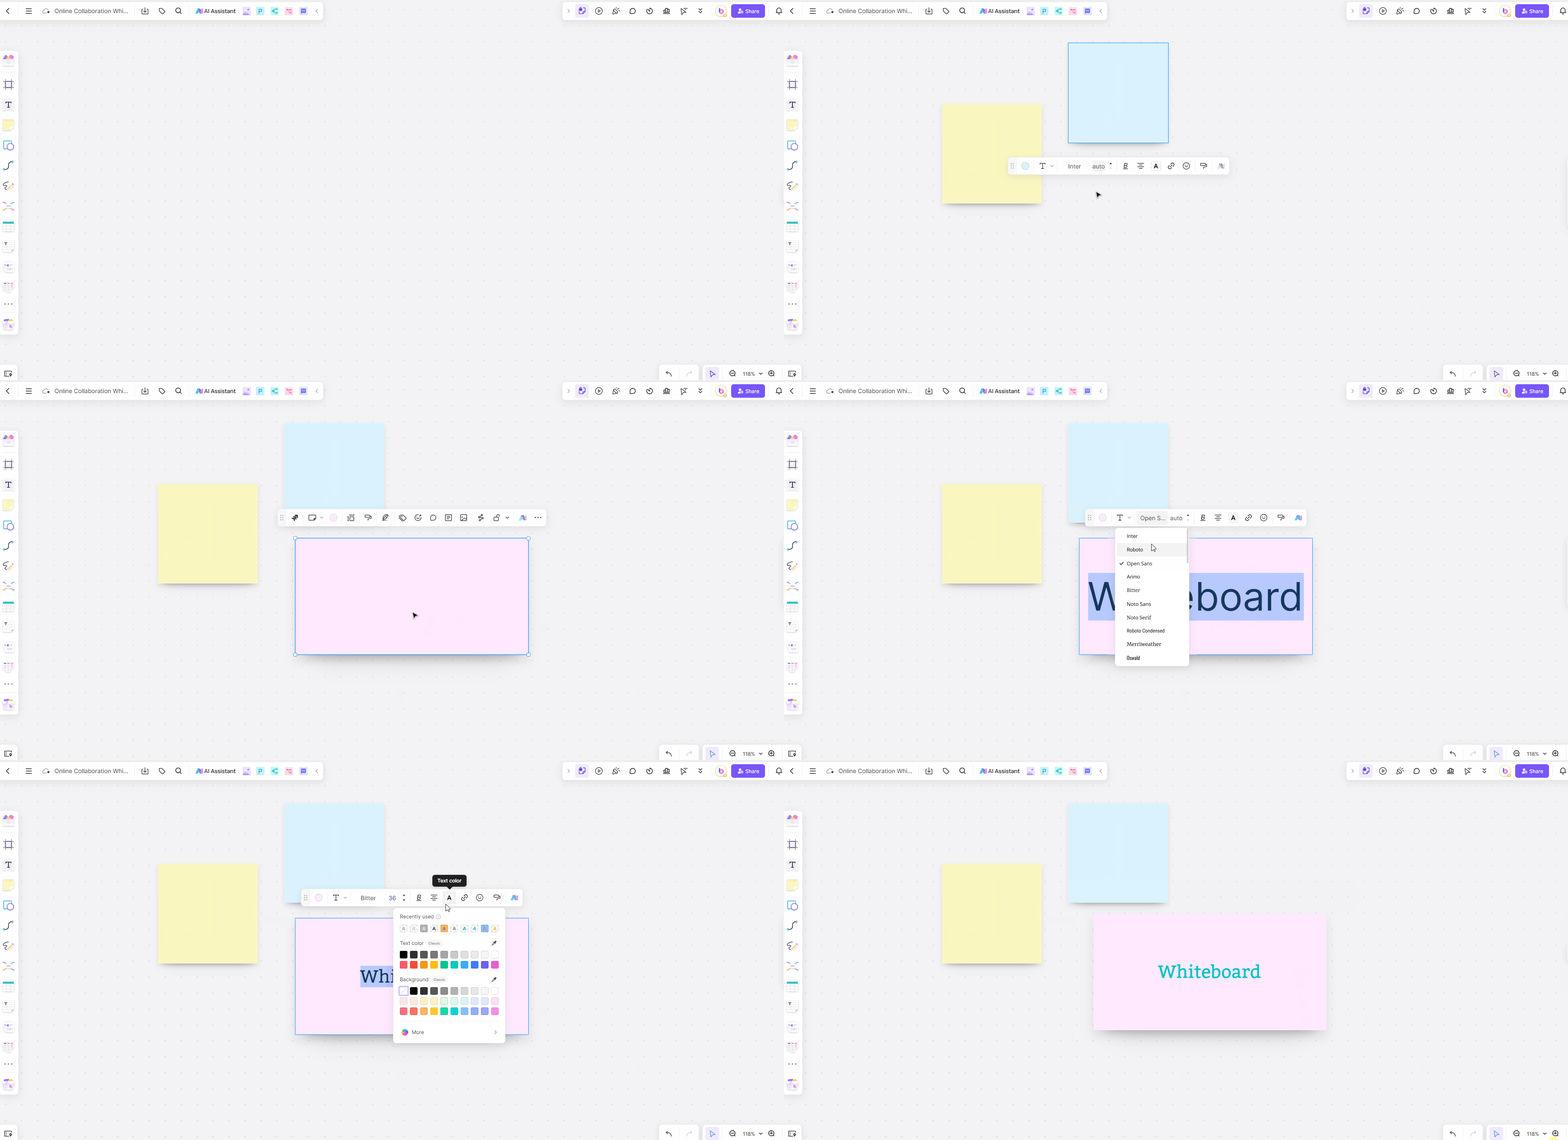
Sticky notes are perfect for brainstorming sessions, allowing users to jot down ideas quickly and move them around the board.
How to Use:
Click on the Sticky Note Tool: Found on the toolbar, often represented by a sticky note icon.
Type Your Note: Click on the canvas where you want the sticky note, then type your content.
Move and Organize: Drag the sticky notes around the canvas to organize your thoughts.
Mind Mapping
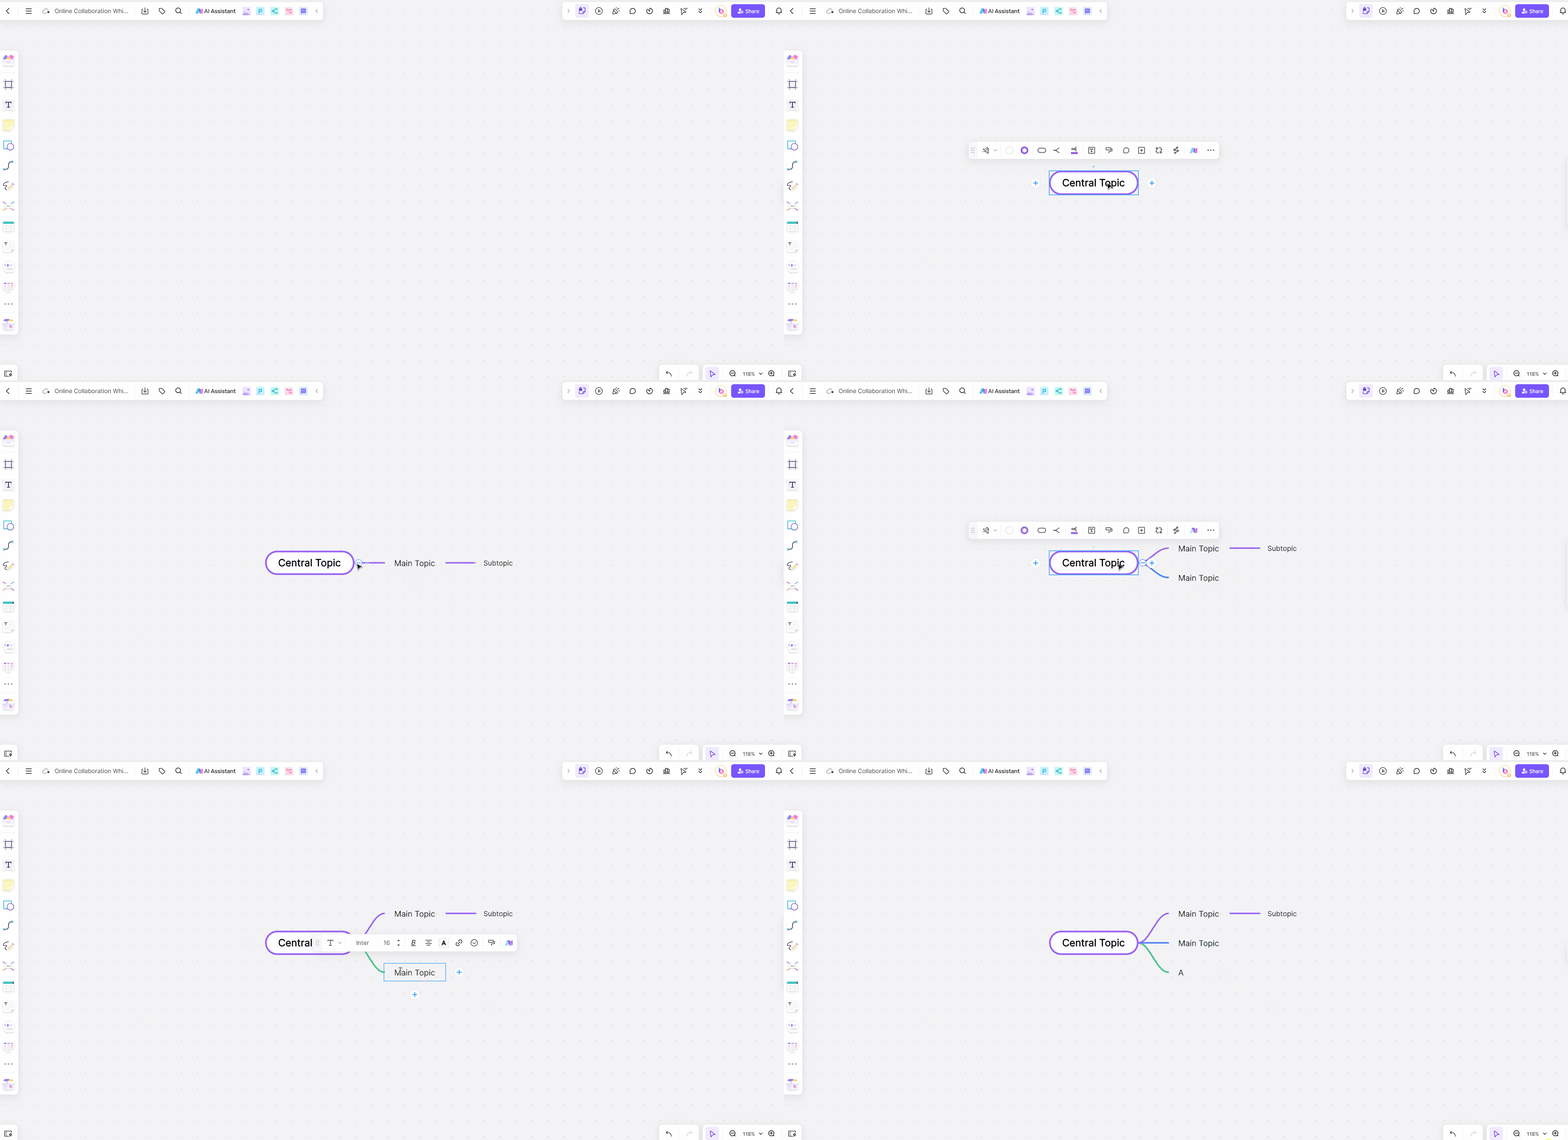
Mind mapping helps in organizing thoughts and ideas visually, making it easier to understand and communicate complex information.
How to Use:
Select the Mind Map Tool: This tool is often represented by a branching diagram icon.
Start with a Central Idea: Click on the canvas to place your central idea.
Branch out with related concepts: Add a related topic to the central idea and give it a short label. Continue adding topics to show the relationships your team needs to discuss.
Table Management
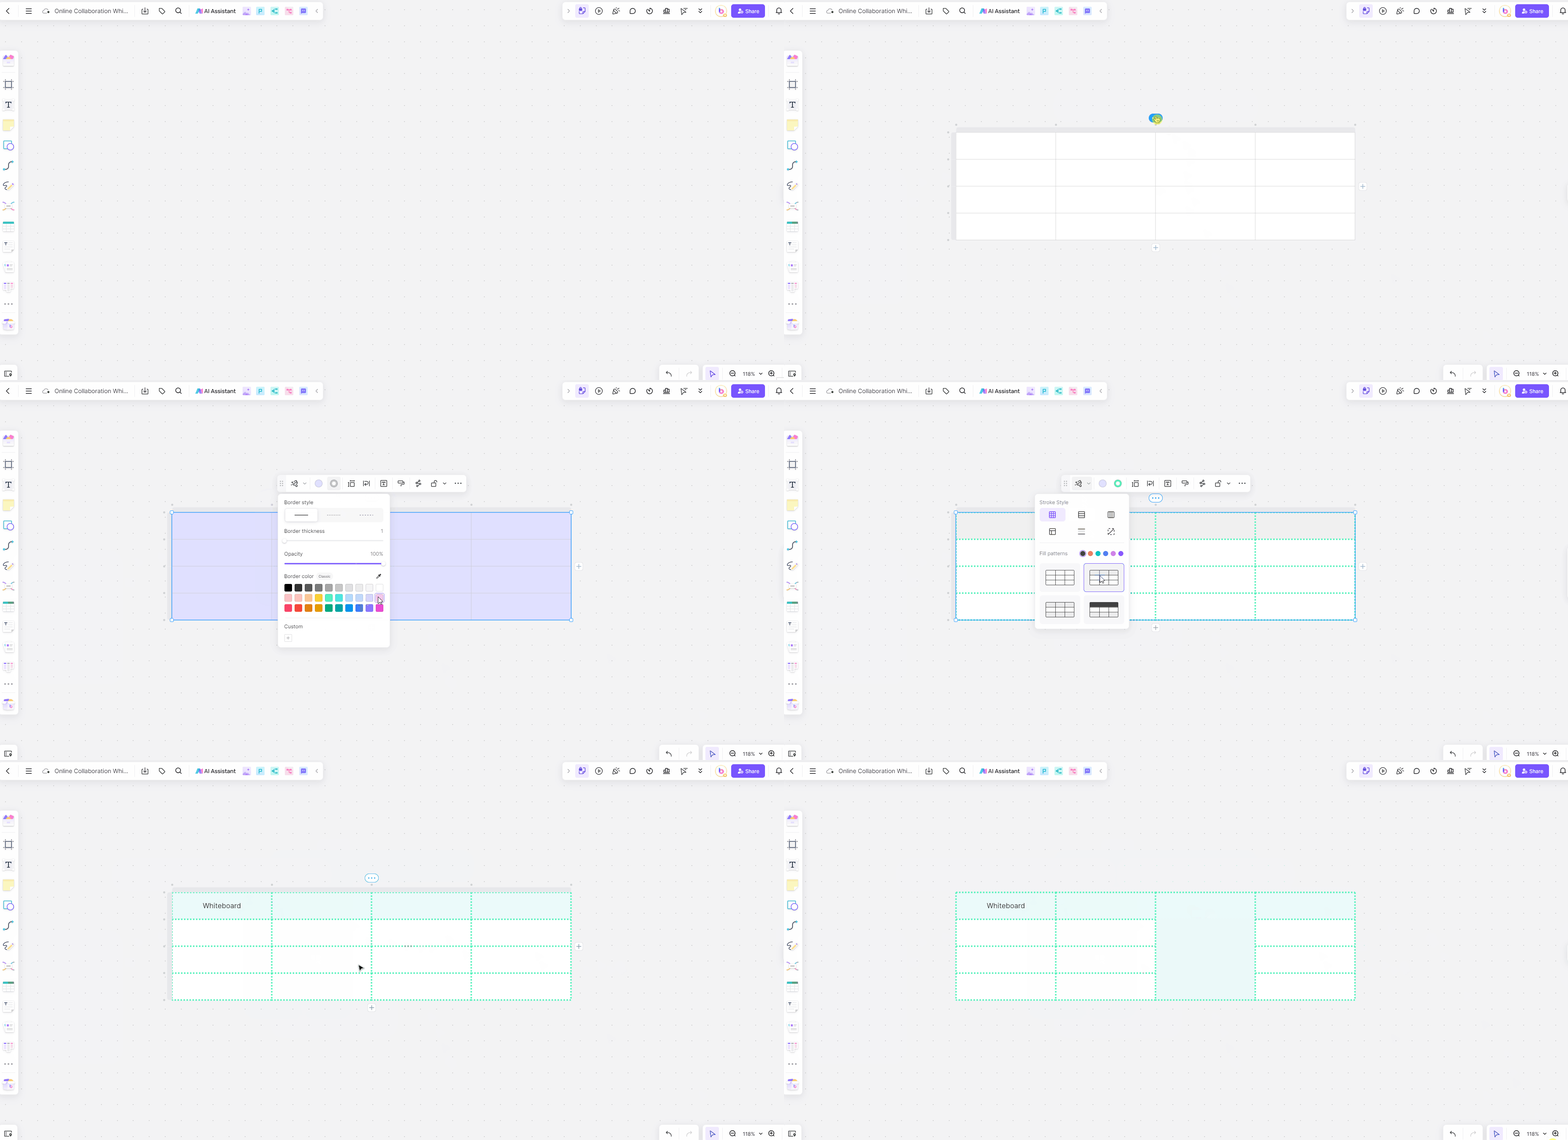
Users can create and manage tables, adjusting cell sizes, merging cells, and customizing styles.
How to Use:
Click on the Table Tool: Located on the toolbar, usually represented by a grid icon.
Specify Rows and Columns: Choose the number of rows and columns for your table.
Customize Appearance: Adjust cell sizes, merge cells, and change the table’s style.
Input Data: Click on each cell to input your data.
Kanban Collaboration

Boardmix supports Kanban boards, allowing users to organize tasks into columns and manage workflows efficiently.
How to Use:
Create Columns: Set up columns for different stages of your workflow, such as "To Do," "In Progress," and "Done."
Add Cards for Each Task: Click within a column to add a new card. Enter task details on the card.
Move Cards Between Columns: Drag and drop cards between columns to track the progress of tasks.
Connecting Lines

Connecting lines are used to link different elements on the board, showing relationships and dependencies.
How to Use:
Select the Line Tool: Found on the toolbar, represented by a line or connector icon.
Click on the Starting Element: Click on the element you want to start the line from.
Drag to the Ending Element: Drag the line to the element you want to connect to, then release.
Enable Real-Time Multi-Person Collaboration
Sharing, comments and live changes support different parts of the review:
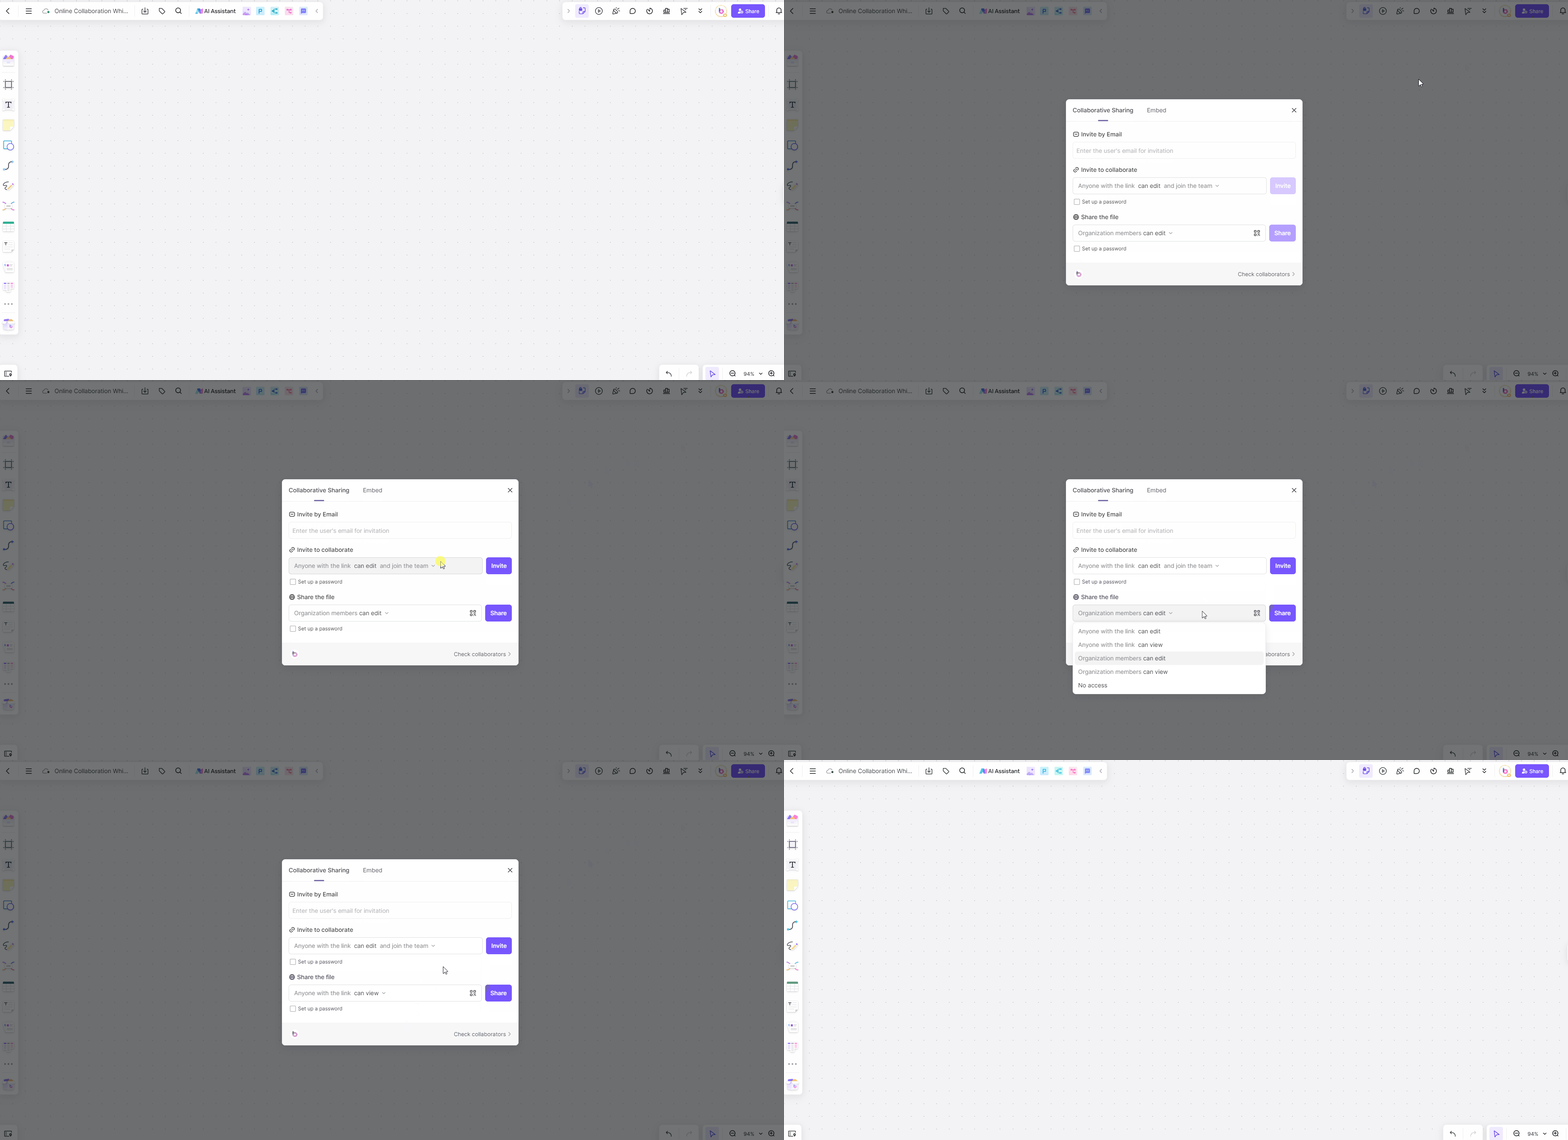
Sharing whiteboard links: Invite teammates through the board's sharing controls and choose the appropriate access. Joining and editing depend on the workspace settings, account and plan.
How to use: Click the share button, generate a link, and send it to your teammates. Set permissions to control who can view or edit the shared whiteboard.
Multi-device synchronization: A shared board keeps participants working on the same material. Connection quality and access can affect what each person can see or change.
How to use: Open the same board under the intended account on a supported device. If another participant cannot see a change, check that both of you are on the same board, then check your connection and access.
Interactive tools: Comments and team chat keep feedback near the work. The user guide also documents voting and third-party audio/video. Use your team's meeting service when the group needs a call.
How to Use: Use the voting tool to gather opinions, the comment tool to provide feedback, and the live chat feature to communicate in real-time.
How are Collaboration Whiteboards Used in Different Industries?
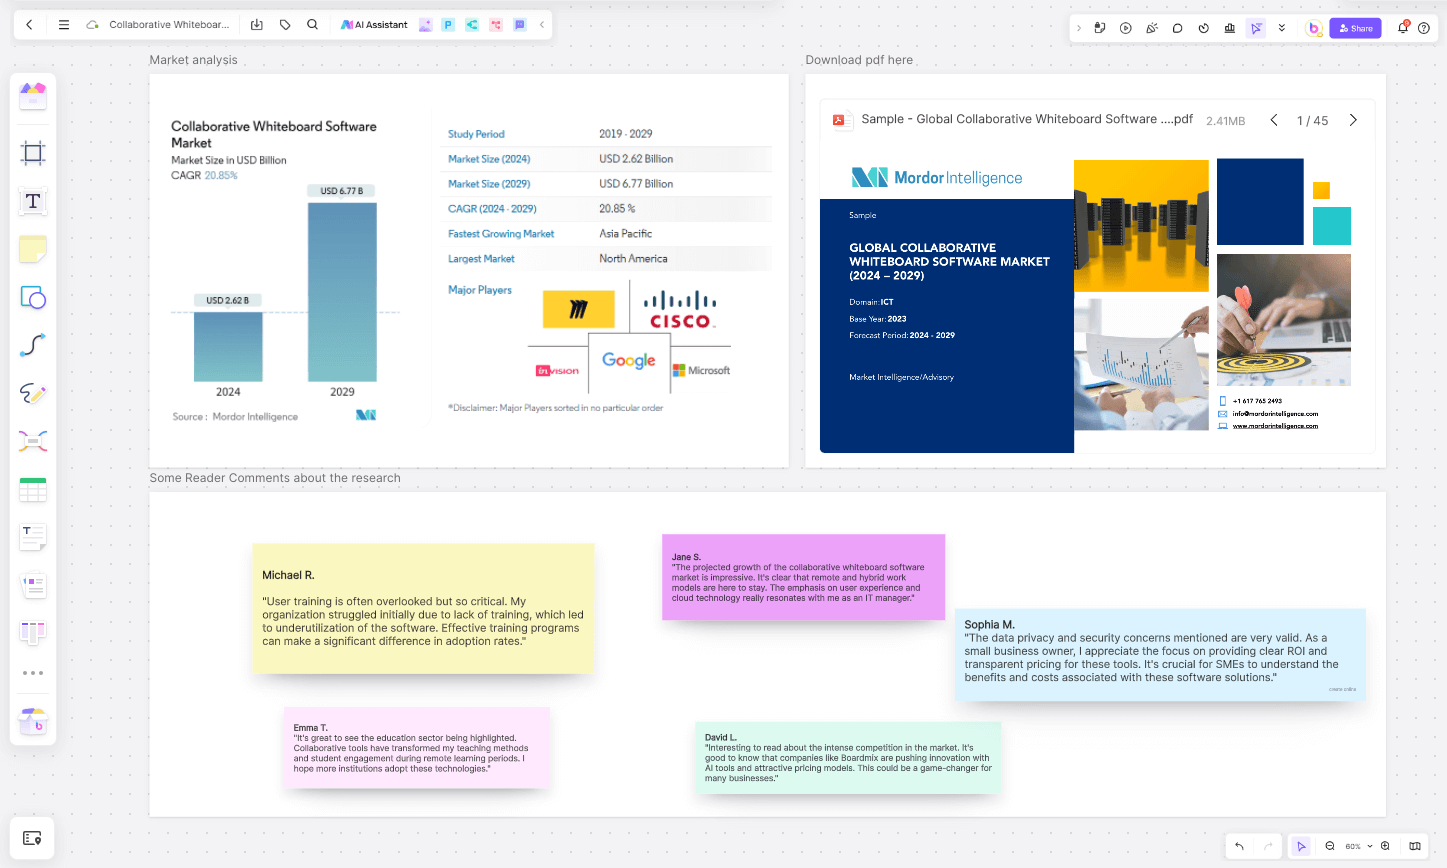
The following are illustrative ways to adapt the same approach, not reported customer results. The research-board image shows a source report alongside discussion notes; use material relevant to your own project.
Business Management: Product Planning and Development
A product team can extend the launch exercise into a roadmap. Arrange proposed features by milestone, connect dependent work and add a name to each decision that needs an owner. Keep the detailed tasks in To Do, In Progress and Done columns. If a milestone moves, review the connected work together and update the cards; drawing a dependency does not automatically reschedule it.
Education: Online Classroom Teaching
A teacher can place a passage or diagram on the board and ask students to add one explanation and one question beside it. For a group project, each group arranges its research findings in a named area and explains the links between them. End with a short question that requires students to apply the concept; the answers show what needs another explanation.
Creative Design: Creative Brainstorming
A design team can place a creative brief beside a mood board and two early concepts. Ask reviewers to comment on a specific criterion, such as whether the proposed hierarchy makes the main action easy to find. Keep feedback beside the sketch it concerns, compare it with the brief and mark the chosen direction before developing the design further.
Conclusion
The product-launch example uses a small set of reusable actions: add information, organize it visually, invite feedback and agree on the next step. The same approach can support the classroom and design scenarios above.
For the next session, use the remote-team whiteboard guide to plan participation and follow-up. Keep the canvas organized around the decision your team needs, rather than trying every tool at once.